If you searched 'how to become a bird flyer,' you most likely want to learn how to fly a bird-themed flying device, either a flapping-wing RC ornithopter (a radio-controlled bird that actually flaps its wings) or a bird-shaped kite you launch and control with lines in the wind. Both are real, rewarding hobbies, and this guide covers both so you can figure out which one fits you and get started today.
How to Become a Bird Flyer: Training Plan and Safety

Marcus Hendricks
4 May 2026
What exactly is a 'bird flyer'? Let's sort this out first
The term 'bird flyer' floats around a few different contexts, so it's worth pinning down before you spend money on the wrong thing. The two most common meanings in the bird-hobby world are: (1) an RC ornithopter, which is a bird-shaped radio-controlled aircraft that flaps its wings to fly just like a real bird, and (2) a bird-themed kite, which you launch into the wind and steer using control lines. There's also a looser meaning where 'bird flyer' just describes the person doing either of those activities. This guide treats it as the hobby itself: learning to launch, fly, and control a bird-shaped flying device.
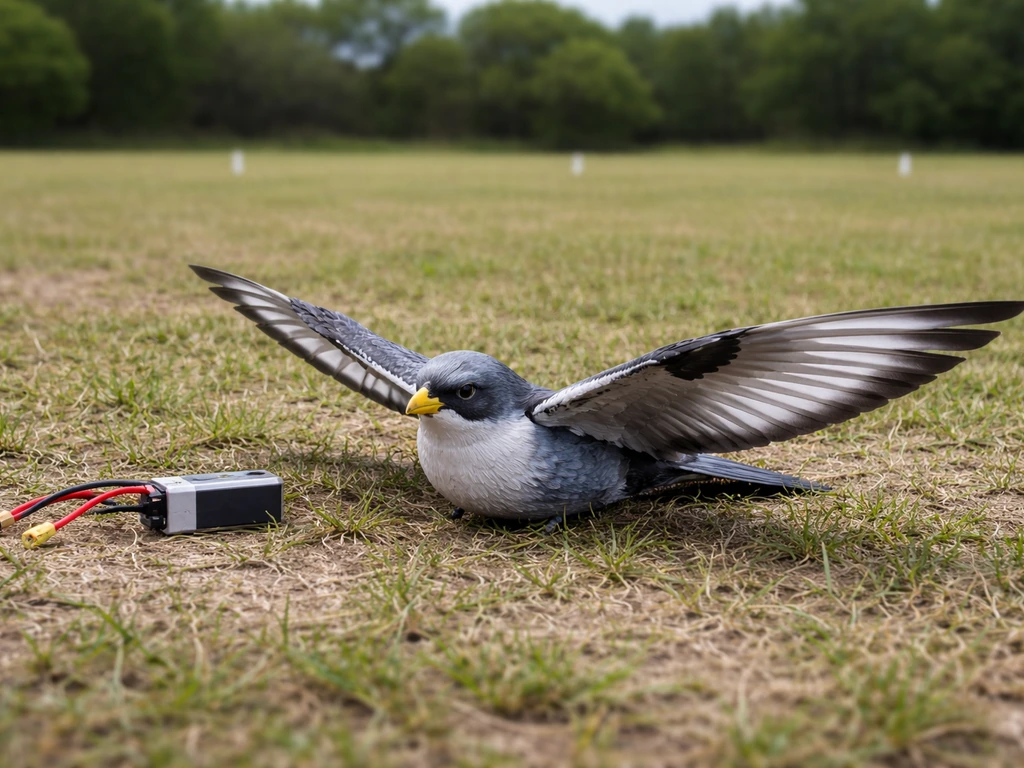
If you've seen videos of realistic-looking RC eagles or seagulls soaring over a park and tricking people into thinking they're real birds, those are ornithopters. Brands like Bionic Bird and Air Hogs have made accessible versions for beginners. On the kite side, bird-shaped kites (hawks, eagles, delta-style birds) are popular at beaches and open fields and are often easier to get started with since they require no electronics. Pick whichever sounds more exciting to you; the core skills of reading wind, launching cleanly, and controlling your device overlap between both.
One quick note: if you actually want to work with real, live birds in a professional or research context, that's a different path entirely. Topics like bird banding, getting a bird permit, or becoming a bird ringer involve licensing, fieldwork, and ornithological training. Those are great pursuits, but they're a different article. To get started, follow the steps for how to apply for bird flyer permits or registration requirements in your area before you fly.
Safety first: gear, environment, and responsible practice

Before your bird leaves your hand for the first time, there are a few safety rules that will save you from the most common beginner disasters. Never fly near power lines, and do not try to free a kite that has become caught in them, as American Kitefliers Association safety guidance for kite events explains. These aren't boring formalities; they're the things I wish someone had drilled into me before I sent my first ornithopter straight into a fence.
The basics you need to know before launching anything
- Choose open, obstacle-free space. Trees, buildings, power lines, and hills all create wind turbulence that will make your bird difficult or impossible to control. A flat park, open field, or beach is ideal. The American Kitefliers Association specifically calls out turbulence from nearby obstructions as one of the top reasons beginners struggle to launch and fly.
- Never fly near power lines. This is non-negotiable for both kites and RC ornithopters. A kite line near a power line is a serious electrocution hazard.
- Keep control lines away from bystanders. If you're flying a kite-style bird flyer, the line can cut or burn skin. Always be aware of where your lines are in relation to people around you.
- Don't attach kite lines to your body without a quick-release system. If the wind surges or the kite dives, you need to be able to let go instantly.
- Fly in calm to moderate wind only. Ornithopters are especially fragile in gusty or high winds. RC glider and ornithopter manuals recommend calm, sunny days for beginners.
- Adult supervision is recommended for younger beginners, especially with electric RC ornithopters that have small moving parts.
- Wear sunglasses on bright days. You'll be staring into the sky for extended periods, and eye protection matters more than most beginners expect.
Gear you actually need to start
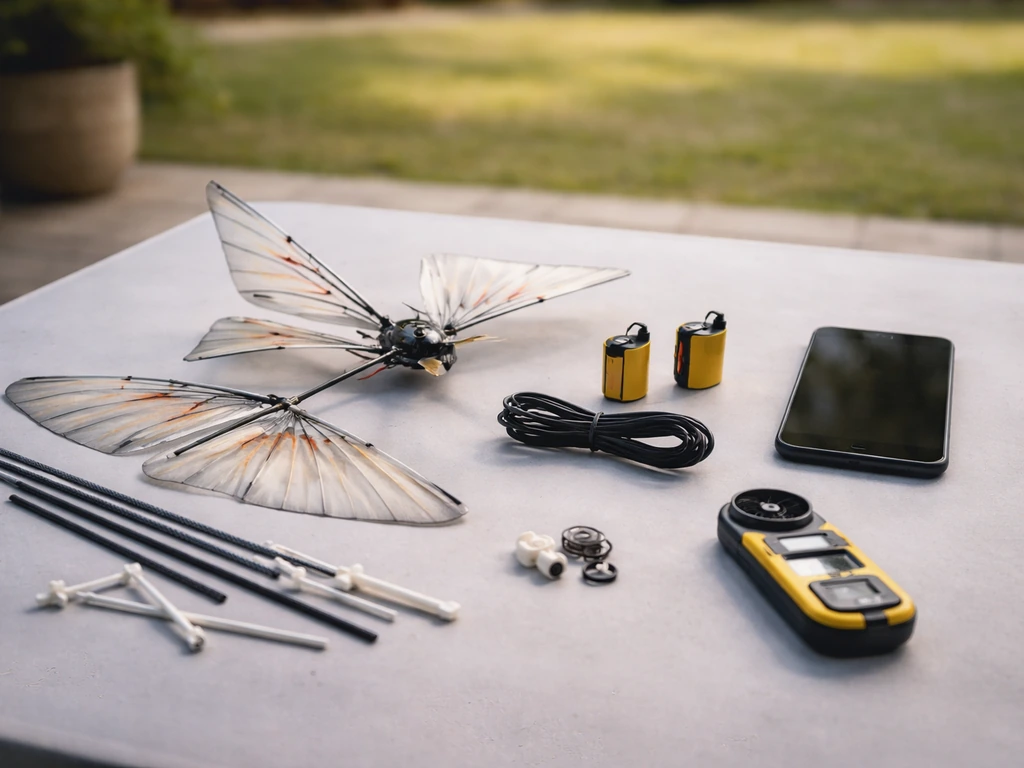
| Activity | Starter Gear | Nice to Have |
|---|---|---|
| RC Ornithopter | Ornithopter (e.g., Air Hogs or Bionic Bird), charged battery, open outdoor space | Spare wings, extra batteries, wind meter app |
| Bird Kite | Bird-shaped kite, 50-100ft of kite line on a winder, open field | Gloves to protect hands from line, sunscreen, a second person to help launch |
How these things actually fly: the basics you need to understand
You don't need an aerospace degree, but understanding the mechanics behind your bird flyer will help you fix problems fast and improve much quicker than trial and error alone.
RC ornithopters: flapping-wing flight
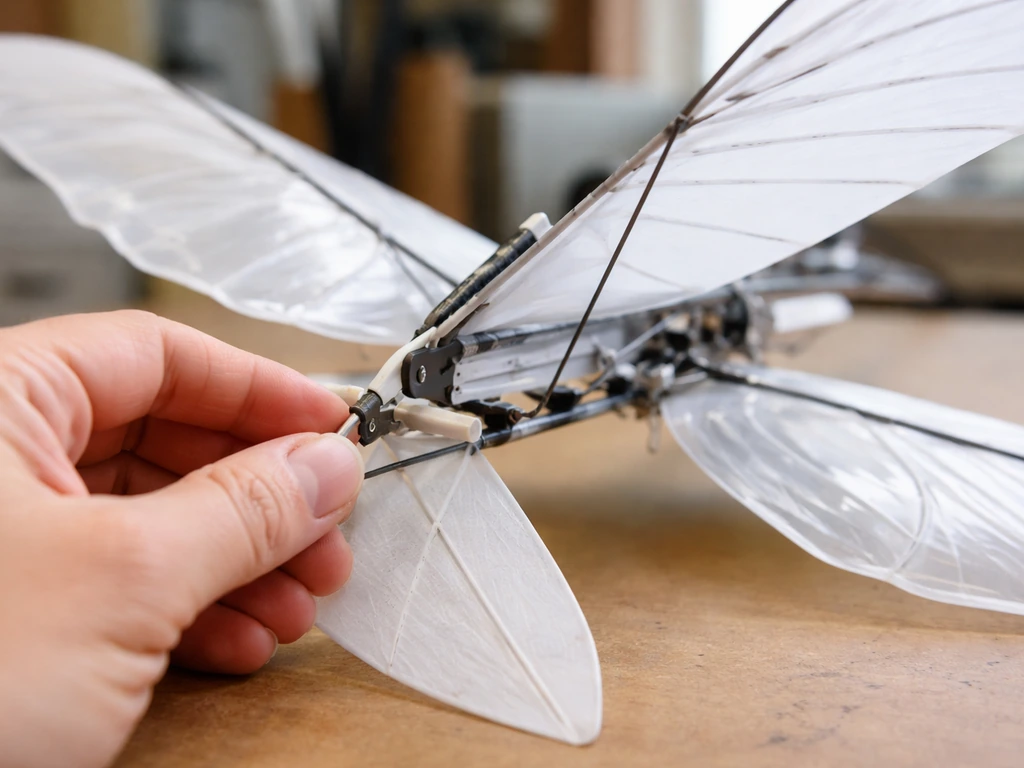
An ornithopter generates lift and forward thrust by flapping its wings, just like a real bird. The tail acts as a control surface: adjusting the tail angle changes the bird's pitch (whether it climbs or dives) and its speed. Most beginner ornithopters like the Bionic Bird have an adjustable tail with multiple notch positions (typically 5 notches) that let you tune the flight characteristics before you launch. The general workflow is: set your tail configuration on the ground, launch, observe how it flies, then land and adjust if needed. The key launch mechanic is pointing the bird directly into the wind and releasing it with a gentle, horizontal toss from your hand. PowerUp Toys also lists “Not launching into the wind” as a common mistake to avoid. Tilting it sideways or upside down before release is the most common beginner mistake: an ornithopter placed or launched upside down simply will not fly.
Bird kites: wind-driven lift and line control
A bird kite works on the same aerodynamic principles as any kite: wind flowing over the kite's surface creates lift, and the angle of the kite to the wind (the angle of attack) determines how high and stable it flies. You control direction by pulling on the appropriate control line: pull the left line to turn left, pull the right line to turn right. The most important skill for kite flying is finding and using steady wind. Turbulent, inconsistent wind (caused by trees, buildings, or hills) makes the kite fight you the whole time. Open space with a steady 8-15 mph breeze is ideal for beginners.
The concept of trim and balance
Both ornithopters and kites need to be 'trimmed,' which just means adjusted so they fly level and predictably without constant correction. For ornithopters, trim happens mostly through tail notch adjustments. Moving to a higher notch generally changes flying speed and the climb angle. For kites, trim can involve adjusting where the bridle (the line connecting to the kite frame) is attached, which changes the kite's angle to the wind. Always start with the manufacturer's default/recommended settings before making adjustments. Chasing a trim problem before you've established a baseline is a frustrating waste of time.
Your beginner training plan: week by week
Here's a practical progression you can actually follow. The goal in the first two weeks is not impressive flying; it's consistent, controlled launches and recoveries. Everything else builds on that.
Week 1: ground school and first flights
- Day 1: Read the manual for your specific device all the way through. Seriously. Set up your device on a flat surface, charge the battery fully, and do a ground-level wing/flap test (for ornithopters) or a full kite assembly check. Don't fly yet.
- Day 2: Go to your chosen open space on a calm day (light, steady wind). For ornithopters: set the tail to the manufacturer's recommended default notch, hold the bird facing the wind, power it on, and do a gentle horizontal hand-launch. Watch where it goes and land it or let it land. Don't try to control it much yet. For kites: unfurl about 30 feet of line, have a helper hold the kite up while you walk downwind to tension the line, then signal them to release. Let the kite climb on its own.
- Day 3-4: Repeat Day 2 launches, focusing on consistency. Your only goal: launch cleanly three times in a row without crashing on takeoff.
- Day 5-7: Begin making small control inputs. For ornithopters, experiment with the throttle to find the speed that keeps the bird stable and level. For kites, practice gentle left and right turns by pulling one line slightly.
Week 2: building confidence and extending flight time
- Day 8-9: Try flying in slightly more wind than Week 1. Observe how your bird flyer responds. For ornithopters, try adjusting one tail notch up or down from your baseline and note the difference in climb and speed.
- Day 10-11: Practice intentional direction changes. For kites, attempt a figure-8 pattern (turn left, stabilize, turn right, stabilize). For ornithopters, try flying in a wide oval pattern around your space.
- Day 12-14: Aim for your first flight of 5 continuous minutes without a crash or loss of control. This is your Week 2 milestone. Celebrate it. It took me longer than I expected and it felt great when it clicked.
Weeks 3-4: skill sharpening and solo flying
- Practice launching solo without a helper (kites) or without a second observer (ornithopters).
- Experiment with different wind conditions: try a slightly gusty day and notice how much harder control becomes. This builds your wind-reading instincts.
- For ornithopters: try outdoor flight tuning by selecting the outdoor-appropriate tail notch setting per your manual (often a higher/faster notch for breezy conditions).
- For kites: let out more line gradually, going from 50 feet to 100 feet or more. More line usually means more stable flight at altitude but longer recovery time if things go wrong.
- Start timing your flights. Aim to beat your personal record each session.
When things go wrong: troubleshooting common problems
Every beginner hits these walls. Here's how to get past them quickly instead of giving up.
The bird won't launch or crashes immediately
- Ornithopter: Check orientation first. If the bird is even slightly upside down at launch, it will not fly. Make sure the belly faces down and the bird points directly into the wind before release.
- Ornithopter: Check battery charge. A low battery produces weak flapping that can't generate enough lift. Fully charge before every session.
- Kite: Check that you're launching into the wind, not with it. Stand with your back to the wind and hold the kite in front of you.
- Kite: Check for turbulence. If there are trees or buildings upwind of you within about 100 meters, move to a more open spot.
Unstable flight or erratic movement
- Ornithopter: Adjust the tail notch. If the bird climbs too steeply and stalls, move the tail to a lower notch. If it dives, try a higher notch. Change one notch at a time and test after each change.
- Ornithopter: Check for wing damage. Even a small tear or bend in a wing changes the aerodynamics significantly. Inspect wings before every flight session.
- Kite: Wind is probably gusty or turbulent. Move to a more open location or wait for steadier conditions. Turbulence is the single most common cause of erratic kite behavior.
- Kite: Check the bridle attachment point. If the kite seems to lean heavily to one side, the bridle may need adjusting.
Loss of control mid-flight
- Ornithopter: If the bird is drifting in a direction you can't correct, check that the RC signal is strong (stay within the specified range for your model) and that no interference is affecting the controller.
- Ornithopter: Sensor or calibration issue: place the device on a flat, level surface, power it off, and restart. This resets the orientation sensors and often resolves unexpected drift.
- Kite: If a kite suddenly dives, you've likely hit a wind lull or a turbulent pocket. Reel in some line quickly to restore tension.
- Kite: Never wrap control lines around your hands. If the kite surges in a gust, you need to be able to release tension instantly.
Short flight time (battery or endurance)
- For RC ornithopters, flight time is heavily battery-dependent. Most beginner models fly for 5-10 minutes per charge. Buy at least two batteries so you can keep practicing while one charges.
- Flying in cold weather drains batteries faster. If you're flying below 50°F (10°C), expect noticeably shorter flight times.
- Higher tail notch settings (faster flying speed) consume more power. If your battery is aging, dial back to a slower setting to extend flight time.
Keeping your bird flyer in top shape: maintenance and upgrades
The difference between a bird flyer that lasts a season and one that's in a drawer by month two is usually maintenance. Neither kites nor ornithopters need a lot of upkeep, but ignoring them will cost you.
Routine maintenance after every session
- Inspect wings for tears, bends, or stress cracks. Ornithopter wings are usually replaceable; order spares before you need them so you're not grounded waiting for shipping.
- Check the tail mechanism on ornithopters. The adjustment notches should click firmly into place. If the tail feels loose or won't hold a notch, it may need replacement.
- Wipe down the body to remove dirt or moisture, especially after flying near sand or water.
- For kites: inspect all line connections, spars (the rigid frame pieces), and the sail fabric for tears. A tiny tear will become a large tear in the next wind gust.
- Store kites and ornithopters in a dry, room-temperature location. Heat and humidity degrade the lightweight materials quickly.
Tuning for better performance
As you get more comfortable, you'll want to fine-tune your setup beyond the default factory settings. For ornithopters, the tail notch system (usually 5 positions) is your primary tuning tool. Lower notches generally give slower, more stable indoor-suitable flight; higher notches increase speed for outdoor conditions. Experiment systematically: change one variable at a time, fly three times to confirm the result, then decide whether to keep the change. The same one-at-a-time principle applies to kite bridle adjustments. Chasing multiple variables at once is how you end up more confused than when you started.
When to upgrade
Starter ornithopters are great for learning, but they have real limitations in wind and range. Once you're landing controlled flights consistently and you want longer range, better wind resistance, or more realistic flight, look into higher-end RC ornithopters with brushless motors or larger wingspans. For kite flyers, the natural upgrade path is from single-line delta kites to dual-line sport kites (which give you much more steering control) and eventually quad-line kites or power kites. Each step up adds complexity, so don't rush it.
Where to go from here: communities, practice spots, and resources
The best way to accelerate your learning is to find other people who are already doing this. Both the RC ornithopter and kite communities are friendly to newcomers and have solid beginner resources.
Communities worth finding
- The American Kitefliers Association (AKA) is the main national organization for kite flying in the US. They publish safety guides, host events, and have local club directories. Their 'How to Fly a Kite' materials are genuinely good for beginners and go far beyond what's in most kite product manuals.
- RCBIRD is a community and resource site dedicated to RC ornithopters (especially the Avitron line). Their FAQ section covers setup, launch technique, and tail tuning in practical detail. Bookmark it.
- Ornithopter.org is a deeper resource focused on the design and mechanics of flapping-wing aircraft. It's more technical, but it's excellent when you're ready to understand why your bird flies the way it does.
- RC forums and subreddits (search for 'RC glider' or 'RC ornithopter') are full of hobbyists who are happy to answer beginner questions.
Best places to practice
- Open parks and sports fields: the most accessible option for most people. Look for fields without trees upwind of your launch point.
- Beaches: usually have consistent onshore wind, minimal obstructions, and soft sand for crash landings. A favorite among ornithopter and kite flyers alike.
- Public open spaces away from airports: always check that you're outside restricted airspace. In the US, use the FAA's B4UFLY app to confirm your practice location is clear.
- Local kite festivals: AKA and regional clubs organize festivals where you can watch experienced flyers, get advice, and try gear you're considering buying.
Your next learning steps
Once you've hit your Week 2 milestone (5 minutes of controlled flight), you're no longer a complete beginner. From there, focus on three things: flying in varied wind conditions to build adaptability, learning to do intentional maneuvers rather than just keeping the bird airborne, and connecting with a local club or online community where you can get feedback on your flying. The skills compound fast once the basics click. And if you find yourself getting interested in the broader world of bird-related activities, things like bird banding, obtaining the right permits to work with live birds, or becoming a licensed bird ringer are fascinating paths that some bird enthusiasts eventually explore alongside their flying hobby. If you're asking how to become a bird ringer, the key steps usually start with training and applying for the proper permits in your area becoming a licensed bird ringer. If you need to legally work with birds, start by identifying what permits apply in your area and the steps for requesting them obtaining the right permits to work with live birds.
FAQ
How do I choose between an RC flapping ornithopter and a bird kite if I just want to learn fast?
If your priority is minimal setup and learning basics immediately, start with a bird-themed kite, because you can focus on wind reading and line steering without electronics. If you want mechanical tuning and realistic “flap” flight, choose an RC ornithopter, but expect a steeper learning curve around trimming and ensuring the wings are mounted correctly. A good rule, if you have access to open outdoor space, kite first is usually faster for first-day progress.
What should I do if my ornithopter keeps pitching up or climbing too steeply after I set the tail notches?
Land and reset to the manufacturer’s baseline trim first, then adjust in small steps. If it’s climbing too steeply, move to a lower notch position, retest with at least three similar launches, and confirm you are releasing with the bird pointed directly into the wind. Also check that the tail assembly is tight and aligned, loose hardware can mimic a trim problem.
What should I do if my bird kite won’t hold altitude even in decent wind?
Confirm your kite is trimmed for that wind and that the bridle is set to the manufacturer’s default before changing anything. If altitude drops, reduce turbulence effects by moving to a more open area away from trees, rooftops, and hills, and try again in steadier wind. If the kite still can’t sustain lift, inspect for line tangles, a twisted bridle, or uneven control line lengths that can cause unintended yaw.
Is it safe to practice indoors with a beginner ornithopter?
Indoor practice can work only with the safest environment controls, wide clear space, and a model designed for indoor use. Avoid hardwood floors close to furniture edges and never practice near people or pets. Even with “indoor-suitable” models, use the same discipline as outdoors, have a spotter if possible, and expect that odd winds indoors from HVAC vents can still destabilize trim.
How can I prevent getting turned around on control lines when flying a kite?
Pick a consistent stance (for example, face the kite and keep the left hand on the left line), and do not switch sides mid-flight. If you find yourself confused, land immediately, walk the lines straight so they are not crossed or twisted, then restart. Many beginners lose control because the lines have rotated during ground handling rather than because they “forgot” which line turns what.
What’s the most common beginner mistake with ornithopter launches, beyond trim?
Releasing with the bird rotated, not level, or not properly pointed into the wind. Even if your tail is correct, a sideways or upside-down launch will often fail instantly because the wing surfaces are not presenting the intended lift angle. Practice the toss motion on the ground by aiming into the wind, holding steady for a beat, then releasing with a gentle horizontal throw.
How do I systematically tune my equipment without wasting time?
Change one variable at a time, fly three attempts after each change, and record what happened (climb angle, stability, and whether it turns or oscillates). Start from the exact default settings, then only move one notch or one bridle attachment position per tuning cycle. If you change multiple things between flights, you cannot know which adjustment helped.
What if my kite behaves unpredictably in gusty or patchy wind?
Treat gusty conditions as a “no-tuning” environment, do not chase trim in turbulence. Wait until you see a steadier pocket of wind, then do short practice bursts, focusing on smooth line pulls rather than aggressive steering. If terrain around you creates rotating airflow, relocate to a more open area before making any adjustments.
How often should I inspect or maintain my bird flyer?
Do a quick pre-flight check each session: confirm tail notch hardware is secure, verify there are no loose screws on the frame, and inspect the wings or control surfaces for warps or damage. After crashes, inspect before the next launch rather than assuming it is fine, minor misalignment can turn into repeated trim problems.
What’s a safe way to expand beyond starter equipment without getting overwhelmed?
Upgrade in stages based on a single skill gap you’ve identified, such as needing better steering control for kites or better wind resistance for ornithopters. For example, move from simpler kite types to dual-line sport kites only after you can reliably launch, steer, and recover. For ornithopters, consider higher-end models when your current one consistently achieves controlled landings but still struggles with wind or range limitations.
Can I join a community or use feedback safely if I’m a beginner?
Yes, but choose feedback channels that prioritize safe setup, correct stance, and realistic expectations. Ask people to watch one specific launch or one turn pattern rather than asking for general criticism. If you have a spotter or club member, confirm they understand your model type because different ornithopters and kite geometries require different trim approaches.
Next Article
How to Bird Mouth a Rafter: Step-by-Step DIY Guide
Step-by-step guide to cut the bird-mouth notch in a roof rafter, measure pitch accurately, and fit for a tight seat.