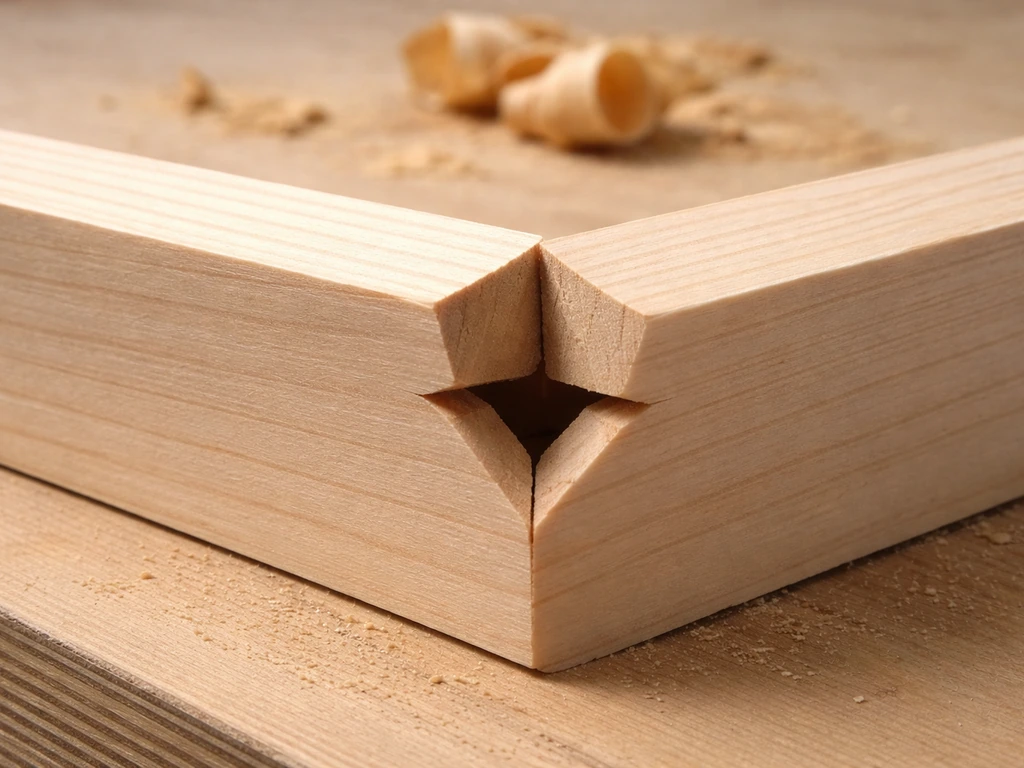
A bird mouth cut is a notch made in a rafter or angled board that creates a flat seating surface so the board can rest squarely on a wall plate or horizontal support. It has two faces: a horizontal "seat cut" that bears the weight, and a vertical "plumb cut" (also called the heel cut) that sits flush against the side of the support.
How to Calculate a Bird Mouth Cut for Woodworking

Marcus Hendricks
26 Apr 2026
To calculate the dimensions, you need three things: your board's pitch angle, the length of the seat cut you want (usually 1. 5 to 3. 5 inches for most projects), and the formula heel depth = seat cut length x tangent(pitch angle). DIYCalculate notes that roof pitch angle and pitch multiplier can be derived using the arctan(rise/run) relationship for common pitch ratios like 4:12 [tangent(pitch angle)](https://diycalculate.
com/roofing/roof-pitch-calculator/). That triangle relationship is everything.
What a bird mouth cut actually is (and the shapes you'll see)
The term "bird mouth cut" comes from the way the notch looks when you hold the board up: the two cut faces meet at an inside corner that opens up like a little beak. In traditional roof framing it connects a sloped rafter to the top plate of a wall, but you'll see the same geometry on birdhouse roof panels, angled perch stands, feeder supports, and any DIY project where a sloped piece needs to sit flat and stable on a horizontal surface.
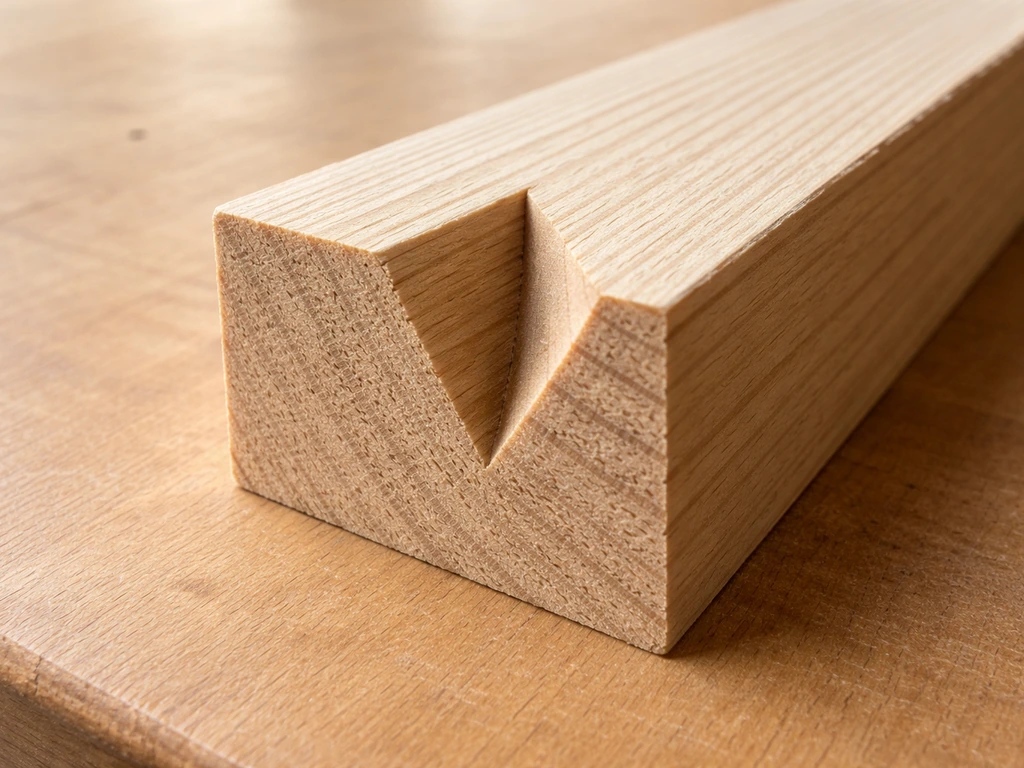
There are two common variations. The first is a standard right-angle bird mouth: the seat cut is perfectly horizontal and the plumb cut is perfectly vertical, so the inside corner is exactly 90 degrees. This is the one you'll make for almost every project. The second is an offset or modified bird mouth where one side is deeper or the angle is adjusted for an overhang or a non-standard pitch. Both follow the same underlying geometry; the offset version just shifts where you start measuring.
One thing worth knowing upfront: the inside corner of the notch must always be a right angle (90 degrees), regardless of the slope angle of your board. That's what makes the seat sit flat and the plumb cut flush. If that inside corner isn't square, nothing will fit cleanly, and you'll feel it the moment you test-fit the piece.
Tools and materials you need to measure and mark accurately
You don't need a lot of gear, but the right tools make the difference between a notch that fits first try and one you have to redo. Here's what I'd have on the bench before starting any bird mouth layout:
- Speed square or framing square: essential for marking both the plumb line and the seat line at your exact pitch angle. A speed square has the pitch angles printed right on it, which saves a lot of head-scratching.
- Combination square: acts as a depth gauge and a marking guide for consistent lines. Set it to your required seat cut depth and you can scribe the same measurement repeatedly without re-measuring each time.
- Marking knife or sharp pencil: a marking knife gives you a finer, more accurate line than a pencil on rough lumber. Position the blade tip exactly where you want the cut to start before scribing.
- Tape measure: for locating where along the board the bird mouth should begin.
- Sliding bevel gauge (optional but helpful): lets you set and transfer an exact angle from one piece to another, useful when you're cutting multiples.
- Circular saw or handsaw: for making the actual cuts once marked.
- Chisel and mallet: for cleaning up the inside corner to ensure it's a true right angle.
- Scrap lumber for test cuts: always cut a test piece before committing to your good stock.
Step-by-step: measure your stock and calculate the bird mouth dimensions
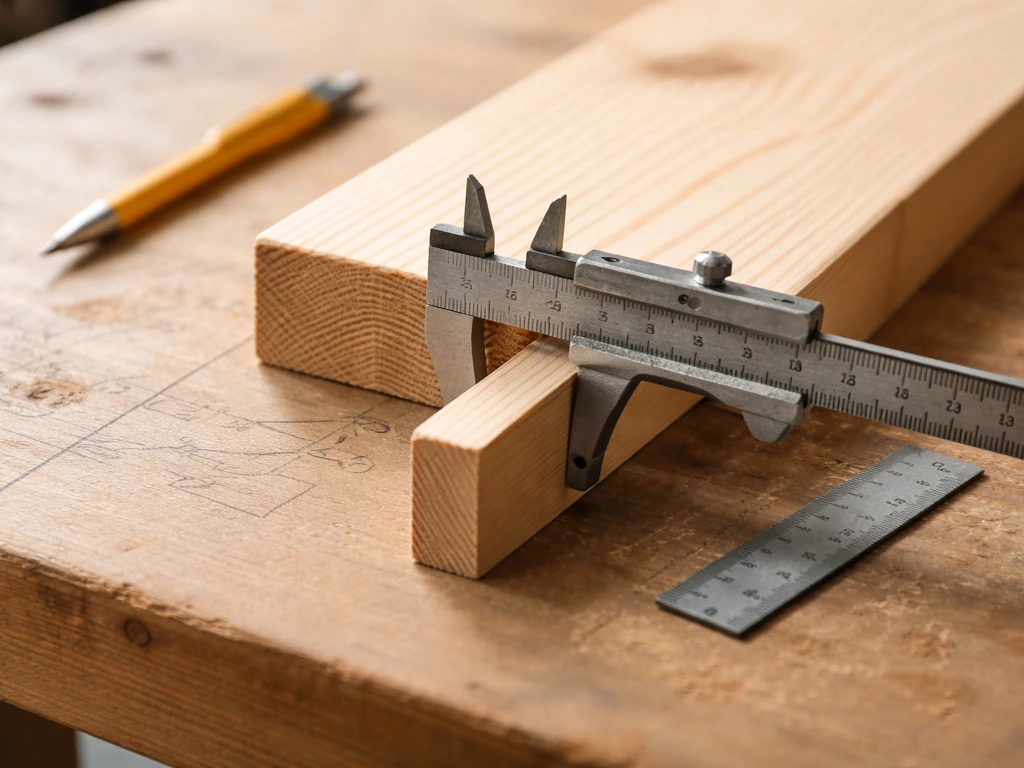
This is the core of the whole thing. To get exact bird formula instructions, use the same pitch angle and seat cut length values, then plug them into the heel-depth and tangent relationship. Work through these steps in order and you'll have clean numbers to mark before you ever pick up a saw.
- Determine your pitch angle. This is the slope angle of your rafter or angled board relative to horizontal. If you're working from a plan, it may be given as a ratio (like 4:12, meaning 4 inches of rise for every 12 inches of run) or as a degree value. Convert a ratio to degrees using: angle = arctan(rise/run). For a 4:12 pitch, that's arctan(4/12) = arctan(0.333) = about 18.4 degrees. A scientific calculator or a free online tool handles this in seconds.
- Decide on your seat cut length. This is the horizontal measurement of the flat bearing surface at the bottom of the notch. For birdhouse and small stand projects, 1.5 to 2.5 inches is usually plenty. For heavier structural work, aim for at least 1.5 inches minimum bearing (that's a code requirement in roof framing under IRC R802.6). In practice, matching the seat cut to about two-thirds of the support member's width gives a solid fit without weakening the rafter too much.
- Calculate the heel (plumb) cut depth. Use the right-triangle relationship: heel depth = seat cut length x tan(pitch angle). For example, with a seat cut of 2 inches and a 4:12 pitch (18.4 degrees): heel depth = 2 x tan(18.4°) = 2 x 0.333 = 0.667 inches, so roughly 11/16 inch. Write this number down; it becomes your plumb cut depth mark.
- Check that the notch doesn't weaken your board too much. A common rule of thumb is that the total depth of the bird mouth (the heel cut depth) should not exceed one-third of the board's depth. If your board is 3.5 inches deep (a 2x4), your heel cut depth should stay under about 1.17 inches. If the calculation spits out a deeper number, shorten the seat cut length and recalculate.
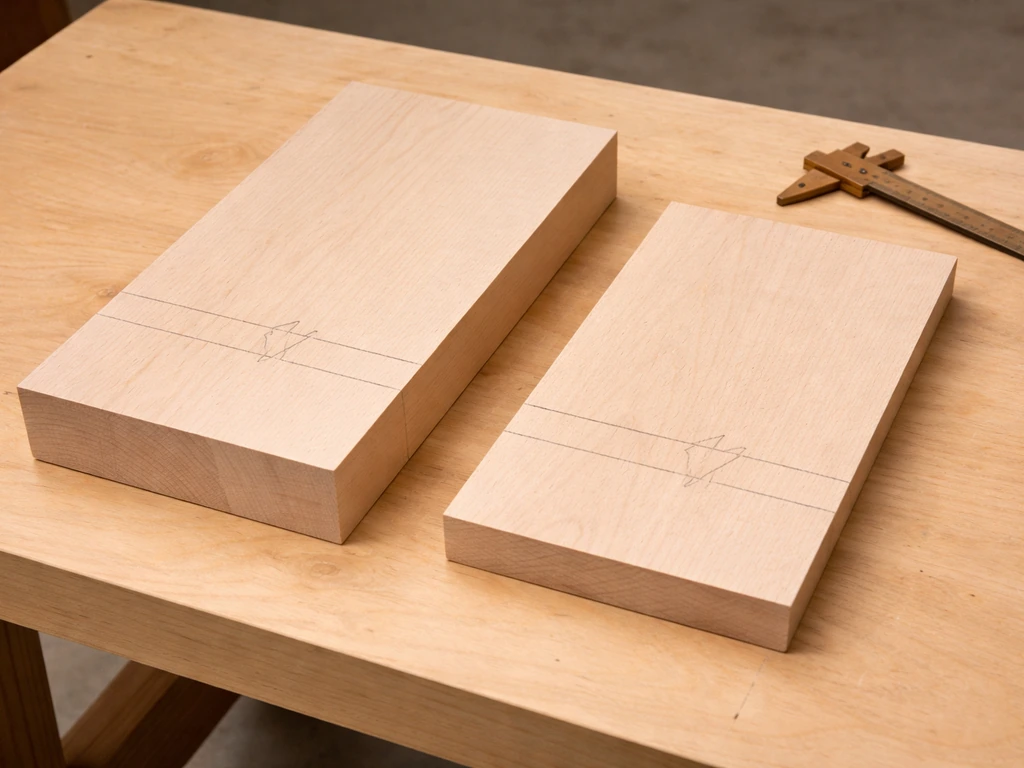
- Note the location along the board where the bird mouth starts. This is usually measured from the tail end (the lower end of the rafter) and is sometimes called the "bird line" or the plumb mark reference point. Measure along the board's length to this point and mark it clearly with a pencil or knife.
Converting your measurements to angles and notch geometry (including tricky cases)
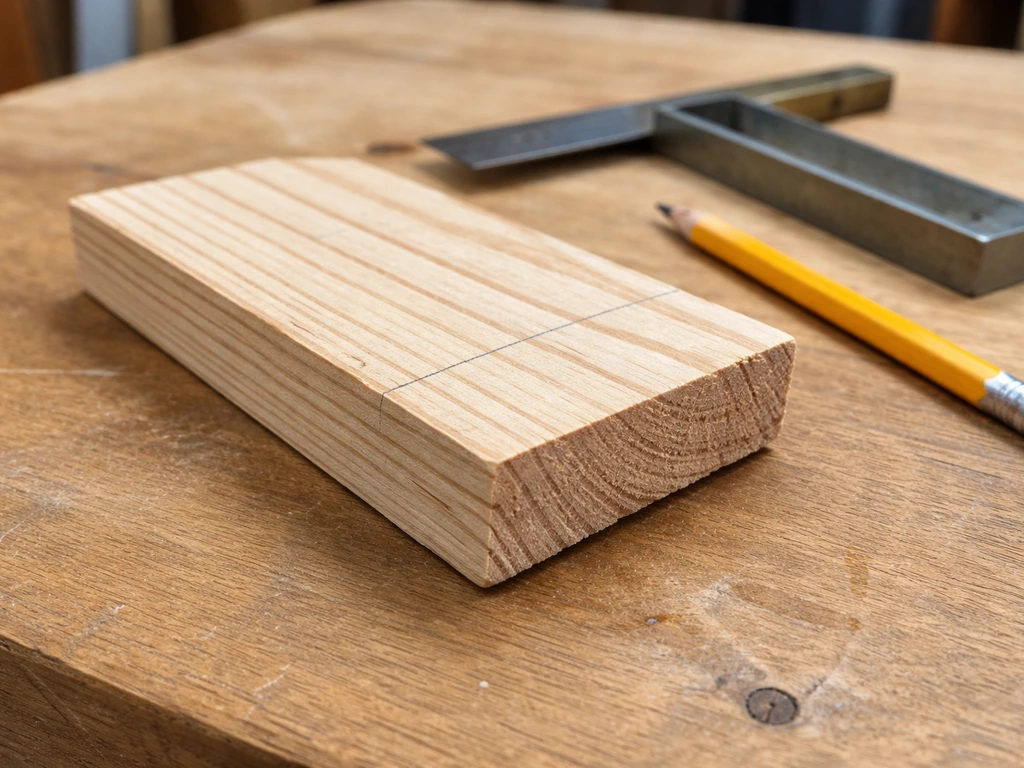
Once you have your seat cut length and heel cut depth, you need to translate those into two intersecting lines on the face of your board. Here's the sequence that actually works in practice:
- Mark the plumb line first. Place your speed square on the board at your bird line mark, with the pivot at the mark and the square's angle set to your pitch angle. Draw a line along the vertical (plumb) edge of the square. This is your heel cut line. It runs perpendicular to the pitch, not perpendicular to the board's face.
- Measure the heel cut depth down from the top edge of the board along the plumb line. Make a clear mark at that depth. This point is the inside corner of your bird mouth.
- From that inside corner point, draw the seat cut line horizontally (perpendicular to the plumb line, not to the board's face). Use your combination square or framing square to make sure it's truly horizontal. This line should extend inward by your seat cut length.
- Double-check the inside corner. Lay your square into the notch lines: the angle between your plumb line and your seat line must be exactly 90 degrees. If it isn't, one of your reference lines is off and you need to find which one before you cut anything.
Handling tricky cases
| Situation | What changes | How to handle it |
|---|---|---|
| Different board thickness | Heel cut depth limit changes | Recalculate the one-third depth limit for the actual board size; adjust seat cut length to stay within it |
| Offset or overhang required | Bird line location shifts | Add the overhang measurement to your bird line position before marking; the notch geometry itself stays the same |
| Non-standard (non-right-angle) inside corner | Geometry is no longer a simple right triangle | Use a sliding bevel to transfer the actual angle from your support piece and recalculate using that angle instead of the pitch angle |
| Clearance fit vs. tight fit | Seat cut length changes slightly | For a clearance fit, add 1/16 to 1/8 inch to the seat cut length so the board drops in without forcing; for a tight fit, use exact calculated dimensions and test-fit before final assembly |
| Very low pitch (under 10 degrees) | Heel cut depth becomes very shallow | Double-check with tan() calculation; very shallow heels are fragile, so consider increasing the seat cut length to compensate |
One mistake I made early on was assuming "horizontal" meant "parallel to the board's face." It doesn't. Horizontal means level, relative to gravity, regardless of the board's angle. Always use a level or a properly set square to confirm your seat cut line is actually horizontal before marking.
Cutting workflow: transfer marks, cut safely, and verify the fit
Good marks only help if the cutting process preserves them accurately. Here's the sequence that keeps everything clean:
- Make a test cut on scrap first. Use a piece of the same thickness as your real stock. Cut the notch exactly as marked and test it against your support piece. A test cut costs you 10 minutes and saves you a whole board.
- Secure the workpiece firmly before cutting. Clamp it to a workbench or sawhorses so it won't shift mid-cut. A moving board means a misplaced cut.
- Make the plumb (heel) cut first. Set your circular saw to the correct bevel angle matching your pitch angle and cut down the plumb line to the inside corner mark. Stop exactly at the corner; don't overshoot.
- Make the seat cut second. With the saw back to 90 degrees (no bevel), cut along the horizontal seat line inward toward the plumb cut. Again, stop at the inside corner. The waste piece should fall away cleanly.
- Clean the inside corner with a chisel. Saw blades leave a small radius at the corner; pare that out with a sharp chisel so the corner is a true right angle. This step is not optional. A rounded inside corner is one of the most common reasons a bird mouth won't sit flat.
- Test-fit the piece. Place it over the support member and check: the seat face should sit completely flat with no rocking, the plumb face should be flush against the support side, and there should be no gap at the inside corner. If everything contacts cleanly, you're done.
- Mark and cut your remaining pieces using the first as a template. Once the first one fits, use it to transfer marks directly to the next boards rather than recalculating from scratch each time.
How to troubleshoot mistakes and adjust for real-world tolerances
Even when the math is right, wood is not a precision material. Boards have crown, grain variations, and slight twists that fight your calculations. Here's how to deal with the most common problems:
- Rocking on the seat: the seat face isn't flat or isn't truly horizontal. Check with a straight edge along the seat face. If it rocks, use a hand plane or chisel to shave the high spot. Take thin passes; you can always remove more but you can't put it back.
- Gap on the plumb face: the heel cut angle is off. This usually means the pitch angle you used on the square was slightly wrong. Measure the actual angle your board sits at using a bevel gauge, then compare it to what you calculated. A small gap (under 1/16 inch) is usually fine for non-structural DIY work. A larger gap means re-cutting the plumb face.
- Inside corner not 90 degrees: this causes both the seat and plumb faces to mis-seat simultaneously. Place your square in the inside corner and check. If it's off, pare with a chisel until the corner is square. Don't try to fix this by re-cutting from the outside.
- Notch too deep (heel cut exceeded one-third of board depth): you can't add wood back, but you can sister a new board alongside the cut one and use the sister as your bearing piece. For decorative or light-duty projects, a bit of wood glue and a backing block on the tension face is a practical fix.
- Notch too shallow (seat cut too short, board rocks off the support): carefully extend the seat cut slightly with a chisel or a router plane, taking small passes and test-fitting after each one.
- Cuts look right but the fit is still loose: this is usually a clearance issue from lumber that's slightly undersized. Shim the seat face with a thin strip of matching wood, glue it in place, and re-fit.
One pattern I've noticed: most bird mouth problems come down to that inside corner not being a clean right angle. Before assuming your angle calculations were wrong, always check the inside corner first with a small square. It's a 10-second check and it solves the problem more often than not.
If you're working on a larger roof-framing project rather than a small birdhouse or stand, the same calculation principles apply but the stakes for accuracy are higher. If you want to take it from layout to install, see the full guide on how to bird mouth a rafter for sizing and cutting tips.
Related guides on how to bird mouth a rafter and how to install a whirly bird on a tin roof go deeper into the structural side of these cuts if your project needs that level of detail. Related guides on how to bird mouth a rafter and how to install a whirly bird on a tin roof go deeper into the structural side of these cuts if your project needs that level of detail.
For now, if you've got your pitch angle, your seat cut length, and a sharp chisel, you have everything you need to calculate and cut a clean bird mouth on your first try. If you want the full walkthrough, follow this guide on how to file bird beak to shape the notch accurately.
FAQ
Does the 90-degree inside corner requirement mean my pitch angle calculation can be ignored if the corner looks square?
Confirm your inside corner is a true 90 degrees on the finished notch, not just on your layout lines. Use a small try square and test-fit the seat against the support before committing to a full-depth cut, since small squareness errors can show up as a rocking or visible gap.
What happens if I use the wrong pitch angle units when calculating a bird mouth cut?
Use the smallest pitch angle that matches your rafter’s slope, and verify the pitch from an actual run and rise measurement (or your framing plan). If you accidentally mix degrees with a rise-over-run pitch, the tangent step will be wrong even if your seat length is correct.
Can I increase the seat cut length to make the bird mouth stronger or more stable?
If your project requires a wider bearing surface, increase the seat cut length you use in the heel-depth formula, then re-check that the plumb cut still lands flush at the support. A longer seat can improve stability, but it also removes more material, which may reduce clearance near fasteners or edges.
How do offset or modified bird mouth cuts change the calculation and layout process?
For a modified or offset bird mouth, the seat cut and plumb cut still form a right-angle inside corner, but you start measuring from a shifted reference point. Decide your reference first (top of the board, edge of the board, or a chosen layout face) and keep that reference consistent on both sides.
When marking a seat cut line, should “horizontal” mean parallel to the board or level to the ground?
Always treat “horizontal” as level to gravity. If you lay out the seat line by eye or by assuming it is parallel to the board’s face, your seat will not bear flat and the plumb face will not meet cleanly.
What’s the best way to troubleshoot a bird mouth that gaps or rocks during the first test-fit?
Do a dry test-fit with the seat resting on the support and check the plumb face contact without forcing it. If only the outer edge touches, shave toward the high spot gradually, keep the inside corner sharp, and avoid removing material from the wrong face.
How do I make sure the bird mouth notch does not interfere with mounting hardware or structural requirements?
Plan your cut depth so the notch does not expose or weaken areas you need to fasten later. If the seat or plumb cut would interfere with nails, screws, or structural members, adjust the seat cut length or choose an alternative framing detail before cutting.
If my measurements are correct but the notch still doesn’t fit, what cutting issue is most likely to blame?
For a clean notch, the inside corner is what matters most for fit. If your lines drift due to a dull blade or wandering chisel, recut to the lines, then refine the seat surface with controlled shavings until it sits full, flat, and square.
Next Article
How Does a Bird Find a Worm? Senses, Behaviors, Tips
Learn how birds find buried worms using sight, sound, smell, and probing, plus bird-safe tips to spot and attract them.