To play 'Flightless Bird, American Mouth' by Iron & Wine on guitar, put a capo on the 3rd fret and play the four-chord loop C, Am, F, G in standard tuning (EADGBE). That combination shifts the sound into Eb Major to match the recording, while keeping the chord shapes simple enough for beginners. The song runs at a slow, gentle tempo around 75–80 BPM, and the main technique is fingerpicking rather than strumming, though a soft strumming approach works fine for casual play. Master those four chord shapes, learn the basic fingerpicking pattern, and you can get through the intro, verse, and chorus within a single focused practice session.
How to Play Flightless Bird on Guitar Step by Step

Marcus Hendricks
30 Apr 2026

Which version of 'Flightless Bird' you're actually learning
There are a few different guitar arrangements floating around online, so it's worth knowing exactly what you're targeting before you dive in. The most widely used beginner version is the chord-based arrangement in the key of Eb Major using a capo at the 3rd fret. With the capo in place, your fingers use C, Am, F, and G shapes, but the guitar actually sounds in Eb, which matches Sam Beam's original recording. You'll see this confirmed on sources like E-Chords, ChordLines, and Songsterr, all of which agree on the capo 3 setup and that same four-chord progression.
The difficulty level is beginner to early-intermediate. If you already know open C, Am, F, and G, the chords themselves won't slow you down. The main challenge is the fingerpicking pattern and keeping the transitions smooth at a quiet, controlled tempo. This isn't a fast or technically demanding song, but it rewards patience and gentle touch more than any fancy technique.
| Detail | Value |
|---|---|
| Song | Flightless Bird, American Mouth — Iron & Wine |
| Tuning | Standard (EADGBE) |
| Capo | 3rd fret |
| Sounding key | Eb Major |
| Chord shapes used | C, Am, F, G |
| Technique | Fingerpicking (strumming works as alternative) |
| Tempo | ~75–80 BPM |
| Difficulty | Beginner to early-intermediate |
The four chords and strumming patterns you need
The entire song, intro, verse, and chorus, runs on the same four chords cycling in order: C, Am, F, G. That's it. No surprise chord halfway through, no key change to panic over. Each chord gets roughly two beats or a full measure depending on the section, so the loop feels natural once you have it memorized.
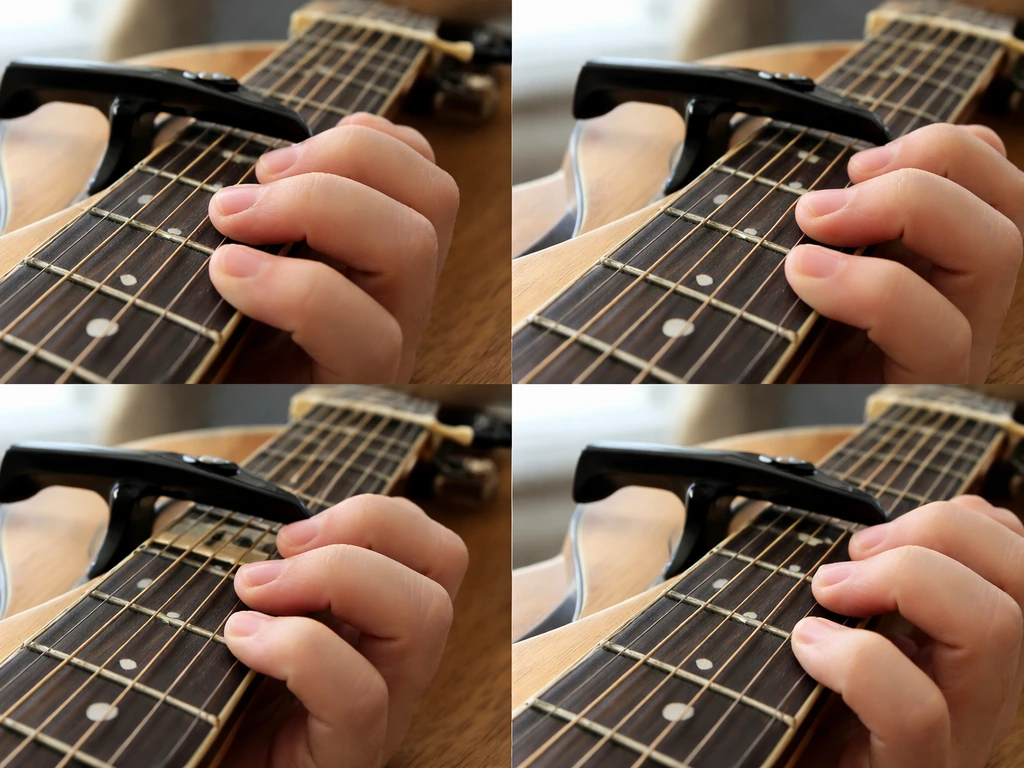
Chord shapes (capo on 3rd fret)
- C major: Ring finger on 5th string/3rd fret, middle finger on 4th string/2nd fret, index finger on 2nd string/1st fret. Strum strings 5 through 1.
- Am: Index finger on 2nd string/1st fret, middle finger on 4th string/2nd fret, ring finger on 3rd string/2nd fret. Strum strings 5 through 1.
- F major: This is the trickiest one for beginners. Use a barre with your index finger across all strings at the 1st fret, ring finger on 5th string/3rd fret, pinky on 4th string/3rd fret, middle finger on 3rd string/2nd fret. Alternatively, use the easier 'mini barre' version: index finger barring just the 1st and 2nd strings at fret 1, middle on 3rd string/2nd fret, ring on 5th string/3rd fret, pinky on 4th string/3rd fret.
- G major: Ring finger on 6th string/3rd fret, middle finger on 5th string/2nd fret, pinky on 1st string/3rd fret. Strum all six strings.
If the full F barre chord is currently a wall for you, the mini-barre version sounds great for this song since the top two strings carry the melody. Don't let F stop you from playing the whole thing. Use the simpler shape now, clean it up later.
Strumming pattern (if you're not fingerpicking yet)
If you want to strum rather than fingerpick, keep it soft and sparse. A simple down, down-up, down pattern per measure works well and keeps the mood of the song intact. Think of it as a gentle lullaby rhythm, not a driving acoustic strum. Use the flesh of your thumb or a thin pick with a light touch. Heavy strumming will kill the vibe immediately.
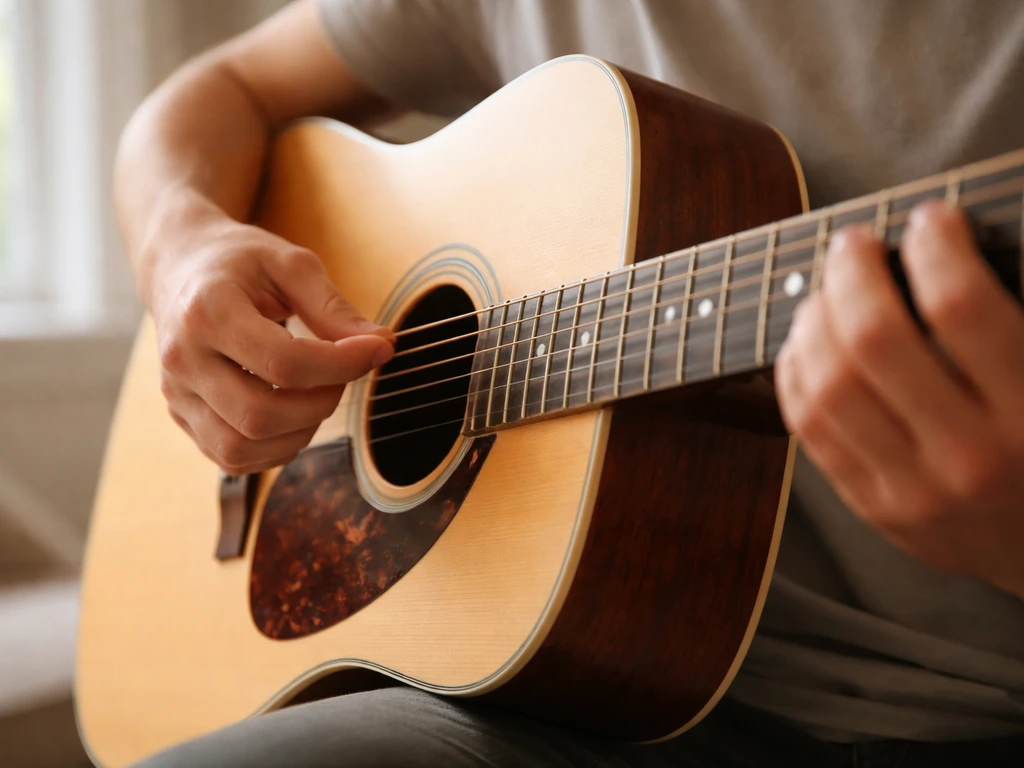
Fingerpicking and lead parts: what to practice first
The original recording leans heavily on fingerpicking, and it's what gives the song its delicate, almost floating quality. The good news is the picking pattern is repetitive, once you learn it over one chord, it works over all four. Here's the basic pattern in plain terms, using the C chord as your practice chord:
- Thumb plucks the bass note (5th string for C, 6th string for G, 5th string for Am and F).
- Index finger plucks the 3rd string.
- Middle finger plucks the 2nd string.
- Ring finger plucks the 1st string.
- Repeat or vary the order slightly — the most common pattern alternates bass notes while the fingers roll across the treble strings in a gentle arpeggio.
A practical arpeggio sequence that fits the song is: Thumb (bass), Index (3rd), Middle (2nd), Ring (1st), Middle (2nd), Index (3rd). That gives you six plucks per measure and flows naturally at the song's tempo. Slow it right down when you first try it, even 50 BPM, and aim for clean, even tone from every string before you speed up.
The transition moments are where most players stumble. When you move from Am to F, your fingers are doing two jobs at once: reshaping the chord and keeping the picking rhythm going. The trick is to keep your picking hand moving even if your fretting hand hasn't quite landed yet. A slightly muted or incomplete chord during the transition sounds far better than a dead stop in the rhythm. Once you can play this fingerpicking pattern comfortably, you can also follow a piano-focused guide to learn how to play "Free as a Bird" on piano how to play free as a bird on piano.
How intro, verse, and chorus sections connect
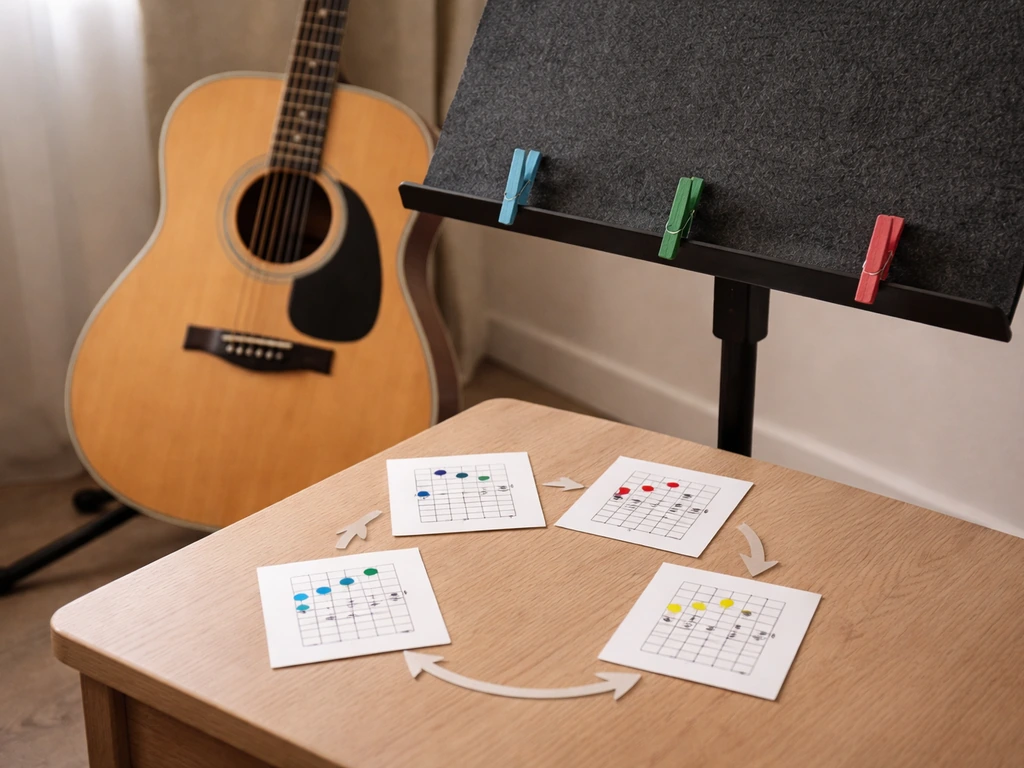
One of the best things about this song is that the chord progression doesn't change between sections. The intro, verse, and chorus all use the same C, Am, F, G loop. What changes slightly is the energy and the picking density, the intro and verses feel more open and sparse, while the chorus can fill out a little more with slightly fuller picking or gentle strumming between the arpeggios.
Intro
Start with a single pass through C, Am, F, G using just the basic arpeggio pattern. If you want the full walkthrough for how to play Little Bird on guitar, start with the fingerpicking pattern and the four-chord loop. Keep it quiet. This sets the mood before the vocals come in. Play it clean and unhurried, there's no rush here. If you're matching the recording, listen for where the first vocal line lands so you know how many measures the intro takes before the verse kicks in.
Verse
The verse sits right on top of the same loop. Keep your picking light and let the chord ring between plucks. The vocal melody fills in the space your guitar leaves open, so resist the urge to over-pick or strum heavily. Think of your guitar as providing a bed for the melody, not competing with it.
Chorus
The chorus feels slightly fuller. You can add a gentle upstroke between picked notes or play slightly more firmly to add a bit of lift. Some players switch to a soft strum pattern on the chorus for contrast, then return to fingerpicking for the verse. Either approach works, just be consistent so the sections feel intentional rather than accidental.
Rhythm, tempo, and the mistakes I see beginners make
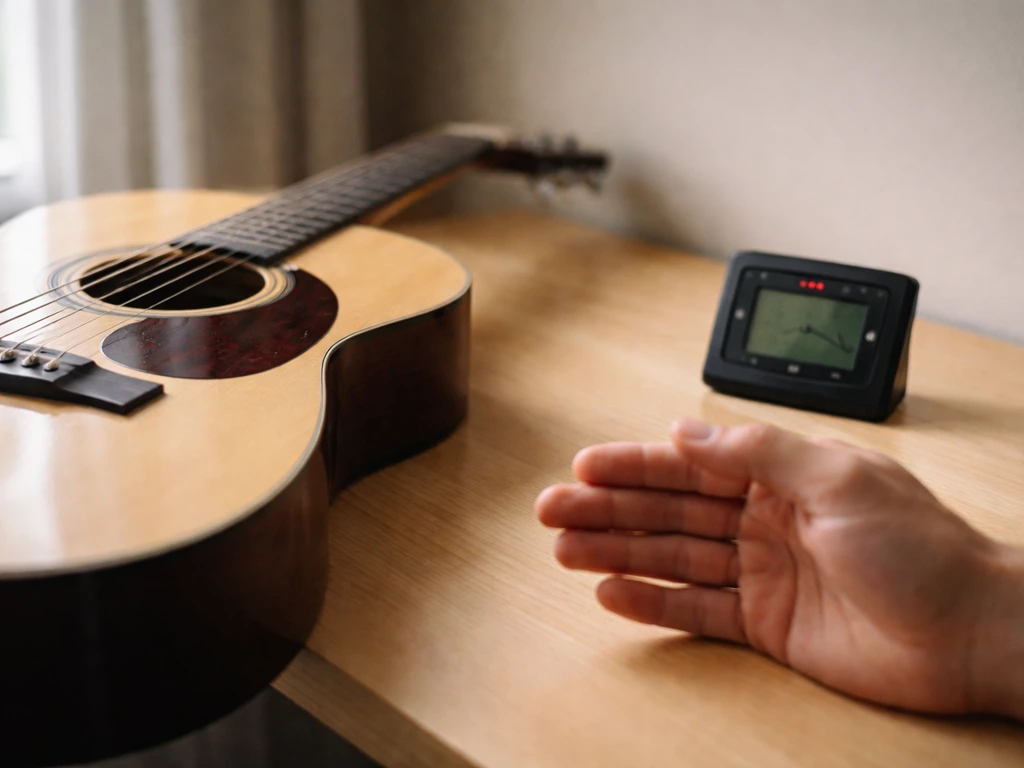
This song is slow, which sounds easy but is actually a trap. Slow songs expose every hesitation and gap in your timing because there's nowhere to hide. Set your metronome to 75 BPM and count in 4/4. Each click is one beat, and each chord typically gets four beats (one full measure) before you switch. If you're rushing the G-to-C turnaround, you'll hear it clearly at this tempo.
Common mistakes and how to fix them
- Rushing chord changes: You anticipate the next chord and move too early, creating an awkward gap or clunky transition. Fix it by planting one finger at a time when learning new transitions, and don't lift your whole hand at once.
- Muting the F chord: Barre chords go dead when your finger isn't flat enough or your wrist isn't positioned behind the neck properly. Roll your index finger slightly toward the nut and press with the bony edge rather than the pad of the finger.
- Uneven picking dynamics: Some strings come out loud and others barely sound. Slow down and isolate each string until every pluck sounds equal and intentional.
- Stopping at transitions: Players freeze between chords instead of keeping the picking pattern going. Even if the chord isn't perfect, keep your picking hand moving at tempo. This is the single most important habit for smooth-sounding guitar.
- Playing too fast too soon: This locks in bad habits. Start at 60 BPM, play cleanly, then bump up by 5 BPM increments only when a section sounds solid.
A realistic practice plan to get it up to speed

Here's a simple daily routine you can follow over one to two weeks to go from shaky chords to a complete, smooth performance of the song.
- Day 1–2: Get your capo on fret 3 and memorize the four chord shapes. Don't play the song yet — just move between C and Am, then F and G, then C to G. Aim for clean, buzz-free notes on each. Spend 10–15 minutes per day just on chord changes.
- Day 3–4: Introduce the basic arpeggio pattern over each chord individually. Use a metronome at 55–60 BPM. Don't move between chords yet — just get the picking pattern automatic on one chord at a time.
- Day 5–6: Combine the picking pattern with the chord loop. Play C for four beats, switch to Am, F, G, and back to C. Keep the metronome at 60 BPM. Focus entirely on smooth transitions, not speed.
- Day 7–8: Play through the intro and verse sections from start to finish, slowly. Match the chord timing to the actual recording by listening with headphones while you play along at half speed using a tool like YouTube's playback speed control.
- Day 9–10: Bring the tempo up to 70 BPM. Add the chorus and practice moving between verse and chorus energy levels. Record yourself and listen back — you'll catch timing and muting issues faster than you think.
- Day 11–14: Play at full tempo (75–80 BPM) from intro through chorus. Work on dynamics — softer in the verse, slightly fuller in the chorus. Play along with the recording. You're aiming to match it, not just approximate it.
Tools and resources to make this easier
You don't need much to learn this song well, but having the right tools makes a real difference, especially for matching the recording and catching your own mistakes.
- Chord charts: E-Chords, ChordLines, and Songsterr all have accurate chord charts for this song with capo 3 clearly marked. Cross-reference at least two sources to make sure you're reading the right version.
- Tab for the fingerpicking pattern: Songsterr's interactive tab player lets you slow down the track and loop specific sections, which is invaluable for learning the picking sequence measure by measure.
- Metronome: Use a free app like Pro Metronome or GuitarTuna's built-in metronome. Set it to 60 BPM to start and build up gradually. Don't skip this — it's the difference between a song that sounds like music and one that sounds like stumbling.
- Playback speed tools: YouTube's speed control (0.75x or 0.5x) and apps like Amazing Slow Downer or Transcribe let you slow the original recording without changing pitch, so you can hear exactly what's happening in the fingerpicking pattern.
- Recording yourself: Even a voice memo on your phone is enough. Play through a section, record it, and listen back. You'll immediately hear the chord that buzzed and the transition that rushed. It's the fastest feedback loop available.
- Verify against the recording: After each practice session, play along with the actual Iron & Wine track. If it sounds like you're in the same key and your timing roughly matches, you're on the right path. If something sounds off, double-check that your capo is on fret 3 and tuned correctly.
If you enjoy learning bird-themed songs on guitar, you might also want to explore how to play Yellow Bird or Little Bird on guitar, which share a similarly gentle fingerpicking style and beginner-friendly chord structures. Each one builds similar skills and gives you more repertoire once you've got Flightless Bird under your fingers.
The best thing about this song is that it rewards a slow, careful approach. Take your time with each piece, trust the practice plan, and within two weeks you'll have a genuinely beautiful-sounding song ready to play for anyone who wants to listen. The Shepherd’s Dog is the album that includes “Flightless Bird, American Mouth,” and the song was used in the 2008 film Twilight.
FAQ
What should I do if my guitar sounds brighter or “off” compared to the recording even with the capo at the 3rd fret?
Check that you are in true standard tuning, EADGBE, not drop tuning or a slightly lowered A. Also make sure the capo is placed directly behind the 3rd fret without covering it, uneven pressure can cause string buzz or pitch issues that make the overall color feel wrong.
Do I have to use C, Am, F, and G open shapes, or can I use barres for smoother transitions?
You can use barres if they help your hands, but the mini-barre F is usually the easiest upgrade from full F. The key is keeping the picking rhythm continuous through the Am to F change, so choose the chord shape you can switch to without stopping.
How can I practice the fingerpicking pattern without accidentally changing the chord timing?
Loop one chord at a time with a metronome, keep the same number of plucks per measure, and only switch chords when the last pluck of the measure is finished. If transitions feel messy, practice with only two chords (Am to F) for 3 to 5 minutes before adding the full loop.
What if my thumb keeps hitting the wrong bass string when I play the arpeggio?
Slow down and deliberately decide the bass string per chord. For the C chord shape, aim your thumb for the 5th string as your lowest note, then keep the rest of the sequence on the intended treble strings. Consistency beats “perfect” variety at first.
Is there a simpler version of the arpeggio if I am a beginner who cannot pluck all six notes cleanly?
Yes. Start by picking only the bass note with your thumb, then add one treble note after it (for example bass, then index). Once those land evenly, expand to the full six-pluck order without increasing tempo until the timing is steady.
How do I keep the chorus from sounding like a different song when I add more energy?
Use contrast in touch, not structure. Keep the same chord loop and the same pluck positions, then vary only dynamics, slightly fuller picking, or a light upstroke between notes. If the rhythm pattern changes too much, it will feel like you switched songs.
Can I play it with a flatpick instead of fingers without losing the vibe?
Yes, but keep the motion small and the attack gentle. A thin pick lightly handled between your thumb and index can mimic the delicate fingerpicking feel, but avoid hard strums, the song depends on even, quiet note separation.
How many measures does the intro typically take before the vocals enter, and how should I count it?
Count in 4/4 with your metronome, and treat the intro as repeating full measures of the same C, Am, F, G loop. For matching the recording, listen for where the first vocal syllable lands, then mark how many measures of the loop happen before that point so you can keep your structure consistent.
What is the best way to fix rushing specifically on the G-to-C turnaround?
Practice the turnaround as a standalone drill: play the last measure of G at a slow tempo, then play the very first measure of C with your metronome clicks exactly on your chord switch. If needed, mute the strings lightly during the switch so you do not get extra sound that masks timing errors.
Should I mute strings during the fingerpicking, or let everything ring?
Aim for controlled ring, let notes sustain when possible, but avoid letting unwanted strings stay loud during chord changes. During transitions like Am to F, a very light left-hand mute (or partial fretting) can prevent a smeary sound while you keep the picking moving.
Next Article
How to Bird Mouth a Rafter: Step-by-Step DIY Guide
Step-by-step guide to cut the bird-mouth notch in a roof rafter, measure pitch accurately, and fit for a tight seat.