You can figure out what bird species you're looking at right now, even as a beginner, by following a simple workflow: start with where and when you spotted it, work through its size, shape, and color patterns, listen for its voice, then confirm with a good app or field guide. That's the whole system. Everything below just fills in how to do each step well, and what to do when it gets tricky.
How to Find Out Bird Species: A Step-by-Step Method

Marcus Hendricks
16 Apr 2026

Start with location, time, and habitat
Before you even look at the bird closely, you already have useful clues. Where are you? What does the environment look like? What time is it? These questions sound basic, but they eliminate huge chunks of the field guide before you've identified a single feather.
Different birds live in different habitats. A warbler in a dense thicket is not the same problem as a warbler at the edge of a pond. Habitat is a bird's home, and most species stick to theirs with surprising consistency. Pair that with the time of day, and you narrow things down fast. Some species are active at dawn and quiet by mid-morning. Others are crepuscular, meaning most active near dusk. Knowing it's 7am in a freshwater marsh versus 2pm in a dry scrubland makes a real difference in what you're likely seeing.
Your geographic location matters just as much. A bird's known range is usually your best sanity check. If an ID seems to require a species that's never been recorded in your state, it's probably wrong. That said, vagrants (birds that wander far outside their normal range) do exist and can genuinely surprise you, so don't instantly dismiss something unusual just because it seems unlikely.
The practical move: before you open any app, mentally note your habitat type (forest, wetland, open field, suburban yard), your location, and the time. If you're ready to go deeper on the general practice of birding before you start identifying, learning how to bird as a discipline will give you a solid foundation for every outing.
Read field marks: size, shape, color, bill, feet, and plumage
Field marks are the specific physical details that separate one species from another. All About Birds also explains that after you use size and shape, color pattern, behavior, and habitat to get the general type, field marks are what you use to be certain between similar birds Field marks are the specific physical details that separate one species from another.. Think of them as the bird's ID card. The trick is to look at them in the right order, because some clues are more reliable than others.
Size and shape first
Size is relative, so use reference points. Is the bird sparrow-sized, robin-sized, or crow-sized? Shape is even more useful: is the body chunky or slender? Is the tail long and narrow or short and squared off? Is the neck thick or thin? These observations hold up even in poor light or at a distance, which is why they're worth prioritizing over color.
Color pattern (not just color)

Color can mislead you, especially in direct sun, deep shade, or when you're looking at a wet bird. What's more reliable is the pattern: where does the color sit on the body? Look for a cap, an eye ring, a supercilium (the stripe above the eye), a malar stripe (the line down the cheek), a breast band, or wingbars (the stripes across the folded wing). Two birds can look similarly colored from a distance but have completely different patterns up close, and that's what actually separates the species.
Bill, feet, and legs
Bill shape tells you a lot about what a bird eats and what family it belongs to. A thick, seed-cracking bill points to finches and sparrows. A long, curved bill suggests a nectarivore or a shorebird. A hooked tip means a raptor or a shrike. Leg color and length matter too, especially for wading birds and shorebirds where leg color (yellow, pink, black) can be a decisive field mark when similar species are standing side by side.
Use structure and silhouette to narrow it down
Structure means the overall proportions and architecture of the bird: how it's built. Silhouette is what you see when it's backlit or far away. Getting comfortable with both is one of the fastest ways to level up your identification skills.
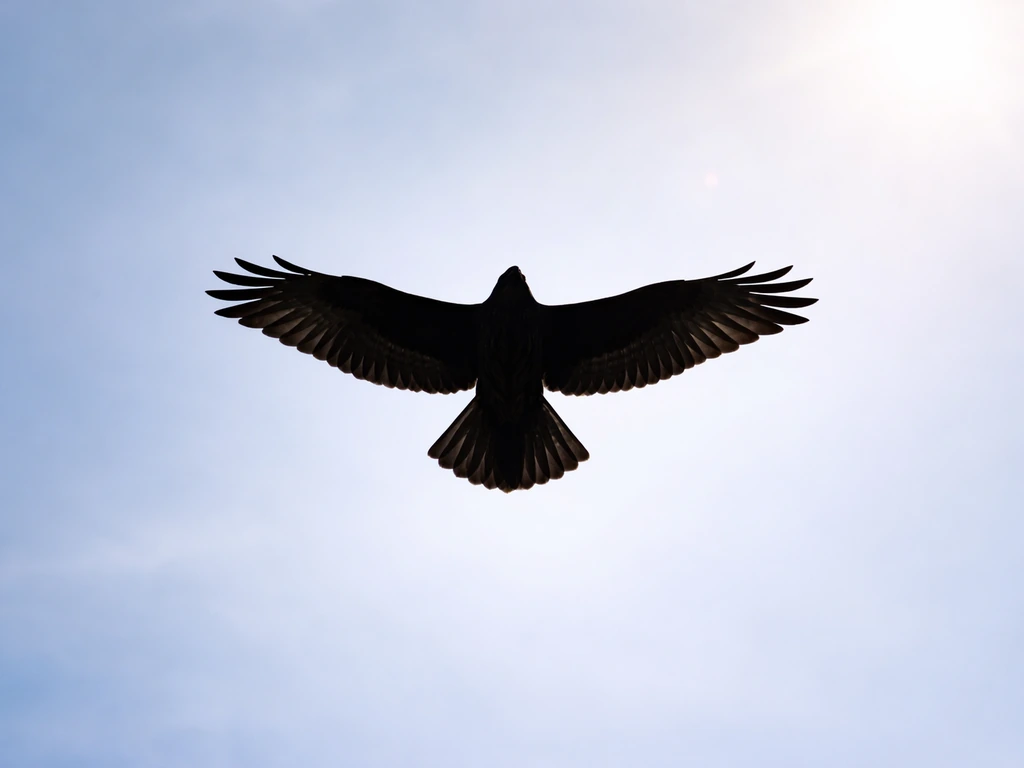
An experienced birder can often identify a distant hawk by wing shape alone before they can see a single feather detail. Broad, rounded wings with a fanned tail means buteo (like a Red-tailed Hawk). Long, narrow, pointed wings with a long tail means accipiter (like a Cooper's Hawk). The same logic applies across all bird groups. Ducks that hold their tails flat on the water are different from ducks that cock their tails upright. Shorebirds with horizontal postures feed differently from those that stand tall and upright.
Here's a tip I learned the hard way: when lighting conditions make color useless, structure and silhouette are often still perfectly readable. A bird in deep shadow with washed-out color can still give you its body proportions, its stance, and its movement style. Lean on those when color isn't cooperating. Behavior is part of structure in this sense: a bird creeping head-first down a tree trunk is almost certainly a nuthatch. You don't need to see its plumage at all.
Listen and learn: identifying birds by sound
A huge percentage of birds you encounter in the field you'll hear before you see them, and some you'll only hear. Learning to use sound is not optional if you want to be a confident identifier.
Bird vocalizations come in two main categories: songs (usually longer, more complex, used primarily for territory and mating) and calls (shorter, simpler sounds used for contact, alarm, or flight). Some species have calls that are instantly and uniquely recognizable. The Killdeer's loud "kill-deer" call is a perfect example. Others have calls that sound frustratingly similar to two or three related species, making sound alone insufficient without also seeing the bird.
It's also worth knowing that birds make sounds beyond vocals. Wing beats, tail feather vibrations, and even bill snapping can all be part of what you're hearing in the field. Don't assume every sound is a song or call.
The best way to build your sound library is through deliberate practice: spend time listening to recordings before you go out, and when you're in the field, try to record what you hear. A short clip on your phone is surprisingly useful. Apps like Merlin's Sound ID can listen in real time and flag likely species. The Cornell Lab's Macaulay Library is also an incredible resource, with a curated audio guide covering hundreds of species including songs, calls, and flight calls.
One practical habit: when you hear an unfamiliar sound, stop and watch the area it's coming from. Try to match the sound to a specific bird you can see. That pairing (sound plus visual) is how identification by ear becomes reliable rather than guesswork.
Confirm your ID with field guides, apps, and checklists
Once you have a tentative ID in mind, the goal is to confirm it with a reliable source, and to do that correctly rather than just clicking through until you find something that sort of matches.
Field guides
A good printed or digital field guide gives you range maps, multiple plumage illustrations (adult, juvenile, seasonal), and written descriptions of field marks. Use it to check: does the species you think you saw actually occur in your location? Does the illustration match the specific pattern you observed, not just the general color? Does the habitat description fit? If you're not sure where to start with field guides, a practical guide on how to find a bird book that suits your region and skill level can save you a lot of frustration.
Birding apps
Merlin Bird ID from Cornell Lab is the go-to free app for most beginners and intermediate birders. You can filter by location and date, which is critical: changing those filters if you get no match is often the fix when searches seem to come up empty. Merlin also supports sound identification in real time, which makes it genuinely useful in the field. The key to using it well is to let your own observations lead, and use the app to confirm or challenge your hypothesis, not to start from scratch and just scroll through photos hoping something looks right.
eBird checklists
eBird (also from Cornell Lab) lets you see what species have actually been reported near your location, which is one of the best ways to quickly generate a realistic shortlist for a given date and place. If you're logging your own sightings, note that unusual species may get flagged and require you to add written descriptions or media before the checklist is accepted. This isn't a punishment: it's a quality check, and it encourages you to document what you actually observed rather than just logging a name. Even low-quality photos or a rough written description of what you saw or heard can be enough to support an ID.
When you're out in the field trying to locate a specific bird you've heard about, the techniques overlap with general search strategy. The guide on how to find a bird covers exactly that kind of targeted search, and it pairs well with the identification workflow here.
Comparison at a glance
| Tool | Best Use | Limitations | Cost |
|---|---|---|---|
| Merlin Bird ID app | Real-time field ID, sound ID, filter by location/date | Needs good input; can mismatch if filters are wrong | Free |
| Printed field guide | In-depth plumage detail, range maps, habitat descriptions | Can't listen to sounds; may feel slow in the field | One-time purchase |
| eBird checklists | See what's been reported nearby; log and document sightings | Unusual sightings need documentation before submission | Free |
| Macaulay Library audio guide | Curated, edited sound recordings for hundreds of species | Audio-focused; not a visual ID tool | Paid product |
| Audubon Bird ID tool | Enter observational details to generate species matches | Online-based; less useful without cell signal | Free |
Tricky cases: similar species, juveniles, hybrids, and partial views
This is where most beginners get stuck, and honestly, where experienced birders spend most of their time too. Bird identification isn't always clean, and being comfortable with uncertainty is part of the skill.
Similar species
When two species look nearly identical, the separator is almost always a very specific field mark: leg color, eye ring width, wingbar pattern, bill length in millimeters. Audubon's troubleshooting advice is spot-on here: sometimes you need to focus on a single trait like leg or bill color to make the call. If you can't see that one decisive mark, it's okay to log the bird to genus level rather than forcing a species ID you can't support.
Juveniles and molt
Young birds often look nothing like the adults pictured in field guide illustrations. A juvenile can have streaky brown plumage, a completely different head pattern, or duller bare parts (bill and leg color) compared to what you expect. Molt complicates this further: birds replace their feathers on a schedule, and a bird mid-molt can look like two different species at once. A molt limit, which is where old and new feathers sit side by side on the same wing, is actually a useful age clue once you know to look for it. Worn, brownish primary feathers on an otherwise fresh-looking bird usually signal a juvenile or first-year bird.
Hybrids and seasonal variation
Hybrids exist in wild birds and can be genuinely confusing. A hybrid will often show a mix of field marks from both parent species, which means it won't cleanly match any one entry in a field guide. Seasonal variation is also real: many species look dramatically different in breeding plumage versus non-breeding (winter) plumage. Make sure you're comparing your bird to the right seasonal illustration for the time of year.
Partial views
Sometimes you see a flash of something in dense vegetation and that's it. Work with what you have. A partial view can still give you: approximate size, tail length and shape, wing color patches, foraging behavior, and the sound it made when it flushed. Document all of it. A mystery bird seen briefly is still worth tracking, which is where the skills in how to track a bird come in handy, especially when you want to relocate and get a better look.
Take better notes so your ID holds up later

The time between seeing a bird and getting home to confirm the ID is where most of the useful detail gets lost. Good field notes close that gap.
What to write down (or voice-memo) immediately
- Date, time, and exact location (or a GPS pin if your phone is handy)
- Habitat type: what was the bird in or near? Water, dense shrubs, open field, forest canopy?
- Size comparison: what familiar bird was it closest to in size?
- Shape notes: tail length, neck thickness, wing shape if seen in flight
- Specific plumage details: cap color, eye ring, streaking on the breast, wingbars, any bold markings
- Bill shape and color, leg color if visible
- Behavior: what was it doing? How was it moving?
- Any sounds: try to phonetically describe what you heard, even roughly
Photos and recordings
Even a blurry photo is better than no photo. Shoot it first and worry about quality later. A poor-quality image can still show tail length, overall shape, or a key plumage mark well enough to confirm or rule out a species. For sound, a short video or audio clip on your phone works. These recordings are genuinely valuable: eBird actively collects sound recordings for the Macaulay Library, and those recordings are used to train Merlin's Sound ID. Your contribution helps the whole system get better.
If you're documenting a habitat alongside your sighting, a wide shot of the environment can add useful context when you go back to verify the ID, or when you submit to eBird and need to support an unusual record.
Revisiting and improving your ID
When you get home, compare your notes and photos against your field guide and eBird's recent reports for your location. If something doesn't fit, resist the urge to force the ID. It's better to log "Empidonax sp." (meaning an unidentified member of the Empidonax flycatcher group) than to pick a species you can't actually confirm. Over time, the things you notice in the field get sharper, and IDs that felt impossible start coming quickly.
If you've lost track of a bird you were watching and want to go back and find it, the approach in how to find a missing bird covers relocating a bird you've briefly lost sight of, which comes up more often than you'd expect. And if you're curious about how birds themselves locate things in their environment, the article on how a bird finds a worm is a surprisingly useful detour for understanding bird behavior and sensory cues. Understanding how birds interact with their habitat makes you better at predicting where they'll be and what they'll be doing, which feeds directly back into your identification workflow.
The last thing I'll say: every birder who's been doing this for years has a thick stack of "mystery bird" encounters they never fully resolved. That's not failure. That's the hobby. The workflow above won't give you a perfect ID every time, but it will give you a reliable, defensible one most of the time, and it'll make you noticeably better every single outing.
Your quick-reference ID checklist
- Note your location, date, time, and habitat type before anything else
- Estimate size relative to a familiar bird (sparrow / robin / crow scale)
- Observe overall shape: body, tail, neck, wing proportions
- Look for specific field marks: cap, eye ring, wingbars, breast pattern, bill shape, leg color
- Watch behavior: how is it moving, foraging, perching?
- Listen and try to record any vocalizations, even a rough phonetic note
- Open Merlin with your location and date set correctly, or check eBird for recent reports nearby
- Cross-reference with a field guide illustration for the right season and age class
- If unsure, photograph it (even badly) and note the one or two marks you are certain of
- Log it in eBird and add a description if it seems unusual for your area
If you find yourself wanting to dig even deeper into the search side of the practice, the full guide on how to find the bird in the unwanted experiment explores some of the more challenging search and identification scenarios you might encounter as your skills develop.
FAQ
What should I do if my best guess bird species seems unlikely for my location?
Use a quick “most likely by range, then confirm” rule. Start with what species are expected in your area and season, then check 1 to 2 decisive field marks (often bill shape, wingbar pattern, or leg color). If the best match is still uncertain, record at the safest taxonomic level you can justify (species only when you can point to a specific mark you saw).
How do I use a bird ID app without letting it override my observations?
Treat app results as hypotheses, not answers. If the app shows multiple candidates, compare each candidate to your own highest-confidence traits, not general color impressions. Also verify that your filters (location, date, and if you included audio) match when and where you actually observed the bird, since those settings strongly change candidate lists.
How can I distinguish two species that look nearly identical to me?
For look-alikes, pick one trait you can observe consistently, then rule in or rule out. Examples: eye ring width for many small passerines, bill length for sparrows and finches, leg color for many shorebirds, and wingbar number and tone for certain small woodland birds. If you cannot see that one trait due to distance or lighting, it is better to stop at genus (or a small group) than to guess.
What’s the best method when the bird is in poor light or the colors look washed out?
If lighting ruins plumage color, switch your priority order to structure. Focus on silhouette and proportions (tail length and shape, wing shape, body build), then movement style (how it perches, feeds, or creeps). Motion and posture usually survive bad light better than color does.
If I hear a bird but can’t immediately see it, how should I track down the correct individual?
Don’t assume vocalization equals the bird that is closest to you visually. When you hear something, pause and identify the direction and likely distance of the sound source, then watch that area long enough for the bird to reveal diagnostic features. If you cannot confirm visually, document the sound with timing and location anyway, since that can support later ID.
How can I write notes that actually help with ID when I only see part of the bird?
Record “diagnostic negatives.” For example, note what is missing (no obvious eye ring, no wingbars, not a thick seed-cracking bill). These observations can eliminate candidates even when you cannot see the ideal mark.
How do I identify birds when what I’m seeing might be a juvenile or first-year bird?
For juveniles, compare to the right age and seasonal context, not just the species illustration. Look specifically at whether the head pattern looks juvenile-like (more mottled or streaked), and whether bare-part color is duller than adult expectations. If you can, focus on stable structural traits (tail shape, wing shape) instead of relying on adult plumage colors.
What should I look for to avoid getting fooled by molt during identification?
Molt can create a “split appearance,” especially on wings and primaries. Look for a feather-by-feather transition pattern (fresh darker feathers mixed with older worn ones) and note what body regions are changing. If you can’t determine the molt stage confidently, log the most defensible ID you can, because molt often makes exact species confirmation harder.
How can I handle it if I suspect the bird is a hybrid?
Hybrids usually show mismatched combinations of field marks that do not fit any single “clean” description. Your best response is to avoid forcing a single species, and instead document which traits look like which parent species. If you can, add photos or sketches of the specific mixed features (for instance, bill shape plus wingbar pattern).
What photo angles or shots should I prioritize if I want my evidence to be usable later?
If you get a clear view of the bird, try to take at least one shot that captures the posture (side profile or full-body stance), and one that captures the wings folded (for wingbars and pattern). For moving birds, a short burst of photos is better than one single frame, because tail length and head shape are often only visible when the bird turns.
Is it better to guess a species or record only a genus when I’m unsure?
When you cannot confirm, log to the level that matches the certainty of what you actually saw, like “species sp.” or a recognized group, rather than a random species name. This keeps your future searching honest, improves the usefulness of your records, and makes it easier for you to refine the ID the next time you see that bird.
What details should I capture so I can find the same bird again after I leave?
For birds you want to relocate, note micro-habitat details from the first encounter, not just general habitat. Include things like the edge of a pond versus open water, the type of tree used for perching, and whether it was foraging on the ground, in shrubs, or high in the canopy. These specifics make re-finding far more reliable than relying on location alone.
Next Article
How to Find a Bird Book: Step by Step Guide
Step-by-step guide to find the right bird book by region, format, and ID method, plus where to buy or borrow.