Becoming a bird bander is absolutely doable, but it takes more steps than most people expect. You cannot just buy a band and start clipping it onto wild birds. In the U.S., banding any migratory bird without a federal permit is illegal under the Migratory Bird Treaty Act. So the real path starts with understanding the rules, finding a mentor, and working your way through supervised training before you ever hold a bird in your hands. Here is exactly how to do that, from day one.
How to Become a Bird Bander: Training, Permits, and Safety

Marcus Hendricks
14 Apr 2026
What a bird bander actually does (and who regulates it)
A bird bander captures wild birds, attaches a small numbered aluminum band to one leg, records measurements and field data, and releases the bird unharmed. That data gets submitted to a central database, where it builds up over years into a picture of migration routes, survival rates, and population health. The USGS Bird Banding Laboratory (BBL) is the federal hub in the United States. It collects, curates, archives, and shares all banding data, and those records are used directly in wildlife management decisions, especially for waterfowl populations that hunters report encountering.
In the UK, the British Trust for Ornithology runs the ringing scheme (yes, it is called 'ringing' there, not banding). Across Europe, EURING coordinates bird ringing through national member schemes, with each country handling operations locally. The rules differ by country, but the logic is the same everywhere: this is a regulated scientific activity, not a hobby you can pick up without oversight.
In the U.S., the legal backbone is the Migratory Bird Treaty Act (16 U.S.C. 703-712). A Federal Bird Banding and Marking Permit is required to place a band or any marker on any wild bird protected by the MBTA. That permit specifies exactly which species or species groups you are authorized to work with. No permit means no banding, period. This is similar in spirit to how to get a bird licence for other bird-related activities: the paperwork is not optional, it is the foundation.
Basic eligibility and prerequisites
There is no single age or degree requirement to start training as a bander, but there are real expectations you should meet before applying for any permit or approaching a mentor. Banding involves live wild animals, and doing it poorly causes genuine harm to birds, so the bar for competence is high from the start.
- Comfort handling live birds without panicking or gripping too hard (this comes with practice, not instinct)
- Basic bird identification skills, especially for the species groups you want to band
- Understanding of bird anatomy: wing structure, primary feathers, leg anatomy, and how bands sit on the tarsus
- Awareness of molt, age, and sex determination, since banders record this data for every bird
- Physical steadiness and patience: some processing takes only 60 seconds, but you need to be calm and deliberate every single time
- Willingness to work early mornings, often in cold or wet conditions, since banding is timed around bird activity
On the legal side, you need to know upfront that a Federal Banding and Marking Permit does not authorize you to remove or modify a band from a bird you did not band yourself, unless the bird's health or safety is at immediate risk. Understanding these boundaries from the start saves you from accidental violations later. Think of it the same way you would think about what you need to own a bird legally: there are rules about what you can and cannot do, and they exist for good reason.
Training pathways and mentorship
This is where most beginners get stuck, because there is no single front door. The training system is decentralized, and finding the right mentor takes some legwork. Here is how to approach it.
Start with the FWS online course (U.S. readers)
The U.S. Fish and Wildlife Service offers a free online course called 'Fundamentals of Bird Banding (Passerines).' This is listed as introductory training material required to begin the process of being permitted by the USGS to leg-band passerine birds. Complete this first. It covers legal frameworks, basic techniques, and safety principles, and it signals to future mentors that you are serious. You can find it through the FWS training website. Just know this: the course alone is not enough. Further hands-on training and apprenticeship under a master bander is required to be fully permitted to live-capture and band birds without supervision.
Find a master bander or banding station
Once you have done the online course, you need a master bander willing to take you on as an apprentice. Here is where to look: contact your nearest Audubon chapter, local bird observatory, or wildlife research station. Many universities run banding programs through their ornithology departments. The North American Banding Council (NABC) also connects aspiring banders with training resources. NABC’s Banders’ Study Guide PDF serves as a training manual for banders and is intended to support that onboarding and supervised learning process The North American Banding Council (NABC) also connects aspiring banders with training resources.. BirdPOP offers customized bird banding classes taught by NABC-certified trainers, which is a structured option if you cannot find a local mentor immediately.
UK and European pathways
In the UK, the BTO requires you to obtain a training permit (T permit) and then train under a licensed ringer who holds a Trainer endorsement. You cannot operate unsupervised as a trainee at any point. Once your Trainer judges that you have reached the required standard, you can apply for your first endorsements, sometimes with restrictions that gradually lift as you progress. In Europe, the system runs through EURING's national member schemes: each country has its own certification process, and you would contact your national scheme directly to find a trainer.
The permit application timeline
In the U.S., once you have completed training and are ready to apply for a master banding permit, plan ahead. The USGS states that applicants should allow a minimum of 4 to 6 months for the BBL to process and review each new master banding permit application. You will need a current email address for all communications, and the BBL will not approve authorizations to band outside the USA until you have obtained the required permits for that other country. This process is not unlike how to get a bird breeders license in that the lead time and documentation requirements are longer than most beginners expect.
Field equipment and setup for banding
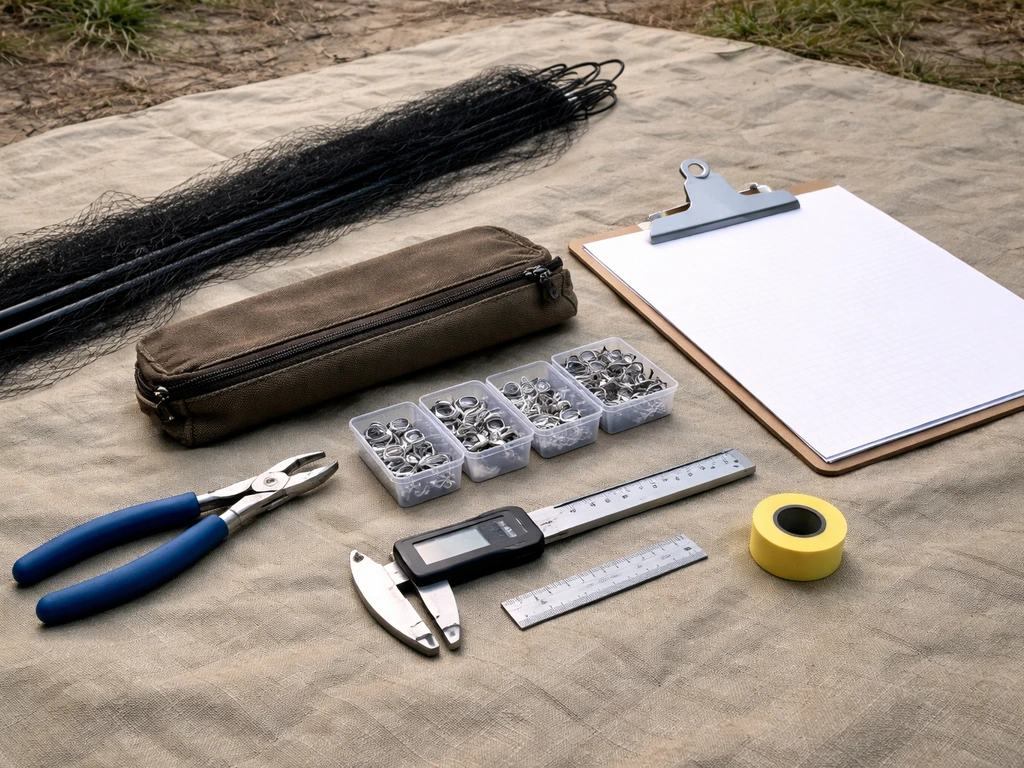
Getting your equipment right matters both for efficiency and bird welfare. Here is what a working banding kit looks like for passerine banding, with notes on raptors where the tools differ.
| Tool | What it's for | Notes |
|---|---|---|
| Mist nets | Capturing birds safely in the field | Audubon Rockies-style stations run around ten nets per session; net size and mesh vary by target species |
| Band assortment | Leg bands in multiple sizes for different species | USGS-authorized aluminum bands, sized to species; your permit specifies which species you can band |
| Banding pliers | Closing bands securely around the tarsus | Must close the band smoothly without gaps or pinching; specialized pliers for different band sizes |
| Digital calipers | Measuring culmen (bill length), hallux, wing chord | Standard for raptors; also used for precise measurements in passerine work |
| Digital scale | Weighing birds | Used for every bird; weights flag health issues and inform population data |
| Band size chart / reference cards | Matching species to correct band size | Critical — wrong band size can injure or kill a bird |
| Data sheets or digital logger | Recording all measurements, age, sex, band number, date, location | Must be submitted to USGS via the Bander Portal |
| Cloth bags or bird bags | Holding birds calmly before processing | Reduces stress and struggling between net extraction and processing |
For raptors specifically, HawkWatch International lists digital calipers for culmen and hallux measurements, banding pliers sized for USGS rings, and a scale as core in-hand tools. Raptor banding involves larger, stronger birds, and the equipment and technique requirements reflect that.
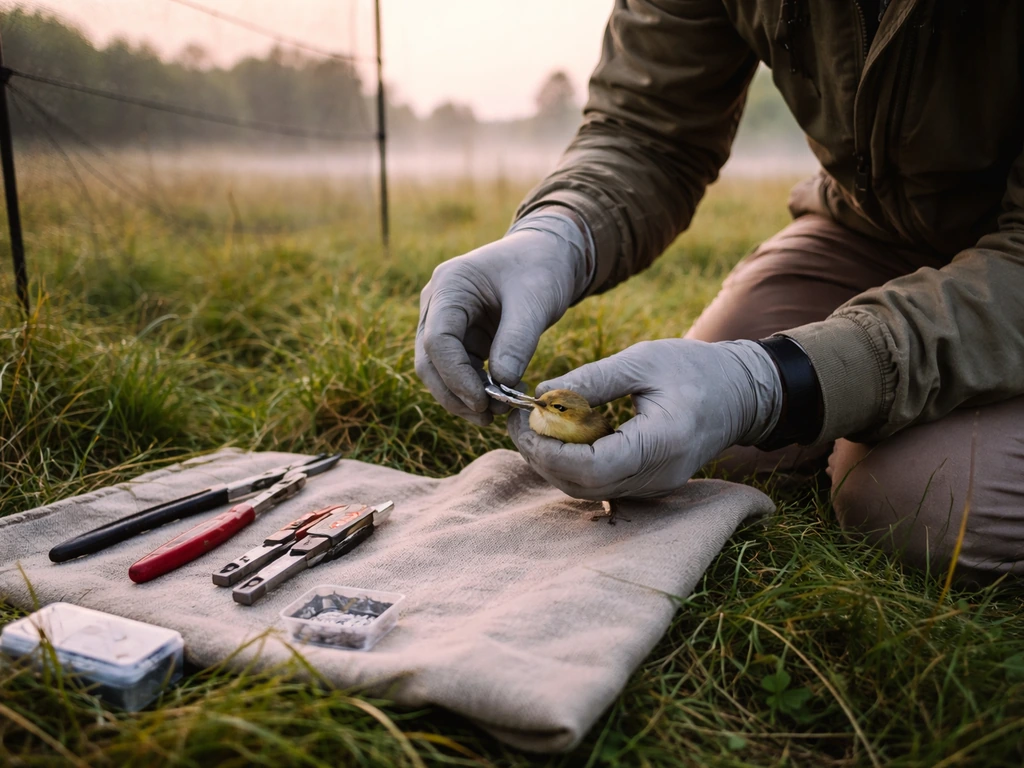
The banding process from capture to release
Here is the basic workflow, step by step. Your mentor will walk you through each stage under supervision before you attempt it independently.
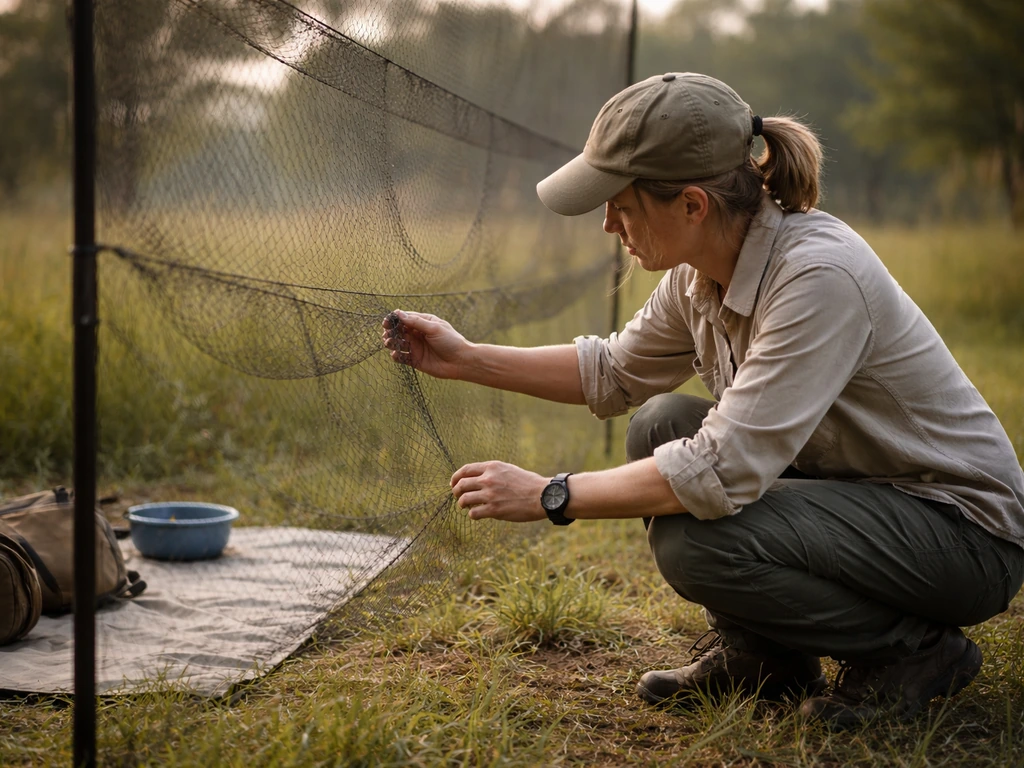
- Set up mist nets in appropriate habitat before dawn, orienting them along flight paths or vegetation edges where birds move naturally
- Check nets at regular, short intervals (standardized timing limits how long any bird spends entangled; Audubon emphasizes this as a non-negotiable practice)
- Extract the bird carefully from the net, following the direction it flew in to avoid tangling feathers or wings further
- Place the bird in a cloth holding bag to keep it calm while you process other birds or prepare your station
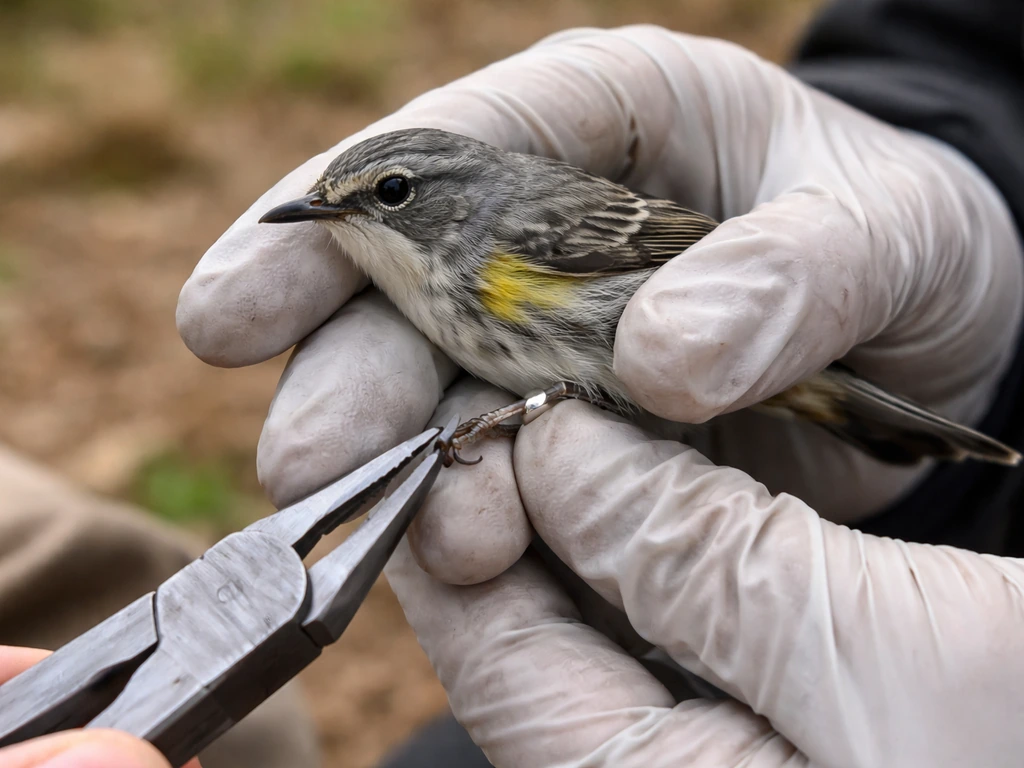
- Hold the bird using the 'bander's grip' (also called the photographer's grip): the bird's body rests between your index and middle fingers, legs hanging free, with your thumb securing the back
- Select the correct band size for the species using your reference chart; the band should fit snugly but slide freely up and down the tarsus without catching
- Apply the band using banding pliers, closing it so the ends meet cleanly with no gap and no overlap
- Take all required measurements: wing chord, weight, tarsus length, and any additional measurements your permit or project requires
- Assess age and sex using plumage, molt patterns, and measurements, and record everything on your data sheet
- Release the bird promptly in the direction it was captured; a healthy bird will fly off immediately
The whole process for a small passerine should take well under five minutes once you are practiced. Speed comes from preparation and repetition, not from rushing the bird.
Species-specific considerations
Not all birds are banded the same way, and your permit will specify which species or groups you are authorized to work with. Trying to band a species you are not authorized for is a permit violation, even accidentally. Here is a practical overview of how approach and technique vary.
Passerines (songbirds)
Passerines are the most common starting point for new banders. Mist nets are the standard capture method. Mesh size matters: finer mesh catches smaller birds more effectively. Most banding stations target migration windows in spring (April to May) and fall (August to October), when bird movement is heaviest. Early morning is critical since passerines move most actively in the first two hours after dawn.
Raptors
Raptors require different capture methods (including bal-chatri traps and other live-trap designs) and much more robust handling technique. Talons are the main risk. Raptor banding manuals published by NABC are widely used as curriculum for this work, and most programs require extended supervised experience before you work raptors independently. Band sizes are larger, and measurements like hallux claw length and culmen depth become standard data points.
Waterfowl
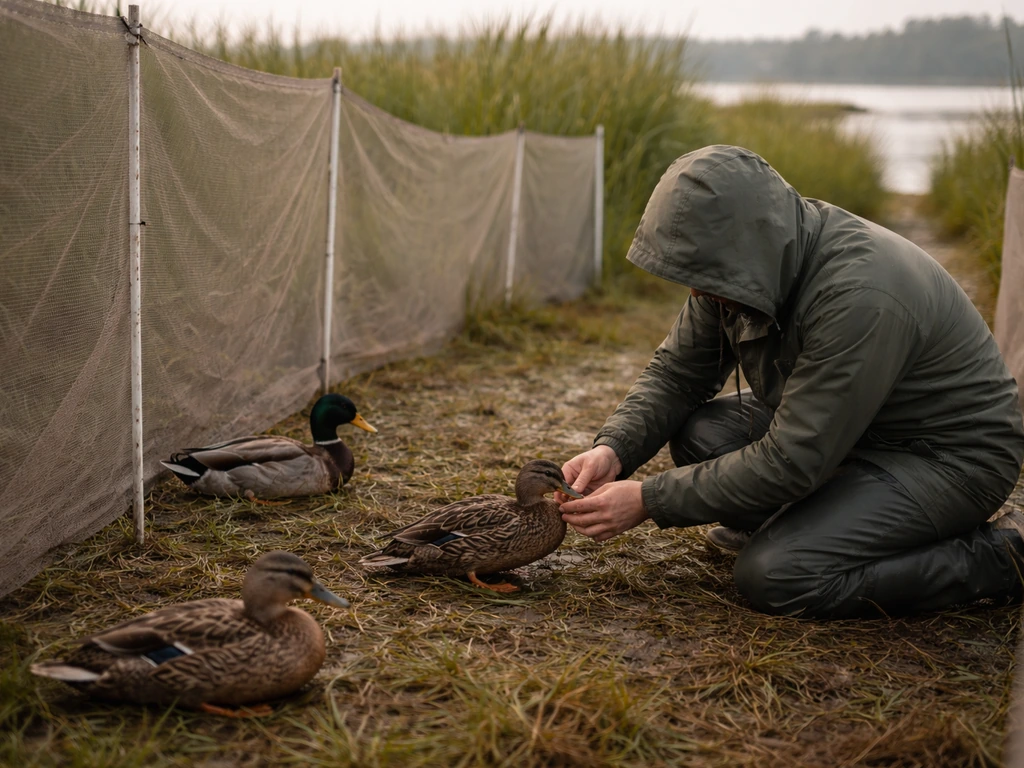
Waterfowl banding often happens during the flightless molt period in summer when ducks and geese can be herded into capture enclosures. Hunters report band encounters, and that hunter-report data feeds directly into USGS population models, making waterfowl banding one of the highest-data-return programs in North American wildlife management. Timing is tied entirely to the molt calendar, not just migration.
Owls
Owls are banded at night using mist nets or other techniques near nest boxes or along known movement corridors. Playback is sometimes used to attract birds, but must be used carefully and ethically. Handling an owl without proper grip technique risks a serious talon injury, so owl work is generally not a beginner's first assignment.
Permits, reporting, and recordkeeping
The data you collect in the field is only valuable if it gets submitted. Here is how the administrative side works in the U.S., with a note on UK requirements.
In the U.S., all banding and band recapture data must be submitted to the USGS Bird Banding Laboratory blank" rel="noopener noreferrer">using the Bander Portal. This is not optional and is part of your permit conditions. When a banded bird is found or reported by a member of the public (including hunters reporting leg bands), that report goes through reportband.gov, which feeds back into the BBL system. The data loop closes when your field records and these encounter reports are matched in the central archive. Think of this like how to register a bird with an official body: there is a specific system, and going outside it means the data does not count.
Your permit also specifies renewal requirements. In the UK under BTO, a report must be submitted and the renewal fee paid by the end of each calendar year to keep your permission valid. In the U.S., the BBL Bander Portal handles permit renewals and any requests to add color or auxiliary markers to your authorization. If your research needs change, such as adding a new species group, that requires a permit amendment, not just a field decision.
On certification: the NABC offers a voluntary passerine certification process that tests competence through written, practical, and experiential assessments. It is worth knowing that NABC certification is not a prerequisite to holding a banding permit, but it is a strong signal of quality to potential collaborators and employers. Some stations prefer or require it. If you're wondering how this fits alongside other formal bird-related registrations, it helps to understand the difference between how to delete my bird account in a digital system versus how official banding records work: banding data is permanent and public, not something you can undo.
Ethics, bird welfare, and mistakes beginners make
Here is the part that matters most. Banding is a scientific tool, and every bird you handle is a living animal that did not choose to be caught. The goal is always to collect the data and release the bird with zero net harm. That requires being honest with yourself about your skill level and not cutting corners.
Non-negotiable welfare practices
- Check nets frequently: the standard at well-run stations is every 20 to 30 minutes, or more often in hot weather. A bird left in a net too long can die from stress, hyperthermia, or predation
- Never band in extreme heat: bird thermoregulation is poor under stress, and high ambient temperatures dramatically increase mortality risk during handling
- Use the correct band size every time: a band that is too tight can cut off circulation; one that is too loose can catch on vegetation and trap the bird
- Keep handling time short: every extra second in hand is additional stress. Get your measurements, record your data, done
- Do not band birds in poor condition: a bird that is underweight, injured, or clearly stressed should be assessed for release without banding rather than processed for data
- Work in pairs when learning: a second set of hands and eyes catches mistakes before they become injuries
Common beginner mistakes
- Gripping too tight out of fear of dropping the bird: this restricts breathing in small birds. A confident, relaxed hold is safer than a tense one
- Using the wrong band size because they did not check the reference chart: this is the number one equipment error and the most consequential
- Forgetting to record data before release and then trying to reconstruct it from memory: always write it down first
- Extracting a bird from a net in the wrong direction, twisting feathers or wings: always work backward from how the bird entered
- Skipping the online course or rushing into field work before understanding the legal framework: you can cause permit violations that affect the entire banding station, not just yourself
- Not telling your mentor when something feels wrong or uncertain: experienced banders have made every mistake you can make; they would rather hear a question than see an injured bird
The NABC's passerine evaluation process exists precisely because competence in banding is harder to self-assess than people expect. Even if you feel ready, an outside evaluation catches blind spots. Treat feedback from your trainer as the most valuable data you will collect in your first season.
Your next steps, starting today
Here is the action list in the order that makes sense. Do not skip ahead; each step builds on the last.
- Complete the FWS 'Fundamentals of Bird Banding (Passerines)' online course: it is free and required anyway, so start there
- Contact your nearest Audubon chapter, bird observatory, or university ornithology program and ask whether they run a banding station that accepts volunteers or trainees
- Reach out to NABC or BirdPOP to find certified trainers or structured classes if no local station is available
- In the UK, contact BTO directly about obtaining a T permit and finding a licensed Trainer in your area; in Europe, look up your national EURING member scheme
- Volunteer at an active banding station before applying for any permit: this is where real learning happens and where mentors evaluate whether you are ready
- Once your mentor confirms readiness, begin your USGS master banding permit application and budget 4 to 6 months for processing
- Set up your Bander Portal account and understand the data submission process before you band your first bird independently
Bird banding is one of the most hands-on, data-rich activities in field ornithology, and getting into it properly, through the right training and the right permits, means your work will actually count toward real science. That is worth doing carefully. Start with the course today, make a few phone calls this week, and you will be in the field with a mentor faster than you think.
FAQ
Can I practice by banding birds before I have a permit?
No. In the U.S., you need a Federal Bird Banding and Marking Permit for the specific species or species group you will band, and your permit conditions limit what you can legally do. Buying bands or using them “for ID practice” does not make the activity legal, and you should not band any wild bird until you are explicitly authorized and working under the correct level of supervision.
What should I do if I catch or find a bird that already has a band on it?
You generally cannot. If you did not band the bird yourself, you are not authorized to remove or alter that band unless there is an immediate health or safety risk to the bird. If you find a banded bird in the field, follow the reporting route (in the U.S., that means submitting the encounter through the designated reporting system) rather than trying to handle the band directly.
How do I know whether I’m allowed to band a specific species or do a specific method?
Your authorization is species and sometimes technique specific. Even if you are trained in passerines, trying to band a species outside your permit, or using a capture method your authorization does not cover, can create a permit violation even when your intent is scientific and careful. Before each season, confirm your permitted species list, capture methods, and data requirements with your mentor or permitting authority.
Do I need to band in a particular season or time window to be considered legitimate?
Plan to band at a time and location that match your permitted scope and the station’s operational plan. For example, for passerines, timing typically focuses on early morning during peak movement windows, and for waterfowl it is tied to the molt calendar rather than general migration. If your local station is already operating during certain windows, your best next step is to coordinate entry dates around their established schedule.
What happens if I collect good data in the field but forget to submit it?
A common mistake is assuming a field record automatically becomes official science. In the U.S., your work only counts when the data you collect is submitted in the Bander Portal, and encounters reported by the public are separately ingested through the encounter reporting system. If you fail to submit, you still handled a bird but the scientific value is lost.
Is NABC certification required to become a bird bander in the U.S.?
Not exactly. NABC passerine certification is voluntary and not required for a permit, but many banding stations use competence checks and may prefer or require additional verification. If you want to improve your odds of being accepted as an apprentice, treat certification as a quality signal and be ready to demonstrate hands-on competence anyway.
Can I band birds while traveling or working outside the USA?
Yes, and the rules can change where you live versus where you plan to work. If you want to band outside the USA, you must obtain the required authorizations for that other country, and you should not assume your U.S. permit extends beyond national boundaries. Before you travel, confirm the paperwork you need for both the departure country’s requirements and your destination country’s permitting process.
If my project changes mid-season, do I need to update my permit?
Not always, and it is easy to get tripped up. If your research needs change, such as adding a new species group or requesting permission to add color or auxiliary markers, you should request an amendment or follow the appropriate add-on process through the permit system rather than treating it as a simple field decision. Your permit should clearly reflect what you will do in that season.
How fast should I be, and what’s the biggest mistake new banders make with speed?
Use the workflow you were trained on, and don’t rely on “just being fast.” The bird should be in and out quickly once you are practiced, but rushing before you can do every step correctly increases risk. Your mentor should help you set a realistic performance target and a “stop if something is wrong” checklist.
What setup issues most often lead to poor capture outcomes or higher bird stress?
Yes, and it can matter even for non-raptor work. Finer mesh, correct timing (like early morning movement for passerines), and careful handling influence both capture success and stress levels. If your results are poor, the first place to look is whether your setup matches your station’s target species and authorized methods, not whether you should force more captures.
Is it better to start with passerines, or can I begin with raptors or owls?
If you’re new and tempted to start with owls or raptors, be cautious. Those tasks require specialized capture and handling, and risk is higher (for example, talon injury concerns for raptors, and ethical constraints for nocturnal/attraction methods for owls). A safer next step is to enter through passerine training and supervised progression before asking to assist on higher-risk projects.
Can I add color bands or other markers to help with field identification?
Yes. If you are considering adding auxiliary markers such as color bands, that is typically handled through the Bander Portal process and must be authorized under your permit. Do not assume marker use is bundled with a general banding permission, even if you have experience with the core aluminum bands.
How do I know I’m actually competent enough to band independently?
Yes, treat your “first season” as a supervised learning period even if you feel ready. Outside evaluation can reveal blind spots in measurement, data consistency, or handling technique. Ask your mentor what specific competence areas you will be assessed on before you attempt independent work, and use that feedback loop to guide practice.
Next Article
How to Bird Mouth a Rafter: Step-by-Step DIY Guide
Step-by-step guide to cut the bird-mouth notch in a roof rafter, measure pitch accurately, and fit for a tight seat.