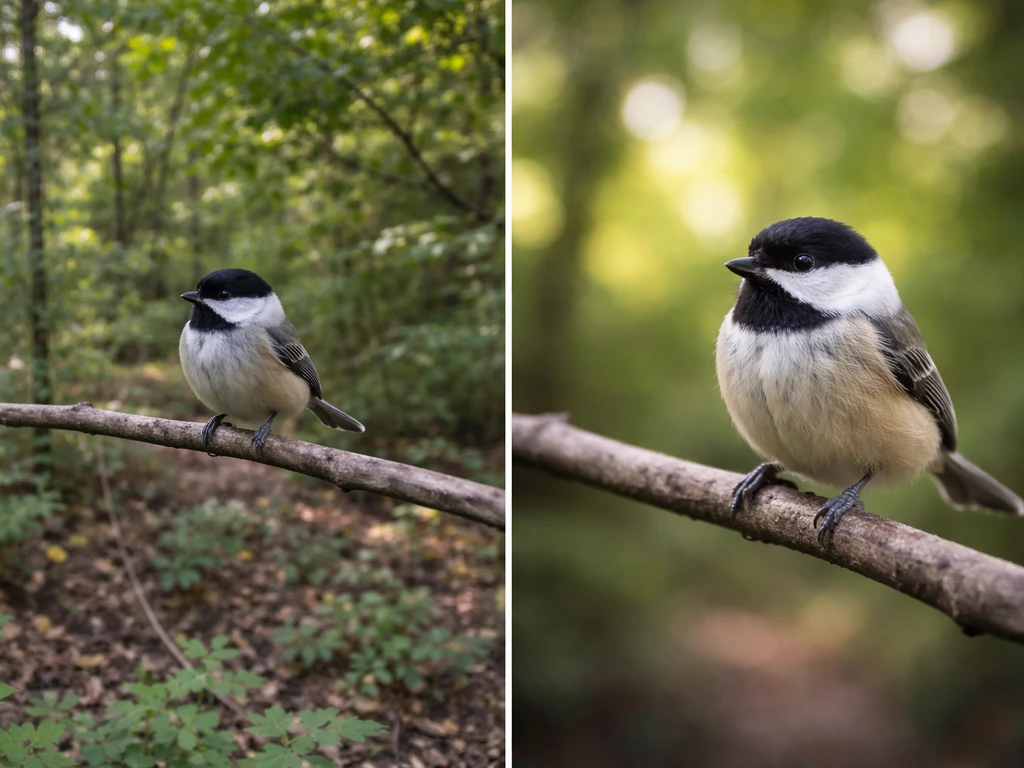
To blur the background in bird photography, you need a wide aperture (f/4 to f/6.3 on most telephoto lenses), a long focal length (400mm or more), and as much physical distance between your bird and the background as you can get. Get those three things working together and the background melts away. Miss one of them and you'll get a sharp bird sitting on what looks like a busy wallpaper.
How to Blur Background in Bird Photography Step by Step

Marcus Hendricks
3 May 2026

I've spent a lot of time chasing warblers through cluttered forest backgrounds and herons over reflective water, and the biggest lesson I learned is this: background blur isn't just about aperture. It's about the relationship between your focal length, your distance to the bird, and how far that background is sitting behind the bird. Nail all three and even f/5.6 looks gorgeous. Ignore them and f/2.8 won't save you.
Why backgrounds blur in bird photos (the quick version)
The technical term is depth of field, or DOF. It describes how much of your scene is in sharp focus at any given moment. A shallow depth of field means only a thin slice of the scene is sharp, which is exactly what makes backgrounds blur so beautifully behind a bird. A deep depth of field keeps more of the scene sharp, from the bird all the way back to the trees.
Three things control your depth of field in bird photography: your aperture (how wide the lens opens), your focal length (how zoomed in you are), and your distance to the subject. Here's a useful rule of thumb: roughly one-third of your depth of field falls in front of the focused point and two-thirds falls behind it. That matters a lot when you're trying to focus precisely on a bird's eye and keep the whole body sharp without accidentally sharpening the background.
The distance from the bird to the background is just as important as any camera setting. A bird perched in front of a hedge five feet behind it will be much harder to separate from that background than a bird perched on an exposed branch with open sky or a meadow fifty feet back. You can't always control where birds sit, but when you can choose your shooting position, always look for maximum separation between bird and background.
Camera settings that give you sharp birds and blurred backgrounds
This is where a lot of beginners get tangled up, because bird photography throws a curveball: you need a very fast shutter speed to freeze a moving bird, which fights against your desire to keep the aperture wide open and the ISO manageable. Here's how to balance it.
Aperture: wide open, but not reckless
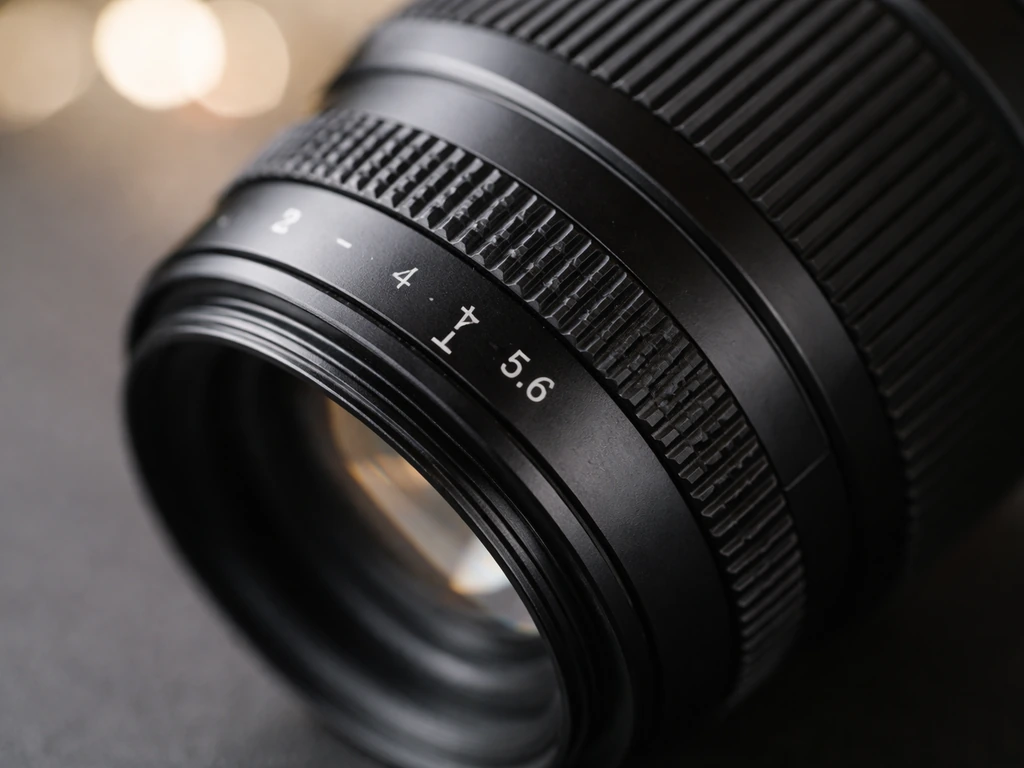
For maximum background blur, shoot at or near your lens's widest aperture. For most telephoto bird lenses that means f/4, f/5.6, or f/6.3. If you're working in good light and the background is already distant, even f/5.6 or f/6.3 will give you beautiful separation. If the background is messy and close, push to your widest setting. One thing I've found: if the background is far enough away to blur nicely even at f/8 or f/11, stopping down a little is actually smart because it gives you more wiggle room on focus accuracy, especially with smaller birds where depth of field gets razor thin.
Use Aperture Priority mode (Av or A on your dial) when light is consistent. It lets you lock in your aperture for blur while the camera adjusts shutter speed and ISO automatically. Switch to full Manual when light is tricky or you need precise exposure control, like shooting into bright sky behind a bird.
Shutter speed: fast enough to freeze feathers
This is non-negotiable. A blurry bird is a wasted photo, no matter how gorgeous the background looks. Here are the shutter speed targets I rely on:
| Situation | Minimum Shutter Speed |
|---|---|
| Perched bird, still | 1/500s |
| Perched bird, moving head/ruffling | 1/1000s |
| Bird in moderate flight | 1/2000–1/2500s |
| Fast flight or rapid wingbeats | 1/3200–1/4000s or faster |
When in doubt, go faster. A slightly underexposed sharp photo is fixable in editing. A motion-blurred bird is not. If your shutter speed is creeping too low and you're losing blur in the background, the answer isn't to slow the shutter down further. It's to raise ISO or find better light.
ISO: raise it without guilt
Modern cameras handle high ISO very well. ISO 1600, 3200, even 6400 is totally usable on most cameras made in the last several years. If raising ISO from 400 to 1600 lets you keep your shutter at 1/2000s and your aperture at f/5.6, do it. A sharp, slightly grainy bird beats a blurry clean one every time. Remember the basic exposure relationship: every time you double your shutter speed (one stop faster), you need to either open your aperture one stop or raise your ISO one stop to maintain the same exposure.
Autofocus and drive mode settings
For moving birds, continuous autofocus is essential. You can't use single-shot AF and expect to keep a flying bird sharp. On Canon cameras, use AI Servo or the tracking modes available on mirrorless bodies. On Sony, use Continuous AF with Animal Eye Tracking turned on. Increase AF tracking sensitivity if you're shooting small, fast, or erratic birds in flight, which helps the camera respond faster to sudden direction changes.
Back-button focus is worth learning early. The idea is simple: you separate the autofocus activation from the shutter button. Press the AF-ON button (or a rear button you assign) to drive continuous focus on the bird, then press the shutter button separately to take the shot. This gives you much better control, especially when a bird briefly passes behind a branch and you don't want AF to hunt away from it.
For the AF area, use Zone AF or a wide tracking area for birds in flight so the camera has room to keep up. Switch to single-point AF for perched birds in cluttered backgrounds, where a wide AF area might grab onto a branch instead of the bird. Canon's guides suggest using 1-point AF specifically for a bird that's about to take off from behind an obstruction, which is good practical advice.
Set your drive mode to continuous high-speed burst. You're not trying to waste memory cards, but with birds, the difference between a sharp eye and a blurry one can be a fraction of a second. Shoot bursts and pick the sharpest frame.
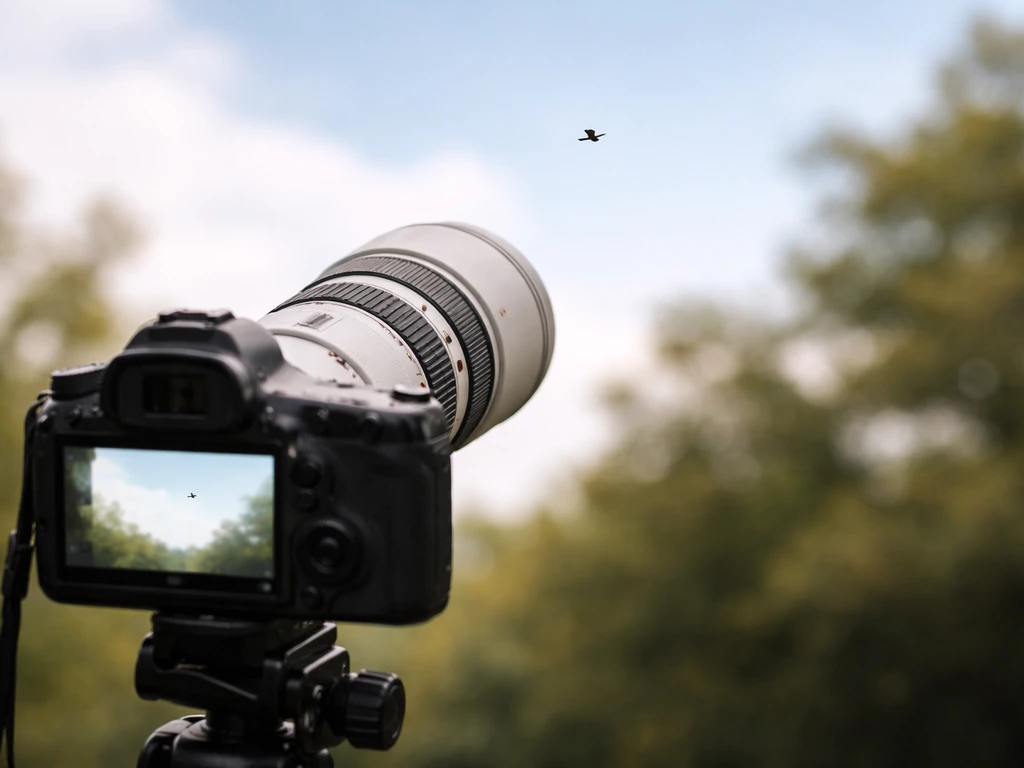
Lens and focal length choices for background blur
Your lens choice matters more for background blur than most people realize. Longer focal lengths compress the scene and produce more background blur at the same aperture compared to shorter lenses. Wikipedia notes that long (telephoto) lenses make it easier to blur the background through defocus and subject separation, even when depth of field is similar blank" rel="noopener noreferrer">Longer focal lengths compress the scene and produce more background blur at the same aperture compared to shorter lenses.. That's why a 500mm f/5.6 shot will have creamier background blur than a 200mm f/5.6 shot, even though the aperture number is identical.
How much focal length do you actually need?
For most bird photography, 400mm is a practical minimum if you want both reach and blur. At 400mm you can fill the frame with mid-sized birds at reasonable distances and get meaningful background separation. For smaller songbirds, 500mm or 600mm makes life much easier. For large wading birds or raptors, 400mm is often plenty.
Prime vs zoom: which is better for blur?
Prime lenses (fixed focal length) generally offer wider maximum apertures than zooms. A 400mm f/2.8 prime or a 600mm f/4 prime will give you dramatically more background blur potential than a 100–500mm f/6.3 zoom at the long end. Primes also tend to be about 20% sharper at the apertures used in bird photography (f/4 and f/5.6), which means your bird stays crisper even while the background melts. They also tend to focus faster, which matters when a bird turns and bolts.
That said, primes are expensive and heavy. A 400mm f/2.8 or 600mm f/4 is a serious investment. Zoom lenses like a 100–500mm or 150–600mm are far more versatile and affordable, and they still produce excellent blur at their widest aperture setting. If budget is the constraint, a quality zoom at f/6.3 paired with smart positioning (get close, maximize background distance) will give you far better results than a mediocre prime.
| Lens Type | Max Aperture Typical | Background Blur Potential | Sharpness at f/5.6 | Best For |
|---|---|---|---|---|
| 400–600mm Prime | f/2.8 to f/4 | Excellent | Outstanding | Professionals, serious hobbyists, maximum blur |
| 100–500mm Zoom | f/5.6–f/6.3 at long end | Good to Very Good | Very Good | Versatility, travel, beginners |
| 150–600mm Zoom | f/6.3 at long end | Good | Good | Budget reach, larger birds |
My honest recommendation: if you're starting out, get a 100–500mm or 150–600mm zoom, shoot it wide open, and focus your energy on positioning and technique. If you are looking for a step-by-step way to apply these ideas in the field, see the guide on how to guide skye's bird for practical shooting flow. You'll get great blur. When you're ready to invest more and want that extra stop of blur and sharpness, look at the fast primes.
Shooting technique: distance, focus strategy, and panning
Get closer and push the background further away
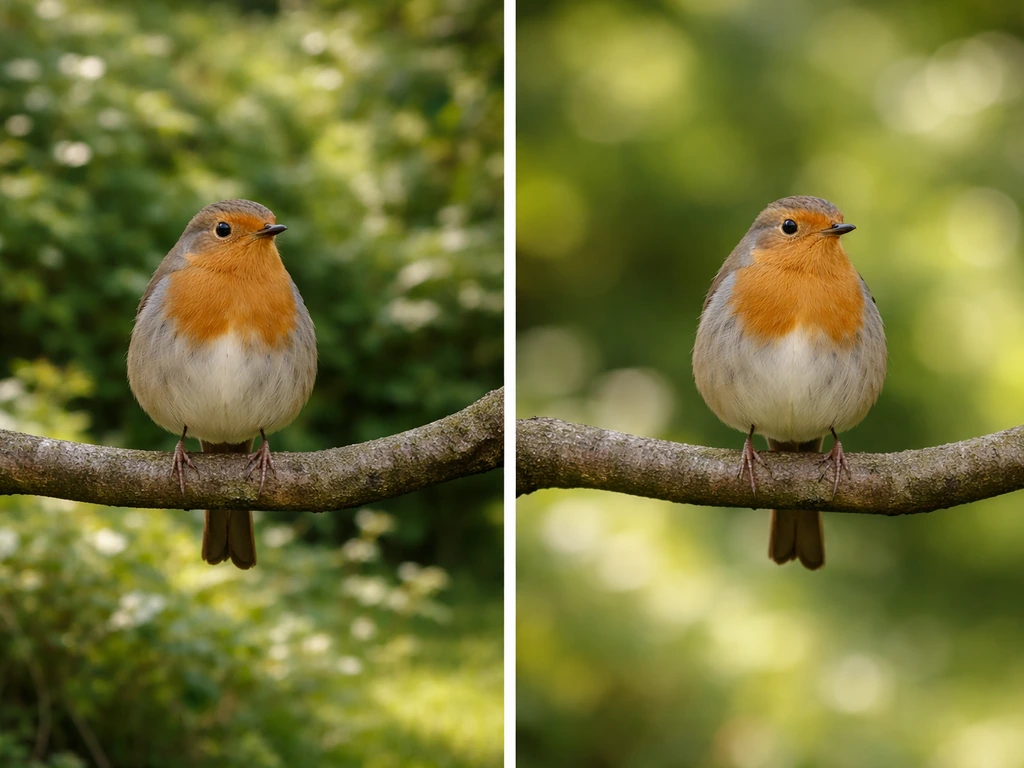
Two moves change your background blur more than almost any camera setting: getting physically closer to the bird, and finding angles where the background is as far behind the bird as possible. At typical songbird distances of 15 to 50 feet, a wide aperture will keep the whole bird sharp while the background blurs. At larger bird distances of 30 to 100 feet, you still get great results with the right aperture and focal length combination.
Here's a positioning trick I use all the time: if branches or other distractions are cutting through your background from one spot, walk just a few feet to one side. What was a busy, distracting background from one angle can completely disappear behind the bird from just a short distance away. Always check your background before you lock onto a perched bird.
Focus on the eye, always
The rule in bird photography is simple: the eye must be sharp. Everything else is negotiable. Use your camera's animal or bird eye detection AF if it's available. On Sony mirrorless and modern Canon R-series bodies, Eye AF for animals works extremely well. If you're using manual focus point selection, place your AF point directly on the bird's eye, not the body. Because depth of field falls two-thirds behind and one-third in front of your focus point, focusing on the eye usually gets the whole head sharp.
Panning: creative blur with a big catch
Panning is a technique where you follow a moving bird with your camera during a slower shutter speed, blurring the background into streaks while (ideally) keeping the bird sharp. It produces dramatic, dynamic images when it works. The catch: it produces far more failures than successes, even for experienced photographers. I've had sessions where I got one usable pan shot out of forty attempts.
Panning works best when the bird is flying across your field of view at a consistent speed and direction, not toward or away from you. Birds flying directly toward or away from the camera reduce the relative motion between bird and background, which actually limits background blur with this technique. For panning, try shutter speeds in the range of 1/60s to 1/250s depending on how much blur you want, follow the bird's movement smoothly before you press the shutter, and keep panning through the shot. Expect to delete a lot of frames. It's worth experimenting with, but don't rely on panning as your main blur strategy.
Lighting and exposure tricks to keep shutter speed up
Here's the fundamental tension in bird photography: you want fast shutter speeds to freeze motion, but fast shutter speeds let in less light, which means you either need more light, a wider aperture, or higher ISO to compensate. Here's how I handle it practically.
- Shoot in good light whenever you can. Early morning and late afternoon light (the golden hours) are softer and more flattering, but midday light gives you more exposure to work with if blur is your priority.
- Face toward the light. Backlit birds are beautiful but they often push you toward slower shutter speeds or higher ISOs. Light behind you means more light falling on the bird.
- Use ETTR (Expose to the Right). This means pushing your exposure as bright as possible without clipping highlights. A brighter exposure at the same ISO gives you cleaner shadows and more detail. Check your histogram and highlight clipping warnings, then dial exposure down just enough to protect the brightest areas.
- In bright sun, the risk flips: you may be forced to stop down from f/5.6 to f/8 or use a neutral density filter to avoid overexposure at fast shutter speeds. At f/8 in bright sun, check whether your background is still blurring enough. If the background is far away, it often still will.
- In low light, don't fight ISO. ISO 3200 or 6400 with a sharp bird is a winner. Noise reduction in editing is simple. Unsharp birds are unfixable.
A practical workflow I follow: I set my shutter speed first based on what the bird is doing (perched, moderately flying, or fast flight). Then I open the aperture as wide as I can. Then I let Auto ISO fill in the rest, with a maximum ISO cap set at whatever my camera handles cleanly (usually ISO 6400 or 12800 on modern bodies). This keeps blur and sharpness predictable while the camera handles the exposure math.
Common problems and quick fixes
Problem: the background isn't blurring enough
This is almost always a positioning problem rather than a settings problem. Check these things in order: Is your aperture at or near maximum? Is your focal length long enough (400mm or more)? If you are also trying to use a Skyе bird setup while shooting, check the steps in our guide on how to use skye bird so you get reliable results. Is the background close behind the bird, or is there real separation? Move your shooting position to increase background distance. If all three are dialed in and the background still looks sharp, the background itself might just be too close and there's no camera setting that will fix that.
Problem: the bird isn't sharp
There are two separate causes for this and they need different fixes. First, motion blur from a shutter speed that's too slow. If the bird's body looks smeared or streaky, increase shutter speed. Second, focus misses where the AF grabbed the branch instead of the bird's eye. If the bird looks soft but not streaky, your AF was on the wrong thing. Switch to a more precise AF point selection, use Eye AF if your camera has it, or switch to single-point AF for perched birds in cluttered backgrounds.
Problem: the background blur looks messy or distracting
Not all blur looks good. Busy backgrounds with branches, mixed colors, or high-contrast edges can blur into what looks like visual noise rather than a clean, smooth wash. This is usually a background choice problem. Look for backgrounds that are one color or tone: open sky, water, distant grass or foliage. Moving a few feet often hides distracting elements behind the bird itself. Clean sky backgrounds work beautifully even at f/5.6, while cluttered foliage backgrounds can look messy even at f/2.8.
Problem: the whole shot looks too bright or washed out
Wide apertures in bright light can blow out your highlights. Use your histogram. Icon Photography School’s ETTR definition explains pushing the histogram to the right without clipping highlights, then using post-processing to improve the captured sensor signal Use your histogram.. If the right side of the histogram is clipping, either increase shutter speed, stop down the aperture by one stop, or reduce ISO. In very bright sun, a fast shutter speed of 1/4000s or faster can actually help you maintain a wide aperture without overexposing.
Problem: panning shots are all blurry
Panning is genuinely hard and produces a high failure rate even for experienced photographers. If your pan shots are consistently blurry on the bird, try increasing shutter speed slightly (even 1/250s instead of 1/100s). Make sure you're following the bird's motion smoothly before you trigger the shutter, not starting your pan at the same moment. And remember: birds with erratic, changing flight paths are almost impossible to pan successfully. Save panning for birds with predictable, consistent trajectories.
Once you've got background blur working for you, editing becomes the finishing touch rather than the rescue plan. If you want help controlling bird behavior and getting closer safely, see our guide on how to control bird. If you want to make bird photos look their best, learn how to edit bird photos with simple adjustments to exposure, contrast, and sharpness editing becomes the finishing touch. If you want to build on these foundations, the related topics on editing bird photos and cropping bird photos cover how to refine your shots in post so the background separation you captured in-camera looks its absolute best. If you’re looking for a complete walkthrough, bird photography how to guides cover everything from camera setup to capturing sharp, separated subjects.
FAQ
Why does my background look blurry but the bird is still soft, even at a wide aperture?
In bird work, soft often means focus, not blur. Make sure the AF target is on the eye (or closest high-contrast facial area), and use a smaller AF area for perched birds. If you are using Eye AF, check that it is enabled for animals and that it is not locking onto a branch or wet feathers. Also watch for shutter speed, if the bird is moving, slow speeds will look like softness even when focus is correct.
How do I keep the whole bird sharp when I’m using shallow depth of field?
You usually cannot have razor-sharp everything plus heavy background blur. A practical approach is to focus on the eye, then stop down slightly when needed (for example, from f/5.6 to f/6.3 or f/7.1) if the bird is small in frame or your DOF is visibly too thin. Another fix is compositional, shoot a little farther back and recompose only if it increases separation without making focus harder.
What shutter speed should I use for perched birds versus birds in flight?
Perched birds generally tolerate slower shutter speeds than flight, but any head bob, wing twitch, or breathing movement can soften the image. For flight, use the fast end of your range, around 1/2000s or faster for erratic action, and at least around 1/1000s for steadier glides. If you see streaks or smearing, increase shutter speed rather than trying to fix it with aperture.
Should I use Auto ISO or should I set ISO manually?
Auto ISO is useful when light changes quickly, because it protects your shutter speed goal. If you want maximum consistency for a burst sequence, keep shutter speed and aperture fixed and let Auto ISO operate within a cap your camera handles well. If you are deliberately trying to preserve a specific ISO for noise or a slower workflow, then switch to manual ISO, but be ready to adjust shutter speed when light shifts.
Why does the background blur disappear when the bird turns its head or changes distance?
Depth of field shrinks as your bird comes closer, and focusing on different planes (like the beak or body instead of the eye) changes what is sharp. For perched birds, re-lock onto the eye after major head turns. For moving birds, use continuous tracking and burst shooting, so you get frames where the eye stays the focal plane during the moment the bird settles.
How can I tell whether my issue is background blur or subject sharpness?
Check two cues: motion streaks versus focus softness. Streaks and smears point to shutter speed being too slow. Softness that looks consistent across the bird, while the background is already blurred, points to AF target selection being wrong or your focus point not on the eye. If only the background is sharp, your aperture and positioning are likely not creating enough separation.
Does cropping in post create background blur that was not captured in-camera?
Cropping can make your subject fill the frame and it can increase the apparent smoothness, but it does not change the original depth of field. If the background was not blurred enough at capture, resizing and sharpening will not create real blur, it will just enlarge what was recorded. If you need more separation, the solution is usually longer focal length, wider aperture, and more distance between bird and background during the shoot.
Why do I sometimes get ugly blur, like tangly shapes or noisy colors instead of a smooth background?
That usually happens when the background contains high-contrast edges close to the bird, or it includes branches and textured elements that remain identifiable even when blurred. Clean, single-tone backgrounds (sky, distant water, uniform foliage) blur more pleasingly. Also try small position changes, moving just a few feet can hide busy elements behind the bird silhouette.
What’s the best way to choose an angle for background separation?
Look behind the bird, not just around it. Move your shooting position so the background is farther behind and has less clutter at the same depth. If branches cut through from your current spot, step sideways rather than fighting it with settings. After you find an angle where the background is uniform, then lock focus and shoot.
Is panning a reliable method for bird background blur?
It can work, but it is not dependable for most bird scenarios. Panning is best when the bird moves across your frame at a consistent speed and direction, and you are willing to delete many frames. If you miss focus or the bird’s path changes, you can end up with an unsharp bird and only partially blurred background. Use panning as an occasional technique, not your default blur strategy.
How should I set AF area for birds perched in clutter versus birds in flight?
For flight, use zone or wide tracking so the camera can follow the bird as it moves through the scene. For perched birds in clutter, switch to a tighter method, often single-point, so AF does not grab nearby branches. If your bird is about to take off behind an obstruction, use a mode that allows accurate acquisition on the eye and then tighten the AF area as the bird becomes predictable.
Next Article
How to Guide Skye’s Bird: Identify, Setup, Training Steps
Clarify Skye’s bird meaning, then get step-by-step setup and training routines plus safety, troubleshooting, and next st