Setting up a live bird cam is genuinely easier than most people expect. You need a weatherproof camera, a stable power source, a decent Wi-Fi signal, and a mounting spot that won't disturb the birds. That's the short version. The longer version, which this guide covers in full, walks you through every decision from picking the right camera to fine-tuning your streaming settings so you actually get clear, reliable footage day and night.
How to Set Up a Live Bird Cam: Beginner Guide

Marcus Hendricks
19 Apr 2026
Whether you want to watch backyard birds at a feeder, monitor a nest box with a dedicated nest camera, or stream live to YouTube for others to enjoy, the core setup process is the same. The main difference with a nest camera is that you have to be extra careful about placement and heat, since you're working close to eggs or chicks. I'll flag those extra considerations throughout.
Choose the right cam and accessories
The camera you choose sets the ceiling for everything else, so it's worth spending five minutes here before you buy. The three most practical options for a beginner bird cam setup are a standard outdoor Wi-Fi camera, a battery or solar-powered camera, and a PoE (Power over Ethernet) camera. Each has a clear use case.
| Camera Type | Best For | Example Model | Weather Rating | Power Source |
|---|---|---|---|---|
| Outdoor Wi-Fi camera | Feeder or garden, near power outlet | TP-Link Tapo C320WS | IP66 | Mains power via adapter |
| Battery/solar Wi-Fi camera | Remote spots without power access | Reolink Argus Pro | IP65 | Rechargeable battery + optional solar panel |
| PoE (Ethernet) camera | Permanent installs, advanced users | Ubiquiti UniFi G4 Pro | IP67 | Single Ethernet cable (power + data) |
For most beginners, the TP-Link Tapo C320WS hits the sweet spot. It shoots in 2K resolution (2560x1440), has full-color night vision powered by a starlight sensor, includes a built-in microphone and speaker so you can hear the birds, and carries an IP66 weatherproof rating that handles rain and dust without issue. Its IR LEDs can illuminate up to 98 feet at night using 850 nm infrared, which is more than enough for a backyard setup. It connects to your home Wi-Fi and runs off a standard outdoor power adapter. I've found cameras like this are the easiest to get working on the first try.
If your chosen spot has no power access, the Reolink Argus Pro is the go-to. It's IP65 rated, runs on a rechargeable battery, accepts an optional solar panel to keep it topped up, and uses a PIR (passive infrared) smart sensor to detect motion at up to 30 feet. PIR detection means it's triggering on actual heat-movement signatures rather than just pixel changes, which cuts down on false alerts from wind or shadows.
For a nest box camera specifically, you want something compact with a wide-angle lens and ideally passive IR night vision rather than visible-light LEDs, since bright light inside a nest box can stress birds. Small dedicated nest box cameras (sometimes sold as "bird box cameras") are purpose-built for this and run on low-voltage DC power via a thin cable that fits through a small hole in the box. These are worth looking at if nest monitoring is your primary goal.
Accessories you'll actually need
- Outdoor-rated extension cord or weatherproof power adapter cable if running mains power
- Conduit or cable clips to protect any exposed wiring from weather and chewing
- A sturdy adjustable mount or pole bracket to aim the camera precisely
- MicroSD card (64GB minimum, Class 10 or U3 speed rating) for local recording if you want a backup beyond cloud storage
- Solar panel (if going battery-powered and the spot gets decent sun)
- A small waterproof junction box if you're splicing or securing cable connections outdoors
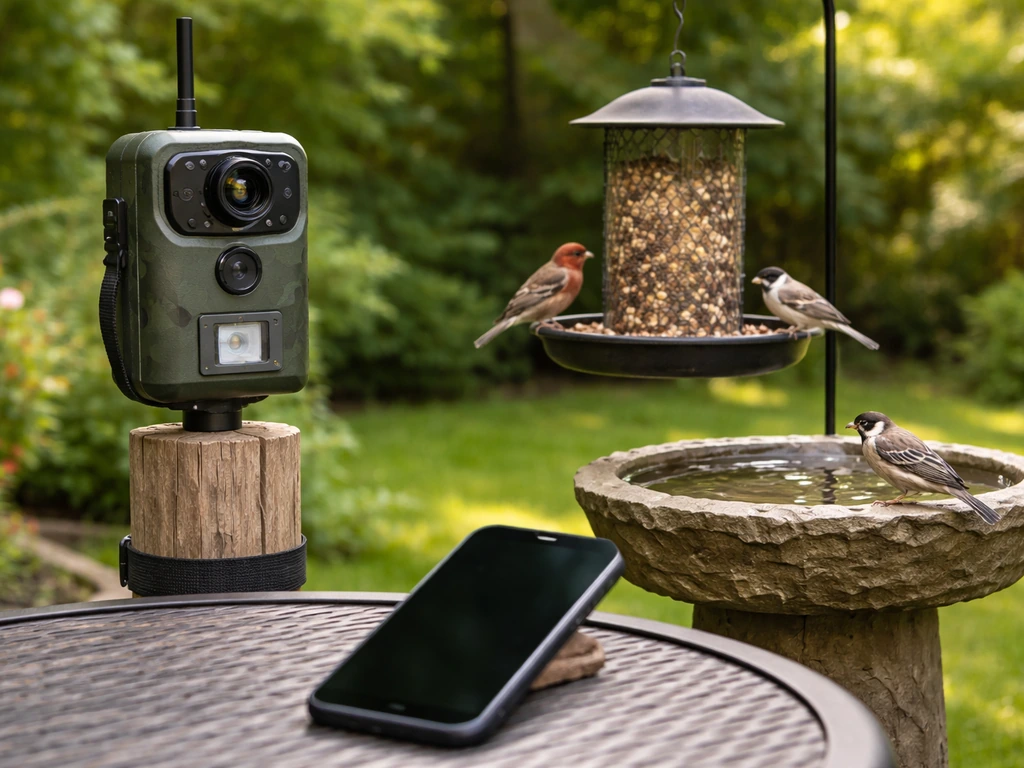
Pick a safe, bird-friendly location and mounting setup
Where you place the camera matters as much as which camera you buy. The goal is a clear sightline to wherever birds gather or nest, without the camera being so close or so conspicuous that birds avoid the area entirely. Most birds will habituate to a camera quickly as long as it doesn't move unpredictably or make sudden sounds.
For a feeder or birdbath cam, position the camera 2 to 4 feet away from the activity area and slightly to the side rather than pointing directly at the feeding spot. This gives you a natural angle that captures birds in profile, which is far more watchable than a top-down or head-on shot. If you're specifically aiming for sharp bird photos, you can borrow these same setup ideas and focus on camera settings like shutter speed, autofocus, and proper lighting. Avoid placing it where it will get direct afternoon sun blasting into the lens, which will wash out your footage.
Nest camera placement rules
A nest box camera needs extra care. These are the rules I follow strictly: install the camera before nesting season begins, not after birds have moved in. Disturbing an active nest can cause abandonment. Mount the camera inside the box in the upper corner pointing down, or externally just above the entrance hole. If it's an internal camera, make sure it doesn't add heat to the interior because a cramped, warm box can harm eggs and chicks. Test it at least a week before birds are likely to arrive so you're not fussing with cables near an occupied box.
- Never mount a camera in an occupied nest box mid-season
- Keep all wiring outside the box or routed through a tight-fitting hole that doesn't create a draft
- Avoid cameras with bright white or visible LED lights inside the box at night
- Check local regulations: in many countries, disturbing an active nest is illegal regardless of intent
- Use a camera with passive IR night vision for internal nest box monitoring
For mounting the camera itself, a dedicated pole-mount bracket gives you the most flexibility to adjust the angle after installation. If you're attaching to a fence, wall, or tree, use stainless steel screws to avoid rust staining and make sure the mount is rated for outdoor use. Aim to keep the camera at roughly bird-eye level or slightly above, and angle it downward 10 to 20 degrees so rain runs off the lens rather than pooling on it. If you want closer, steadier views without spooking birds, a monopod can be a practical mounting option for certain bird-photography setups a monopod for bird photography.
Set up power, internet, and viewing options
Before you drill a single hole, figure out your power and connectivity plan. These two things trip up more beginner installs than any other step, so getting them sorted on paper first saves a lot of backtracking.
Power options
Mains-powered cameras need a weatherproof outdoor outlet or a cable run from an indoor outlet through the wall. Always use an outdoor-rated power adapter and keep connectors out of standing water. If you're running cable through a wall, use a waterproof cable gland to seal the entry point. For battery cameras like the Reolink Argus Pro, a small solar panel (5W is usually sufficient) mounted nearby keeps the battery charged through most of spring and summer.
In winter, expect to recharge manually every 3 to 6 weeks depending on activity levels. PoE cameras are the neatest option: a single Ethernet cable carries both power and data, so there's only one run to manage. For UniFi Video cameras, the quick-start documentation also includes PoE grounding requirements and guidance on using shielded Ethernet cable for installations [PoE cameras are the neatest option: a single Ethernet cable carries both power and data, so there's only one run to manage.
](https://dl. ubnt. com/guides/unifivideo/UVC-G4-PRO_QSG. pdf).
Wi-Fi and connectivity
Check your Wi-Fi signal strength at the camera location before committing to it. The easiest way is to walk out there with your phone and run a speed test. You want at least a -65 dBm signal (shown in your phone's Wi-Fi settings or a free app like WiFi Analyzer). If it's weaker than that, a Wi-Fi extender or a mesh node placed closer to the camera location will make a real difference. For a PoE camera, you're running Ethernet directly so Wi-Fi isn't relevant, but you'll need a PoE switch or PoE injector to power the camera over that cable.
How you'll watch: local vs. cloud vs. live stream
There are three main ways to view your footage. Local viewing means you watch through the camera's app on your phone or computer while on the same network. Cloud viewing means footage is uploaded to the manufacturer's servers and you can watch from anywhere. Live streaming to a platform like YouTube or Twitch means anyone with the link can watch in real time. Most beginners start with local viewing plus cloud alerts, then add public streaming later once the setup is stable.
Install the hardware step-by-step
Do this in order. Skipping steps to save time almost always means you're back outside redoing things in the rain.
- Charge or confirm the power source: for battery cameras, fully charge before installation; for mains cameras, confirm the outlet works with a phone charger first.
- Attach the camera to its mount bracket loosely so you can still adjust the angle.
- Mark and drill your mounting holes at the chosen location. Use wall plugs (plastic anchors) if drilling into brick or masonry.
- Run your power cable or Ethernet cable from the camera location to the power source, securing it with cable clips every 12 to 18 inches. Keep it tight against walls and away from foot traffic.
- Seal any holes where cable enters the house with outdoor silicone sealant or a cable gland.
- Connect the camera to power and wait for the indicator light to confirm it has booted (usually a solid or blinking LED, check your model's manual).
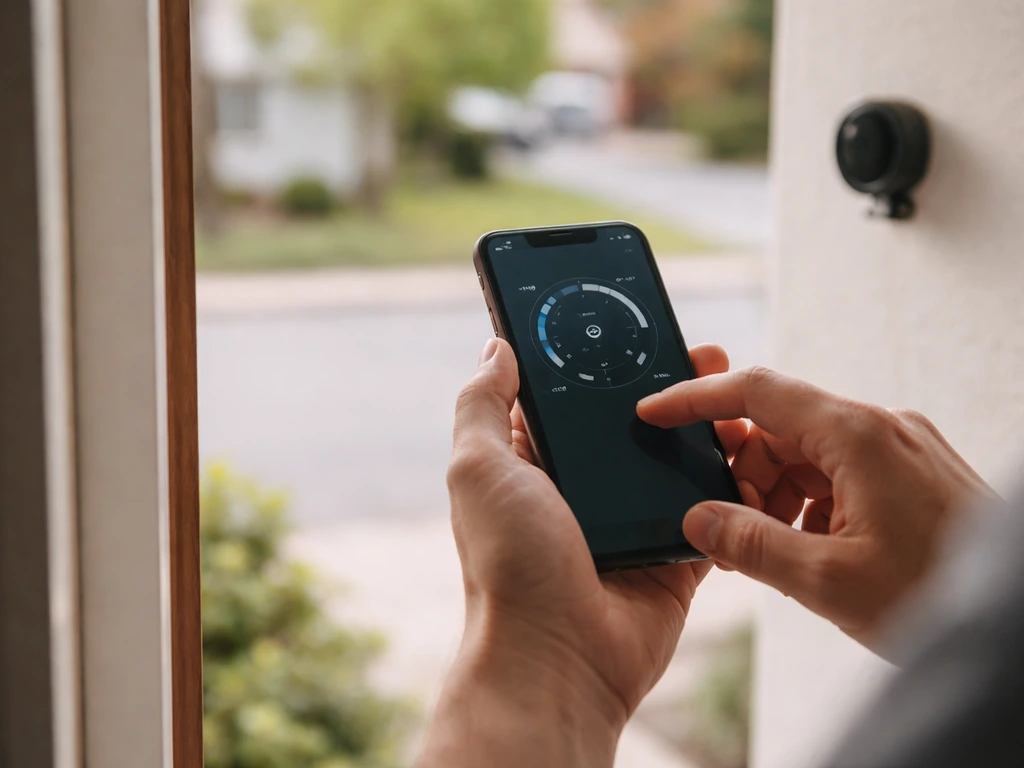
- Download the manufacturer's app on your phone (Tapo app for TP-Link, Reolink app for Reolink, UniFi Protect for Ubiquiti) and follow the in-app pairing process to connect the camera to your Wi-Fi.
- Tighten the mount bracket fully once you've confirmed the camera is online and the angle looks right in the app.
- Insert your MicroSD card into the camera's card slot (usually accessed by removing a weatherproof cover) to enable local recording.
One thing I learned the hard way: don't fully tighten the mount until you've checked the live view in the app and adjusted the angle there. It's much easier to tweak the aim before everything is locked down tight.
Configure software, app alerts, privacy, and streaming settings
Once the camera is live in the app, spend 15 minutes getting the software settings right. This is where most people just leave everything on default and then wonder why they're getting 40 motion alerts a day from leaves blowing in the wind.
Motion detection and alerts
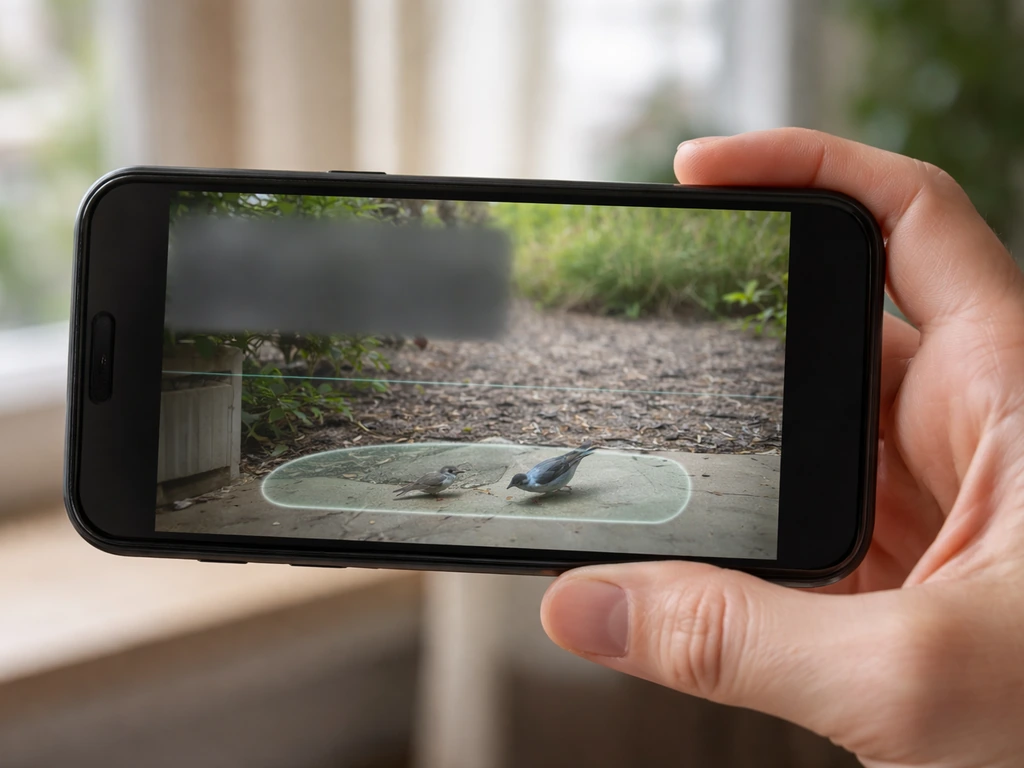
Set your motion detection zone to cover only the area where birds actually are, not the whole frame. On most apps, you can draw a custom detection zone by tapping or dragging on the live view. Exclude sky, busy roadsides, and areas where nothing of interest happens. If your camera has PIR sensitivity adjustment (like the Reolink Argus Pro, which allows up to 9 meters or 30 feet), start at medium sensitivity and lower it if you're getting too many false triggers. For a nest camera, you may actually want to turn motion alerts off entirely and just let it record continuously, since constant notifications from normal nest activity will drive you mad.
Privacy settings
If your camera's field of view includes a neighbor's property, a footpath, or a public road, you have both a legal and a courtesy obligation to handle that carefully. Use privacy masking (available in most camera apps) to black out any areas you shouldn't be recording. In many places, recording audio of conversations without consent is restricted, so if your camera has a microphone and is near a shared boundary, check your local laws. For a backyard bird cam aimed at a feeder or nest box away from boundaries, this usually isn't an issue, but it's worth a quick check.
Cloud storage and local recording
Most camera apps offer a free tier of cloud storage for motion clips (typically 7 days of event history). For continuous recording, you'll need either a paid cloud plan or a MicroSD card installed in the camera. I prefer the SD card route for continuous local recording, with cloud alerts enabled for when I'm away from home. If you're using a PoE camera with the Ubiquiti UniFi Protect system, recording and AI detection processing all happen locally on your own hardware, which means your footage never leaves your network.
Setting up live streaming
To share your bird cam live with others, the most accessible route is streaming via an RTSP (Real-Time Streaming Protocol) feed to a platform like YouTube Live. Most mid-range cameras including the Tapo C320WS support RTSP. You'll need free software like OBS Studio on a computer that stays on, which receives the camera's RTSP stream and re-broadcasts it to YouTube. Set up a YouTube Live stream key in YouTube Studio, paste it into OBS, connect OBS to your camera's RTSP URL (found in your camera's settings or manual), and go live. It sounds involved but the actual process takes about 20 minutes once you've done it once.
Test, troubleshoot, and optimize for reliable footage
Before you call it done, run through a proper test. Check the live view during the day and at night to confirm image quality in both conditions. Walk through the detection zone to confirm motion alerts fire correctly. Play back a recorded clip to confirm the SD card is writing properly. Check the audio if your camera has a microphone: you should be able to hear birdsong clearly without excessive wind noise.
Common problems and fixes
| Problem | Likely Cause | Fix |
|---|---|---|
| Camera won't connect to Wi-Fi | Weak signal or 5GHz network selected | Move router closer, use a Wi-Fi extender, or ensure camera is on 2.4GHz band |
| Blurry or dark night footage | Lens dirty or IR LEDs blocked | Clean lens with a microfiber cloth, check nothing is blocking the IR emitters |
| Constant false motion alerts | Detection zone too large or sensitivity too high | Narrow the detection zone and reduce PIR or pixel sensitivity in the app |
| No audio or muffled sound | Microphone covered or audio disabled in app | Check app audio settings, confirm mic isn't blocked by the mount or housing |
| SD card not recording | Card not formatted for the camera or wrong speed class | Format the card inside the camera app, use Class 10 / U3 rated cards only |
| Live stream keeps buffering | Upload speed too low or OBS bitrate too high | Lower OBS bitrate to 2500 kbps, check your home upload speed is at least 5 Mbps |
Night vision quality is one of the things most worth optimizing. If you're using a camera with both color night vision (via starlight sensor) and IR mode, try both to see which looks better in your specific setup. Color night vision needs a tiny bit of ambient light to work, so it's great in light-polluted yards but less effective in truly dark rural spots where IR mode will outperform it.
Maintenance, seasonal adjustments, and bird safety best practices
A bird cam isn't fully set-and-forget, but the ongoing effort is minimal if you build a few habits. Check the lens every few weeks and wipe it with a clean microfiber cloth: spiders love to build webs directly over the lens, especially at night when the IR LEDs attract insects. Inspect all cable clips and the mount bracket before winter to catch any loosening before storms do. Battery-powered cameras should have their battery level checked monthly via the app.
Seasonal adjustments
In spring, revisit your detection zone and sensitivity settings. Foliage coming in can suddenly block your view or create false triggers from moving leaves. In late autumn, check that no new branches or overgrowth has shifted into frame and that the camera is still aimed correctly after any summer movement in the mounting hardware. For nest cameras, once the breeding season is over and the nest is empty, it's fine to open the box, clean it out for next year, and inspect the camera and wiring. That's the best time to upgrade equipment or reposition the camera if this year's angle wasn't ideal.
Bird safety non-negotiables
- Never handle or adjust a nest box while it contains eggs or chicks
- Keep all wiring secured so birds can't get tangled in loose loops
- Avoid cameras with bright visible LEDs near nesting sites: stick to IR night vision only near nests
- Don't broadcast the exact location of active nests publicly, as this can attract egg collectors or opportunistic predators
- If birds stop visiting a feeder after you install the cam, move the camera back another foot or two and give it a few days for them to adjust
- In extreme heat, ensure the camera housing isn't radiating heat into a nest box: check interior temperatures if possible
Once your cam is running smoothly and you're getting great footage, you'll probably find yourself wanting to improve the visuals further. Thinking about the quality of your camera angle and the background is actually something you share with bird photographers, and a lot of the same principles around backgrounds, perch placement, and natural light apply here just as much as they do in still photography. Setting up a natural-looking perch or branch near your feeder cam, for instance, gives birds a landing spot and gives you consistently better-framed shots, whether you're recording video or capturing stills. For a perch setup for bird photography, place a natural branch near the feeder but keep it far enough from the camera that birds feel safe while still giving you great angles.
The whole setup, from unboxing to watching your first live bird footage, typically takes two to three hours for a beginner. The most common reason people give up halfway is connectivity trouble, so if that's where you get stuck, go back to the Wi-Fi signal check before anything else. Once you're past that hurdle, the rest is just adjustment and enjoyment.
FAQ
How do I handle privacy if my live view includes a neighbor or a public path?
Most apps let you set a “privacy mask” or “recording schedule.” Turn off recording and notifications for the busiest hours (for example, late morning lawn care) and mask any sections that include neighbors or walkways. If your camera has a hard IR cut filter mode, keep it on auto only after you confirm the night view looks good, otherwise set a fixed mode to avoid nighttime exposure flicker.
My live feed keeps buffering or disconnecting, what should I check first?
Start by updating the camera firmware, then power-cycle the camera and your router. If it still drops, check whether your phone’s signal at the camera spot improves when you stand there with Wi-Fi on (not just at your house). For many Wi-Fi cameras, using 2.4 GHz instead of 5 GHz (if offered) stabilizes long-range connections outdoors.
What’s the best way to ensure the SD card records continuously without gaps?
For continuous SD recording, confirm the camera supports the card size and speed class it lists in the manual, then format the card in the camera app if the app offers it. After formatting, do a 30 to 60 minute write test before nesting season, and verify the recording actually continues after a reboot or power dip.
Birds avoid the camera area, how can I change the placement to keep them comfortable?
If birds are not coming to the area, reduce disturbance by mounting slightly farther back and angling downward so the camera lens is less “in their face.” Avoid pointing it at shiny surfaces that reflect movement. Also, don’t move the camera or change the detection zone repeatedly, birds habituate faster when the setup is consistent.
I’m getting too many motion alerts from wind and shadows, how do I reduce false triggers?
Set motion zones to cover only perching and feeder areas, then lower sensitivity if you get frequent alerts from leaves. For wind-heavy spots, watch the footage during a windy day and adjust the zone edges to exclude branches that sway. If your camera supports PIR, keep it on (not pure motion on pixels) because it typically reacts to heat movement more reliably.
How can I set up RTSP streaming so it stays stable for YouTube Live?
If you need a steady stream, use local viewing and cloud alerts first, then add public streaming once the camera is stable. For RTSP, ensure your computer network is on the same LAN or has strong wired connectivity to avoid packet drops. Also check OBS “buffering” settings and keep your computer plugged into power, battery mode can throttle performance.
How do I choose between color night vision and IR for the clearest night footage?
Night color (starlight) often needs nearby ambient light, if your yard is truly dark switch to IR mode. Compare both by watching a 5 to 10 minute clip at night and look for color smearing versus detail clarity on feathers. For the best look, avoid placing the camera where bright porch lights directly hit the lens, that usually causes glare.
What power and cabling mistakes most often cause failure outdoors?
Before drilling or running cable, confirm whether your power source can handle outdoor temperature swings. Outdoor outlets and adapters can fail if exposed to constant moisture, so use an outdoor-rated GFCI outlet when possible and route cables with drip loops so water doesn’t run into connectors. If using PoE, label both ends of the Ethernet cable and test link speed before locking the mount.
How should I configure audio (microphone) so it doesn’t become useless or disruptive?
If your camera supports it, disable audio recording for nest boxes if local rules or bird welfare concerns apply, and at minimum place the microphone so it points away from wind funnels. For wind noise, use the camera’s wind-reduction setting if available and avoid direct intake areas near vents or open doors. Always test audio during a breeze, not just on a calm day.
Should I rely on cloud storage or SD card recording, and what’s the best setup?
Cloud storage tiers usually limit motion events, while SD card recording needs local storage management. A practical approach is: use motion clips in the cloud for quick review, then record continuously to SD if you want full coverage. Periodically check remaining SD space in the app, if the card fills up the camera may stop writing depending on its settings.
Next Article
How to Bird Mouth a Rafter: Step-by-Step DIY Guide
Step-by-step guide to cut the bird-mouth notch in a roof rafter, measure pitch accurately, and fit for a tight seat.