Whether you can file a bird beak safely depends almost entirely on what kind of beak you're dealing with. If it's a real bird, stop right there: filing or trimming a live bird's beak at home is genuinely dangerous for the bird, and you should contact an avian vet instead. If it's a bird-themed toy, prop, costume piece, or decorative item, then yes, you absolutely can file it smooth yourself, and this guide will walk you through exactly how to do it without over-removing material or leaving sharp edges.
How to File Bird Beak: Vet-Safe Steps and DIY Toy Fixes

Marcus Hendricks
29 Apr 2026
First: Which Kind of Bird Beak Are We Talking About?
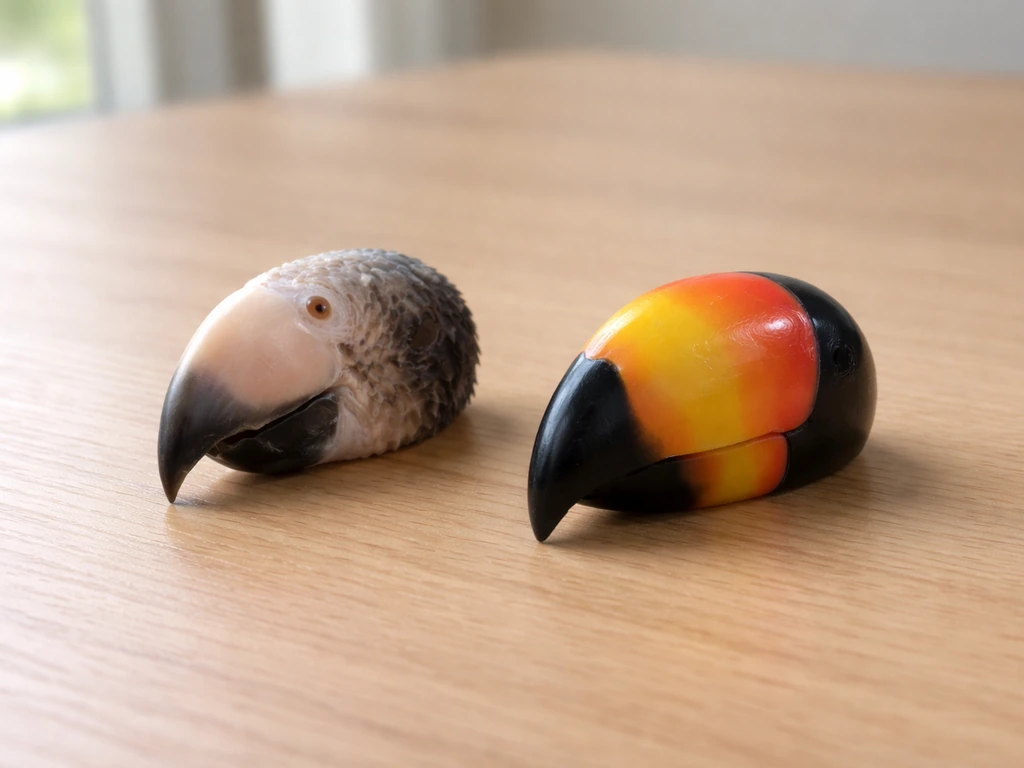
The phrase 'how to file bird beak' comes up in two very different situations, and mixing them up is a real problem. One is a live, biological beak on a pet parrot, finch, cockatiel, or any other bird. The other is a hard prop, toy, or costume piece shaped like a beak. The answer for each is completely different, so it's worth being clear before you pick up any tool.
| Situation | What 'Filing' Means | Safe to DIY? | What to Do |
|---|---|---|---|
| Real pet bird | Trimming/shaping live keratin tissue with blood vessels and nerves | No | Call an avian vet |
| Bird toy, prop, or costume piece | Sanding/shaping hard plastic, foam, resin, or wood | Yes, with right tools | Follow the steps below |
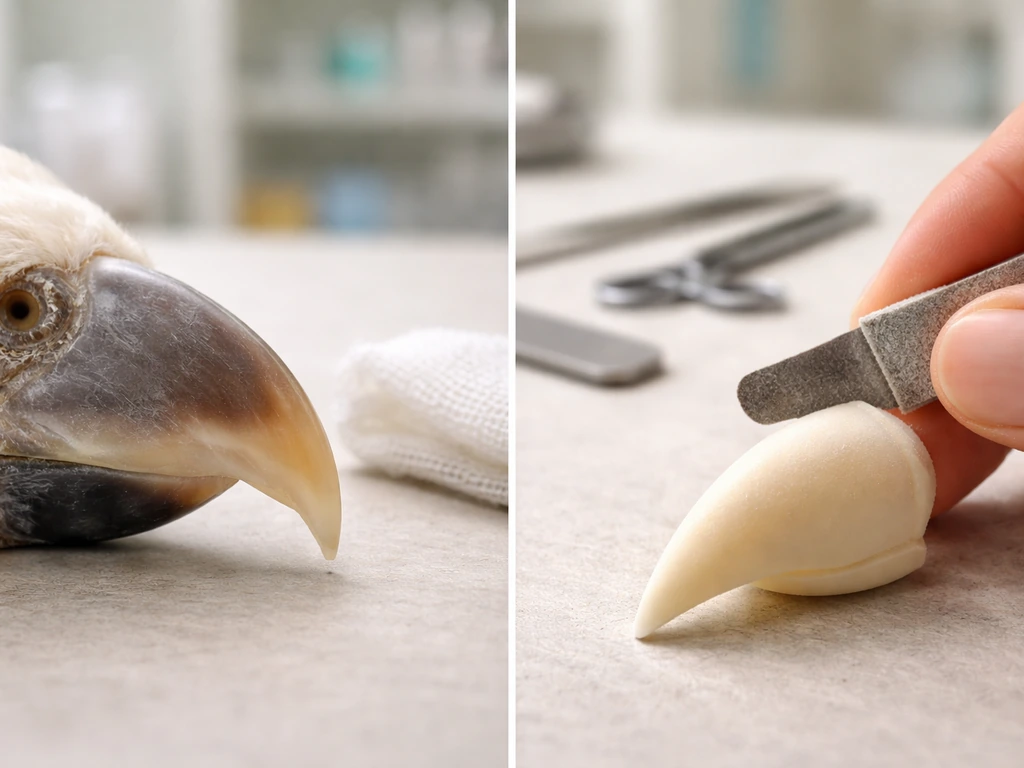
Real Bird? Here's Why You Should Not File It Yourself
I know it might look like a simple grooming task, like clipping a fingernail. It isn't. A bird's beak is a living structure packed with blood vessels and nerves. The tip of the upper beak in particular has a substantial nerve supply, which means trimming even a small amount incorrectly causes real pain. Cut too short and you get bleeding, and that bleeding can be severe enough to stop the bird from eating for days depending on how badly you nick the tissue. Permanent damage and chronic abnormal beak growth are also real outcomes of a bad DIY attempt.
There's also a second issue beyond the immediate injury risk. An overgrown or misshapen beak isn't always just a grooming problem. PetMD and other veterinary sources point out that beak overgrowth can be a sign of an underlying health condition, so what looks like a quick fix with a nail file might actually be masking something that needs a proper diagnosis. The right move is always to have the beak evaluated by an avian vet first.
Signs You Need a Vet Right Away
Some beak situations are urgent, not just inconvenient. Get your bird to a vet (or call one immediately) if you notice any of the following:
- The beak is cracked, chipped, or actively bleeding
- The bird has stopped eating or is dropping food it normally grasps
- The bird seems fluffed up, weak, or is losing weight
- You can see tissue damage or deformity that wasn't there before
- The bird is vocalizing differently or seems to be in pain
These are not 'wait and see' signs. Birds with bleeding or very painful beaks and those not eating need to be examined by a veterinarian right away.
Tools and Safety Basics Before You File (Toy or Prop)
If you're working on a toy, costume beak, resin prop, or similar item, this is where things get practical. Before you start shaping anything, get the right tools together. Using the wrong grit or technique is how you end up with a melted plastic edge or a rough surface that catches on fabric or skin.
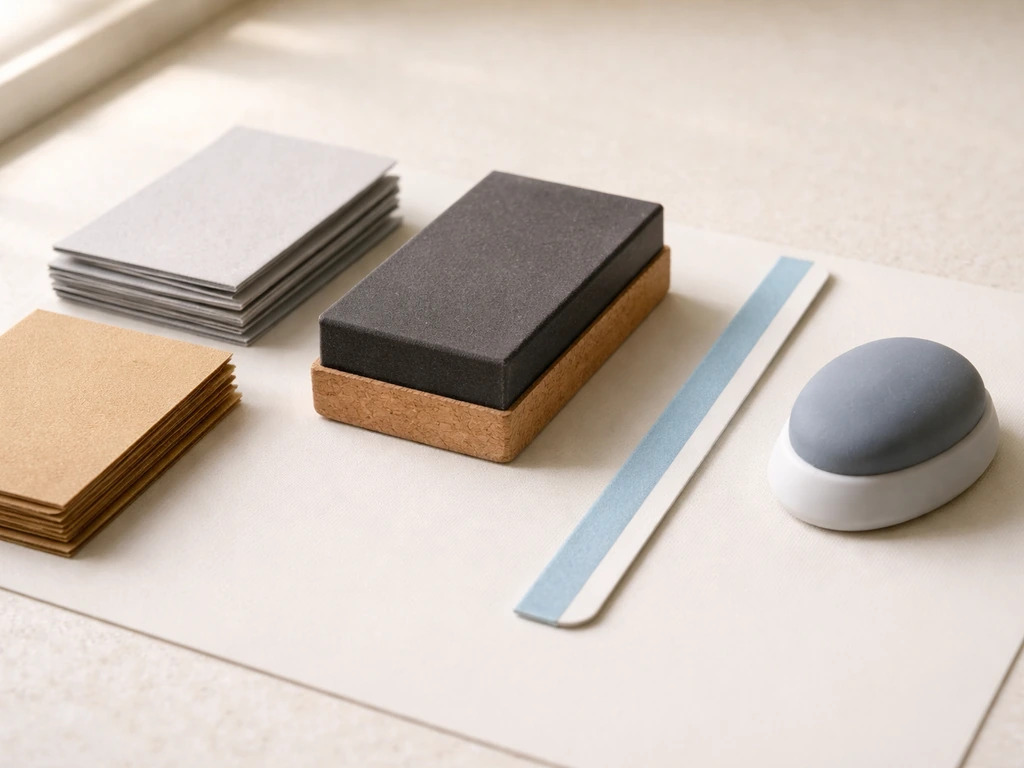
Here's what you'll want on hand:
- Sandpaper in multiple grits: start around 80-120 grit for heavier material removal, then step up to 150, 180, and 220 grit for smoothing
- A small hand file or needle file for tight curved areas and hard-to-reach spots
- A rotary tool (like a Dremel) with sanding drum or disc attachments, if you're comfortable using one
- Flexible sanding pads or foam-backed sandpaper for curved surfaces (these conform to the shape instead of flattening it)
- Safety goggles to protect against dust and micro-particles
- A dust mask, especially if you're sanding resin or painted surfaces
- A clean cloth or microfiber towel for wiping dust between steps
- Good lighting so you can actually see burrs and rough spots
One hard-learned lesson here: if you're using a rotary tool on plastic, keep the speed low. Dremel's own guidance warns that plastic can melt if the RPM is too high or you hold the tool in one spot too long. Melted plastic is harder to fix than rough plastic. Go slow, use light pressure, and keep the tool moving.
Step-by-Step: How to File a Bird Beak (Toy or Prop)
- Inspect the beak first. Run your finger carefully over all the edges, the tip, and any seam lines. Note where it's sharp, rough, or has raised burrs (small raised ridges left over from molding or casting). Mark those spots with a pencil if it helps.
- Secure the piece. Clamp the beak or hold it firmly so it doesn't shift while you're filing. If it's part of a costume, stuff the inside with a cloth to give it structure.
- Start with coarser grit (80-120) for actual shaping. If you need to remove a significant sharp edge or reshape a tip, use your coarser sandpaper or a hand file here. Work in short strokes along the edge rather than across it, and check your progress frequently. This is where most people over-remove material by going too fast.
- Switch to medium grit (150-180) once the rough shape is right. This step removes the scratches left by the coarser grit and starts to soften the surface. For curved sections, use a foam-backed sheet or wrap sandpaper around a dowel so you're following the curve instead of flattening it.
- Finish with fine grit (220+). This is your smoothing pass. Use light pressure and long, even strokes. The goal is a surface that feels uniform with no catches.
- Wipe clean between each grit stage. Use a microfiber cloth or a slightly damp cloth to remove dust. This helps you actually see the surface you're working on instead of inspecting through a layer of particles.
- Do a tactile check at the end. Close your eyes and slowly run your finger along every edge. What you can feel is more reliable than what you can see for detecting sharp points or rough spots.
Checkpoint: Is the Edge Right?
After your final pass, the edge should feel smooth with a slight softness to it, not razor-sharp and not rough. If it's going against skin (like in a costume), press it against the back of your hand with the same force someone would wear it. If you feel any discomfort, go back with 220 grit and make another pass.
After you finish shaping, check how the beak edge lines up with the fit, then adjust as needed for a comfortable fit fit bird comb. The goal is breaking the sharpness without rounding the edge so much that it loses its beak shape. If you are working on a toy or prop, you can apply the same focus on edge shape to learn how to bird mouth a rafter for a better fit.
Aftercare: Smoothing, Checking Fit, and Re-Testing
Once the filing is done, don't just call it finished and pack it away. Do a proper post-work inspection in good lighting. Look at every edge at an angle so you can catch any remaining burrs, which are small raised ridges that the sandpaper might have pushed rather than removed. If you spot one, a single stroke with a fine file or 220 grit sandpaper right at that spot will take care of it.
If the beak is part of a wearable costume, do a full fit-test now. Put it on and move around as you would when wearing it. Check that no edge digs into your nose, chin, or cheeks. Have someone else look at the seam where the beak meets the costume for any gaps or rough transitions that could catch on fabric or hair.
For a toy or decorative prop, run it through its normal use scenario. If it clips onto something, clip it. If a child will handle it, test it against their skin gently. This re-testing step is the one most people skip, and it's the step that catches the one sharp spot you missed.
When to Stop and Get Help
For a Real Bird
The short version: stop before you start. Do not attempt to file or trim a live bird's beak at home. If you already tried and caused bleeding, get the bird to an avian vet immediately. Birds Online strongly recommends leaving beak trimming to an experienced avian vet, because bleeding from injured blood vessels can be severe and may require cauterization to prevent significant blood loss. Beak bleeding can be serious, and the pain from a poorly trimmed beak can stop a bird from eating entirely, which becomes a medical emergency on its own. Even if there's no bleeding, improper trimming can cause chronic abnormal growth that affects the bird long-term.
For a Toy or Prop
Stop filing if you notice you've gone past the intended surface and exposed a different layer (like foam under a hard shell, or bare plastic under paint). At that point, more filing will just make it worse. Stop also if the material starts to melt, warp, or discolor from heat, which means your tool speed is too high or you're staying in one spot too long. If the piece is structurally compromised, no amount of finishing will fix it and you'll need to look at repair or replacement.
Alternative Solutions When Filing Isn't the Right Fix
For real birds, the alternatives to DIY filing are straightforward. Healthy birds with access to appropriate chewing materials, such as cuttlebone, mineral blocks, and wooden toys, naturally wear down their beaks through normal activity. If the beak looks overgrown despite that, the answer is a veterinary evaluation, not a home grooming session. The vet can determine if there's an underlying condition and perform any necessary trimming safely with the right equipment and procedures to prevent excessive bleeding and infection.
For props and toys, filing isn't always the best approach either. If the beak has a removable part or a replaceable tip, check the manufacturer's guidance first. If you are trying to get the same kind of result as the exact bird formula instructions, start by checking whether your prop or costume beak has a removable part or replaceable tip rather than reshaping it. Some bird-themed costume beaks are designed with snap-in or magnetic components specifically so you can swap a damaged piece instead of reshaping it. If the whole piece is structurally damaged or the material is too brittle to file without cracking, look for a replacement part rather than trying to salvage it.
For costume beaks specifically, thermoplastic options like Worbla or Wonderflex can be re-heated and reshaped entirely rather than filed, which gives you much more control and doesn't risk over-removing material. If you're working on something more complex or structural, a professional prop maker or costume repair service is a genuinely reasonable option, especially if the piece is expensive or irreplaceable.
And if this project is sitting inside a bigger DIY build, some of the fitting and structural concepts that come up in other bird-related how-to guides, like calculating precise cuts or fitting components to a fixed structure, can actually inform how you approach shaping and finishing work like this too. If you mean a whirly bird roof turbine, look up the specific steps for mounting it on a tin roof so you seal and fasten everything correctly.
FAQ
How do I know I’ve filed too much when I’m smoothing a toy or costume beak?
Stop and reassess your target surface, because exposing foam, bare plastic, or an unpainted layer means you have gone past the intended material. At that point, further filing will usually worsen the appearance and can create a weak edge, switch to repair (fill and re-finish) or replace the tip if the beak is removable.
What should I do if my rotary tool starts to melt the beak material?
If you notice melting, warping, or shiny discoloration, your heat is building from tool speed or prolonged contact. Back off immediately, let the piece cool fully, and resume with lower speed, lighter pressure, and more time spent on short passes rather than holding the tool in one spot.
What’s the best way to check whether the edge is still safe after filing?
For safety and comfort, you need to test the edge after every shaping session. Do a quick “skin contact” check by pressing the edge to the back of your hand with the amount of force it would experience on the wearer, if you feel discomfort, go back with 220 grit and refine before final finishing.
Can I file through painted or coated beak surfaces without ruining the finish?
Yes, but use the right approach for the material. If the beak is foam or layered, you may need to stop filing sooner and instead use filler, primer, and sanding in stages to avoid creating a step or exposing inner layers.
How much rounding is too much when finishing a beak edge?
A properly finished edge should remove sharpness while keeping the beak’s silhouette, it should feel smooth with a slight softness, not razor-sharp and not overly rounded. If you start losing shape, switch to finer grit for controlled deburring rather than continuing to remove height or width.
Do I need to fit-test a costume beak after filing, or is visual inspection enough?
If the beak is part of a wearable, do a full movement fit-test, put it on and walk or move as you would during use. Also have someone check the seam where the beak meets the costume for gaps, rough transitions, or pinch points that can catch hair or fabric.
Why do people find sharp spots only after the toy is used, not during the sanding step?
Yes, if the beak is a toy handled by children, confirm it is still free of sharp points after the first real-use cycle. Clips, drops, and normal grip can reveal a missed burr or loosen a joint, so test it against skin gently after use.
What’s the emergency cutoff for a live bird beak problem?
If a beak injury involves any bleeding, severe pain signs, or not eating, treat it as urgent and contact an avian vet right away. Do not attempt further home trimming or filing because the beak is vascular and nerves-rich, and small additional changes can worsen bleeding and pain.
My bird’s beak looks overgrown, can I file it down gradually to avoid a sudden injury?
If your bird has an overgrown or misshapen beak, filing it at home can mask a medical issue and can also cause chronic abnormal growth. Arrange an avian exam first, the vet can determine the cause and do any necessary safe trimming with proper equipment.
When should I replace a beak tip instead of filing it?
If your prop has a replaceable tip or modular component, prioritize replacement over reshaping. Manufacturers often intend damaged sections to be swapped, and this prevents you from thinning structural areas or creating weak points that are hard to finish.
What if the prop beak is cracked or brittle, is sanding a solution?
When the beak is cracked, structurally compromised, or too brittle to file without chipping, finishing cannot restore strength. Look for a replacement part, a professional prop repair, or a re-forming option (for suitable thermoplastic pieces) rather than trying to grind it smooth.
Do I need different sanding steps for plastic beaks compared with other materials?
If you’re using a file or sandpaper on plastic, keep the workflow controlled: short passes, frequent checks for burrs, and stop if you see heat effects. For final cleanup, you can use fine grit specifically to remove remaining ridges, not to change the beak’s profile.
If I already tried filing a live bird’s beak and it bled, what should I do next?
If you accidentally caused bleeding during any attempt on a live bird beak, get the bird to an avian vet immediately. While waiting, avoid further handling of the beak and do not apply homemade products, the key priority is professional assessment because bleeding and pain can rapidly affect eating.
Next Article
Exact Bird Formula Instructions: Step by Step Guide
Step-by-step exact bird formula instructions for beginners: setup, mix ratios, safe use, troubleshooting, and a final ch