Crop your bird photo by placing the bird about one-third from the nearest edge, leaving extra space in front of wherever the bird is looking or flying, and keeping enough room above the head and around the wings so nothing feels cramped. Then pick an aspect ratio that matches where the photo is going (4:3 for most sharing, 1:1 for Instagram, 9:16 for Stories), and export as a JPEG in sRGB at the highest quality your platform allows. That's the core workflow. Everything below breaks it down step by step so you get great results every time, whether you're on your phone or at a desktop.
How to Crop Bird Photos: Step-by-Step Guide for Better Composition

Marcus Hendricks
7 May 2026
What you're actually trying to do when you crop a bird photo
Cropping isn't just cutting away the boring parts. Wikipedia defines cropping as a basic image manipulation used to remove unwanted elements, change aspect ratio, or improve composition blank" rel="noopener noreferrer">Cropping isn't just cutting away the boring parts.. For bird photos specifically, it's about three things: putting the bird in the right spot in the frame, keeping enough context so the image feels natural, and not accidentally removing something important like a wingtip or the perch the bird just launched from. That last one trips up beginners more than anything else.
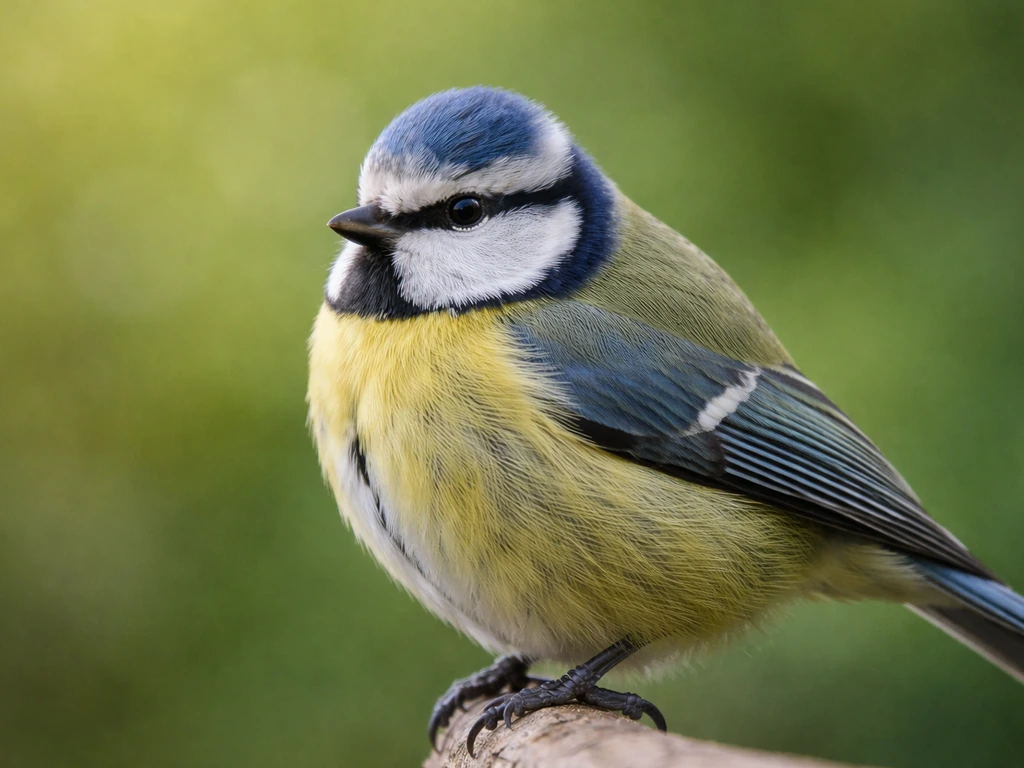
The big temptation is to crop as tight as possible so the bird fills the frame. Resist it. A bird with breathing room looks like a real wildlife photo. A bird jammed edge-to-edge looks like a passport photo. Unless you're shooting macro-style detail shots of feathers, leave some air around the subject. The goal is a composition that's pleasing and tells a small story, not just a big bird.
For flight shots especially, you need to decide what the story is before you crop. If you want to show where the bird is going, leave more space in the direction of travel. If the takeoff perch adds meaning, include it behind the bird. These are intentional decisions, not accidents of cropping. Get clear on the goal first, then crop to serve it.
Choosing your crop size and aspect ratio
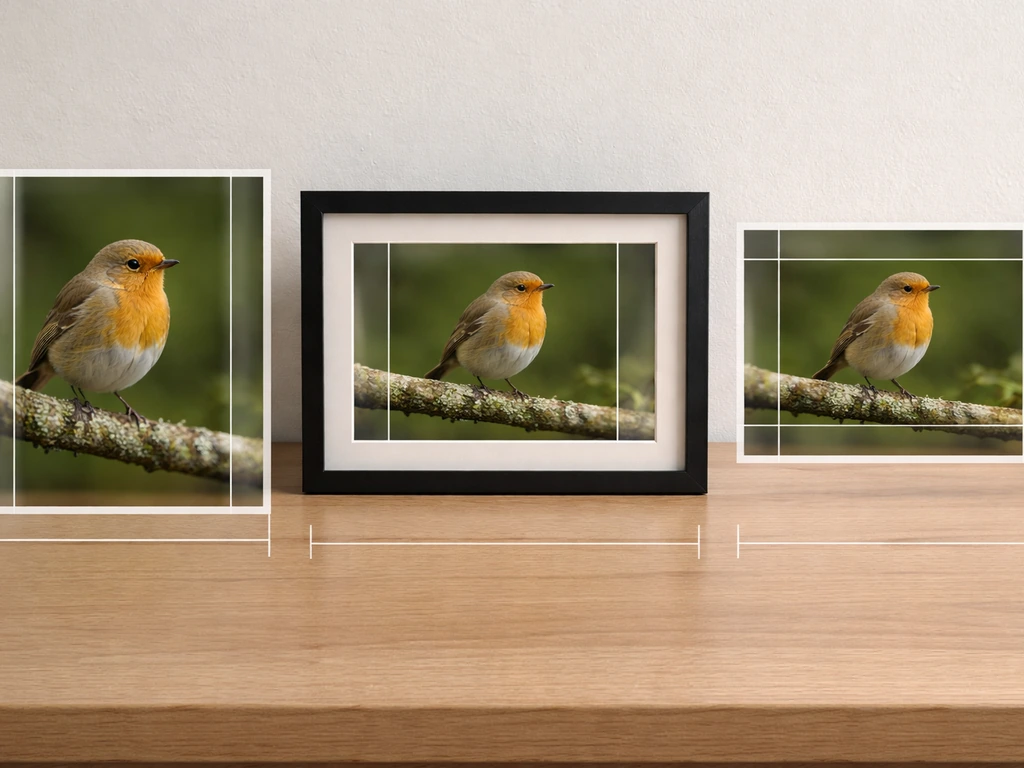
Aspect ratio is just the shape of your final image: wide, square, or tall. Your choice depends on where the photo is going. Here's a quick reference:
| Use case | Recommended aspect ratio | Notes |
|---|---|---|
| General sharing / email | 4:3 | Matches most camera and phone defaults |
| Instagram grid post | 1:1 (square) or 4:5 | 4:5 portrait fills more screen space |
| Instagram / TikTok Stories | 9:16 | Tall vertical format, best for birds on branches |
| Twitter / Facebook post | 16:9 | Wide landscape; great for flight shots with space |
| Print (standard photo) | 5:7 or 4:6 | Check your print lab's requirements |
| Desktop wallpaper | 16:9 or your monitor's native ratio | iPhone Photos preset includes 'Wallpaper' option |
One thing beginners often miss: changing the aspect ratio after shooting means you're cutting pixels, not adding them. A Reddit thread in r/googlephotos discusses aspect ratio and cropping issues that can show up after rotating or cropping Google Photos uploads on desktop changing the aspect ratio after shooting means you're cutting pixels, not adding them. If your original shot is horizontal and you crop it to 9:16 (vertical), you're removing a lot of image data. That's fine if the bird is centered, but it can destroy a flight shot where all the action is spread across the width. Think about the ratio before you get too attached to a specific crop shape.
How to crop on iPhone, Android, and desktop tools
iPhone (Apple Photos)
- Open the photo and tap Edit in the top right corner.
- Tap the crop icon (looks like overlapping rectangles) at the bottom of the screen.
- To change the aspect ratio, tap the ratio icon in the top right (it looks like a grid with an arrow). Choose from Square, 5:7, 9:16, and others.
- Drag the corners to move the crop boundary. By default, dragging a corner keeps your original aspect ratio locked. If you've selected a preset ratio, it stays locked to that shape.
- Use two fingers to pinch and zoom inside the crop frame to reposition the bird within the boundary.
- Tap Done when happy. Your original is always preserved, so you can go back and re-crop later.
Android (Google Photos)
- Open the photo and tap Edit (the pencil or slider icon).
- Tap Crop at the bottom of the editing toolbar.
- Tap the aspect ratio button (usually labeled with a ratio like 4: 3 or a grid icon) to choose your format.
- Drag the handles to adjust your crop, or drag inside the frame to reposition the bird.
- Tap Done or the checkmark to save.
- Important note: if your photos are backed up in Google Photos' storage-saving mode rather than original quality, images above 16 MP may have been resized. This limits how much you can crop before things get soft or pixelated. If you plan to crop heavily, always keep original quality backups of your best shots.
Desktop: Adobe Lightroom Classic
- Select your photo and press R to open the Crop & Straighten panel (or click the crop icon in the Develop module toolbar).
- Click the padlock icon next to the aspect ratio dropdown to lock or unlock your ratio. Locked means it stays proportional as you drag.
- Choose a ratio from the dropdown (Original, 1x1, 4x5, 16x9, etc.) or type in a custom ratio.
- Drag the crop overlay handles to reframe the bird.
- Use the Angle tool (the protractor icon) or drag the horizon line to straighten a tilted shot.
- Press Enter or Return to confirm the crop.
Desktop: Adobe Photoshop
- Press C to activate the Crop tool.
- In the top toolbar, set your aspect ratio or pixel dimensions. You can save custom crop presets here, which is handy if you always crop to the same size for a blog or print format.
- Drag the corner handles to adjust the crop boundary.
- Check 'Delete Cropped Pixels' if you want to permanently crop, or uncheck it to keep the full original behind the crop (non-destructive, lets you adjust later).
- Press Enter to apply.
Bird-specific framing techniques that make the crop work
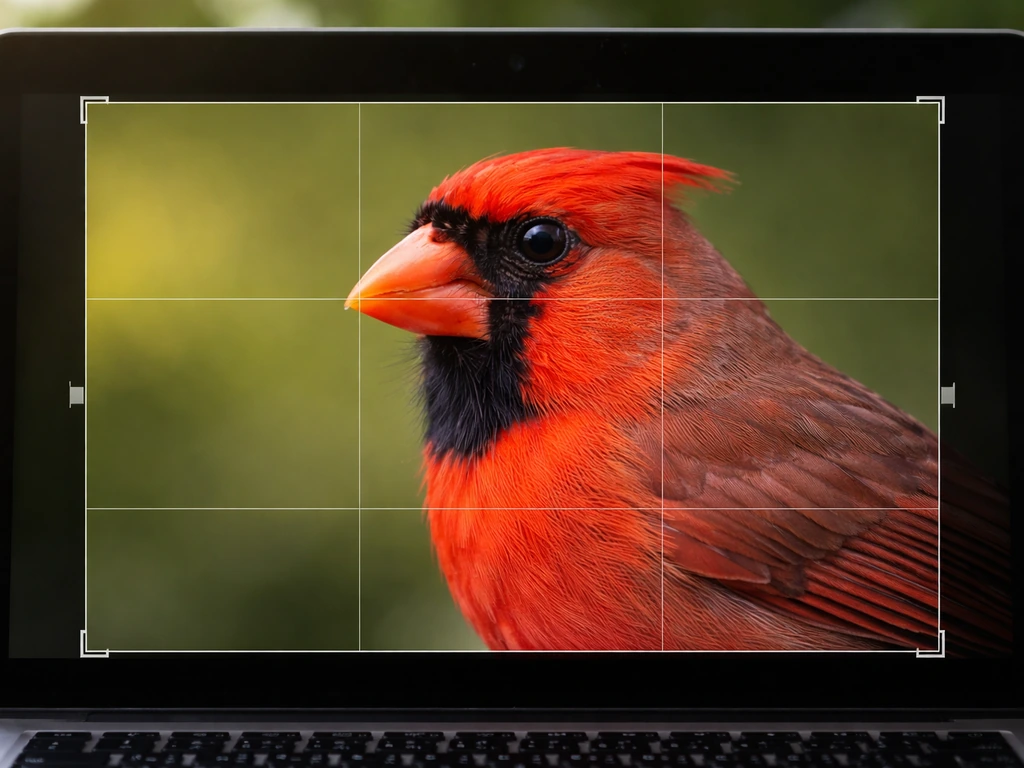
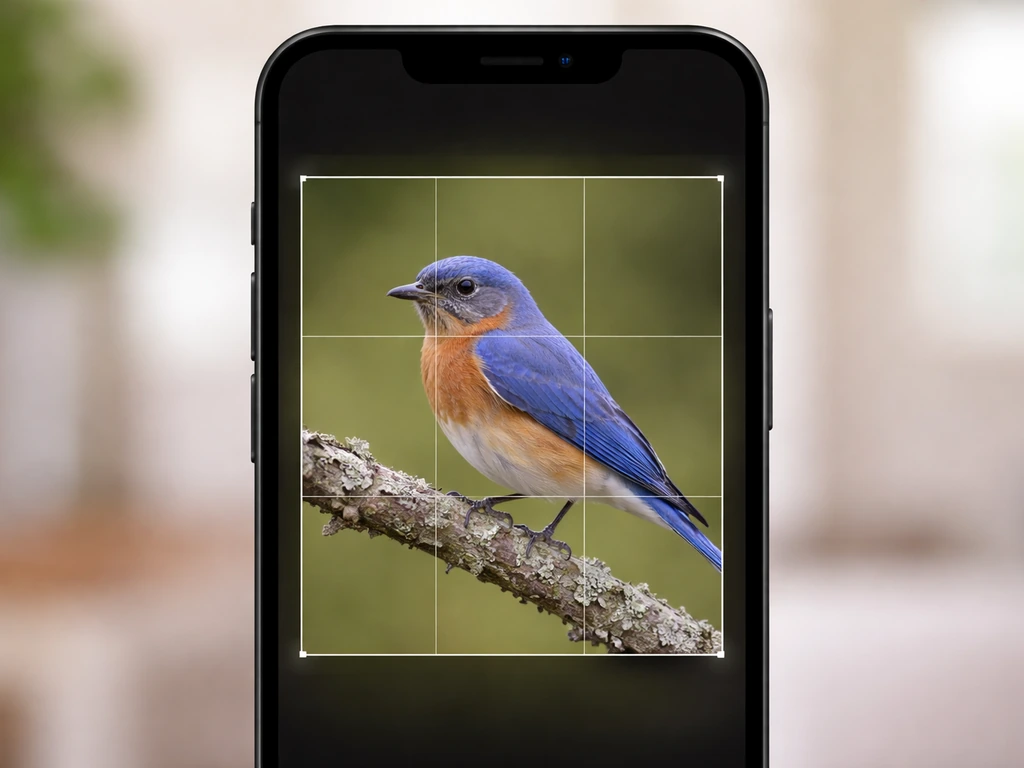
The rule of thirds (and why it's a starting point, not a law)
Place the bird roughly one-third of the way from the nearest edge of the frame. So if you have a bird on a branch facing right, position it in the left third of the image with space opening up to the right. Most phone and desktop crop tools can display a rule-of-thirds grid overlay, which makes this easy to eyeball. It's a starting point, not a rigid formula. If it doesn't look right, trust your eye and adjust.
Eye space and head room
The bird's eye is almost always the focal point of the image. When you crop, make sure the eye has a little breathing room above it, typically at least as much space as the height of the bird's head. Cutting off the top of the head is one of the most common beginner mistakes. Even a tiny sliver of sky above the bird's crown makes the image feel complete. Cutting it off makes the photo feel rushed and accidental.
Lead room (direction space)
Always leave more space on the side the bird is facing or flying toward. This is called lead room, and it's what makes a composition feel dynamic instead of awkward. A bird looking to the right needs more empty space on the right side of the frame. A bird in flight needs even more, because the viewer's eye naturally wants to 'see where it's going.' Birds moving fast need more breathing room than birds sitting still, so adjust accordingly.
Flight shots: space ahead vs. space behind
For birds in flight, make a deliberate call before you crop: do you want to show where the bird is going, or where it came from? If you leave more space in the direction of travel, the image feels forward-moving and energetic. If you include the perch or tree it just left behind, you get context and story. Both are valid. Just don't crop out both ends accidentally and leave the bird trapped in the center with nowhere to go.
Cleaning up edges and background clutter
Sometimes a careful crop is the simplest way to remove a distracting background element. If there's a trash can or fence post sneaking in at the edge of the frame, cropping it out takes three seconds and costs nothing. Start there before reaching for more advanced tools.
For clutter that's closer to the bird, like a branch cutting across a wing or a bright patch of light in an awkward spot, cropping alone probably won't fix it. In Lightroom Classic, the masking tools (Select Subject, Select Background, and Object masks) let you target just the background and tone it down without touching the bird. In Photoshop, the Content-Aware Fill workspace can remove objects like a stray twig or a distracting element near the bird's head. These are more advanced tools, but they're worth learning if you're doing a lot of bird photo editing.
One edge issue unique to bird photos: feathers. Detailed feather edges at the boundary of your crop can look jagged or clipped if you crop too close. Leave at least a small buffer of background around the bird's body, especially for fluffy or spread-wing shots. If a feather tip is right at the crop edge, pull the boundary out slightly so it has room to exist cleanly.
Keeping image quality when you crop and export
Resolution and how cropping affects it
Every time you crop, you're throwing away pixels. A photo from a 24 MP camera has plenty of room for moderate cropping and still looks sharp. But if your phone backed up your photos at reduced quality (Google Photos' non-original mode caps images at 16 MP, for example), you're starting with fewer pixels to begin with. Heavy cropping on a compressed or resized image leads to visible softness or pixelation, especially when printed or viewed on a large screen. Keep original-quality backups of any bird photo you care about.
A good rule of thumb: if you're cropping more than 50% of the original frame away, check the resulting pixel dimensions. For web sharing, you generally want at least 1200 pixels on the longest side. For a 4x6 print at 300 DPI, you need at least 1200x1800 pixels in the cropped result. Lightroom and Photoshop both show you the current pixel dimensions as you crop, so you can catch problems before exporting.
Straightening without quality loss
Straightening a horizon always requires a tiny crop of the corners, because rotating the image creates triangular gaps at the edges. Both Lightroom and Photoshop handle this automatically when you confirm the crop. Keep the straightening correction small (under 5 degrees) whenever possible, both for quality and because heavy rotation can make feather details look slightly soft. If the horizon is way off, it's better to address it at the shooting stage next time.
Export settings that protect quality
For web and social sharing from Lightroom Classic, use JPEG format, sRGB color space, and set the longest edge to the size you need (800 to 2400 pixels covers most use cases). Quality settings around 80 to 90 out of 100 give you a good balance of file size and sharpness. Going below 70 starts to introduce compression artifacts, especially around detailed feather edges. For Photoshop, 'Save for Web' or 'Export As' gives you the same controls. On your phone, just save to your camera roll rather than screenshotting the photo, since screenshots add an extra compression pass.
Common mistakes and a before/after checklist
Most cropping problems come down to the same handful of errors. I've made every one of them. Here's what to watch for:
- Cutting off wingtips or the top of the head: always check all four edges before confirming the crop
- Cropping too tight: if the bird fills more than 70-75% of the frame, try pulling back slightly
- No lead room: the bird should face into space, not into an edge
- Centering the bird without reason: centered works for symmetrical shots like a bird on still water, but for most birds a rule-of-thirds placement looks more natural
- Cropping a heavily compressed or resized photo and then wondering why it looks pixelated: check your backup quality settings
- Forgetting to straighten: a slightly tilted horizon reads as sloppy even in an otherwise great shot
- Using a crop ratio that doesn't match the destination: a 16:9 crop posted to Instagram grid loses the top and bottom when displayed
Before-and-after crop checklist

Run through this before you hit export. It takes under a minute and saves a lot of regret.
- Is the horizon straight? Use the angle/straighten tool if not.
- Does the bird have clear space in front of where it's looking or flying?
- Is there at least a small margin above the bird's head?
- Are all wingtips, tail feathers, and feet fully inside the frame (or intentionally cropped for artistic effect)?
- Is the bird placed on or near a rule-of-thirds intersection rather than dead center (unless center is intentional)?
- Is there a distracting element near any edge that a small adjustment would remove?
- What's the pixel count of the cropped result? Is it high enough for your intended use?
- Is the export format set to JPEG, color space to sRGB, and quality to 80 or above for online sharing?
Cropping is honestly one of the fastest ways to improve your bird photography without changing a single thing about how you shoot. If you want more keep-away from typical framing mistakes, check out skye how to control bird as well. If you are learning how to use Skye Bird for photo editing, cropping is one of the quickest wins you can apply right away cropping is honestly one of the fastest ways to improve your bird photography.
If you want more than cropping, this guide on bird photography how to will help you build a stronger capture and editing workflow. Pair it with good editing habits (adjusting exposure, sharpening feather detail, cleaning up the background) and you'll be surprised how much better even a mediocre shot can look. If you're ready to go deeper, exploring how to blur backgrounds in bird photos and broader bird photography editing techniques will take your results further than cropping alone.
If you want to fine-tune details after cropping, learn how to edit bird photos with the same workflow exploring how to blur backgrounds in bird photos. If you want to level up after your crop, use this guide on how to blur backgrounds in bird photos for more separation and a cleaner look.
FAQ
How do I crop a bird photo when I’m not sure which aspect ratio to choose for social media?
Start by checking where it will be viewed most often on your plan (feed, story, or desktop). If you are unsure, export two crops from the same original, one horizontal (4:3 or 16:9) and one vertical (9:16). This prevents you from committing to a shape that forces heavy trimming on flight shots where action spans the width.
What should I do if my bird is slightly cut off at the edge but looks best in a tight crop?
If any essential detail is missing or truncated, widen the crop boundary. For birds, prioritize keeping the eye, both wing edges, and the full head silhouette. A small increase in framing usually preserves the realism, while cutting into feather edges often looks jagged or accidental.
Should I crop before or after I straighten the image?
Straighten first, then crop. Rotating introduces empty corner areas, and cropping after rotation lets the tool remove those corners cleanly. If you straighten after cropping, you may end up losing more pixels than necessary.
How can I avoid losing image quality when I crop on my phone?
Crop using the original image, not a version that was already resized or compressed (like a downloaded share or a screenshot). If your phone only gives you one save option, look for “save original” or “export” and avoid screenshotting, since screenshots add an extra compression pass.
When is it better to use editing tools instead of cropping to fix the background?
If the distracting element overlaps the bird (for example, a branch crossing a wing) or sits close enough to change feather edges, masking tools or object removal will usually look cleaner than cropping. Cropping helps most when the distraction is confined to the outer edges and does not touch the subject.
What if my bird is facing toward the center, so there is little empty space to place lead room?
Re-evaluate the story choice: include either slightly more space in the direction the head is turning, or if the bird is perched and calm, favor balance over strict lead room. In tight compositions, even a modest amount of lead room can prevent the “staring at a wall” look.
How do I choose the crop position when the bird is both looking one way and flying another?
Use the direction that best matches your intended narrative. If you want “where it is going,” align the lead room with the flight path and allow extra space in that direction, even if the head points elsewhere. If you want “where it came from,” reverse the lead room and consider including more of the takeoff context.
My crop looks fine on my screen but blurry when I share it. Why?
This usually comes from exporting at too small a pixel size, saving as a low-quality JPEG, or sharing via an app that re-compresses your file. Use a larger export size (at least 1200 pixels on the long side for typical web use) and keep JPEG quality around the mid to high range to protect feather detail.
Can I crop more than half of the image if the bird looks centered?
Yes, but check the resulting pixel dimensions afterward. Heavy cropping is often fine for high-resolution originals, but if the source was reduced (compressed backups, low-quality transfers), more than 50 percent cropping can make feather edges and fine textures look soft.
How do I handle feather edges when cropping close to the bird?
Leave a small buffer of background around the body, then adjust until the feather tips do not touch the crop boundary. If a feather tip is right on the edge, slightly pull the crop outward so the boundary does not clip the irregular feather silhouette.
What’s the quickest checklist to avoid common bird-cropping mistakes before export?
Check in this order: the eye is fully inside the frame, no wingtip is clipped, the head top has a bit of space above it, the perch or takeoff context is included if it matters, and the bird is not centered with no breathing room in front. Then verify pixel dimensions for your target (web or print) before exporting.
Next Article
Skye How to Control Bird: Identify, Train, or Use the Toy
Learn to control Skye’s bird by identifying it or using a bird toy, with safe training steps and troubleshooting.