A good perch setup for bird photography comes down to four things working together: the right perch type for the bird you want to shoot, smart placement that controls your background and light, safe materials the bird is comfortable landing on, and camera settings dialed in before the bird even shows up. Get those four right and your hit rate goes up fast. Miss one and you end up with blurry shots, empty perches, or photos where the bird is sharp but the background looks like a wire fence exploded behind it.
Perch Setup for Bird Photography: Step-by-Step Guide

Marcus Hendricks
7 May 2026
Choosing the right perch type for photo results
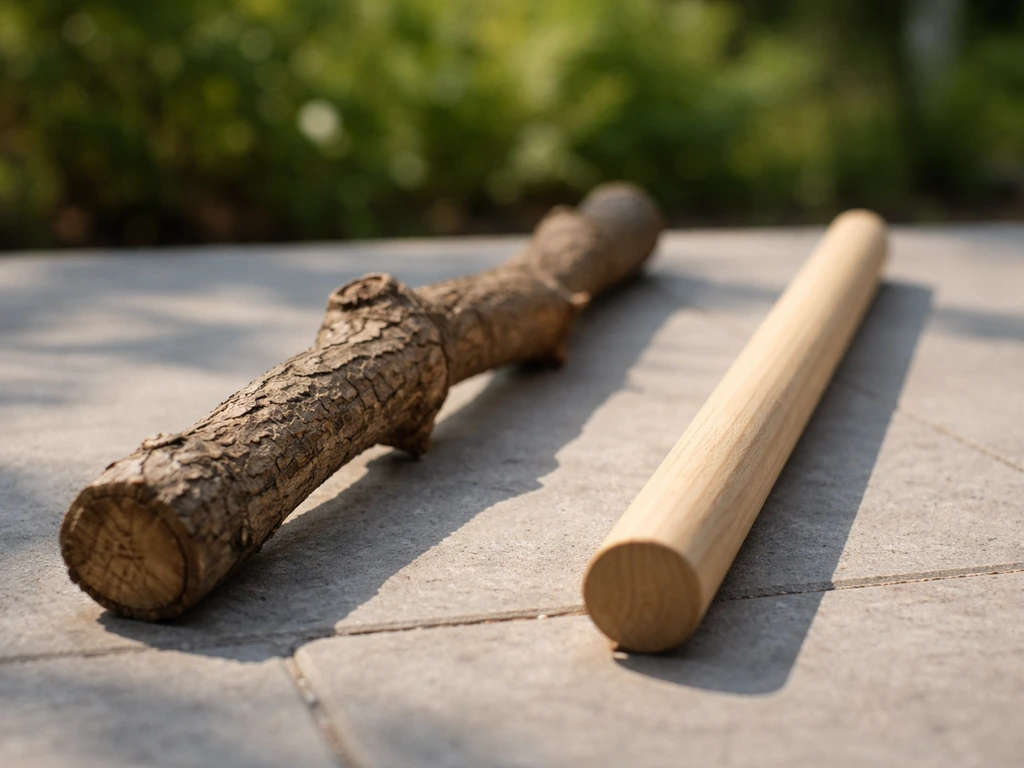
The perch type shapes the whole photo before you even press the shutter. A bare, gnarly branch with natural texture looks far more compelling than a smooth dowel rod, and birds tend to feel more comfortable on something that mimics what they land on in the wild. For most backyard bird photography, a natural dead branch is the gold standard. It has grip texture, irregular shape, and reads as believable in a photo.
Here are the main perch styles and when to use each one:
- Natural dead branch: Best all-around choice. Textured bark, organic shape, and birds feel at home on it. Grab one from your yard or a local park. Avoid anything with live buds if you want a cleaner frame.
- Lichen-covered branch: Adds color and visual interest. Works especially well when you want the perch to be part of the story rather than just a landing pad.
- Flower stem or reed: Great for smaller birds like finches and sparrows. Adds natural context and sways slightly in the wind, which actually makes the shot feel alive.
- Mossy log or stump: Useful if you want a low, ground-level look, especially for thrushes and robins. More stable than a branch and easy to position.
- Feeder perch: If you already have a feeder, birds will use the existing perches. These shots are totally valid and accepted by most photography ethics bodies, just make sure the feeder itself is out of frame or cleanly framed.
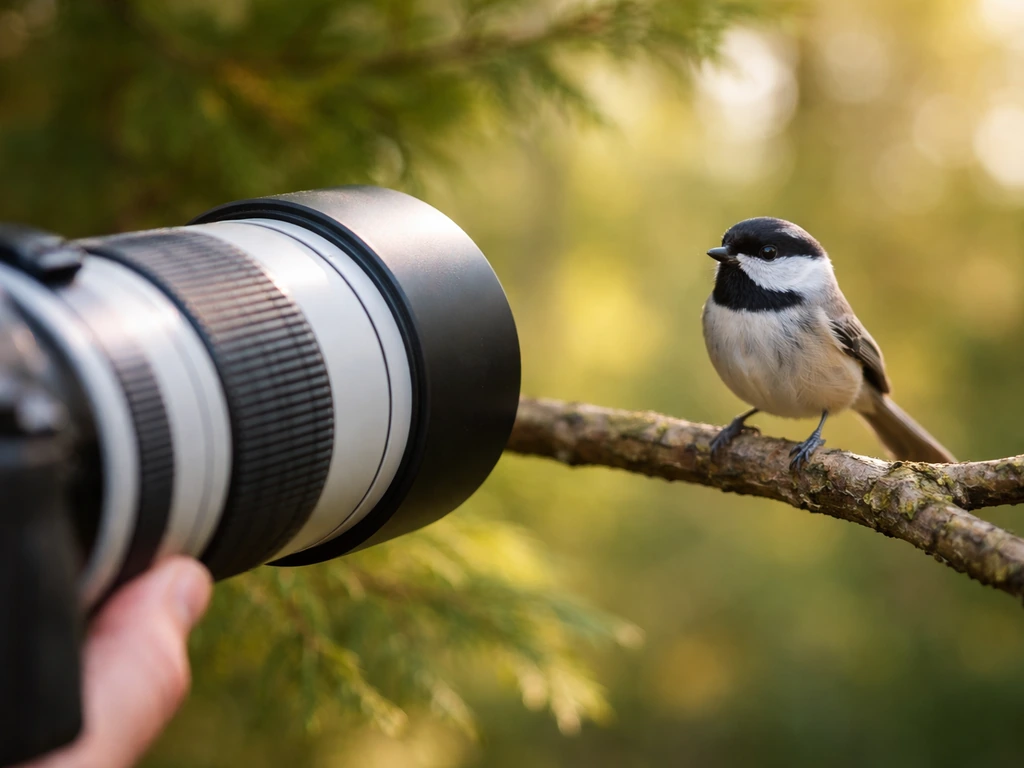
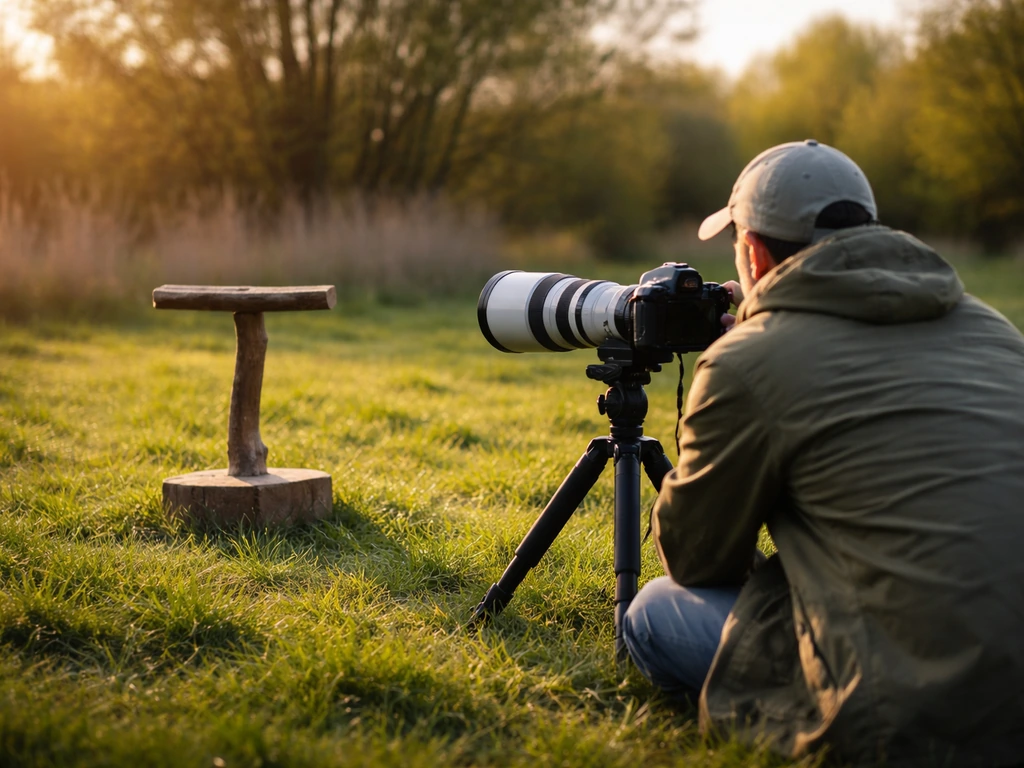
One tip I learned early: align the branch roughly parallel to your camera's shooting position. This means the branch runs more or less across the frame rather than poking directly toward or away from your lens. When the branch is parallel, the bird's body sits cleanly in-frame and you avoid awkward foreshortening where the perch looks stubby or weirdly angled.
Perch placement: height, distance, and background control
Placement is where most beginners make their biggest mistakes, and it's also where you have the most control. Three variables matter most: how far the perch is from your camera, how far the background is from the perch, and what angle the whole setup sits at relative to your light source.
Distance from camera
With a typical telephoto lens in the 400–600mm range, you want the perch somewhere between 15 and 30 feet away depending on the bird size. Closer feels dramatic and fills the frame, but gives you less room for autofocus error. Farther back gives you more breathing room to compose but can soften fine feather detail. Start at around 20 feet and adjust from there once you see a few shots.
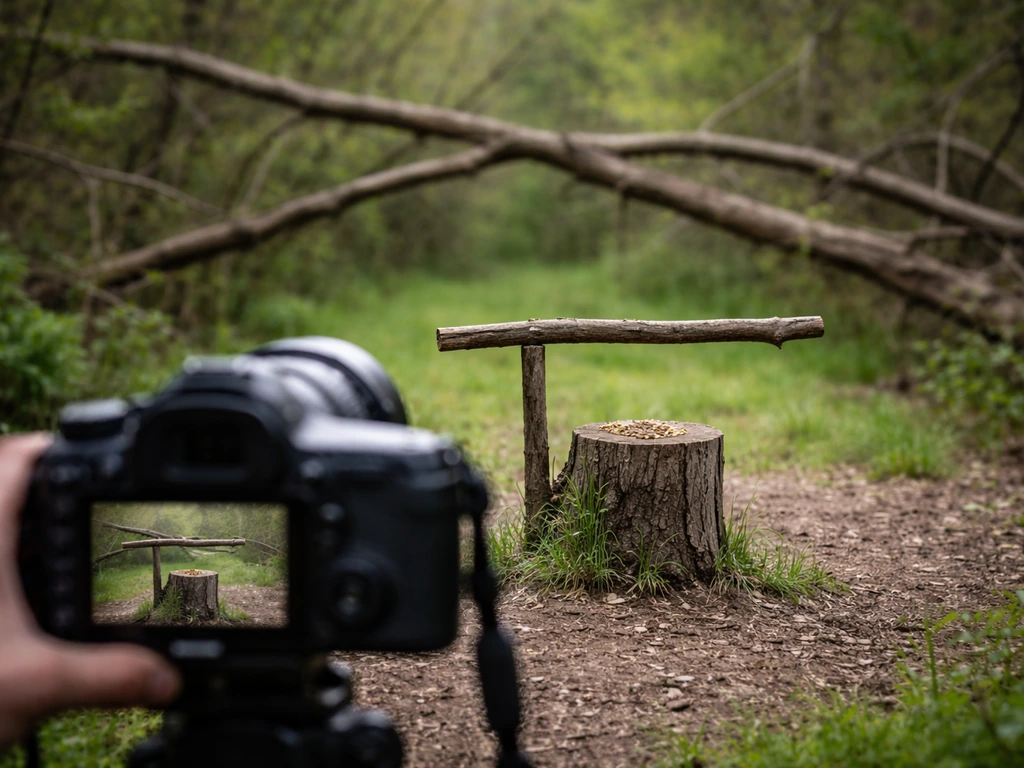
Background distance and what to put behind the perch
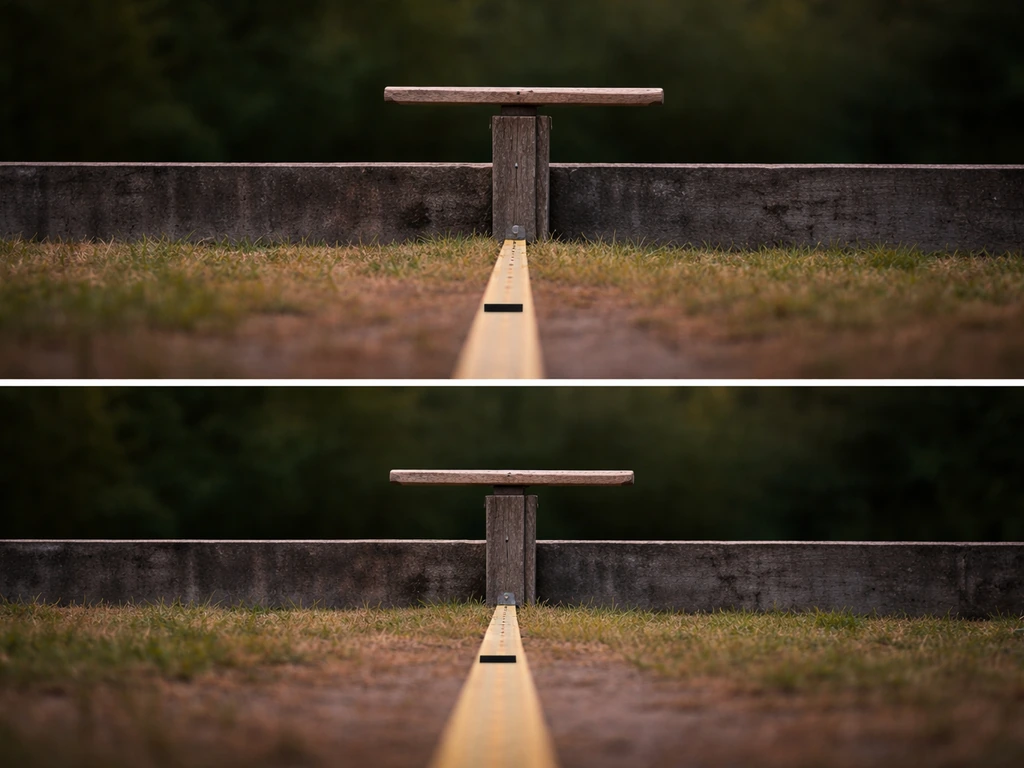
This is critical. Even a long telephoto lens at a wide aperture can show distracting detail in a background that's only a few feet behind the bird. Push that background as far back as possible. Ideally you want at least 10 to 15 feet between the perch and anything behind it. A solid wall of green foliage 20 or 30 feet away makes a gorgeous natural backdrop. Open sky works too, though midday sky can blow out easily.
Watch out for linear elements in the background. Branches, fences, wires, and stems cutting through the frame stay visible even when they're out of focus because their line structure reads clearly even blurred. If you see one in your viewfinder, shift your shooting position a foot or two to the left or right. Moving just a small amount can hide a distracting branch behind the bird completely.
Height and eye level
Try to shoot at or near eye level with the bird. If you want more stability at eye level, learning how to use a monopod for bird photography can help you keep your frame steady while adjusting your perch distance and angle. Eye-level shots feel intimate and direct. If you're photographing small birds on a low perch, get down on the ground. If the birds perch high in a tree, elevate yourself if you can, or accept a slightly upward angle and compensate with composition. Shooting straight down on a small bird makes it look squashed and disconnected. It's one of those things that seems minor until you compare shots side by side.
Angle relative to light
Plan your perch placement based on where you'll be standing and what time of day you'll be shooting. Audubon specifically recommends thinking through the perch-to-camera angle relative to the sun before you set anything up. The classic setup is to have the sun behind you and slightly to one side, so light falls evenly on the bird's face. Side lighting creates drama but can put the eye in shadow. Backlit shots are beautiful but hard to expose correctly as a beginner. Early morning golden hour light from a low angle is genuinely worth setting an alarm for.
Perch materials and safety: stability, grip, and sanitation
A perch that wobbles, slips, or collects disease is worse than no perch at all. Birds won't return to a perch that felt unstable, and a dirty perch near a feeder can spread illness through your whole local bird population. Both things are fixable.
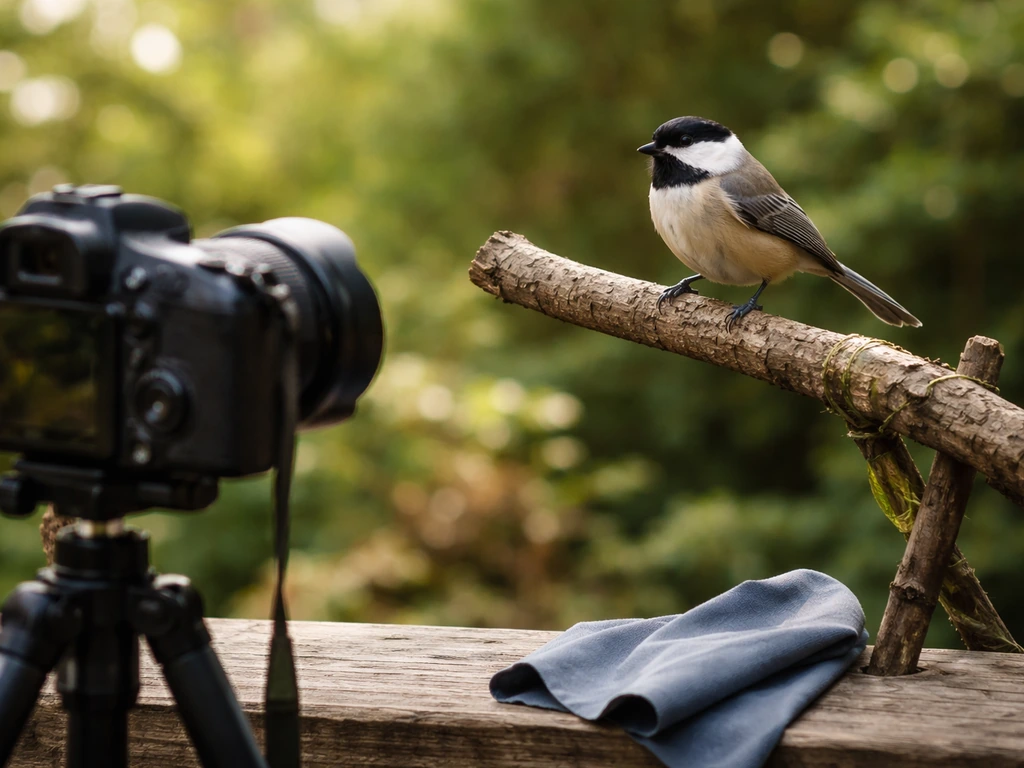
Stability and mounting
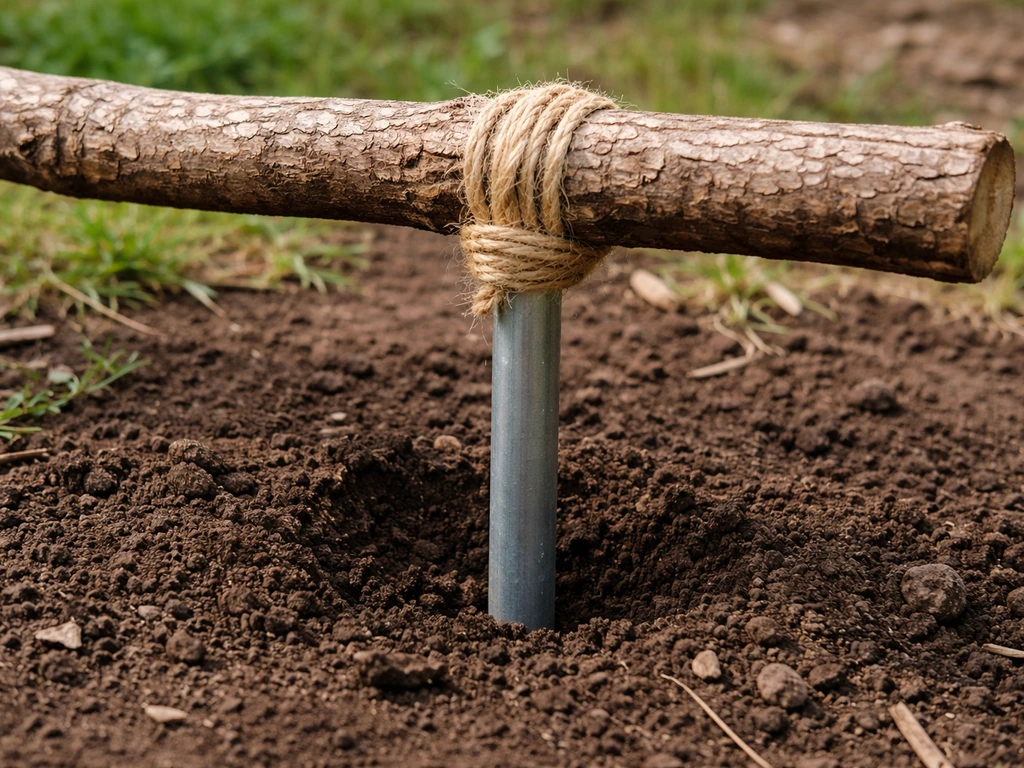
For a ground-level perch, drive a metal stake into the soil and secure your branch to it. For a perch attached to vegetation or a fence, use a sturdy clamp. The branch should not sway significantly in a light breeze. If it wobbles noticeably when you press on it with your finger, a bird landing on it will cause enough movement to blur your shot. Add a second point of contact or use wire to brace it.
Grip and foot comfort
Rough, textured bark gives birds a secure foothold. Smooth or wet surfaces are harder to grip and birds may shift, fidget, or leave quickly. If your branch is very smooth, rough it up slightly with sandpaper or wrap a small section in natural rope. Avoid any perch surface that could be slippery in rain or morning dew.
Sanitation near feeders
If your perch is near a feeder or bird bath, sanitation matters. Cornell Lab recommends taking feeders apart and cleaning them with a dilute bleach solution or running them through a dishwasher on a hot cycle. Project FeederWatch guidance (cited by Audubon) suggests cleaning seed feeders roughly every two weeks. Also sweep or rake up fallen seed and hulls under the feeder because damp seed debris on the ground is a bacterial breeding ground. For nectar feeders specifically, change the sugar water every three to five days, and more often in hot weather, to prevent mold and fermentation. A well-maintained feeding station is safer for birds and more likely to keep them coming back to your perch.
Lighting and camera setup for perched birds
The good news about perched birds is they're not moving fast, which means you have a little more flexibility with settings than you do for birds in flight. But they're still birds, which means they twitch, turn, and take off without warning. Here's how to set up so you're ready when it counts. If you're setting up a live bird cam instead, focus on steady power, reliable Wi-Fi or a cellular connection, and an unobstructed view of the perch area.
Shutter speed
For a perched bird that's mostly still, a shutter speed of 1/500s to 1/800s is a good baseline. This is enough to freeze small head movements and wing flicks. If the bird is actively singing, calling, or preening, bump it to 1/1000s. In low light, you might have to go as slow as 1/200s for a truly stationary bird, but that's risky because birds rarely stay completely still for long. Shutter speed is the variable that makes or breaks a bird photo, so when in doubt, go faster and raise your ISO to compensate.
Aperture and focus
For perched birds, shoot at or near your lens's widest aperture (something like f/5.6 or f/6.3 is common on telephoto zooms). This blurs the background and isolates the bird. The critical rule is that the bird's eye must be sharp. Everything else can be slightly soft and the photo still works. Place a single focus point directly on the bird's eye or head. This is the most reliable method for perched songbirds in cluttered branches where tracking autofocus can grab the wrong thing.
If your camera supports it, set up back-button autofocus. This separates focus from the shutter button so you can lock focus on the eye with your thumb and then shoot with your finger without the camera refocusing between shots. It sounds fiddly at first but after a day of practice it becomes completely natural.
ISO and exposure
Modern cameras handle ISO 1600 and even ISO 3200 better than most people expect. Don't be afraid to raise ISO to protect your shutter speed. A slightly grainy photo of a sharp bird beats a perfectly exposed blur every time. Use auto ISO with a minimum shutter speed floor if your camera supports it, and set the ceiling somewhere around ISO 3200 to 6400 depending on how your specific camera handles noise.
| Situation | Shutter Speed | Aperture | ISO range |
|---|---|---|---|
| Still perched bird, good light | 1/500s | Widest available | 200-400 |
| Perched bird singing/moving | 1/800-1/1000s | Widest available | 400-800 |
| Low light, overcast morning | 1/500s minimum | Widest available | 800-3200 |
| Backlit or silhouette shot | 1/1000s+ | f/8 or narrower | 200-800 |
Using bait and lures: what's ethical and what's not
This is an area where a lot of photographers, especially beginners, stumble into genuinely harmful territory without realizing it. Let's be straight about the lines here.
Feeding stations, seed feeders, and water sources are widely accepted as ethical ways to attract birds to a photography area. BirdLife Photography's code explicitly states that photos of birds at feeding stations are acceptable. These methods work with natural bird behavior and don't stress or endanger the birds.
What's not acceptable is active baiting: using live animals, dead animals or parts, processed meat, or decoys like fake mice to lure predatory birds in for a shot. Audubon is explicit on this, and specifically calls out owls as a species that should never be baited. Baiting predatory birds can change their hunting behavior in ways that harm them long-term. It also often stresses the bird and can attract unwanted attention from other wildlife or humans to a sensitive location.
One nuance worth knowing: photographing around a fresh kill or natural cache that a bird has already made is generally considered acceptable because you're not altering the bird's behavior or environment. You're just being present at something that was already happening. That's very different from placing bait to manufacture the shot.
A few practical, ethical methods that work well:
- Set up a seed feeder near your perch and let birds discover it naturally over several days before you try to shoot
- Use a clean, shallow birdbath near the perch (birds are reliably drawn to fresh water, especially in dry weather)
- Plant native berry-bearing or seed-bearing shrubs nearby to make the area naturally attractive
- Use pishing calls (making quiet sounds with your mouth) sparingly and briefly to get a bird to pause, not to chase it toward you
- Keep your distance and use a longer lens rather than trying to get physically closer to the perch
Timing, patience, and reading bird behavior
No perch setup in the world helps if you show up at the wrong time. Birds have very predictable daily rhythms once you know what to look for. The first hour after sunrise is consistently the most active period for most songbirds. They're hungry, territorial, and vocal, which means they're moving to visible spots and staying long enough to actually photograph. The last hour before sunset is a close second.
Midday, especially in summer, is the dead zone. Birds shelter in dense cover during peak heat. Don't waste your best light and energy during those hours. Use that time to adjust your perch position, check your background, and fine-tune your camera settings so you're ready for the evening session.
Watch for these behavioral cues that tell you a bird is about to land on your perch:
- A bird perching in nearby vegetation and looking toward the setup repeatedly, it's evaluating the area
- Short, fluttering movements from nearby branches toward the perch direction
- Singing or calling from a spot directly adjacent to your perch (territorial birds often cycle through the same high spots)
- Other birds already using the feeder or water nearby, which signals that the area is safe
Once a bird lands on the perch, resist the urge to immediately machine-gun your shutter. Take a breath, let the bird settle for two or three seconds, then shoot. Birds that feel startled by rapid shutter noise or movement leave fast. If you're using a mirrorless camera with a silent electronic shutter, this is less of an issue, but it's still good practice to let the bird relax before hammering the burst mode.
Patience is genuinely the most underrated skill in bird photography. The photographers getting consistently great shots aren't luckier than you. They've set everything up in advance, they're comfortable and still in their position, and they've waited long enough for birds to stop treating the setup as new or threatening. Give any new perch setup at least a few sessions before judging whether it's working.
Common mistakes and quick troubleshooting
Here are the most common failure points and how to fix them fast.
Birds won't land on the perch
First, check how close you're sitting. If you're too visible or too near the perch, birds will avoid it entirely. Try adding a hide, sitting farther back, or using natural cover around your shooting position. Also give a new setup time. Birds often need two to five days to accept a new perch as safe, especially if there's no food reward nearby. Make sure a feeder or water source is within a few feet so birds have a reason to be in that spot.
Photos are blurry
Check the blur pattern. If the bird is uniformly soft, you probably missed focus entirely. Go into your camera's image review and zoom in on the bird's eye. If focus landed somewhere other than the head, adjust your autofocus point placement and make sure you're putting it directly on the eye before shooting. If the blur looks like smearing or ghosting (the bird's outline is streaky), your shutter speed was too low. Bump it up to at least 1/500s. Atmospheric shimmer causing soft images is common when shooting across long distances in midday heat, another reason to shoot in the cooler morning hours.
The perch keeps moving or falling
A wobbling perch ruins shots and trains birds to avoid the spot. Check that your stake is driven deeply enough into the ground (at least 12 inches for soft soil) and that the branch is secured at two points. In windy conditions, use a heavier, thicker branch that doesn't oscillate as much. If you're using a clamp on a fence or railing, double-check it before every session.
Distracting or cluttered backgrounds
Before you even sit down to wait, walk around the perch setup and look through your viewfinder from your shooting position. Check for linear elements crossing the background: branches, wires, fences. Then shift your position left, right, up, or down until those elements are hidden behind the bird or pushed out of frame. A move of as little as one or two feet can completely transform a background. If the background is too bright or too detailed at any angle, consider placing a large piece of dark green or brown fabric several feet behind the perch to create a clean backdrop.
Bad timing leading to missed shots
If birds are landing but you're always a second too slow, switch your camera to continuous shooting mode (burst mode) and have it ready before the bird arrives. Use back-button focus to pre-focus on the perch itself so you have a starting point when a bird lands. Keep your eye on the viewfinder and your hand on the camera rather than checking your phone or the field guides during sessions. The shot you miss is always the one where you looked away for 10 seconds.
If you want to take your bird photography further after mastering the perch setup, it's worth diving into sharpness techniques and camera settings in more depth. You can also learn a proven workflow for how to take sharp bird photos by pairing these perch basics with the right camera settings and timing. Getting sharp bird photos consistently is its own skill set that builds directly on everything a good perch setup gives you, and the two work together in ways that make a noticeable difference in your results. If you want more specific, step-by-step guidance, check mattk com bird photography tips for additional perch, focus, and exposure ideas.
FAQ
How do I choose between a natural dead branch and an artificial perch (like a dowel or plastic)?
For perched songbirds, prioritize natural texture and irregular shape, even if it takes more effort to find. Artificial perches often look too smooth or too uniform at telephoto distance, and some are slightly too slippery when wet, causing quick departures. If you must use one, roughen or texture the landing surface and position it where you can still control background and sun angle.
What’s the best height for a perch if I’m trying to photograph birds without them looking awkward?
A good starting point is eye level for the species you’re targeting. If the bird uses a low branch, shoot from ground level rather than standing over it, because a steep top-down angle makes small birds look squashed. If the perch is high, elevate yourself if possible or use composition to avoid an excessive upward tilt that exaggerates body proportions.
Should I use the same perch distance for all birds, or adjust per species?
Adjust. The 15 to 30 foot guideline is a baseline, but smaller birds usually benefit from slightly closer placement so feather detail can survive heat shimmer and autofocus limitations. Larger birds often tolerate more distance because their eye and head fill more of the frame, but you still want the background far enough away to avoid distracting shapes.
Can I place the perch near a feeder if I’m trying to keep the background clean?
Yes, but plan for two things. First, keep the feeder area tidy so you do not get damp seed scatter or clutter that creates textured bokeh. Second, treat the feeder as part of your background plan, if it produces bright points, stems, or spokes, reposition your camera or perch so those lines fall out of frame.
How do I handle focus when the bird’s eye is hidden by the bird’s head angle or posture?
Use a single focus point on the head position you expect the eye to be in during the next moment, then be ready to re-aim the focus point as the bird turns. If your camera misses repeatedly because the eye keeps disappearing behind feathers, reduce burst length, shoot fewer frames, and prioritize steadier aim over chasing every twitch.
Is it okay to shoot with a very wide aperture, or should I stop down for more depth of field?
In most perched-bird scenarios, keep the bird’s eye sharp using your widest practical aperture, then accept slightly softer feathers away from the eye. Stop down only if the perch situation forces your focus point to land slightly off the eye or if the bird moves closer to and farther from the perch within your depth-of-field range. Rechecking eye sharpness on playback matters more than a rule about aperture.
What should I do if my background has branches or fences, even when I shift a few feet?
Try changing the shooting position angle, not just side-to-side movement. Walk your camera left or right by more than one step, then adjust up or down slightly (even a foot). If you still cannot hide linear elements, place a large dark fabric panel behind the perch and ensure it stays out of the bird’s landing area, so it reads as a smooth backdrop.
How can I tell if my perch wobble will ruin images before I set up properly?
Perform a finger test at the exact landing spot with the same pressure you expect a bird to use. If you see noticeable rocking, the bird will likely trigger motion blur when it commits to the landing. Fix by bracing, adding a second contact point, using a thicker branch, or driving a deeper stake for ground mounts (especially in soft soil).
What’s the safest way to brace or secure a perch without making it uncomfortable for birds?
Secure the structure, not the bird’s body. Use clamps on stable parts, wire bracing that does not touch the landing surface, and ties that do not create hard edges near where feet will land. Also check repeatedly after wind gusts or temperature changes, because clamped mounts can loosen over time.
How do I prevent disease risk if I’m using the same perch spot repeatedly?
Clean the landing surface and nearby debris. If the perch is near a feeder or bird bath, sweep up damp seed and hulls regularly, because they can collect microbial growth. Consider rotating between a couple of perch locations so the area dries out and you are not constantly exposing the same surface to moisture and droppings.
Should I use burst mode for perched birds, or will it just waste shots?
Burst mode is useful when birds are actively settling, preening, or twitching frequently, but use it with a purpose. Pre-focus and keep your eye on the viewfinder, then start short bursts after the bird is settled for a second or two. Long uncontrolled bursts increase the chance of shooting when the bird is starting to leave.
What’s a practical plan when a new perch setup doesn’t get birds right away?
Treat it like a staged trial. Give the setup a few days, ideally with consistent timing during peak bird activity, and keep a nearby food or water incentive within a few feet. In the meantime, check the background and perch stability daily, because birds may avoid the spot for safety reasons even if food is available.
Next Article
Mattk.com Bird Photography Tips: Beginner Do This Today Guide
Beginner do-this-today bird photo workflow: gear, camera settings, tracking, composition, fieldcraft, and simple edits.