The safest and most practical way to pluck bird feathers today is to collect only naturally shed (molted) feathers, or if handling a live bird, to remove only fully 'ripe' feathers using a gentle brushing motion with no force, no bleeding, and no skin damage. Forcing out feathers that aren't ready causes pain, injury, and real legal risk depending on the bird species you're dealing with. Get the ethics and legality sorted first, then the hands-on technique becomes much easier.
How to Pluck Bird Feathers Safely: Step-by-Step Guide

Marcus Hendricks
24 Apr 2026
Before you pluck: ethics, legality, and your safest options
This is the part most guides skip, and it's the part that can actually get you in trouble. In the United States, the Migratory Bird Treaty Act (16 U. S. C.
§703) makes it illegal to take or possess feathers from native migratory bird species without a permit. That includes feathers you find on the ground. The U. S.
Fish & Wildlife Service is explicit: MBTA protection covers all feathers regardless of how they were obtained. A felony violation can mean a fine of up to $2,000 and up to two years in jail. Bald and golden eagle feathers have a separate layer of protection under federal regulations at 50 CFR Part 22, and those rules are even stricter. Bottom line: if you're in the U.
S. and you pick up a feather from a wild native bird, you could technically be breaking the law.
So what's actually allowed? Feathers from non-native, non-protected birds are generally fine. That includes domesticated birds like chickens, turkeys, geese, and ducks raised on farms. It also includes feathers from captive pet birds like parrots, cockatiels, and budgies. If you're collecting shed feathers from your own pet bird or a friend's backyard flock, you're in the clear. If you're eyeing feathers from a wild crow, hawk, or songbird in your yard, put them back and walk away.
For anyone working with a live bird, the welfare framing matters too. The European Food Safety Authority's research on live feather collection is clear: you should only collect feathers that are 'ripe,' meaning fully ready to shed, using a brushing or combing motion with minimal force. If any feather causes bleeding or skin damage when you try to remove it, it is not ready and you should stop. This applies whether you're working with pet birds, farm poultry, or any captive bird. And if your pet bird is plucking its own feathers excessively, that's a sign of stress or illness, not an invitation to help along the process. Contact a vet in that situation.
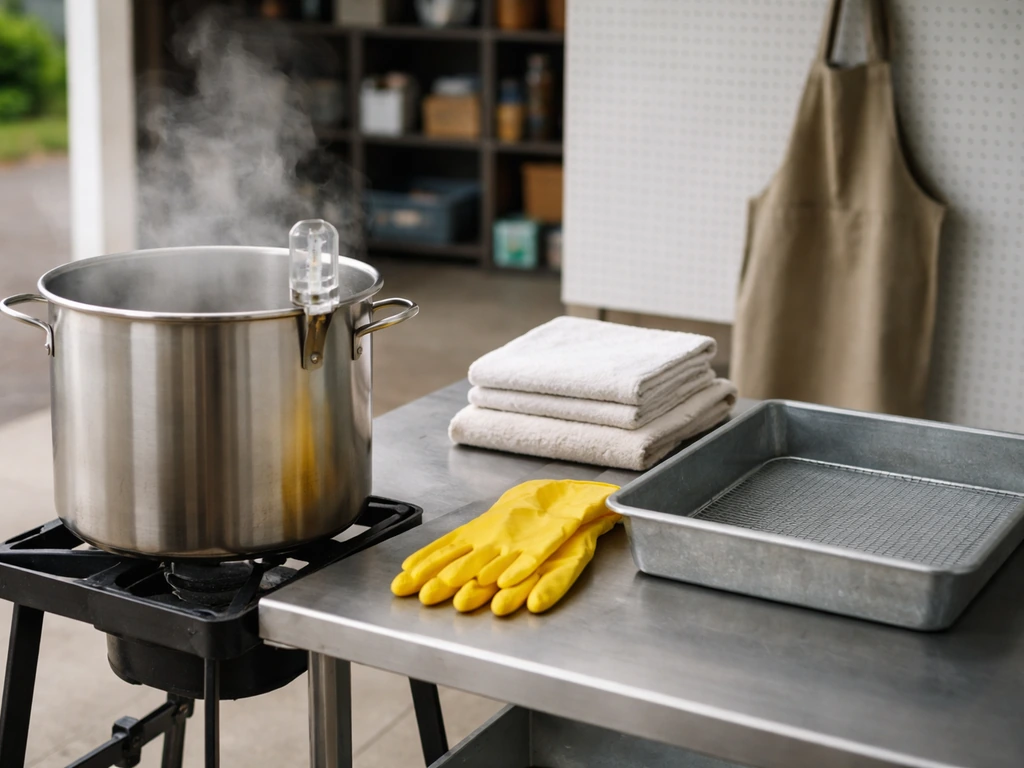
Supplies and setup for feather removal
You don't need a lot of gear, but the right setup makes a big difference. Working clean and organized from the start saves you a lot of headaches later, especially if you're planning to use the feathers for crafts or hobby projects.
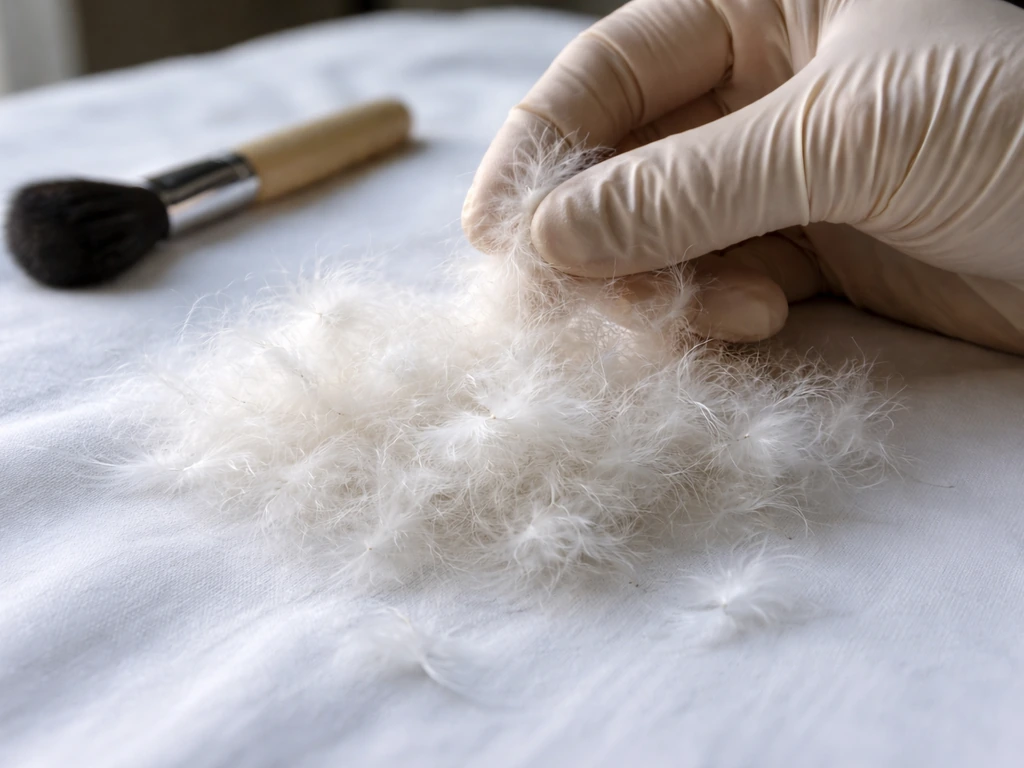
- Latex or nitrile gloves: Always wear them. Feathers can carry bacteria, mites, and other pathogens. Texas A&M's veterinary diagnostic lab recommends gloves as standard practice when handling feathers.
- A fine-toothed comb or soft brush: For working through feathers on a live bird to find ripe ones. Not for forcing anything out.
- Clean tweezers or hemostats: Useful for gripping individual feathers cleanly during removal, especially pin feathers or tail feathers.
- Styptic powder or cornstarch: Keep this on hand as a precaution. If a blood feather breaks, you'll need it immediately.
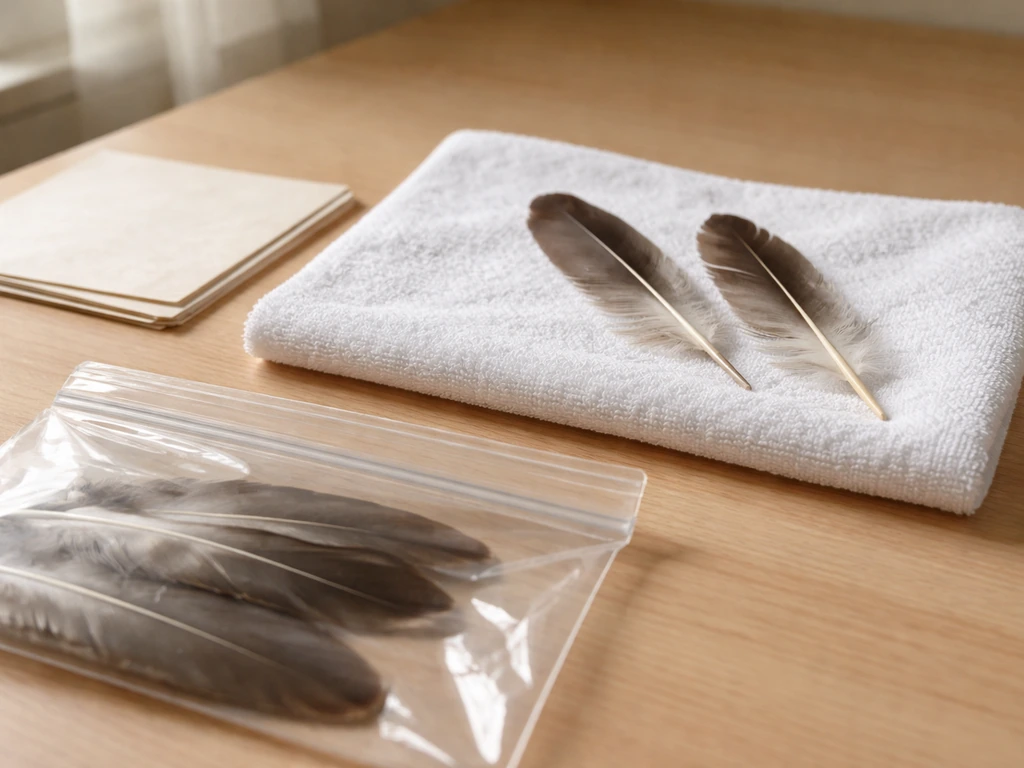
- Paper bags or labeled zip-lock bags: For sorting feathers by type or area as you collect them.
- A clean, flat surface: A cutting board or sheet of butcher paper works well. Makes cleanup easier and keeps feathers from blowing around.
- Good lighting: You need to see what you're doing, especially when checking for blood feathers.
Set up in a space with low airflow so feathers don't scatter. If you're working with a live bird, make sure it's calm and comfortable before you start. A stressed bird moves around, and that's when accidents happen. I learned this the hard way trying to collect a few loose pin feathers from my cockatiel while he was grumpy after a bath. Not worth it. Wait until the bird is relaxed.
Step-by-step plucking technique by feather area
Feathers aren't all the same, and neither is the technique for removing them. Body feathers, wing feathers, and tail feathers each behave differently. Here's how to approach each area.
Body and contour feathers
These are the small to medium feathers covering the torso and neck. They're typically the easiest to collect when molting because they loosen quickly and come free with very little effort. Run a soft comb or brush through the feathers gently. Ripe ones will either fall out on their own or release with the lightest tug. If you need to grip one with tweezers, grasp it as close to the base as possible and pull in the direction of feather growth (outward and slightly away from the body). For a complete walkthrough, follow the step-by-step feather-by-feather technique in the main section. Never pull against the grain. If you feel resistance, stop.
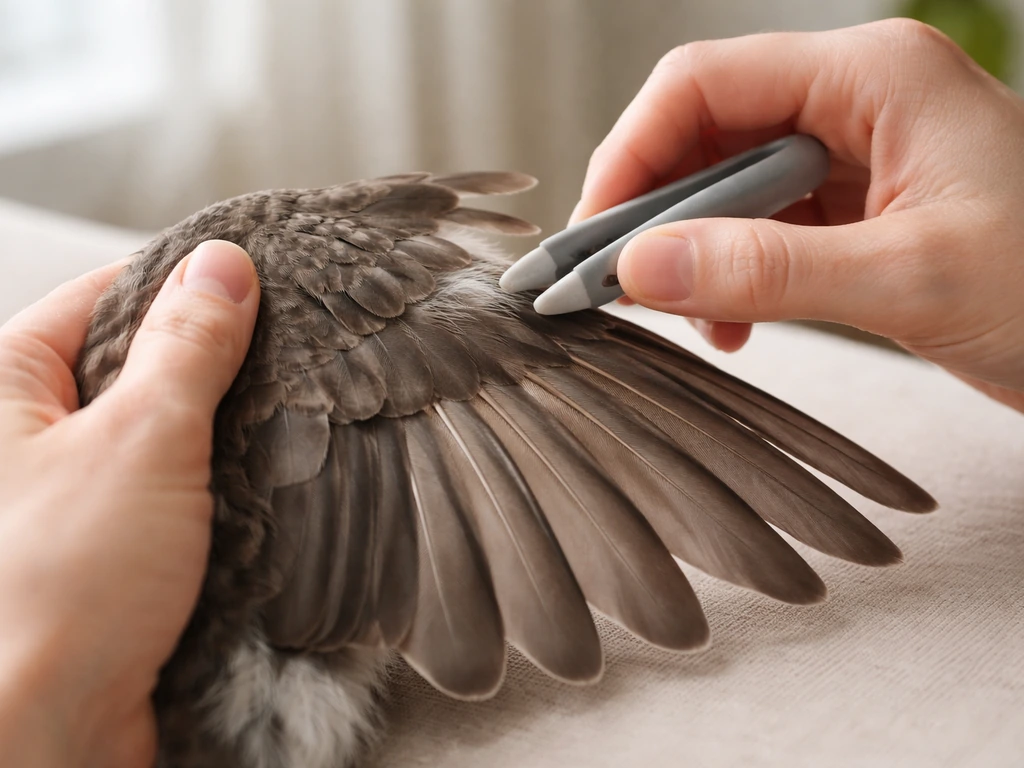
Wing feathers (flight feathers and coverts)
Wing feathers are larger and more firmly anchored. Primary and secondary flight feathers (the long ones along the wing edge) have deep follicles and should never be forced out unless they are clearly ripe or already broken. To check if a wing feather is ready, hold the base of the quill between your thumb and index finger and give the gentlest possible outward tug. A ripe feather will release smoothly. A feather that's still growing or firmly set will resist, and forcing it risks breaking the follicle or causing a blood feather injury. Covert feathers (the smaller ones overlapping the flight feathers) follow the same rule. Work slowly, one feather at a time.
Tail feathers (rectrices)

Tail feathers are often the most visible and the most desirable for crafts. They're also anchored quite firmly even when ripe. Grip the base of the quill with tweezers or hemostats as close to the skin as possible. Pull in a smooth, steady motion directly outward along the feather's natural axis. Don't wiggle or twist. For larger birds like chickens or turkeys, you may need a firmer grip, but the principle is the same: one clean pull in the direction of growth, no jerking. If a tail feather has a dark or translucent quill base, it may still be a blood feather (still growing). Leave it alone.
Down feathers
Down feathers are the soft, fluffy underlayer feathers. They're loosely attached and usually release very easily during molting. A light stroke with your gloved hand or a soft brush is often all it takes. These are great for craft projects and pose the least risk of injury when collected from a molting bird.
How to avoid damage, bleeding, and feather breakage
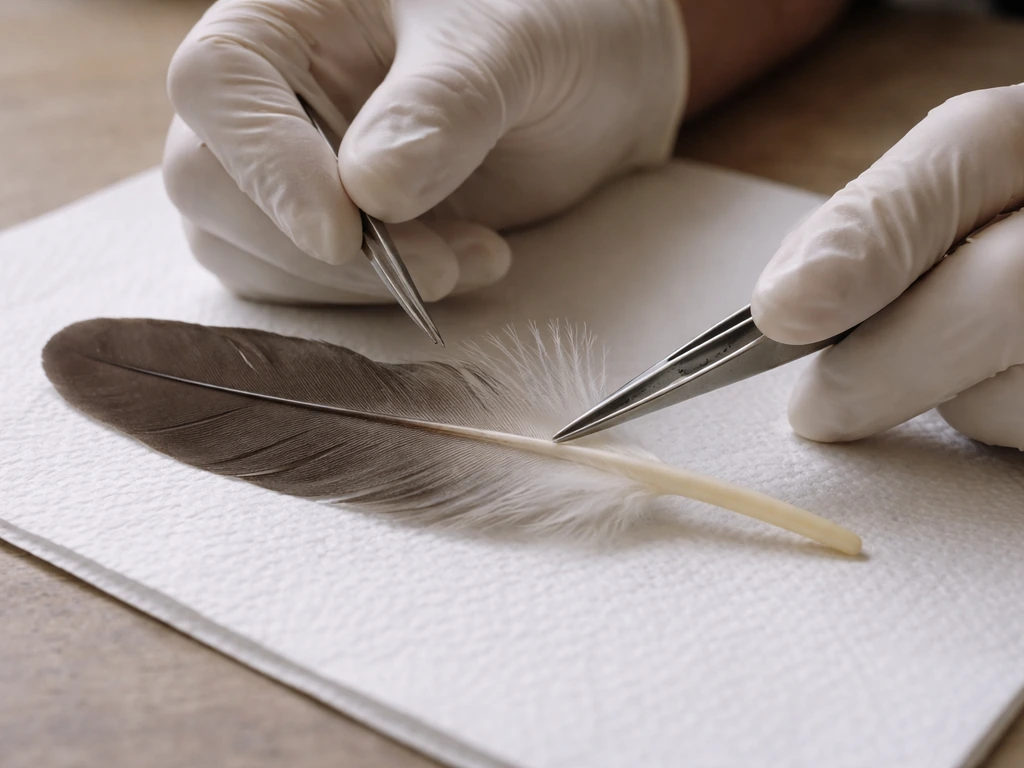
The biggest risk during feather removal is hitting a blood feather. Blood feathers (also called pin feathers or blood quills) are feathers that are still actively growing. They have a live blood supply running through the quill, which means if you break or pull one out incorrectly, it bleeds. You can identify them by their darker, sometimes translucent quill base and a slightly waxy or sheathed tip.
If you’re trying to figure out how to find bird feathers in the first place, start by learning where molting birds and naturally shed feathers show up most often identify them. If you want a smoother process, follow the same basics for how to collect bird feathers while avoiding blood feathers and bleeding.
If you accidentally break a blood feather and it starts bleeding, you have two choices. If the broken feather is still partially in the follicle and bleeding, it needs to come out in one swift, clean motion (gripping at the base with hemostats and pulling straight out) to allow the follicle to close and stop the bleeding. Then apply styptic powder or cornstarch with gentle pressure. If bleeding doesn't stop within a few minutes, get the bird to a vet. This is not a 'wait and see' situation.
To avoid this scenario in the first place: always check visually before you grip anything. Run your fingers through the feathers gently first to feel for any hard, waxy-sheathed quills. Skip anything that doesn't feel fully developed. It's also worth knowing that the EFSA's welfare research uses bloody feathers and skin injuries as direct indicators that the collection attempt has gone wrong. If you see blood, you've gone too far. Stop, treat the area, and don't go back to that spot.
- Always pull in the direction of feather growth, never against it.
- Grip as close to the base of the quill as possible, not the tip or middle.
- One feather at a time. Don't grab bunches.
- Check for blood quill indicators (dark, sheathed, or waxy base) before gripping.
- Keep styptic powder within reach before you start.
- If the bird vocalizes in distress, changes posture dramatically, or droops its wings, stop immediately.
Troubleshooting: stuck feathers and dealing with molting
Sometimes a feather looks loose but won't budge. This is actually the most common frustration for beginners. The temptation is to pull harder. Resist it. A feather that won't release cleanly with minimal force is not ready. It may look dull or slightly loose, but if the follicle still has a hold, forcing it causes unnecessary trauma to the bird and risks a broken blood feather even if the quill looks mature.
If you're working with a molting bird and the shed feathers aren't collecting as fast as you'd like, the best approach is patience. Molting is a natural cycle, and feathers that are truly ripe will come free on their own or with the lightest touch. You can encourage collection by gently brushing the bird daily and collecting whatever releases naturally. Don't rush the molt. Some birds molt gradually over weeks; others drop feathers faster. Each bird is different.
One more thing worth calling out: molting and feather-plucking disorder look similar to untrained eyes, but they're completely different. Natural molting is healthy and cyclic. Feather-destructive behavior (where a bird compulsively over-preens or pulls its own feathers) is a sign of stress, boredom, illness, or nutritional deficiency. The Merck Veterinary Manual notes that feather-destructive behavior can range from mild overpreening to outright self-mutilation. If your bird is losing feathers in patches outside of a normal molting pattern, or seems to be pulling its own feathers out, consult an avian vet rather than trying to collect those feathers. They need help, not harvesting.
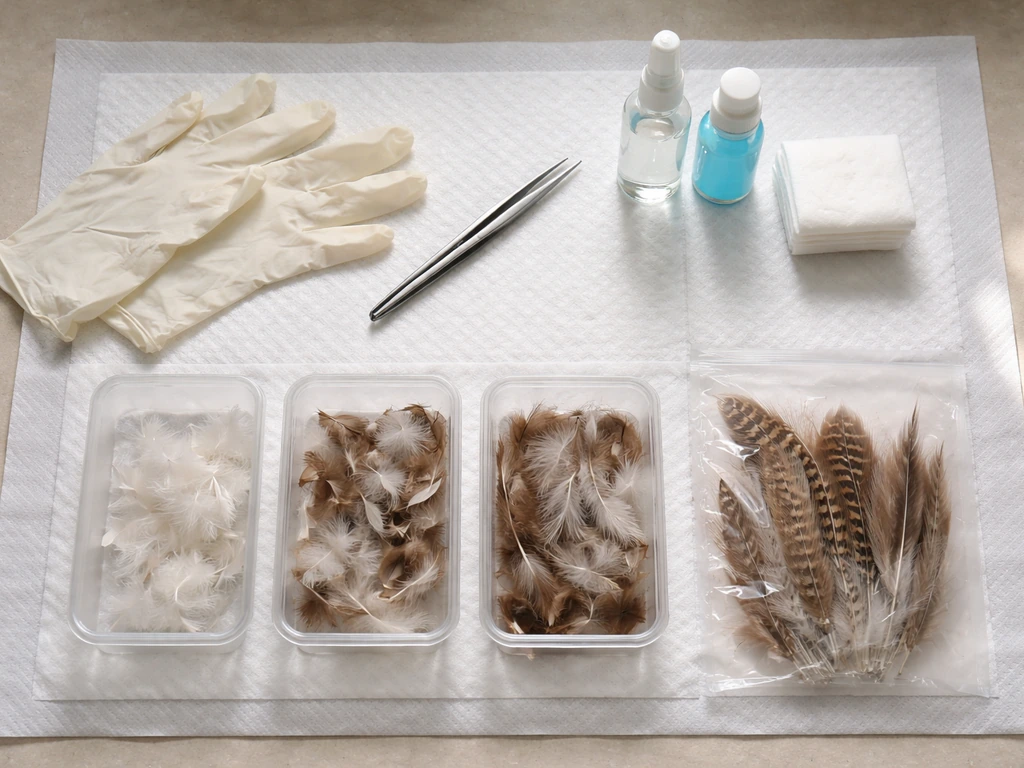
Cleaning, sorting, and storing feathers for crafts or hobbies
Once you've collected your feathers, don't just toss them in a drawer. Raw feathers can carry bacteria, mites, and other contaminants, and they'll degrade quickly if stored improperly. A few simple steps will keep them clean, pest-free, and in great condition for costumes, craft projects, fly tying, or display.
Cleaning your feathers
- Inspect each feather before cleaning. Discard any with obvious damage, mold, or parasites.
- Soak feathers in a 50/50 mixture of isopropyl alcohol and hydrogen peroxide for about 30 minutes. This disinfects without destroying the feather structure.
- Rinse thoroughly with clean water, then gently work a small amount of mild dish soap through the quill and barbs with your fingers.
- Rinse again until the water runs clear.
- Lay feathers flat on a clean towel or hang them to air dry completely. Do not use heat. A fan set on low can speed up drying without damage.
- Once dry, you can gently reshape barbs by running your fingers along them in the direction of growth, mimicking the bird's own preening.
One thing to avoid: bleach. It weakens the keratin structure of feathers and causes brittleness and color loss. Stick with the alcohol and hydrogen peroxide method, or an accelerated hydrogen peroxide (AHP) based disinfectant if you need something stronger. Gentle is always better.
Sorting your collection
Sort feathers by type, size, and source bird as you go. Label your storage bags or envelopes clearly. For a craft or hobby collection, basic categories work well: body feathers, wing feathers, tail feathers, and down. If you're building a reference collection (which pairs nicely with identifying bird feathers or learning to find and collect feathers in the field), keeping notes on when and where each feather was collected adds real value over time.
Storing feathers long-term
Moisture is the enemy of feather storage. It encourages mold, attracts pests, and accelerates decomposition. Store cleaned, fully dried feathers in airtight containers or sealed archival envelopes. Add a packet of silica gel desiccant to each container to buffer humidity. Silica gel adsorbs water vapor from the air inside the container and keeps the environment stable. Humidity-indicating cards (the kind that change color when humidity rises) are a handy low-cost way to monitor conditions inside your storage containers.
For display or long-term preservation of standout feathers, consider a sealed case with UV-protective acrylic and acid-neutral mounting materials. This museum-style approach protects against UV fading, dust, and pest access. Feathers stored this way can last for years without significant degradation. Keep storage away from direct sunlight, heat sources, and areas with fluctuating humidity like basements or attics.
| Storage Method | Best For | Key Benefit | Watch Out For |
|---|---|---|---|
| Sealed zip-lock bag with silica gel | Short to medium-term craft storage | Easy, cheap, portable | Check silica gel regularly and replace when saturated |
| Archival envelope in a lidded box | Sorted reference or hobby collections | Keeps feathers flat and organized | Still needs silica gel and cool, dry location |
| Airtight container with humidity card | Larger collections or long-term storage | Humidity monitoring built in | Containers must be fully airtight to be effective |
| Sealed display case with UV acrylic | Showcase feathers or museum-quality preservation | Best protection from light, dust, and pests | Higher cost; not practical for bulk storage |
Getting your storage system right from the beginning saves you from opening a box six months later to find mold or beetle damage. It takes maybe ten extra minutes per batch, and it's absolutely worth it. Once your feathers are clean, sorted, and safely stored, you've got a collection that's genuinely useful for projects and stays in good shape for the long run.
FAQ
Can I pluck feathers if the bird seems calm but the feather won’t come out easily?
No. If a feather resists, it is not ripe enough, even when the bird appears relaxed. Stop and try a different area later, because forcing increases the chance of a broken blood feather and skin damage.
What should I do with feathers I find on the ground if I am not sure where they came from?
Treat them as “potentially protected” if you are in the U.S. because the protection applies regardless of how you obtained the feather. If it’s a native migratory bird and you cannot confirm it is from a non-protected source, do not collect it.
How can I tell the difference between normal molting feathers and feathers from a bird with illness or stress?
Look for pattern and condition. Normal molting is usually gradual and cyclic, with feathers that are actually ready to shed. If there are bald patches, skin irritation, or repeatedly broken feathers, assume a medical or stress issue and contact an avian vet instead of harvesting.
Is it safe to pluck feathers to help a bird “get it over with” faster?
Generally no. Feather removal should never be used to speed up a molt. The correct approach is only to remove what is fully ripe, with minimal force, and to pause if there is any bleeding or skin trauma.
Can I collect feathers right after a bath or after handling the bird?
Wait until the bird is calm and stable. Immediately after a bath, many birds shake, fluff, or become grumpy, which increases movement and accident risk. Plan feather collection for a calm window, not during or right after agitation.
What is the safest tool choice for beginners to pluck bird feathers?
Start with a soft comb or brush for body and down feathers. Use tweezers or hemostats only when you can clearly see the quill base and the feather releases with minimal outward motion, gripping as close to the skin as possible to avoid tugging the follicle.
If my goal is crafts, should I disinfect feathers before storage or only after?
Disinfecting before long-term storage is helpful because it reduces mites and bacterial contamination while the feathers are still clean and easy to dry. Make sure the feathers are completely dry afterward, because moisture is what drives mold and odor problems.
How do I prevent birds from plucking themselves more if I accidentally trigger stress during feather removal?
Stop immediately if the bird shows discomfort or escalates behavior. Avoid repeated sessions on the same day, and focus only on naturally ripe feathers. If plucking continues outside the normal molt cycle, address the underlying cause with an avian vet.
What should I do if I break a feather that might be a blood feather but it is not actively bleeding yet?
Assume it can start bleeding. Apply styptic powder or cornstarch after the follicle is managed safely, and monitor for bleeding for several minutes. If it does not stop quickly, get veterinary help rather than continuing attempts to remove nearby feathers.
Are there times of year or situations when feather collection should be avoided?
Yes. Avoid collecting from wild birds when you cannot identify whether they are molting, and avoid harvesting from captive birds during illness, after surgery, or during heavy stress. If the bird’s skin is irritated or inflamed, do not pluck nearby feathers, because even “ripe” ones can be part of a problem.
Next Article
How to Pluck a Bird Safely: Tools, Steps, and Cleanup
Safe, legal step-by-step guide to pluck a bird with proper tools, humane order, skin care, cleanup, and storage.