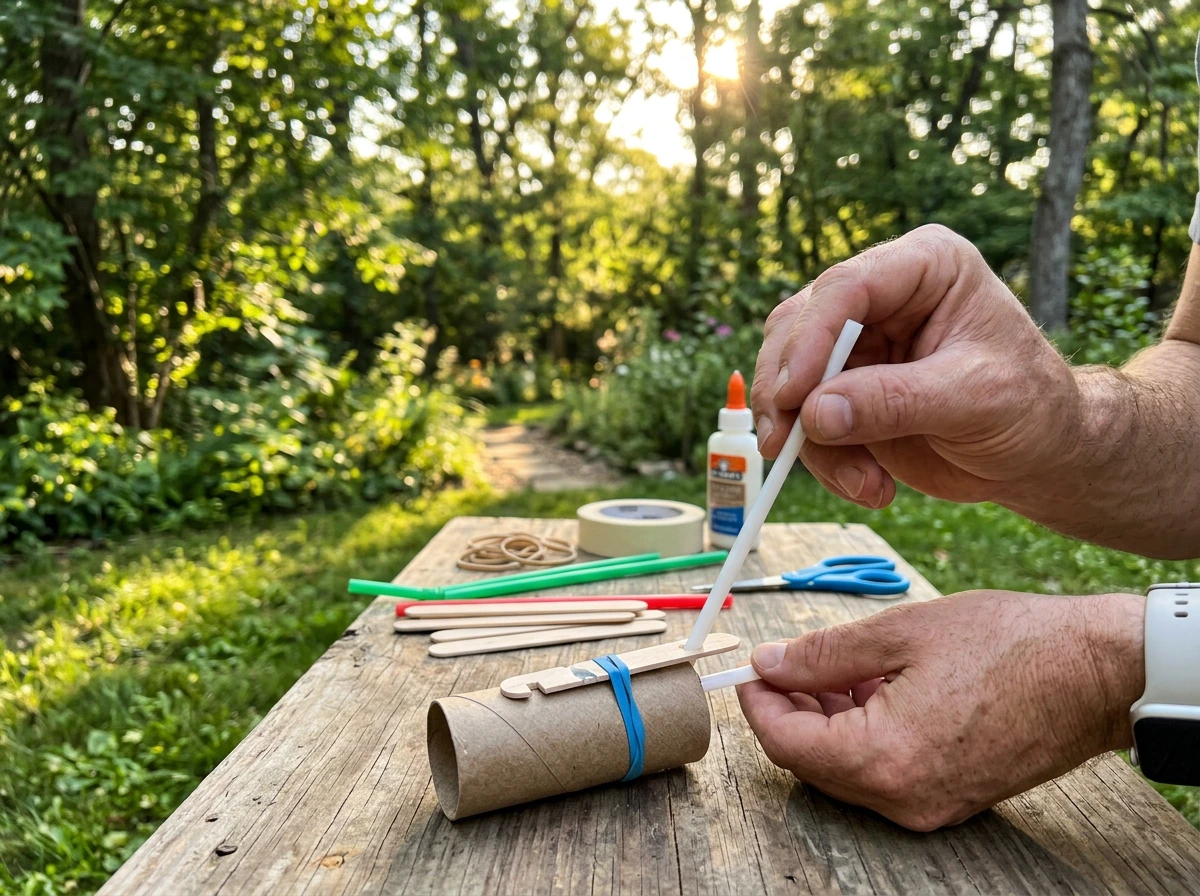
You can make a working bird caller at home today using materials you almost certainly already have, cardboard, a straw, a rubber band, or even a plastic bottle. The build takes anywhere from 10 minutes to about an hour depending on the method you choose, and none of them require special woodworking skills or expensive tools. This guide walks you through three distinct DIY methods, from a simple whistle-style build to a reed-style caller to a kazoo-inspired sound imitation device, so you can pick the one that matches the bird sound you're going for.
How to Make a Bird Caller: DIY Homemade Call Guide

Marcus Hendricks
23 Mar 2026
What a DIY bird caller is for and what to choose
A bird caller is any device that produces a sound meant to imitate or attract birds. In a birding or naturalist context, people use them to draw birds closer for observation, to practice identifying calls by ear, or simply to understand how bird sounds work. Homemade bird callers are excellent learning tools because building one forces you to think about pitch, resonance, and airflow in a hands-on way that no app can replicate.
There are three basic types of DIY bird callers worth knowing about. First, whistle-style callers, which produce sound using a fipple (a shaped mouthpiece that directs air against a sharp edge). Second, reed or squeeze-style callers, which produce sound when air forces a thin strip of material to vibrate. Third, sound imitation callers, which use a vibrating membrane (similar to a kazoo) and your own voice or breath to shape the tone. The type you build should match the bird sound you're trying to replicate.
| Caller type | Best for | Difficulty | Main materials |
|---|---|---|---|
| Whistle-style | Clear, single-tone calls like a peewee or simple songbird note | Beginner | Straw, cardboard tube, tape |
| Reed/squeeze-style | Duck-like, honking, or raspy calls | Beginner-intermediate | Rubber band, craft sticks, cardboard |
| Sound imitation (kazoo-style) | Warbles, complex tones, mimicry practice | Easiest | Cardboard tube, wax paper, rubber band |
If you're just starting out and want something that works fast, go straight to Method 2 (the reed/rubber-band build) or Method 3 (the kazoo-style). If you want to understand whistle acoustics and are happy to spend a bit more time tuning, Method 1 is incredibly satisfying once it clicks.
Materials and tools for a homemade bird call
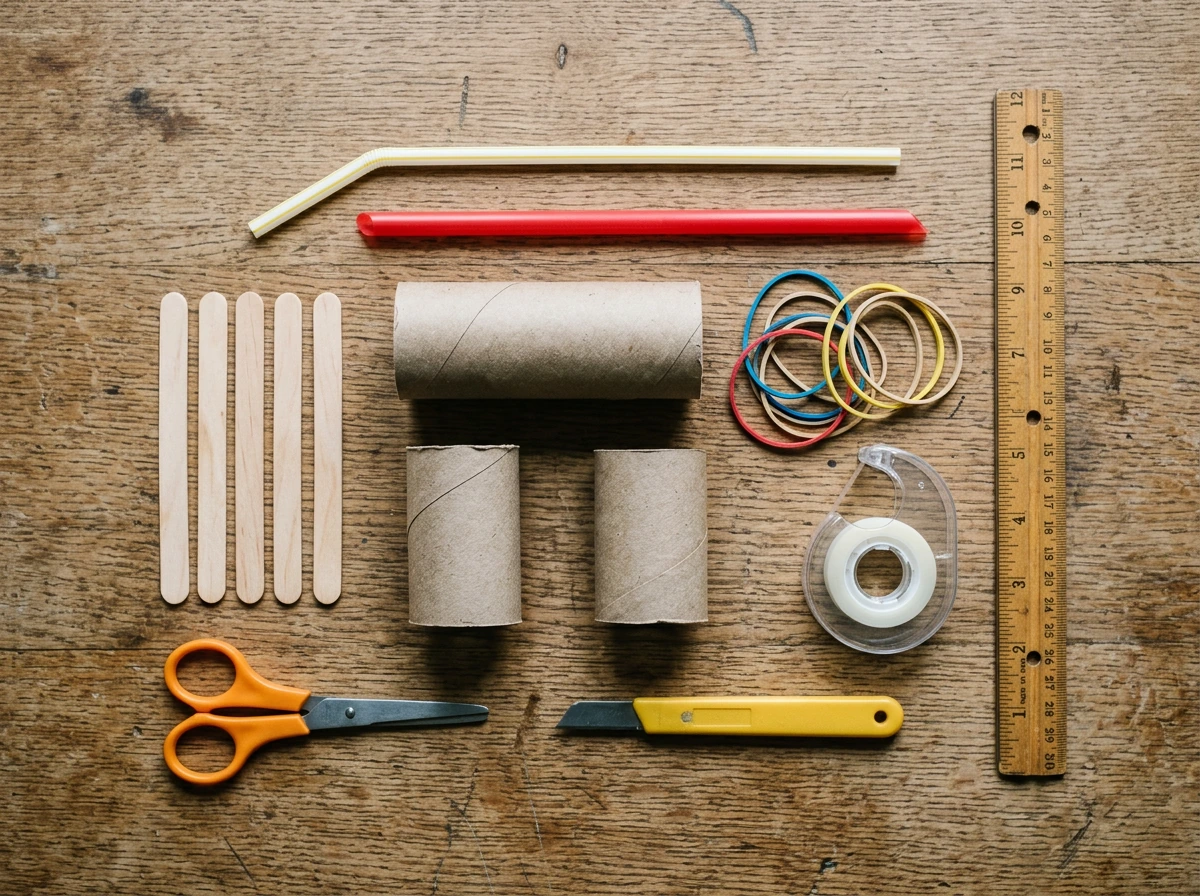
Before you pick a method, gather everything first. Nothing kills momentum like stopping mid-build to hunt for tape. Here's what covers all three methods:
- Cardboard or cardstock (a cereal box works perfectly)
- Plastic straws (regular or jumbo, not flexible/bendy ones for Method 1)
- Rubber bands (a few different thicknesses if possible)
- Craft sticks (popsicle sticks) or thin wooden stirrers
- Wax paper or tissue paper (for the membrane in Method 3)
- Clear tape and/or electrical tape
- Scissors (adult supervision for younger builders)
- A ruler and pencil
- A toothpick or skewer (for poking/shaping the fipple in Method 1)
- Optional: a craft knife for cleaner cuts in Method 1 (adults only)
A quick safety note before you start. If you're using scissors or a craft knife, cut away from your fingers and use a cutting mat or a thick magazine underneath. For younger builders, a grown-up should handle any blade work. Keep small parts (rubber bands, straw pieces) away from very young children. Finally, don't blow into any caller at full lung capacity right next to someone's ear as even a small homemade whistle can be surprisingly loud.
Build method 1: simple whistle-style bird call
A whistle produces sound when a directed air stream hits a sharp edge (called the labium or fipple edge), splitting the air and causing it to oscillate. The length of the air column inside the tube determines the pitch. Longer tube equals lower pitch, shorter tube equals higher pitch. This is the core acoustic principle behind everything from a tin whistle to a referee's whistle, and it applies directly here.
- Cut a piece of cardboard about 15 cm long and 6 cm wide. Roll it tightly into a tube roughly 1.5 cm in diameter and tape it firmly so there are no gaps. This is your resonating body.
- Cut a regular plastic straw to about 8 cm. Flatten one end completely (pinch it hard with your fingers or press it under a ruler for 30 seconds).
- Cut a small notch, about 5 mm wide and 3 mm deep, into the top side of the straw about 2 cm from the flattened end. This notch is your fipple, the sharp edge that generates the tone.
- Insert the uncut end of the straw into one end of the cardboard tube so that about 1 cm of straw protrudes from the other end. Seal the straw-to-tube joint tightly with tape so air can only exit through the fipple notch.
- Blow gently and steadily into the flattened end of the straw. Aim the air toward the notch. You should hear a tone. If not, adjust the straw slightly so the notch is facing upward and the air stream hits the edge of the cut cleanly.
- To raise the pitch, shorten the tube by trimming a small amount from the open end. To lower the pitch, add a short section of tube. Adjust in 5 mm increments and test after each change.
The geometry of the notch matters more than anything else in this build. I learned this the hard way by making the notch too wide on my first attempt, which produced a breathy hiss instead of a clear tone. Aim for a clean, sharp-edged cut, almost like a tiny window with neat corners. A craft knife gives a much cleaner edge than scissors. The air stream needs to hit that edge at roughly a 45-degree angle to split and oscillate consistently.
Build method 2: reed/rubber/squeeze-style bird caller (easy DIY)
Reed-style callers produce sound by forcing air over a thin, flexible strip (the reed) so it vibrates rapidly. This is how duck calls work commercially, where a shorter reed vibrates more quickly and produces a higher pitch, and reed thickness and tension control the tone quality. The rubber-band version of this is forgiving, fast to build, and genuinely fun to tune.
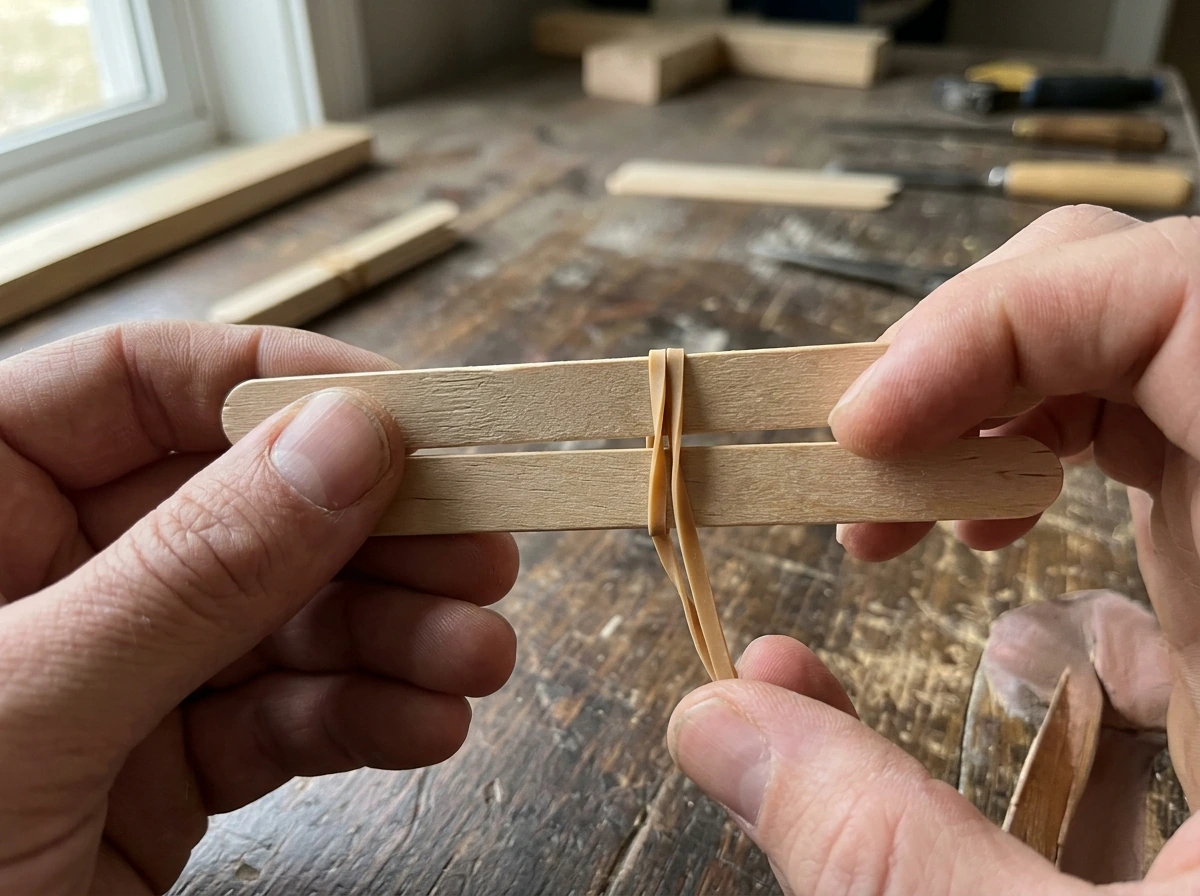
- Take two craft sticks (popsicle sticks) and cut a rubber band so it forms a single long strip rather than a loop.
- Lay the rubber band strip along the length of one craft stick. Wrap a small piece of tape around each end of the stick to hold the rubber band in place, keeping the band centered and flat along the stick's surface.
- Place a small folded piece of cardstock (about 5 mm wide) under each end of the rubber band, between the band and the stick, like a tiny bridge. These spacers lift the rubber band slightly so air can flow underneath it.
- Press the second craft stick on top of the first, sandwiching the rubber band and the spacers between them. Wrap tape around both ends to hold the sandwich together firmly.
- Hold the caller near (but not touching) your lips and blow a steady stream of air into the gap between the two sticks, where the rubber band sits. The band should vibrate and produce a buzzing, reedy tone.
- To raise the pitch, tighten the rubber band by pulling it slightly before taping it down, or reduce the spacer height. To lower the pitch, use a thicker rubber band or increase spacer height to give the band more room to vibrate more slowly.
This is the most beginner-friendly build in this guide. The rubber band tension directly controls pitch because a tighter band vibrates more quickly, producing a higher frequency sound. You can experiment endlessly just by swapping rubber bands of different thicknesses. Thinner bands tend toward higher, buzzier tones. Thicker bands give a lower, more resonant honk. If you want to practice duck-like calls or any raspy bird sound, this is your best starting point.
Build method 3: 'sound imitation' caller using household parts
This method is essentially a homemade kazoo, and it works by a different principle than the first two. Instead of shaping air directly, it uses a thin membrane that vibrates in response to your voice or humming. That vibration adds harmonics to your input sound, changing its character to something much more bird-like. You can even try making bird sounds with your mouth and hands by combining simple humming or whistling with natural hand movements to shape airflow and pitch how to make bird sounds with your mouth and hands. It's the easiest build for producing complex, warbling tones that are closer to songbird calls than a plain whistle.
- Roll a piece of cardboard into a tube about 2 cm in diameter and 10 cm long. Tape it firmly so it holds its shape.
- Cut a circle of wax paper or tissue paper slightly larger than the diameter of the tube, about 3 cm across.
- Place the wax paper circle over one end of the tube and secure it with a rubber band so it covers the opening completely but is not stretched tight. The membrane should be just slightly loose, almost like a drumhead with a little give.
- On the side of the tube, about 2 cm from the membrane end, use a pencil or skewer to poke a small hole, about 5 mm wide.
- Place your lips over the open end of the tube (not the membrane end) and hum or say 'doo' steadily into it. The wax paper should buzz and vibrate.
- To change pitch, simply change the pitch of your humming. To change the tone character (making it buzzier or more mellow), try tightening or loosening the rubber band holding the membrane, which changes how freely it vibrates.
The wax paper membrane works better than tissue paper for durability, but tissue gives a softer, airier tone that can actually sound remarkably close to certain warbler sounds when you hum at the right pitch. The small hole on the side of the tube is important because it provides a pressure release point and helps the membrane vibrate more freely. Without it, the membrane tends to just muffle the sound rather than resonate. If you're interested in learning specific calls by ear and want to practice matching them, this tool is especially useful since you control the pitch directly with your voice.
Tuning, testing, and troubleshooting pitch and volume

Building the caller is only half the job. Getting it to actually sound like a bird requires some tuning, and that part takes patience. The good news is that almost every problem with a homemade bird caller has a straightforward fix once you know what to listen for.
Matching your caller to a target bird sound
The most reliable way to tune your caller is to play a reference recording of your target bird and compare. Free apps like Merlin (from Cornell Lab) let you listen to specific bird calls on demand, and BirdNET can even show you a spectrogram, a visual graph of the sound's pitch and pattern over time. Pull up the recording, blow or hum into your caller, and listen for where the tones diverge. Is your caller too high? Too low? Too buzzy or too clean? That gives you a specific direction to adjust.
Pitch adjustments by method
| Method | To raise pitch | To lower pitch |
|---|---|---|
| Whistle-style (Method 1) | Shorten the cardboard tube (trim from the open end) | Lengthen the tube or add a short extension |
| Reed/rubber-band (Method 2) | Increase rubber band tension or use a thinner band | Use a thicker band or reduce tension |
| Kazoo-style (Method 3) | Hum at a higher pitch; tighten the membrane slightly | Hum lower; loosen the membrane rubber band |
Common problems and fixes
- No sound from the whistle: Check that the fipple notch is clean and sharp-edged. Make sure the straw-to-tube seal has no air leaks. Verify that about 1 cm of straw protrudes from the tube end, not more, not less.
- Breathy or weak whistle tone: The notch is probably too wide or the edge is not sharp enough. Re-cut with scissors or a craft knife for a cleaner edge. Also check that you're blowing steadily and not puffing in bursts.
- Reed caller produces no vibration: The rubber band may be too loose or the spacers too tall, giving so much room that the air stream misses the band. Reduce spacer height by 1-2 mm and test again.
- Reed caller sounds too thin or shrill: Try a thicker rubber band. If you only have one size, double-layer two bands side by side.
- Kazoo membrane produces a muffled thud instead of buzzing: The wax paper is too tight. Loosen the rubber band slightly so the membrane can vibrate freely. Also make sure the side hole is not blocked.
- Volume is too low across any method: Blow more steadily and with more consistent pressure. Uneven breath pressure is the most common culprit. For the kazoo method, project your hum rather than whispering into it.
One general rule across all three builds: test outdoors or in a quiet room so you can actually hear the nuances. Testing against background TV noise makes it nearly impossible to compare your caller to a reference recording. Give yourself good listening conditions and the tuning process becomes much faster.
Responsible practice and next steps for using your bird caller
This is the section that most DIY guides skip, and it matters more than any of the build steps. Using a bird caller irresponsibly can genuinely stress birds, disrupt breeding behavior, and damage the hobby's reputation with other birders and with wildlife managers. So here's the honest picture.
The American Birding Association's Code of Birding Ethics specifically asks birders to limit the use of audio methods to attract birds, and to avoid using them entirely in heavily birded areas or to attract threatened, endangered, or locally rare species. Audubon's guidance goes further, stating outright that playback of bird calls shouldn't be used in certain contexts, and highlights that playback during breeding season can be especially harmful since birds may abandon nests or exhaust themselves responding to a perceived intruder that doesn't exist. Some national parks and wildlife refuges prohibit the use of recorded or imitated calls altogether, so it's worth checking local rules before heading out.
A homemade caller made from cardboard and rubber bands is far less powerful than a phone playing a downloaded recording at full volume, and that does reduce some of the risk. But the principle is the same: any sound that triggers a territorial or mating response in a real bird is creating a stress event for that bird. The responsible approach is to treat your caller primarily as a learning tool at home, in your backyard, or in low-pressure natural areas, not as a shortcut to guaranteed sightings.
Here are practical next steps that keep your practice both effective and ethical:
- Use your caller indoors or in your backyard first to practice the sounds and understand how it works before taking it anywhere near wild birds.
- When you do use it outdoors, limit yourself to a few short attempts, not repeated, prolonged playback. If a bird responds and approaches, stop immediately.
- Avoid using any caller during spring breeding season (roughly March through July in most of North America) when birds are most vulnerable to disturbance.
- Never use a caller to attract threatened, endangered, or locally rare species. If you're not sure of a species' status in your area, check your state's wildlife agency website or eBird's rarity filters.
- Check location rules before using any caller in a park, refuge, or sanctuary. Many protected areas prohibit it entirely.
- Use your caller alongside learning resources rather than instead of them. Guides on how to do a bird call with just your hands and mouth, or how to make bird sounds with your mouth and hands, can complement what you've built here and help you understand the sounds more deeply.
- Treat each outing as a listening session first. Arrive early, stay quiet, and use the caller only if it genuinely adds to your understanding, not just your count.
The goal of how to do a bird call easy is ultimately to deepen your connection to bird sounds and the birds that make them. Once you can do that, you can also learn how to do the bird call more confidently with practice and tuning.
The more you understand how these sounds are physically produced, whether by a vibrating reed, a fipple edge, or a membrane, the better you'll get at identifying calls in the field by ear alone, no device required. BirdNET Sound ID, from Cornell, identifies bird calls from audio and uses spectrogram visualization with machine-learning classification.
Once you find the right pitch and rhythm, you can use this guide to dial in how to make a swallow bird call. That's the real payoff. how to make bird chirping noises. how to do different bird calls
FAQ
How can I make my bird caller louder without changing the whole design?
For whistle-style and reed-style builds, focus on airtightness and edge cleanliness. Seal gaps with tape and trim stray fibers so the air stream stays directed. For rubber-band reed callers, try a slightly longer contact length for the band (if your build allows) to increase buzz volume, but keep it short enough to maintain a stable pitch.
My whistle is making a hiss instead of a clear tone. What’s the first fix I should try?
Narrow the notch and sharpen the fipple edge. A wide, rounded opening usually forces turbulent airflow, creating breathy noise. Use a craft knife to recut until you get a crisp, window-like edge, and check that the air hits the edge at about a 45-degree angle.
How do I stop my reed (rubber-band) caller from sounding too “spitty” or uneven?
Re-tension and reduce slop. If the band flutters erratically, the pitch will jump and the sound will feel gritty. Swap to a band with more consistent thickness, tighten the mount so the band cannot twist, and keep the airflow steady rather than pulsing.
Do I need different materials for different birds, or can one caller work for many species?
One build can teach you principles, but matching specific calls usually requires pitch control and timbre. Your best option is to use the caller as a practice tool for range (high, medium, low) and then tune by swapping tube length (whistle) or band thickness/tension (reed), rather than expecting one fixed device to replicate every species.
What’s the easiest way to tune pitch if I don’t have any bird call apps?
Tune by ear using relative steps. Start with the middle pitch you can comfortably produce, then adjust in small increments (for whistles, change tube length by trimming a little at a time; for membrane callers, change the pitch you hum by half-steps). After each change, compare to the original target sound from memory or a single recording you can replay.
How much should I test outdoors versus indoors?
Test in both, but tune indoors first. Indoors, you can hear differences more clearly without wind and distant noise. After you get a stable tone, do a short outdoor check to ensure it still projects and does not get washed out, especially near open windows or windy areas.
Can I use a bird caller near my feeder or backyard bird bath?
Use it cautiously and keep it brief. Even low-power sounds can trigger stress or territorial responses. Limit sessions, avoid breeding-season intensity, and stop if birds show clear distress behaviors (repeated alarm-like movements, frantic calling, or abandoning normal activity).
Are homemade callers safe for beginners, especially kids?
The risk is mostly from tools and small parts, not the sound. Adults should handle any blade work, cut on a stable surface, and keep rubber bands and tube scraps out of reach of younger children to prevent choking hazards.
Why does my membrane caller sound dull unless I hum at a specific pitch?
Membranes resonate best at certain frequencies. If your voice is far from the membrane’s resonant range, it mostly muffles rather than vibrates strongly. Try humming slightly above and below your target tone until you hear a brighter, more warbly sound, then hold that pitch steady.
What’s a good “stop rule” if the caller isn’t matching the target bird after tuning?
If you can’t get closer after a few focused adjustments, switch strategy. For example, if the whistle never becomes sharp, rebuild with a cleaner notch rather than repeatedly forcing airflow. For reed callers, change rubber-band thickness before changing other parameters. For membrane calls, recheck the side hole size and only then keep tuning.
Should I ever use my homemade caller to lure rare or threatened species?
Avoid it. Even if the device is homemade, imitated sounds can affect vulnerable birds disproportionately. Stick to low-pressure learning in your immediate area and follow local rules about audio attraction, especially for threatened, endangered, or locally rare species.
Next Article
How to Make Bird Sounds With Your Mouth and Hands
Learn mouth and hand techniques to mimic bird calls, control pitch and rhythm, and fix weak or breathy sounds.