If you searched 'how to play bluebird on guitar' and ended up more confused than when you started, you're not alone. If you want recorder-focused guidance instead, check out a step-by-step walkthrough for how to play Bluebird on recorder. There are at least three different songs called 'Bluebird' floating around guitar tabs and chord sites, and then there's a separate tune called 'Black and Bluebird' that keeps showing up in the same searches. Let's sort that out first, then get straight into learning the one you actually want to play.
How to Play Bluebird on Guitar: Beginner Tutorial

Marcus Hendricks
22 Apr 2026
First: Which 'Bluebird' Are You Actually Looking For?
Here's the quick breakdown of the main contenders that pop up when you search this topic:
| Song Title | Artist | Style | Guitar Approach |
|---|---|---|---|
| Bluebird | Buffalo Springfield | 1960s rock/folk-rock | Open chords, strumming |
| Bluebird | Paul McCartney & Wings | Soft rock/pop | Fingerpicked, gentle groove |
| Bluebird | Lana Del Rey | Americana/country-folk | Fingerpicked, chord melody |
| Black and Bluebird | Dave Matthews Band | Folk-rock/acoustic | Fingerpicking with bass notes, key of D |
When people search 'how to play black and bluebird on guitar,' they are almost always looking for Dave Matthews Band's 'Black and BlueBird' from the album Come Tomorrow. That's the one with the lyric about 'butterflies and blackened bluebirds,' and it's the song that has the most guitar tab and chord chart resources available. This guide focuses on that version, which is the most commonly requested by beginners and intermediate players alike. If you are after one of the other 'Bluebird' songs, the Buffalo Springfield and Lana Del Rey versions both work with open chords and fingerpicking approaches similar to what you'll learn here, so the techniques in this guide will still transfer well.
The Key, Chords, and Progression You Need to Know
DMB's 'Black and BlueBird' sits in the key of D major. That's good news for beginners because D major gives you access to a lot of open and first-position chord shapes that are much friendlier than barre chord-heavy keys like F or B flat.
The core chord set for the song is: D, Bm, G, A, and Em. Chordify’s “Black and BlueBird” chord page provides the harmonic outline for the song, including chord letters like G, D, A, and Bm used for chord-chart learning. Some chord charts also include A/C#, F#m, Am, and Dm in certain sections, but for a beginner arrangement you can stick with the five main chords and still sound great.
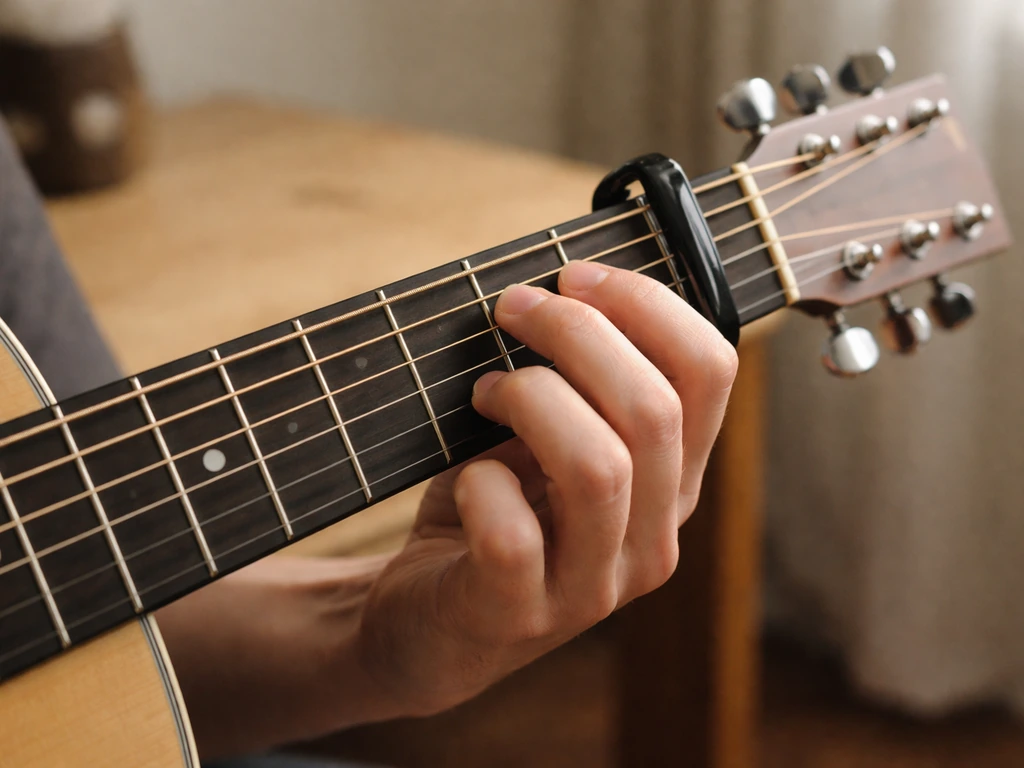
Beginner-Friendly Chord Shapes
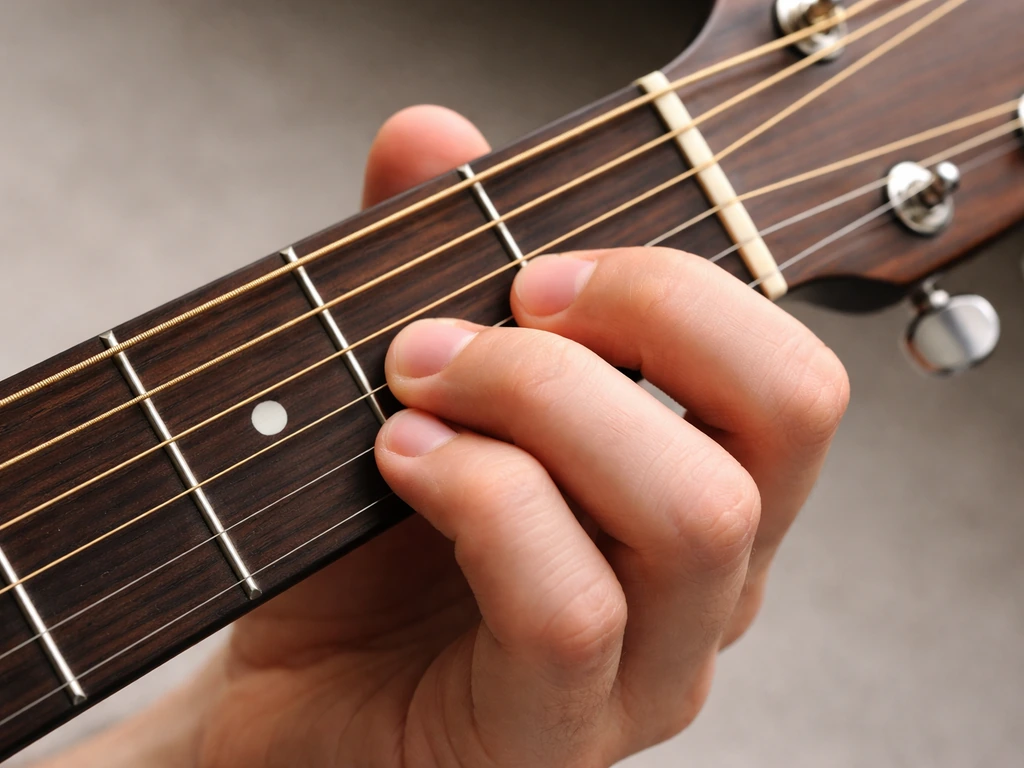
- D major: fingers on the second fret of G string (finger 1), third fret of B string (finger 3), and second fret of high E string (finger 2). Strum from the D string down. This is one of the most common open chords you'll ever learn.
- G major: index finger on second fret of A string, middle on third fret of low E, ring on third fret of B string, pinky on third fret of high E. This is the full open G shape and it rings out beautifully for this song.
- A major: three fingers (or a small barre with your index finger) on the second fret of D, G, and B strings. Strum from the A string down.
- Em: index on second fret of A string, middle on second fret of D string. This is one of the easiest chords on guitar, so enjoy it.
- Bm: this one is the trickiest. The standard shape is a barre chord at the second fret across all strings, with additional fingers on frets 3 and 4 of D, G, and B strings. If barre chords are too hard right now, use a Bm7 shape instead: barre just the top four strings at the second fret. It sounds close enough for practice and is way less frustrating when you're starting out.
The Main Chord Progressions
The song uses two primary progression patterns that rotate through the verse and chorus sections:
- Verse/Intro pattern: D → Bm → G → D
- Chorus pattern: A → Bm → D (sometimes extended with Em → G → A leading back into the verse)
These aren't complicated progressions, which is part of what makes this song approachable. The challenge is not the chords themselves but getting the transitions smooth and the fingerpicking feel right. More on that below.
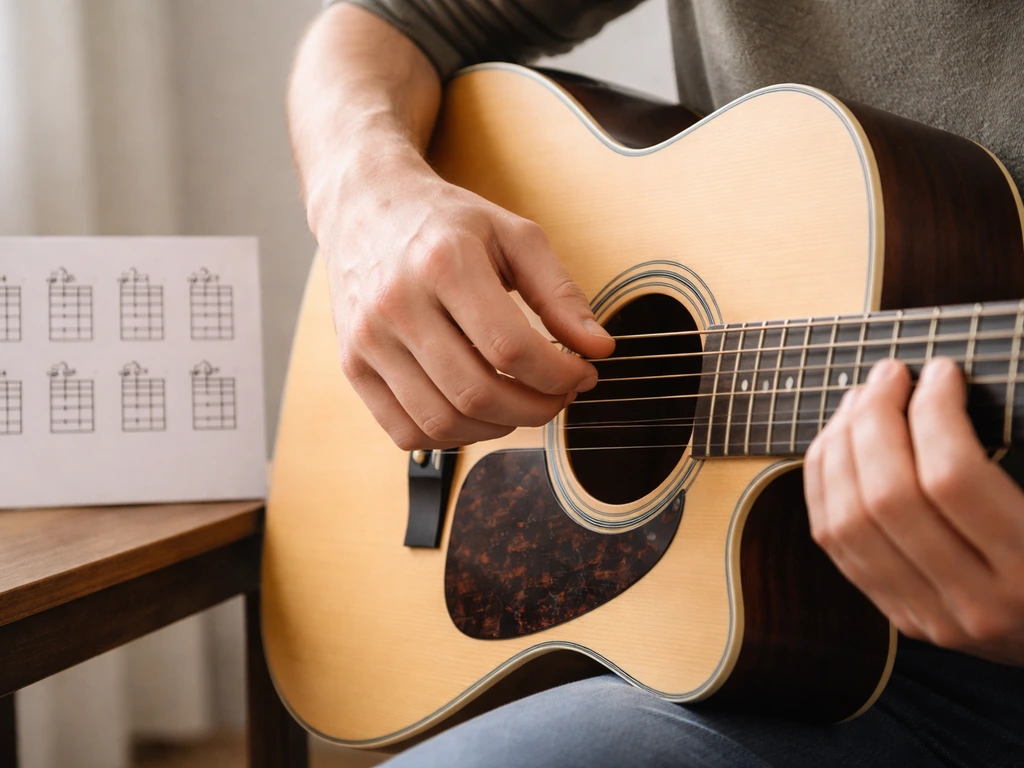
Rhythm and Strumming: Getting the Feel Right
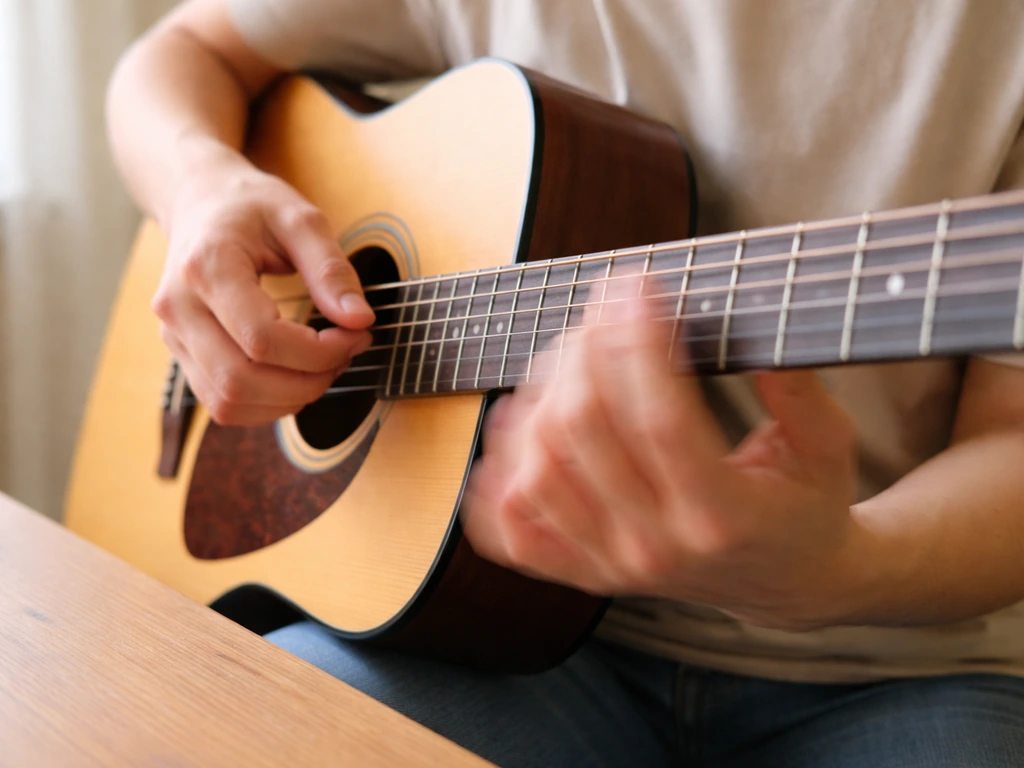
The recording of 'Black and BlueBird' has a relaxed fingerpicking groove rather than a flat strumming pattern. That said, if you are brand new to guitar, there is nothing wrong with starting by strumming the chord progressions to get familiar with the changes before adding the picking texture.
For a basic strum approach, use a down-down-up-down-up pattern in 4/4 time. Each chord in the verse progression (D, Bm, G, D) gets roughly two beats each, so you are moving through all four chords in one measure of four beats. Keep your wrist loose and let the strum flow naturally rather than locking your arm rigid.
Once that feels comfortable, the next step is introducing a simplified fingerpicking pattern that mimics the song's actual feel. Play the bass note of each chord with your thumb on the downbeat, then brush the middle strings with your index and middle fingers on the upbeat. Think of it as thumb-fingers-thumb-fingers in a rolling motion. This is the foundation you need before attempting the full tab arrangement.
Fingerpicking and Lead Notes: Matching the Recording
The recorded arrangement uses a fingerstyle approach that blends bass notes on the low strings (E, A, D strings) with melodic notes on the upper strings (G, B, high E). The tab for the intro and verse describes repeating patterns on the B string at the third fret, the G string at the second fret, and bass hits on open D and fretted D string positions like the fourth fret. The note that unlocks the whole feel is this: let the bass notes on the low strings guide your timing. As one tab note helpfully puts it, use the bass notes to anchor your rhythm first, then the upper notes fall into place around them.
Here's a practical way to build the intro/verse fingerpicking pattern from scratch:
- Start with just the D chord shape held down. Play the open D string (4th string) with your thumb as a bass note. That's beat 1.
- On the 'and' of beat 1, pluck the B string at the third fret with your middle finger.
- On beat 2, play the D string again (or move to the A string depending on the chord) with your thumb.
- On the 'and' of beat 2, add the G string second fret with your index finger.
- Repeat this rolling pattern while holding the chord shape. Once it feels automatic on D, apply the same pattern to G, Bm, and A.
The chorus section uses a slightly different feel with more emphasis on upward brush strokes across the chord after the bass note, giving it a little more energy than the verse. Practice switching between the quieter verse picking and the slightly fuller chorus approach, because that dynamic contrast is a big part of what makes the song sound like the recording.
Song Structure and a Realistic Practice Plan
The song breaks into three main learning blocks, which is exactly how I'd recommend approaching it if you're practicing this week:
| Section | Chords Used | Focus for Practice |
|---|---|---|
| Intro/Verse | D, Bm, G, D | Bass-note fingerpicking pattern, smooth chord transitions |
| Chorus | A, Bm, D (+ Em, G, A) | Slightly fuller strum-pick hybrid, energy shift from verse |
| Little Interlude | Transitional chords (G, A, Em area) | Short bridge connecting back to verse, rhythm reset |
A realistic practice plan for a beginner looks like this: spend the first two or three sessions just on the intro/verse chord progression using a plain strum. Get all four chord changes (D, Bm, G, D) clean and automatic before adding the picking. Then spend another two sessions on the intro fingerpicking pattern with just the D chord, adding the other chords once the pattern is memorized in your fingers. After that, tackle the chorus progression and the interlude. Only once all three sections feel solid in isolation should you try to put the full song together.
If you enjoy working through acoustic fingerpicking songs structured this way, you'll find a lot of overlap with other bird-named acoustic classics. Songs like Bird on a Wire and Free as a Bird share similar open-chord folk-rock territory and are worth exploring once you have this one down. Once you have the fingerpicking groove down, you can apply the same approach to learn how to play Bird on a Wire on guitar. If you're specifically looking for how to play Free as a Bird on guitar, use the same open-chord folk-rock practice ideas and build the picking up gradually.
Common Mistakes (and How to Fix Them)
Timing and Rushing
The most common issue beginners run into is rushing through the Bm chord change. Bm takes a moment to finger correctly, and when the metronome is ticking, there's a temptation to either skip it or slap it down in a panic. The fix: slow way down and isolate the D-to-Bm change specifically. Go back and forth between just those two chords until the transition takes zero thought. I have learned this lesson the hard way on more songs than I care to admit.
Barre Chord Troubles
Bm is the hardest chord in this song for most beginners. If your Bm sounds muted or buzzy, check that your index finger barre is pressing close to the second fret wire (not in the middle of the fret space), and that your thumb is low on the back of the neck rather than creeping over the top. A blank" rel="noopener noreferrer">barre chord is played by using one finger to press multiple strings across a single fret, like making your index finger act like a movable capo. If it still sounds awful, use Bm7 as a substitute while you build finger strength. You can graduate to the full barre shape over time, and no one at a campfire will notice the difference.
Mixing Strumming and Picking
Switching between fingerpicking in the verse and a slightly fuller approach in the chorus trips a lot of players up. The issue is usually a physical awkward moment where the hand has to reposition. Practice the transition from the last bar of the chorus back into the verse picking pattern specifically, looping it ten times in a row at a slow tempo until the hand shift becomes automatic.
Tuning
This song is played in standard tuning (E A D G B E), so no alternate tuning is needed. But always tune up before practicing. An out-of-tune guitar is the fastest way to convince yourself you're playing something wrong when really the guitar just needs a clip tuner check. If your open D chord sounds slightly off against a backing track, tune string by string before assuming your chord shape is wrong.
Play Along Tips: Tempo, Metronome, and Exercises

The song's target tempo is around 90 BPM, which is the practice-tempo figure used in most chord chart tools. The actual track tempo can feel different depending on the recording, but 90 BPM is a solid working target for playing along.
Here's the tempo approach I'd recommend, borrowed directly from the ChordU playbook for this song: start at 45 BPM, which is exactly half the target speed. At that pace, every chord change feels almost comically slow, and that's the point. You're training your fingers to land correctly without rushing. Once you can play through the full verse or chorus at 45 BPM without a single buzzy note or missed change, bump up to 55 BPM. Keep adding 10 BPM increments until you reach 90 BPM. Most players get there within a week or two of consistent daily practice.
For exercises, here are three targeted drills that will accelerate your progress on this song specifically:
- Chord transition drill: set a metronome to 50 BPM and cycle through D → Bm → G → D, spending four beats on each chord. Your only job is to land clean. Do this for five minutes before every practice session.
- Bass note anchor drill: hold a D chord and, without strumming, pick just the D string (open) with your thumb in time to a metronome at 60 BPM. Then add one upper note pick per beat. This trains your thumb independence, which is the core skill for the fingerpicking arrangement.
- Section loop drill: once you know the verse and chorus separately, practice moving from the last chord of the chorus back into the first chord of the verse ten times in a row without stopping. Transitions between sections are where most performances fall apart, so drilling them directly is the fastest fix.
If you find you really enjoy this style of fingerpicking acoustic work, it's worth exploring how this approach differs from other bird-themed guitar pieces. If you also want to learn how to play bird song on guitar, the same relaxed fingerpicking and transition practice will help you get there faster bird-themed guitar pieces. 'Bird Song' has a looser, jam-influenced feel, while 'And Your Bird Can Sing' leans toward melodic electric lead lines. Each one builds different skills, so there's real value in learning a few of them together as a set.
The main thing is to start today with just the D-to-Bm transition and the bass-note thumb drill. Get those two things solid and everything else in this song will follow. You don't need to have the whole arrangement figured out by tomorrow. You just need one clean chord change and one confident picking motion, and you'll already sound better than you did this morning.
FAQ
How do I make sure I’m learning the correct “Bluebird” song when tabs label them differently?
If you mean “Bluebird” by itself, you are likely looking at a different song than the Dave Matthews Band “Black and BlueBird.” The fastest way to confirm is to match the lyric and chord list, “Black and BlueBird” is commonly taught with D, Bm, G, A, and Em in standard tuning, and a D major home base. If the chords you see don’t include Bm and D as the core loop, you probably have the wrong “Bluebird” version.
Can I use strumming while I’m still learning the chords for “Black and BlueBird,” or do I need fingerpicking right away?
Yes. While the article emphasizes fingerpicking, you can practice the same chord transitions with a steady strum until the left hand changes are automatic. A practical method is to keep the same chord timing you’ll use in the fingerpicking, then add picking only after D to Bm, Bm to G, and G back to D are clean at a slow tempo.
What should I do if my Bm chord keeps sounding buzzy or muted?
If your Bm is buzzing, first check finger placement relative to the fret wire (closer to the wire, not mid-fret), then verify your thumb is supporting low on the neck so the barre has enough pressure without overgripping. If it’s still unstable, try Bm7 for the entire passage you’re struggling with, then only switch back to Bm after you can hold the barre without losing tone for several consecutive repeats.
How can I practice the transition between verse fingerpicking and the fuller chorus feel without getting stuck?
Do the switch using “micro-looping,” isolate only the last chord of the section plus the first chord of the next section, and loop at a tempo where you can land cleanly every time. For this song, the most common pain point is chorus-to-verse, so loop the last chorus bar and the first verse bar together ten times, then increase by 5 to 10 BPM once the hand shift feels identical on each try.
What if I can play the song slowly, but it falls apart when I increase tempo?
If you can play along at 45 BPM but break down at 55 to 65 BPM, don’t jump speeds aggressively. Use the same “two-speed” approach: rehearse the hard change (usually D-to-Bm) at 45 BPM until it’s automatic, then test the full section at 55 BPM for just one loop. If it falls apart, drop back to 50 BPM and repeat until the rhythm stays consistent.
Do I need alternate tuning, and how do I know if my issue is tuning versus chord technique?
Even in standard tuning, small tuning offsets can make open chords sound “wrong” against the backing track. Before troubleshooting your shapes, tune string by string with a clip tuner, then re-check D and G specifically, because they reveal detuning quickly when you add fingerpicking and let notes ring.
Can I substitute chords in “Black and BlueBird” to make it easier while I build up skills?
Try chord substitutions only when you’re practicing, not when you’re preparing to play along with specific charts. In this song, Bm7 is a beginner-friendly substitute to preserve flow while building barre control. If you later replace it with full Bm, do it section by section, so the rest of the progression stays consistent and you can measure improvement.
I can play the chords, but my fingerpicking rhythm is inconsistent. What’s the fastest fix?
If you miss the fingerpicking timing, anchor your rhythm with the bass note first, then add the upper-string brush on the upbeat. A helpful drill is to play just the thumb bass pattern on the low strings with a metronome, then add the middle fingers only after the thumb hits feel steady.
Can the same practice approach work for other bird-themed acoustic songs, or is this one unique?
Yes, but match difficulty to your current level. Since the article’s core skills are open-chord folk-rock transitions and switching between quieter and fuller picking, you can apply the same method to other bird-themed songs once D-to-Bm transitions and the thumb bass anchoring feel reliable. Start with the simplest chord loop first, then reintroduce picking patterns after clean transitions are automatic.
What tempo should I practice at if I want to play along with the recording?
If you want to play along with the recording, use the “90 BPM target” as a practice reference rather than assuming it is exactly what the track sounds like. Start at half tempo (45 BPM), build to 55 BPM in small steps, and only increase when you can repeat the full verse or chorus without missed changes or unwanted muting.
Next Article
How to Play Bird on a Wire on Guitar: Beginner Guide
Learn Bird on a Wire guitar: tuning, capo, chords, strumming count, melody drills, timing tips and practice plan.