Measuring a bird's length sounds simple until you actually try it. Is the tail spread or closed? Is the neck stretched or relaxed? Does the crest count? These questions trip up beginners and intermediate birders alike. The short answer: bird length is measured as a straight line from the tip of the bill to the tip of the tail, with the bird lying flat on its back, neck and tail in a natural (not stretched) position. Everything else is a variation you need to know about, and that's exactly what this guide covers.
How to Measure Bird Length: Head-to-Tail Guide

Marcus Hendricks
19 Apr 2026
What 'bird length' actually means (and what people get wrong)
In birding and ornithology, 'total length' has a specific definition: the straight-line distance from the tip of the bill to the tip of the tail feathers. The U.S. Fish & Wildlife Service defines it precisely as the measurement taken from the tip of the bill to the tip of the tail. That sounds obvious, but there are a few details that change everything.
First, it's a straight-line measurement, not a measurement along the curve of the body. A bird's spine curves, especially when relaxed. If you follow the body contour with a tape measure, you'll get a longer number than the actual standardized length. Always measure in a straight line.
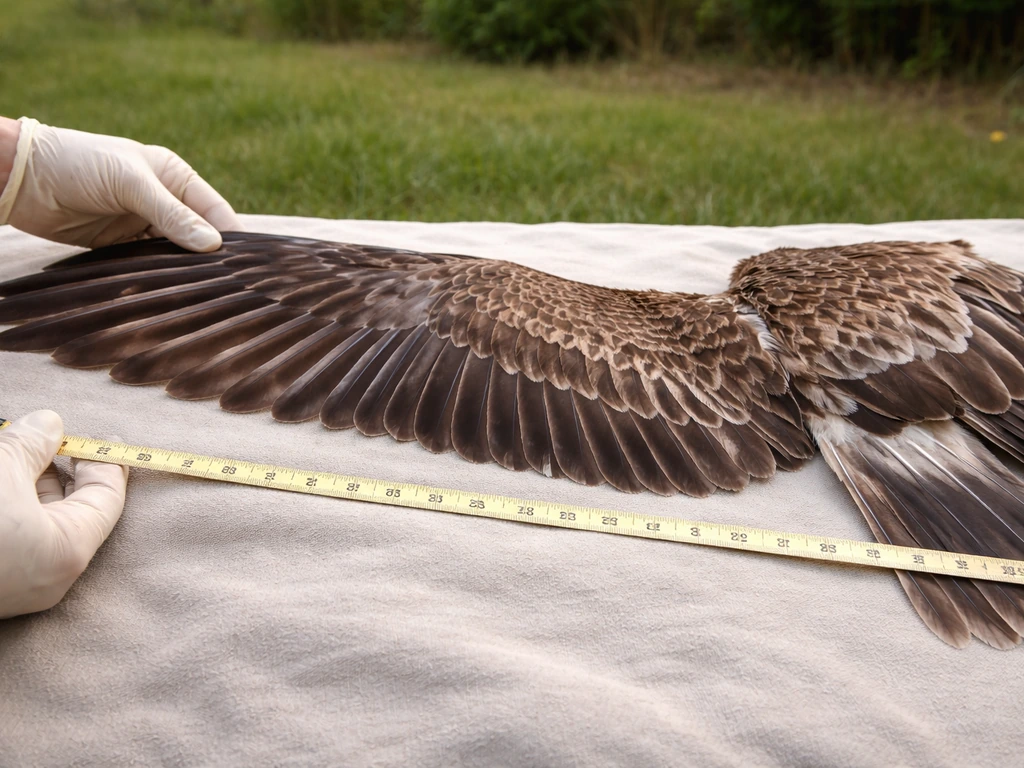
Second, 'total length' is not the same as wingspan. Wingspan is the tip-to-tip measurement of both wings fully extended, which is a completely separate figure. People mix these up constantly, especially when reading field guides. If you're curious about that measurement, it has its own process and its own set of positioning rules.
Third, 'length' doesn't include the crest. A bird's crest feathers stick up above the head and are not part of the bill-to-tail measurement. Similarly, length doesn't include the legs or feet. You're measuring the body axis, full stop.
- Total length: straight-line distance, bill tip to tail tip
- Measured with the bird on its back, body flat, not curved
- Does NOT include crest feathers, legs, or feet
- Not the same as wingspan (a separate measurement entirely)
- Not the same as body weight or body mass
Tools you can use right now (and when to reach for each one)
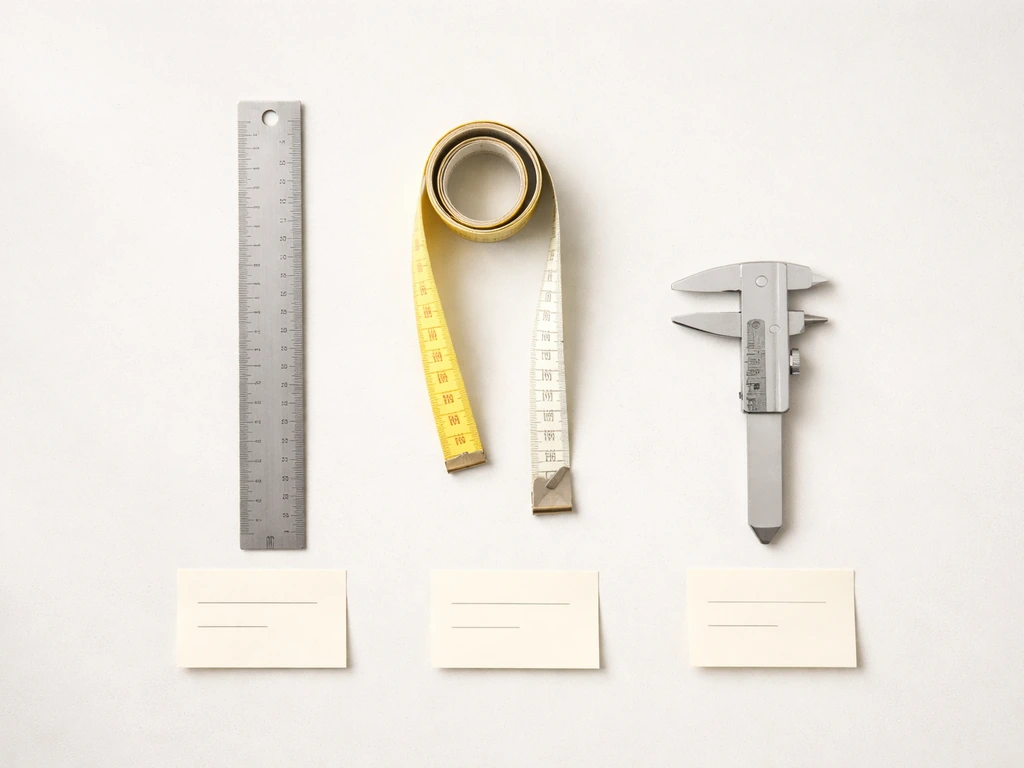
You don't need fancy equipment to get a reliable measurement. Here's what works, depending on what you're measuring and what you have on hand.
| Tool | Best For | Limitation |
|---|---|---|
| Rigid ruler (30 cm / 12 in) | Small to medium birds, specimens | Hard to span large birds or awkward angles |
| Flexible cloth or soft tape measure | Larger birds, live birds you can lay flat | Easy to bow or follow curves if you're not careful |
| Digital calipers | Very small songbirds, precise bill or tail measurement | Short range, usually only 15-20 cm |
| Meter stick or yardstick | Large waterfowl, herons, raptors | Bulky, needs a flat surface |
| Photo scale + software | Measuring from photos (eBird images, etc.) | Requires a known reference object in the frame |
My go-to for most field situations is a flexible tape measure paired with a flat board or table. I keep a 30 cm rigid ruler in my kit specifically for smaller birds and bill measurements where precision matters more. Calipers are great if you're banding small passerines, but they're overkill for a casual observation.
How to measure a live bird safely and accurately
Here's the honest truth: measuring a live bird is not something you should do casually or solo if you're a beginner. Wild birds experience significant stress when handled, and improper restraint can injure them or you. This section assumes you are either working with a licensed bander, measuring a bird in a rescue or rehabilitation context, or have hands-on guidance from an experienced handler. If that's not your situation, skip ahead to the photo measurement section.
Safe handling basics
- Always work with a second person: one to restrain, one to measure
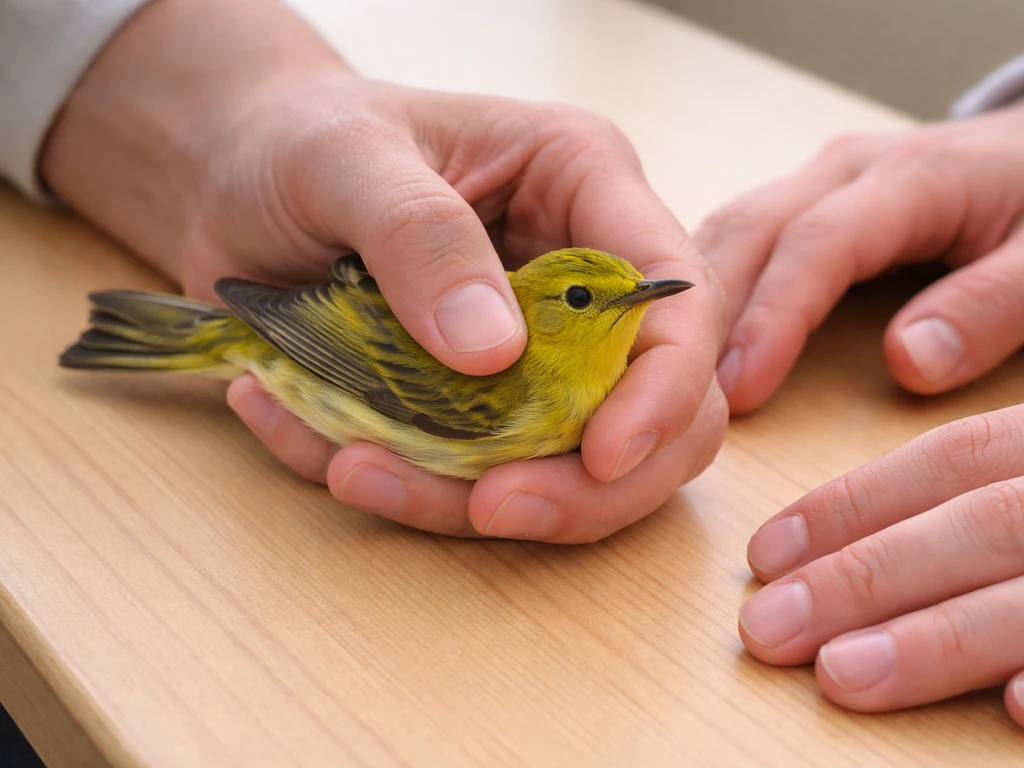
- Hold the bird in a 'bander's grip': body between fingers, wings folded naturally against the body
- Keep handling time under 2-3 minutes to minimize stress
- Never measure a bird that is injured, in shock, or visibly distressed beyond what capture alone causes
- Work in a quiet, low-light environment when possible to keep the bird calmer
- Wash hands before and after contact
Getting the measurement
- Lay the bird on its back on a flat, clean surface (a smooth board works well)
- Gently extend the neck to a natural, not stretched, straight position
- Close the tail feathers together so they form a single point at the tip
- Place your ruler or tape measure so the zero mark aligns with the bill tip
- Read the measurement at the tip of the longest tail feather (the central rectrices on most species)
- Record immediately; don't rely on memory
One thing I learned the hard way: the 'natural straight position' for the neck is not the same as stretched. If you stretch the neck out fully, you can add 5-15 mm to the measurement on a small bird, which is a meaningful error. Let the neck lie in line with the body spine without pulling.
How to measure bird length from a photo or specimen
This is the method most birders will actually use, and it's more reliable than you might think if you do it right.
From a photo
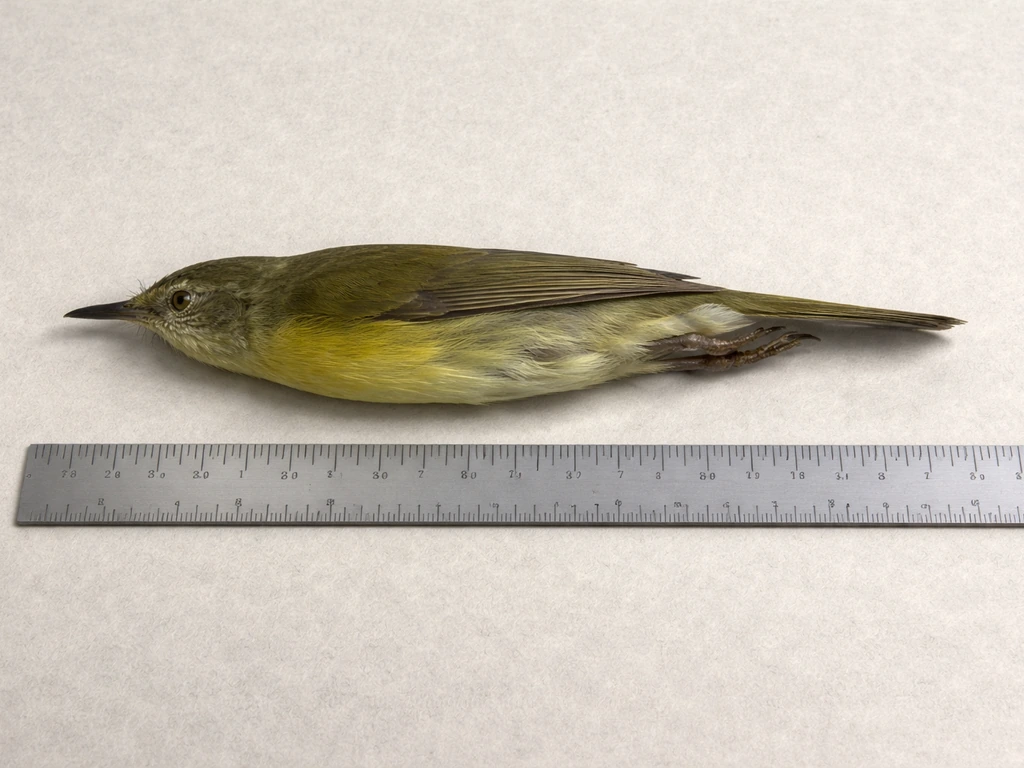
To measure from a photo, you need a reference object of known size in the same frame as the bird. This could be a ruler you placed next to the bird, a banding station scale bar, or a commonly known object. Free tools like ImageJ (a public domain image analysis program) let you set a scale based on the reference object and then draw a measurement line from bill tip to tail tip. The key is that the bird must be photographed flat, from directly above or directly to the side, with no perspective distortion. A photo taken at an angle will give you a shorter apparent length than reality.
From a museum specimen or study skin
Measuring a prepared specimen (a study skin) is straightforward but comes with a catch: prepared skins are often stretched slightly during preservation, so they can read 3-8% longer than a fresh measurement of the same bird. Always note whether your measurement came from a fresh bird or a specimen. Lay the skin flat, align your ruler from bill tip to the tip of the longest tail feather, and measure in a straight line. The same 'straight line, not along the curve' rule applies.
Step-by-step measurement workflow and recording tips
Whether you're working with a live bird, a photo, or a specimen, follow this workflow and you'll get consistent, useful results.
- Prepare your tools: ruler or tape measure, a flat surface, pen and notebook or a data sheet app on your phone
- Note the context: live bird, photo, or specimen; fresh or preserved; date and location
- Position the bird: flat on its back (or flat in the photo), neck in natural alignment, tail closed
- Anchor your zero point at the very tip of the bill (not the base of the bill, not the nostril)
- Extend your ruler in a straight line to the tip of the longest tail feather
- Read and record the measurement in millimeters for precision (not centimeters, which round too much for small birds)
- Take at least two measurements and average them if possible; single measurements have more error
- Note any unusual tail position, feather damage, or molt status that could affect the number
Recording in millimeters feels fussy at first, but it matters. A 3 mm difference on a sparrow is the difference between two species in some identification scenarios. Get in the habit early and you won't have to go back and re-measure later.
Common mistakes and how to avoid them
Measuring along the curve of the body
This is the number one mistake beginners make with a flexible tape. If the bird isn't lying perfectly flat, or if you let the tape follow the arch of the spine and chest, you'll consistently over-measure. Always measure the straight-line distance between the two endpoints.
Getting the tail position wrong
A spread tail reads longer than a closed tail, sometimes by 10-20 mm on a medium-sized bird. The standardized position is tail feathers closed (pressed together) so the longest feather tips form a single reference point. If you're measuring tail length separately, the IUCN field methods approach is to slide a ruler between the rectrices (the main tail feathers) and the undertail coverts until it reaches the base at the rump, then measure to the longest rectrix tip. This gives a consistent, repeatable tail length regardless of how fluffy the undertail coverts are.
Including or excluding the wrong feathers
Undertail coverts (the fluffy feathers that cover the base of the tail on the underside) should not be included in your endpoint. They often project past the rump but don't reach the tail tip. Similarly, on birds with drooping or overhanging tail coverts, measure to the actual rectrix tip, not to the last visible feather edge from above.
Letting the neck stretch
A relaxed neck in line with the body is the standard. Don't pull the head forward to straighten it out; that adds length artificially. Conversely, don't let the head flop back or to the side, which shortens the apparent measurement.
Confusing total length with other measurements
Field guides list total length, but sometimes also list 'body length' (excluding the tail) or 'culmen length' (bill only). Make sure you know which number you're comparing yours to. And again, wingspan is completely separate from length.
Quick tips by bird type
Small songbirds (sparrows, warblers, finches)
Use calipers or a rigid ruler rather than a soft tape for best accuracy. These birds are typically 10-20 cm total length, so a 1-2 mm error is a real percentage point of the measurement. Molt matters here too: a bird mid-molt may have tail feathers of uneven length, so note this and measure to the longest complete rectrix.
Long-tailed birds (magpies, pheasants, birds of paradise)
The tail often makes up half or more of the total length. Tail spread error is especially significant here. Make sure the tail is fully closed, and measure on a surface long enough to accommodate the full length (a standard 30 cm ruler won't cut it for a ringneck pheasant). A meter stick or a long flat board marked with a tape measure works well.
Birds with prominent crests (cockatoos, hoopoes, some kingfishers)
Remember: crests are excluded from total length. Measure from the bill tip to the tail tip only. Field guides for crested species always specify whether their length figure includes or excludes the crest, so double-check before comparing your measurement.
Waterfowl and long-necked birds (geese, herons, swans)
The neck is the challenge here. A heron's neck curves dramatically in life, but the measurement is still a straight line from bill tip to tail tip with the neck laid out in natural alignment (not stretched, not coiled). For very large birds, two people are essentially required: one to hold the bill and one to position the tail while a third reads the measurement. Solo measurement of a goose-sized bird is genuinely difficult to do accurately.
A few things worth knowing before you go
Measuring bird length is one piece of a bigger picture. If you want a fun, meaningful activity for National Bird Day, you can use these same bird-measurement steps to help kids and beginners learn how to observe birds more closely. If you are interested in breeding or raising birds yourself, keep these same careful measurement habits in mind as you plan bird breeding tips like timing and nest setup. Total length helps with species identification, tracking population health in banding studies, and comparing individuals over time. But it works best when you're consistent: same method, same positioning, same measurement unit, every time. Once you have total length down, you might find yourself curious about wingspan, which follows its own set of rules and tells a different story about a bird's flight and ecology. If you want to learn how to measure wingspan of a bird, you'll follow different positioning rules than total length.
If you're measuring birds as part of a banding or monitoring program, ask your team lead about their specific protocol before you start, because there are minor variations between programs and institutions. The core principle (bill tip to tail tip, straight line, flat position) stays the same, but endpoint and posture details can differ slightly. Getting comfortable with the standard method first means you'll adapt to any variation quickly.
FAQ
What should I do if the bird’s tail feathers are missing or badly worn?
Measure to the longest remaining rectrix tip, and record whether the tail is complete or partially missing. If the gap affects a clear endpoint, note it in your data because it can make “total length” non comparable to fresh, intact birds.
How can I tell whether I’m measuring bill tip to tail tip correctly on a curved spine when the bird is on a table?
Use your endpoints as the only truth: place the ruler from the bill tip to the tail tip, keep it straight, then double check that you did not let the tape drift along the chest or curve of the spine. If you notice the ruler touching the body contour, restart and re-center it on a straight line between endpoints.
Can I use a photo if there is background clutter but no obvious ruler in the frame?
Yes, but only if you have a reliable scale reference in the same image, such as a banding station scale bar, known-size cage hardware, or a printed reference card placed in the frame. If the reference is not in the same plane, you risk perspective shortening and should not rely on that measurement.
How strict does the “straight line, not along the curve” rule need to be when using a flexible tape?
Be strict. With a flexible tape, it’s easy to “cheat” by following the body. If you can, switch to a rigid ruler or calipers for a final check, especially on small birds where 1 to 3 mm errors can change identification.
Do I include the tail’s undertail coverts when measuring total length?
No, undertail coverts are excluded from the total-length endpoint. Your tail tip is defined by the outermost end of the rectrix (the main tail feather), not the last visible edge of the coverts.
What’s the best way to measure if the bird is lying on its side instead of flat on its back?
For standardized total length, re-position it if you can do so safely and with appropriate handling guidance. Side-lying introduces depth and angle errors that a straight-line ruler cannot fully correct without a proper imaging scale or another correction method.
How should I record measurements so I can compare results later, especially across different people?
Store the method details with the number, including posture (neck relaxed, tail closed), unit (mm), and whether the bird was fresh, a specimen, or a photo-based estimate. If multiple people measured, note who did the measurement and whether calipers or tape were used, because equipment choice affects precision.
Does molt change how I should measure total length or tail length?
Yes. If tail feathers are uneven during molt, measure to the longest complete rectrix and record that the bird is molting or has incomplete feathers. If the longest feather is partially broken, note that too, since it can shift the endpoint.
If my field guide gives “body length” or “culmen length,” can I compare my “total length” directly?
Not directly. “Body length” may exclude the tail, and “culmen length” is bill-only, so differences are expected even for the same individual. Convert only if you know the exact definition used, otherwise treat them as separate measurements.
What if the bird’s neck looks coiled or partially tucked, but I can’t safely stretch it?
Do not force the neck into position. Use natural alignment without pulling, and record any unusual neck posture. If the neck is tightly coiled such that alignment is ambiguous, consider repeating after correct, safe positioning (or defer to photo methods with a clear scale reference).
How do I handle birds with very long tails when my ruler is too short?
Use a longer flat board or a meter stick marked with a tape measure, and measure in a straight line on the surface. Avoid “bridging” with multiple placements on a curve, because that can introduce subtle angle changes at the endpoints.
Next Article
How to Measure Wingspan of a Bird Safely and Accurately
Step-by-step guide to measure or calculate a bird’s wingspan safely, including setup, partial estimates, and error fixes