To become a bird ringer, you need to find a licensed ringer willing to train you, complete supervised training under their permit, and then apply for your own licence through your country's official ringing scheme (such as the BTO Ringing Scheme in the UK or the USGS Bird Banding Laboratory in the US). There's no shortcut and no solo route: every country requires you to be mentored by an existing licence holder before you can ring birds independently. The good news is that the pathway is well-established and very beginner-friendly if you know where to start.
How to Become a Bird Ringer: Step-by-Step Guide

Marcus Hendricks
23 May 2026
What bird ringing actually is (and what you'll be doing)
Bird ringing, called bird banding in North America, is the practice of placing a lightweight, uniquely numbered metal or plastic ring around a bird's leg. That ring gives the bird a permanent individual identity. If the bird is ever caught again, or found dead, the ring number can be looked up and the data from its entire history, where it was first caught, how old it was, where it ended up, gets added to the scientific record. This information feeds directly into research on migration routes, survival rates, and population changes over time.
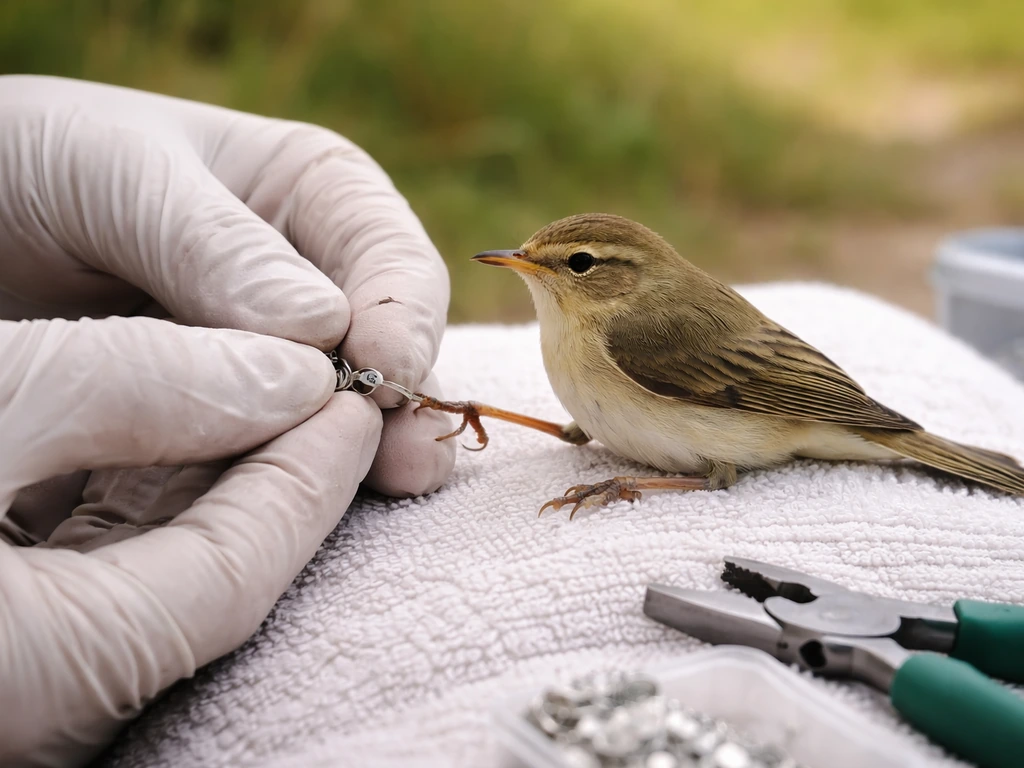
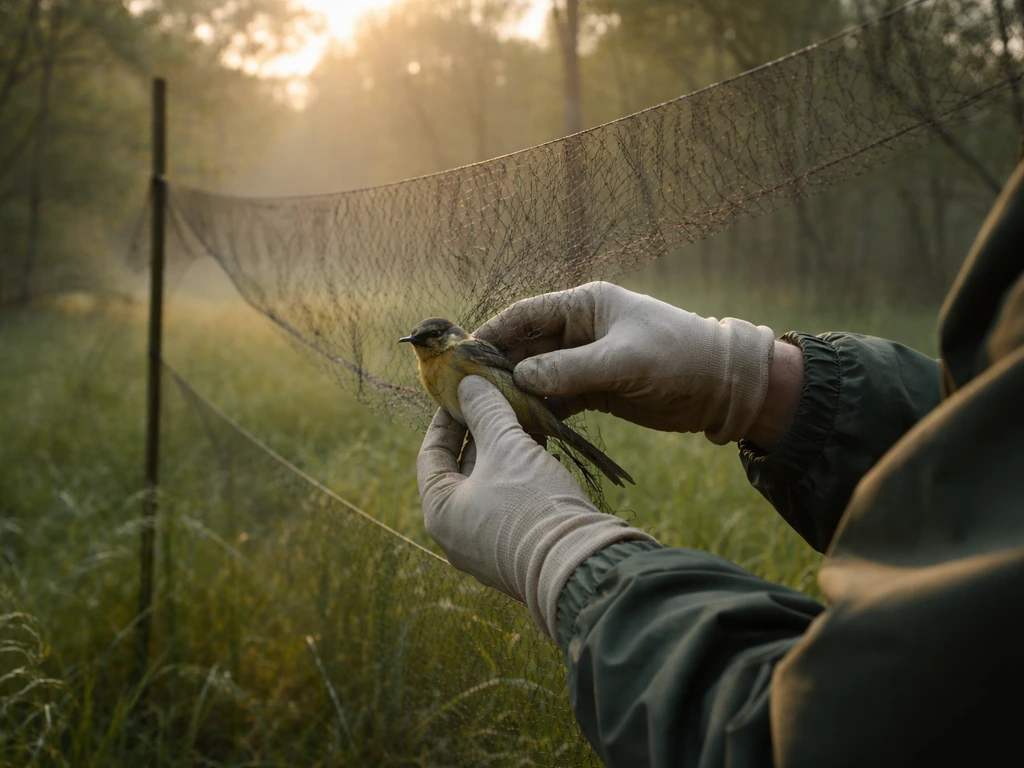
As a ringer, your actual job during a session looks something like this: you set up mist nets (fine, almost invisible nets strung between poles) before dawn, check them every 20 to 30 minutes, carefully extract any caught birds, place them in cotton bags, bring them to a ringing station, record measurements like wing length and body mass, determine the bird's age and sex, fit the correct ring size, and release the bird. The whole process for a single bird typically takes a few minutes in experienced hands. You're also recording all data accurately, because the science only works if the records are complete and correct.
It's genuinely one of the most hands-on things you can do as a birder. Holding a live bird, reading the tiny details of its plumage up close, and knowing that your data will contribute to long-term population monitoring is a pretty special experience. But it comes with real responsibility, which is exactly why training and licensing exist.
Who can do it: eligibility, legal requirements, and licensing
Bird ringing is a licensed activity almost everywhere in the world. You cannot legally catch and ring wild birds without a permit, full stop. The rules exist to protect birds from harm by unqualified handlers, and to ensure the data collected is scientifically reliable. Here's how it works in the main regions:
| Region | Licensing Body | Minimum Age | How You Qualify |
|---|---|---|---|
| UK | BTO Ringing Scheme | 16 (varies by group) | Supervised training, then sit the BTO assessment |
| USA / Canada | USGS Bird Banding Laboratory | 18 for own permit | Demonstrate proficiency under a licensed bander, then apply |
| Australia | Australian Bird and Bat Banding Scheme (ABBBS) | 16+ | Complete approved training, apply through DCCEEW |
| EU countries | National scheme (varies by country) | Varies | National scheme training and assessment |
In practice, most schemes expect you to demonstrate competence across several species and techniques before you can hold your own licence. In the UK, the BTO assesses candidates on their ability to correctly age and sex birds, apply the right ring sizes, and handle birds safely. In the US, a subpermittee (trainee) works under a master bander's federal permit until they can show enough documented experience to apply for their own. The ethical bar is high because these are wild animals and mistakes cause real harm.
Age-wise, most schemes allow you to start training as a teenager if a parent or guardian is involved, but you'll typically need to be at least 16 or 18 to hold your own permit. Check your national scheme's requirements directly, because these details do change.
How to find a ringing group and make contact
This is genuinely the most important step, and it's simpler than most beginners expect. You don't need to cold-email a university or a government agency first. You need to find a local ringing group or individual licensed ringer who takes on trainees.
- Go to your national scheme's website. The BTO has a 'Find a Ringing Group' tool at bto.org. The USGS BBL website lists contacts for the North American Bird Banding Program. These directories are your first stop.
- Search for local bird observatories and bird clubs. Many run ringing demonstrations or have ringers as members. A quick search for '[your county or region] bird observatory' or '[your area] ringing group' will usually surface something.
- Contact your national ornithological society. In the UK that's the BTO directly. In the US, regional bird banding associations (like the Eastern Bird Banding Association) can point you toward local trainers.
- When you find a contact, send a short, specific email. Say you're interested in becoming a trainee ringer, that you're a complete beginner, and ask if they have capacity to take on new trainees or can point you toward someone who does. Keep it brief and polite.
- Attend a ringing demonstration first if possible. Many groups open sessions to the public. It's a low-pressure way to see what's involved and make a face-to-face connection before asking for a training commitment.
One thing I'd say from experience: don't be discouraged if your first contact doesn't pan out. Licensed ringers are volunteers giving their time, and not everyone has capacity to train someone new. Keep trying other groups. The birding community is generally very welcoming once you show genuine, sustained interest.
The training pathway: from first session to your own licence
Training is almost entirely practical and happens over months or years, depending on how often you can attend sessions and how quickly you pick up the skills. Here's what the journey typically looks like:
- Observer stage: You attend sessions and watch. You don't handle birds yet. You learn how nets are set up, how extraction works, how data is recorded, and what the overall workflow looks like. This can last a few sessions or a few months.
- Trainee/subpermittee stage: Under direct supervision, you start handling birds, attempting ring application, taking measurements, and making age and sex assessments. Your trainer checks and corrects everything in real time. Expect to make mistakes here, that's the point.
- Competency assessment: Once your trainer thinks you're ready, you'll go through a formal assessment. In the UK this is the BTO Trainer's Assessment, covering your ability to handle birds safely, apply rings correctly, and record data accurately. In other countries the format differs but the principle is the same.
- Licence application: After passing your assessment, you apply for your own permit through the relevant authority. In the UK this goes to the BTO; in the US it goes to the USGS BBL. You'll typically need your trainer's endorsement.
- First independent ringing: Once licensed, you can ring under your own permit. Many new ringers still work closely with their training group for the first season to consolidate skills before operating solo.
Realistically, the time from starting as an observer to holding your own licence is anywhere from one to three years for most people. It depends on how many sessions you attend and the range of species you encounter. There's no rushing it, and honestly, you wouldn't want to: the skills take time to become second nature.
Core skills you need to develop
Your trainer will teach you everything hands-on, but going into training with some baseline knowledge makes the process much faster and less overwhelming. Here are the main skill areas to focus on:
Bird identification
You don't need to be an expert birder to start training, but the more species you can confidently identify, the better. Focus first on the common passerines (small songbirds) in your region, since these are what you'll be ringing most often. A good field guide for your area, plus time spent actually watching birds, is the best prep. Apps like Merlin (by Cornell Lab) are genuinely useful for learning calls and building your visual ID skills.
Age and sex determination
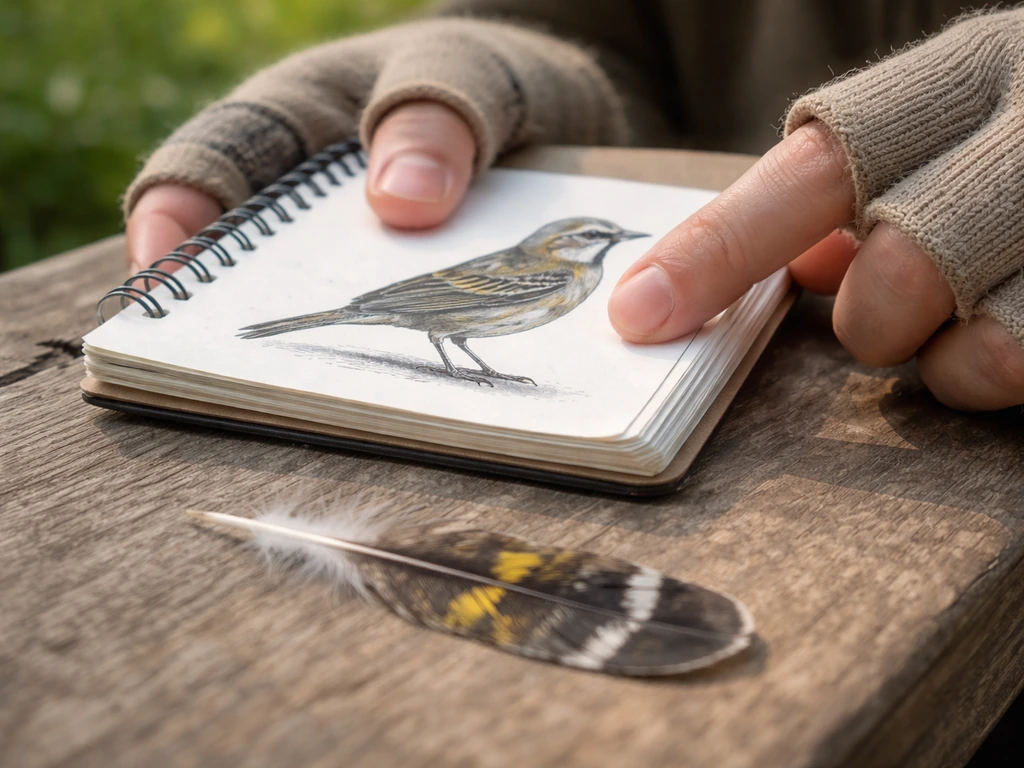
This is one of the trickier skills and takes real time to develop. Ringers use plumage details, like feather wear, moult limits, and feather generation, to work out whether a bird is a juvenile, first-year, or adult, and whether it's male or female. Resources like the BTO Ageing and Sexing guide (the 'Paton and Chard' guide in the UK) are the standard reference. Start reading through these before training begins so the concepts aren't completely new when you encounter them in the field.
Bird handling
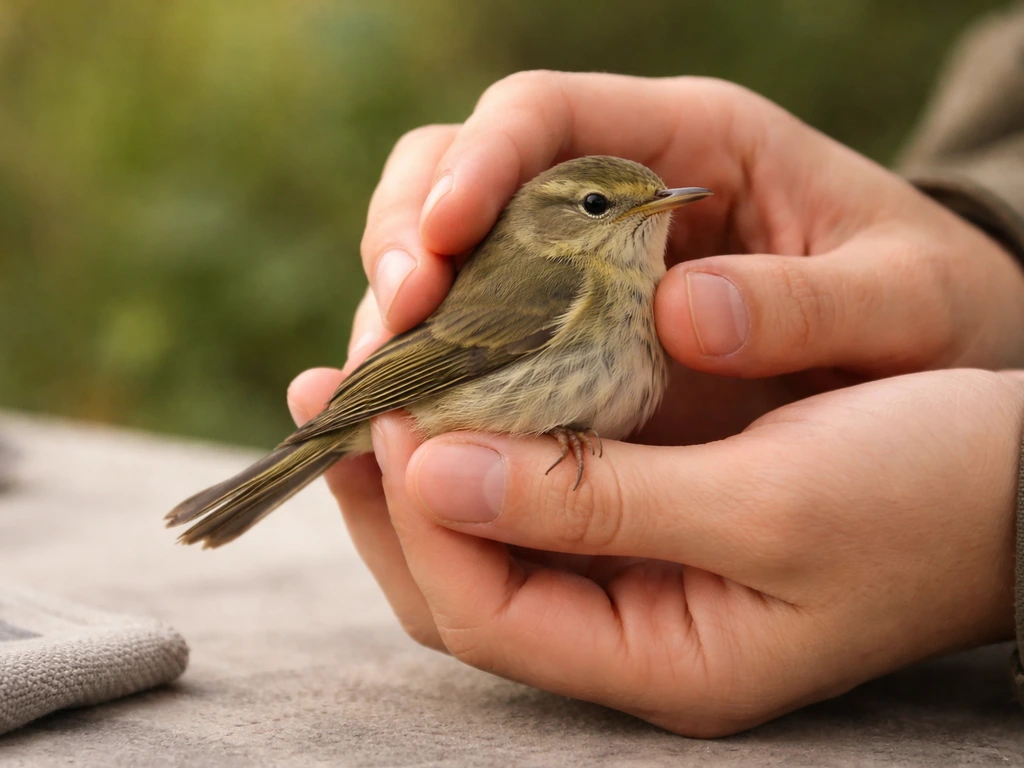
Safe, calm, confident handling is probably the most important practical skill. The two main holds are the 'ringer's grip' (also called the photographer's grip), where the bird sits between your index and middle finger with its legs between your fingers, and the 'bander's grip' used more in North America. You'll practice these repeatedly under supervision. The goal is to keep the bird secure without restricting its breathing or causing injury. Never squeeze. Never rush.
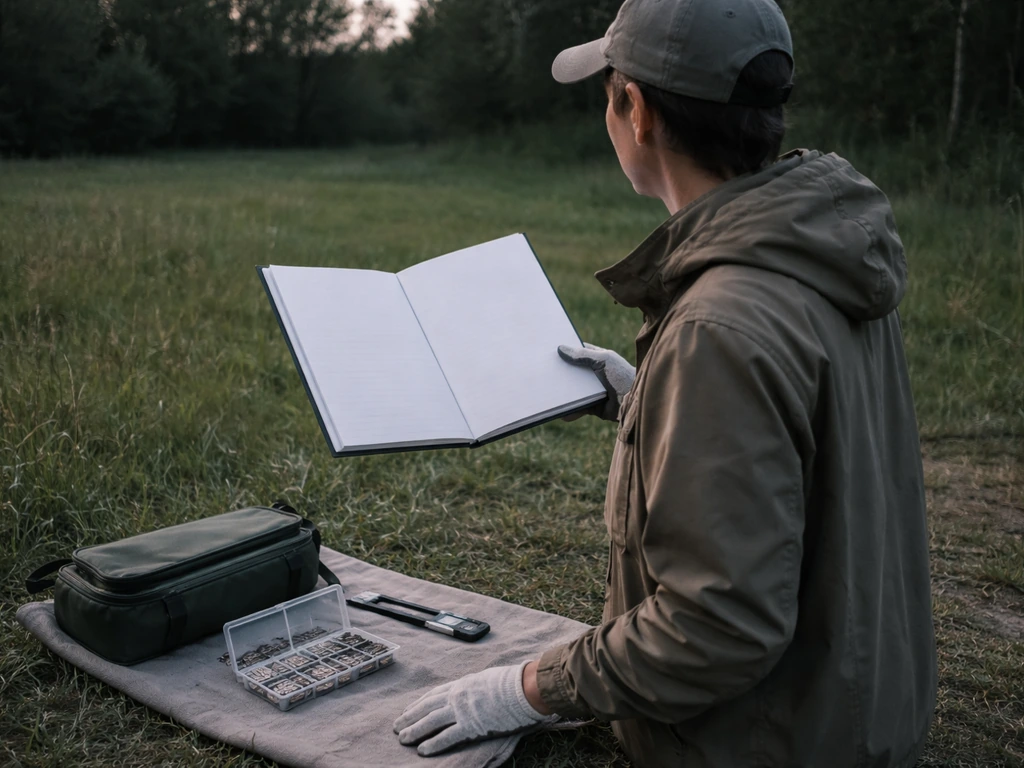
Data recording
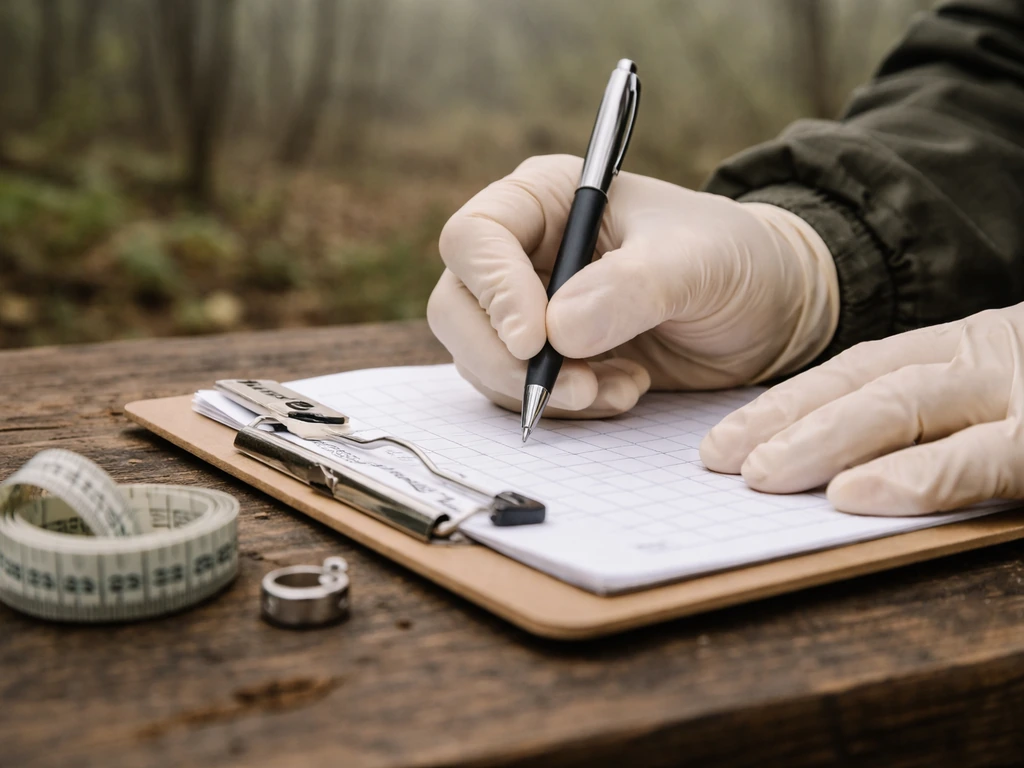
Every bird that passes through your hands generates a data record: species, ring number, date, location, measurements (wing length, tarsus, mass), age, sex, and any other notes. BTO also notes that ringing studies rely on key information associated with the ring, including the ring number or address and where the bird was found ring number and location. Getting into careful, consistent data habits from day one matters. Most schemes have standardized recording forms or apps. Accuracy here is what makes the data scientifically usable.
Net setting and extraction
You'll learn how to erect and tension mist nets correctly, where to position them for best results, and, crucially, how to extract birds from the fine netting without tangling or injuring them. Extraction is a skill that takes real practice to do smoothly. Start slow and prioritize the bird's safety over your speed.
Safety and bird welfare: the non-negotiables
Every part of the ringing process should minimize stress and risk to the bird. This isn't just about ethics (though it absolutely is that too): stressed or injured birds produce unreliable data, and birds that die in the hand are a failure of the whole exercise. Here's what welfare-focused ringing looks like in practice:
- Check nets every 20 to 30 minutes maximum. Birds left in nets for longer are at serious risk of injury, exposure, and death. In very hot or cold weather, check even more frequently.
- Never leave nets open unattended. If you need to leave the site, close the nets first.
- Keep birds in cool, dark, breathable holding bags (usually made of cotton) to reduce stress while waiting to be processed. Don't stack bags or leave them in sunlight.
- Process birds quickly and calmly. The faster a competent ringer works, the better for the bird. As a trainee, take your time to be accurate, but don't linger unnecessarily.
- Release immediately if a bird shows signs of significant distress: open-mouth breathing, extreme lethargy, or inability to grip. Some species tolerate handling poorly and it's better to release without full data than to push on.
- Wash your hands between handling different birds and at the end of every session. This is basic biosafety: some bird diseases (like avian influenza) can be transmitted to humans, and you can also transfer pathogens between birds. Some schemes recommend gloves for certain species or during disease alerts.
- Follow any current biosafety guidance from your national scheme. During avian influenza alerts, schemes often issue specific protocols around handling wild birds, enhanced PPE, and reporting requirements. Always check the latest guidance before sessions.
- Know the legal rules for your location. Ringing without a licence is a criminal offence in most countries. Even with a licence, there are species that require additional permits to handle.
The equipment you'll use (and when)
As a trainee, you won't need to buy your own equipment immediately. Your training group will supply what's needed. But understanding what you're working with is useful from the start.
| Equipment | What It's For | When You'll Use It |
|---|---|---|
| Mist nets | Catching birds safely; fine-mesh nets strung between poles | Every session, set up before dawn |
| Rings / bands | Uniquely numbered metal or plastic leg rings in multiple sizes | Applied during processing; size matched to species |
| Ring pliers / closure tool | Closing the ring around the bird's leg to the correct diameter | During ring application; requires practice to use correctly |
| Spring balance / digital scales | Weighing the bird to the nearest 0.1g | During processing of each bird |
| Wing ruler | Measuring the flattened wing chord to the nearest mm | During processing of each bird |
| Cotton holding bags | Keeping caught birds calm and safe before processing | Between net and ringing table |
| Data sheets or recording app | Capturing all bird data accurately | Throughout every session |
| Headtorch | Working in the dark during net setup and early checks | Before and around dawn |
| Field guide / ageing guide | Confirming species ID and age/sex assessment | During processing, especially for unfamiliar species |
Once you're further along in training or hold your own licence, you'll start thinking about getting your own nets and rings. Nets range from around 6 to 18 metres in length and come in different mesh sizes for different bird sizes. Rings are supplied by the national scheme and are not something you source yourself: you apply for an allocation as a licensed ringer.
Your next steps: a beginner's action plan
If you're ready to actually get moving, here's a concrete checklist to work through over the next few weeks. Treat this as your starting roadmap.
- Find your national ringing scheme online (BTO for UK, USGS BBL for USA/Canada, ABBBS for Australia) and read through their pages on how to become a ringer or bander. Bookmark the trainee information page.
- Use your scheme's group finder or observatory directory to identify ringing groups within reasonable travel distance of where you live.
- Email two or three groups this week. Introduce yourself, say you're a complete beginner, and ask about observing sessions or trainee opportunities.
- Start building your bird ID knowledge right now, before your first session. Spend 15 to 20 minutes a day with a field guide or the Merlin app, focusing on common birds in your area.
- Get a copy of the standard ageing and sexing guide for your region (the BTO guide for UK birders, the Pyle guide for North American banders). Dip in and read a few species accounts even if it feels advanced.
- Attend a ringing demonstration or open day if one is available near you. Look at your local bird club calendar and BTO events listings.
- Once you've been accepted by a group, commit to attending regularly. Consistency is what gets you through training fastest. Even once a month is better than a burst of visits then a long gap.
- Keep a training log. Note the species you handled, the assessments you made, the mistakes you made, and what you learned. This helps you track your own progress and will be useful when you apply for your licence.
If you're also interested in the broader world of bird monitoring and permitting, the topics of how to get into bird banding, how to apply for a bird permit, and how to get a bird permit are closely related to this journey and worth exploring as you work through the licensing side of things. Each country's process has slightly different paperwork and timelines, so understanding the permit system early saves you confusion later. If you want to move toward your own bird permit, make sure you understand your national scheme's application process and eligibility requirements early.
The path to becoming a qualified ringer is genuinely one of the most rewarding routes into serious ornithology. It takes patience, but every session teaches you something new. Start with that first email to a local group and go from there. If you're aiming to become a bird flyer, follow the same training pathway by working with a licensed ringing group and building your skills step by step first email to a local group.
FAQ
Can I start bird ringing on my own if I already know lots of birds and can handle them safely?
In most schemes you will not be eligible to ring independently just because you can identify birds and handle them calmly. You must complete supervised sessions under a mentor’s permit (often as a documented subpermittee) and then pass a scheme competence review for your species and techniques, with paperwork tied to the exact permit process in your country.
What should I do if there is no local ringing group near me?
If you cannot join a local ringing group, your best alternative is to ask for temporary placement with a nearby group that runs training sessions, or to find an individual ringer who already has a trainee workflow. Many schemes prioritize continuity and documentation, so propose a realistic attendance plan (for example, “I can do every second weekend for three months”).
How do I respond if the first ringing contact I reach out to declines?
A first “no” usually means the trainer has no capacity, not that you lack potential. Follow up with a short note showing commitment, such as offering to help with non-ringing tasks (net prep, data entry, or station setup) during observation days, and include your local availability so they can plan around your training.
Which skills do beginners usually need the most extra practice on?
Most schemes require you to show competence across multiple areas before your own licence, especially accurate age and sex, correct ring size, and safe extraction. If you struggle with one skill, ask your mentor for targeted practice sessions rather than hoping it “clicks” during ringing night, because some problems (like extraction errors) need repetition under supervision.
What if my local sessions rarely catch birds, and I feel like I am not getting enough practice?
Mist netting and ringing depend on timing and weather. If birds are scarce, it is normal that trainees feel they are not “learning.” Ask your mentor how they adjust net placement and effort by season, and focus on mastering station routines (recording, measurement consistency, and extraction) during every session you attend.
Can I practice bird extraction and net work without handling birds?
Do not assume you can “practice extraction” alone. You typically need supervised training with birds under the relevant permit conditions, and net safety has its own rules (tension, visibility, checking intervals). If you want to practice without ringing, ask about simulator drills, data drills, or observation days where you can learn workflow safely.
What equipment can I buy before I get licensed, and what should I wait on?
In many programs your access to ring allocations and equipment is tied to your licence or subpermit status. Even if you buy field gear you can use for birding, rings are usually issued only by the national scheme after you are authorized, and nets must meet scheme requirements. Ask your mentor what is allowed at each stage so you do not spend money that you cannot use.
What are the most common data mistakes that could get a trainee in trouble?
Yes, you will need to record data carefully, but some mistakes are more serious than others. A wrong ring size or incorrect sex/age assignment can invalidate scientific usefulness for that individual, so double-check critical fields before releasing the bird and use your scheme’s standard forms or app fields exactly as instructed.
What should I do if a bird seems injured or too stressed during ringing?
If a bird is injured, stressed, or seems unable to recover quickly, ethics and welfare require you to follow your mentor’s welfare protocol and stop ringing for that individual. Do not try to “push through” with ring fitting or additional attempts. Tell your trainer immediately and record notes exactly as required by your scheme.
If I am not old enough yet for my own permit, how do I start in the meantime?
Your ability to hold your own permit can depend on both age eligibility and documented training history. If you are close to the minimum age, plan ahead with a guardian involvement route if your scheme allows it, but still expect the final licence requirements and assessments to be reviewed by the scheme.
How can I keep progressing if I have to miss several training sessions?
If you miss sessions, your progression may slow because documented experience and technique consistency matter. Tell your mentor early, and ask whether you can attend catch-up training, observe additional stations, or complete training modules that count toward competence while you are away.
Next Article
How to Get a Bird Permit: Step-by-Step Checklist
Step-by-step checklist to get a bird permit: types, eligibility, documents, fees, online or in-person application, compl