Photographing birds in flight is genuinely hard at first, but it gets a lot more manageable once you understand what's actually causing your blurry, out-of-focus, or badly exposed shots. The short answer: you need a fast shutter speed (at least 1/1600s, ideally 1/2500s or higher), a continuous autofocus mode that tracks moving subjects, and a lens with enough reach to fill the frame without crowding the bird. Everything else builds on those three things. This guide walks you through the full workflow from gear to post-processing so you can come home with keepers the next time you're out.
How to Photograph a Bird in Flight: Step by Step Guide

Marcus Hendricks
6 Apr 2026

Gear to photograph birds in flight
Cameras
Any modern mirrorless or DSLR camera with a continuous autofocus mode will work. That said, newer mirrorless bodies from Sony, Canon, and Nikon have AI-powered subject detection that specifically recognizes birds, which is a genuine advantage when you're starting out. Don't feel like you need the most expensive body on the market. A mid-range mirrorless with a fast burst rate (at least 10 frames per second) gives you enough frames to catch a wing at a good position.
Lenses: reach vs. weight tradeoff
Focal length matters more than almost anything else for bird-in-flight work. Audubon's ethical photography guidance recommends at least 500mm to keep enough distance from the bird so you're not disturbing it, and that's a good target for wild birds in the field. For backyard species and situations where birds are comfortable approaching closer, 300–400mm is workable. The Canon RF 100-300mm f/2.8L IS USM is a pro-grade option that pairs well with Canon's 1.4x or 2x extenders (minimum focusing distance of about 1.8 m at 300mm), giving you flexibility when subjects are closer than expected. On the Nikon side, the NIKKOR Z 180-600mm f/5.6-6.3 VR packs about 5.5 stops of optical stabilization into a lens that weighs just under 2 kg (4 lb 5 oz), making it a solid reach-plus-portability choice for tracking fast birds. One honest note: long lenses are heavy. If you're new, rent before you buy.
Teleconverters and other accessories
Teleconverters add reach but they do cost you autofocus speed and light. Nikon notes that with teleconverters attached, AF performance can vary depending on focus point selection and lighting conditions, so in dim early-morning light a 2x converter may cause more problems than it solves. A sturdy monopod helps with heavy lenses during long sessions, and a gimbal tripod head is worth considering if you're using anything over 500mm regularly.
Camera settings for sharp action shots
This is where most beginners get it wrong, and I was no exception. The fix is almost always shutter speed. Here's what actually works:
- Shutter speed: Start at 1/1600s as your absolute floor. Cornell Lab's All About Birds recommends starting around 1/2500–1/3200s, and for fast birds like swallows or martins you may need 1/3200s or higher. Think of 1/1600s as your safety net, not your target.
- Aperture: Shoot between f/5.6 and f/8. Wide-open apertures like f/4 look appealing for bokeh, but even small focus errors will throw a wingtip or the bird's eye out of the plane of focus. Stopping down to f/5.6 or f/8 gives you a bit more depth-of-field buffer without losing too much light.
- ISO: Let it go up. Modern sensors handle ISO 800–3200 well enough that a bit of noise is far preferable to motion blur. Use Auto ISO with a minimum shutter speed override if your camera supports it.
- Mode: Shutter Priority (Tv/S) or Manual are both popular. If you use Aperture Priority, dial in positive exposure compensation (+1/3 to +2/3) when shooting against a bright sky so the camera doesn't underexpose the bird trying to protect the background.
- Drive mode: High-speed burst. More frames mean better odds of catching a wing beat at its peak position.
- Metering: Evaluative/Matrix metering works most of the time. If the bird is backlit or against a very bright sky, switch to Spot metering and point it at the bird.
A realistic baseline exposure from the American Birding Association: f/7.1, 1/2000s, ISO 400 for a juvenile red-shouldered hawk in decent light. A U.S. Fish and Wildlife example in good light: f/4.5, 1/1600s, ISO 280 at 400mm. These aren't rules, but they give you a starting reference before you dial things in for your specific conditions.
Technique: tracking, focus, and panning
Autofocus modes
Use your camera's continuous autofocus mode, called AI Servo on Canon, AF-C on Nikon and Sony. This keeps refocusing on the bird as it moves, unlike single-shot AF which locks on once and stops. Turn on subject tracking if your camera has it, and specifically enable Bird Detection if available. Nikon's Z series includes a dedicated Birds option in subject detection. Sony's Animal/Bird subject detection on the A9 III is excellent but benefits from customization: using Tracking Spot M and narrowing the tracking shift range prevents the camera from grabbing a bush or the water surface behind the bird.
Dealing with focus hunting and background confusion
The most frustrating thing in flight photography is watching your camera confidently focus on the branches behind the bird instead of the bird itself. If this happens, there are a few targeted fixes. Canon's AF Setting Guide recommends adjusting the Servo AF characteristics: if focus response feels sluggish after a sudden movement, increase responsiveness by setting Case Auto to Responsive (+1) and bump tracking sensitivity from there. On Nikon, if the camera frequently detects the wrong subject, switch to a smaller AF area mode rather than relying on Wide or Auto area. All About Birds specifically calls out Tracking Sensitivity (labeled Blocked Shot AF Response on some Nikon bodies) as the setting to adjust when you keep losing the lock between the bird and a cluttered background.
Panning and physical tracking
Panning means rotating your whole upper body smoothly as the bird moves, keeping it centered in the frame throughout. Plant your feet shoulder-width apart, tuck your elbows in, and rotate from your hips rather than your shoulders. The goal is a smooth, consistent swing. Start tracking the bird before you press the shutter, continue the swing through the shot, and follow through after you release. Stopping the moment you fire is the single biggest cause of blurred images when shutter speed looks fine on paper. Lens stabilization set to a panning mode (if available) helps enormously here, and the 5.5 stops of VR in a lens like the Nikon 180-600mm is specifically designed to reduce camera shake during exactly this kind of tracking motion.
Anticipating movement
Birds rarely change direction randomly. Watch a bird for a few minutes before shooting. Gulls wheel in predictable arcs. Raptors circle thermals. Ducks tend to land into the wind, so you can predict which direction they'll approach from. Once you start reading flight patterns, you can pre-position yourself so the bird is flying toward you or across your frame rather than away from it. A bird flying toward you fills the frame faster and keeps the face and eye sharp, which makes for a much stronger photo.
Lighting and weather tips for better flight photos
Light direction matters as much as light quantity. Side lighting (sun to your side, hitting the bird's face and wing) gives you the most detail and texture in feathers. Front lighting (sun behind you) is forgiving and keeps exposure simple. Backlit situations (sun behind the bird) are tricky because the camera will underexpose the bird to protect the bright background, and the feathers can go into silhouette. That's not always bad, silhouettes can be dramatic, but if you want detail you'll need to apply positive exposure compensation and accept a blown-out background.
The golden hours, the first hour after sunrise and the last hour before sunset, deliver the warmest light and the most active bird behavior. Overcast days are underrated: the soft, even light eliminates harsh shadows on wings and makes exposure much easier to nail consistently. Avoid shooting in harsh midday sun if you can; it creates deep shadows under wings and blown highlights on white plumage like gulls or egrets.
Wind actually helps you. Birds take off and land into the wind, so if you know the wind direction, you can predict where birds will be coming from. Light winds also slow ground speed slightly, giving you a fraction more time to track. Overcast breezy days at a coastal location can be incredibly productive for flight photography for exactly this reason.
Where to shoot: habitats, timing, and bird behavior
You don't need to travel to a wildlife refuge to practice flight photography. Starting in your own backyard, especially if you have feeders, gives you predictable birds at predictable times. Finches, sparrows, and starlings land and take off constantly, giving you repetitions to dial in your settings without pressure. If you want help putting together a productive backyard bird photography setup, getting feeders and perches positioned well makes a real difference in how many flight opportunities you get per session.
Shorelines (ocean, lake, or river) are the best locations once you're ready to leave the yard. Gulls, herons, pelicans, and shorebirds are large, relatively slow fliers compared to songbirds, and they use predictable flight paths along the water's edge. They're also usually comfortable with people nearby. Wetlands and marshes are great for herons and egrets. Open fields near woods attract raptors during migration. The key in any habitat is to arrive early, find where birds are actively flying (not just perching), and position yourself with the light at your back or side and a clean background behind the anticipated flight path.
Timing within the year matters too. Spring and fall migration concentrate huge numbers of birds in predictable stopover locations, which dramatically increases your chances of finding active birds in flight. Local birding groups and apps like eBird will show you what's being seen where right now.
Common mistakes and how to fix them
| Mistake | What's causing it | The fix |
|---|---|---|
| Motion blur on the bird | Shutter speed too slow | Raise to at least 1/1600s; aim for 1/2500s or faster |
| Whole image blurry or shaky | Camera shake during panning | Smooth your pan, use lens IS/VR in panning mode, brace elbows in |
| Bird sharp but wrong part (ear, not eye) | Depth of field too shallow | Stop down to f/5.6–f/8 for more depth-of-field buffer |
| AF keeps grabbing the background | Tracking sensitivity too high or AF area too wide | Narrow AF area, reduce tracking shift range (Sony), or adjust Blocked Shot AF Response (Nikon) |
| Bird underexposed against sky | Meter exposing for the bright background | Apply +1 to +2 stops exposure compensation, or use Spot metering on the bird |
| Constantly losing the bird in the frame | Not starting to track early enough | Pick up the bird earlier with naked eye, then bring camera up; follow through after shooting |
| Cluttered, distracting background | Position and angle not considered | Change shooting angle so bird is against sky, water, or open field; get lower or higher |
The too-slow shutter speed mistake is so common that it's worth repeating. If you're coming from photographing a bird sitting still, your settings are almost certainly too slow for flight work. A perched bird might look fine at 1/400s. At 1/400s, a bird in flight will look like a motion-blurred ghost.
Post-processing workflow for flight photos
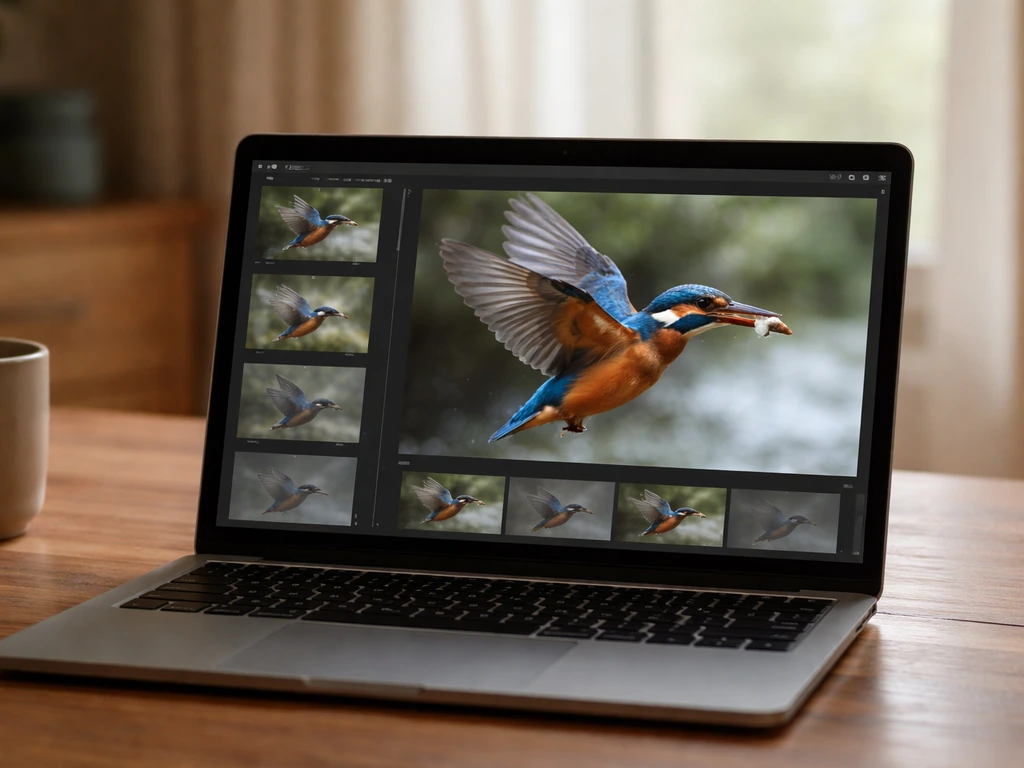
Flight photography generates a lot of frames and most of them won't be keepers. That's completely normal. Cull first: delete anything with closed eyes, badly clipped wings, or motion blur before you even open editing software. Then work the survivors in this order:
- Lens correction: Apply the lens profile in Lightroom or Camera Raw first. This fixes distortion and vignetting introduced by your lens, especially at longer focal lengths.
- Exposure and white balance: Brighten underexposed birds, recover blown highlights in the sky if possible, and correct any color cast from dawn or dusk light.
- Crop and straighten: Crop to place the bird with room in front of it (leave space in the direction it's flying), and straighten the horizon if you were panning across water or a flat landscape.
- Noise reduction: High ISO creates grain, especially in the smooth sky behind the bird. Use Lightroom's Denoise or Camera Raw's AI noise reduction on any shot at ISO 1600 or higher. Don't over-sharpen to compensate for noise; reduce the noise first, then sharpen.
- Sharpening: Use masking to apply sharpening only to the bird and not the background. In Lightroom, hold Alt/Option while dragging the Masking slider to see exactly where sharpening is being applied.
- Selective adjustments: Use a radial or brush mask to brighten the bird's eye specifically. A small dodge on the eye makes a dramatic difference in how alive and engaging the final photo looks.
One thing to keep in mind: post-processing can improve a good photo but it can't rescue a bad one. A photo that's blurry from motion or missed focus isn't fixable with sharpening. That's why getting the settings right in the field, especially shutter speed, is so much more important than what you do in editing afterward.
Building toward consistency
The difference between someone who gets one lucky shot and someone who comes home with a reliable selection of keepers is repetition and deliberate practice. If you're just getting started, it really helps to read through some tips for bird photography more broadly before you specialize in flight work, because the fundamentals of patience, positioning, and light apply to every type of bird photo. Once you've got a session or two under your belt, check out the deeper dive into beginner bird photography for more context on choosing your first location and managing expectations.
For a broader look at all the variables involved, including composition and background selection, the guide on how to take bird photos covers both flight and perched situations in more depth. Flight photography is one of the most rewarding challenges in nature photography, and every session teaches you something. The settings above will get you started today. The rest comes with time in the field.
FAQ
What shutter speed should I use for slow fliers versus fast fliers?
Start at the higher end when the wings are beating quickly (often 1/2500s to 1/3200s), and you can drop slightly for slower, larger birds (for example, 1/1600s to 1/2000s). The quickest check is image review, if you consistently see wing blur even when focus looks sharp, increase shutter speed before changing anything else.
Do I need to shoot wide open to get sharp birds in flight?
Not necessarily. Wider apertures can help isolate the bird, but they also reduce depth of field, making focus misses more obvious. If you are getting sharpness issues or partial misses, try stopping down a small amount (for example, from f/5.6 to around f/6.3 or f/7.1 if your lens allows) while keeping shutter speed high.
How should I choose the autofocus area (whole screen vs tracking zone) when backgrounds are messy?
Use a smaller, more controlled AF area when the bird is near branches, reeds, or water reflections. Large zones increase the chance the camera locks onto the background. A practical workflow is to start with bird detection, then reduce the tracking or area size when you notice repeated focus jumps.
My camera keeps exposing for the background, how can I keep the bird properly bright?
If the bird is backlit or the background is bright, switch to exposure compensation toward positive values (often +0.3 to +1.3) and keep watching the histogram or blinkies if your camera supports them. For white birds, aim to protect highlights, if feathers clip early, reduce exposure compensation instead of relying on “fix it later” noise reduction.
Should I use burst mode or single shot for birds in flight?
Use continuous high-speed burst. Even when the setup is correct, timing is the difference between tack sharp eyes and wing blur. Burst mode also increases your odds of capturing a peak wing position with a clean face angle.
What ISO strategy works best if I’m struggling to hit 1/1600s or faster?
Let ISO rise rather than dropping shutter speed. A noisy image with sharp focus is usually better than a clean but blurry one. If your camera has an ISO setting with an upper limit option, set a ceiling you can tolerate, then prioritize shutter speed first.
Do I need image stabilization, and should it be on when panning?
In most cases, turn it on, it helps with hand shake during tracking. If your lens offers a dedicated panning mode, use it, it’s designed to stabilize in the non-panning axis. If you notice stabilization making the frame drift, test off versus on at the shutter speeds you use most.
How do I tell if my blur is from motion or from missed focus?
If the bird’s eye is sharp but wings smear, it’s typically motion blur, raise shutter speed. If the entire bird looks soft and the eye is not crisp, it’s usually focus misses, adjust AF responsiveness, tracking sensitivity, or reduce the AF area. If only parts of the bird look sharp, it can be a depth-of-field or subject distance issue, stop down slightly.
What’s the safest way to practice before going to a shoreline or refuge?
Practice with predictable birds and start closer than you think you need. Backyard feeders let you dial in your panning rhythm and AF settings using repeat action. You can also practice framing by tracking the bird without firing for a few seconds, then commit to a short burst once you see consistent eye position.
How far should I position myself from wild birds in flight to avoid bothering them?
Use distance and behavior cues. Back off when birds show stress signs like repeated sudden flight, veering away from normal routines, or lingering near cover without resuming flight. Aim for a focal length that keeps you from having to crowd, longer lenses usually allow the bird to keep its natural path.
Should I shoot in RAW or JPEG for bird-in-flight?
RAW is usually the better choice because you’ll need flexibility for exposure compensation and highlight recovery, especially in backlight. JPEG can work if your exposure is consistent, but the moment you underexpose the bird or clip whites, RAW gives you more room to recover detail without degrading color as much.
What minimal checklist should I use each time before I start shooting?
Confirm: shutter speed is high enough, continuous AF is enabled, subject detection or tracking is on, burst mode is set, and exposure compensation is ready for backlight situations. Then do one test frame, zoom in on the eye or nearest feather detail, and only change one setting at a time based on what you see.
Next Article
Tips for Bird Photography: Field Guide for Sharp Shots
Step-by-step bird photography tips: gear, starter camera settings, fieldcraft, sharp shots for perched and in-flight bir