Archery bird tips means using bird-shaped targets to sharpen your shooting form, not taking aim at real birds. This guide walks you through choosing the right gear, nailing your stance, setting up a safe practice space, running drills with bird targets, fixing the most common beginner mistakes, and even turning your sessions into a casual birdwatching experience. If you came here hoping to shoot live birds with a bow, that's both illegal in most places and way outside the scope of what this site is about. If you came here to get better at archery using cool bird-themed targets while actually learning something about the birds around you, then you're in exactly the right place.
Archery Bird Tips: Safe Target Practice and Bird Learning

Marcus Hendricks
20 May 2026
What 'archery bird tips' actually means (and what it doesn't)
The phrase is genuinely ambiguous, so let's clear it up fast. In archery, 'bird tips' most commonly refers to either bird-shaped 3D targets used for accuracy practice, or blunt arrow tips designed for small-game hunting. Arrow tips for bird hunting should be blunted and legal where you practice, and this guide focuses on target bird imagery instead blunt arrow tips. On this site, we're focused on the target practice side: using bird imagery and bird-shaped targets as a fun, engaging way to build real archery skills. Target archery, as defined by World Archery, is simply the discipline of shooting at stationary targets set at fixed distances, with concentric scoring rings to measure accuracy. Bird-themed targets fit perfectly into that framework.
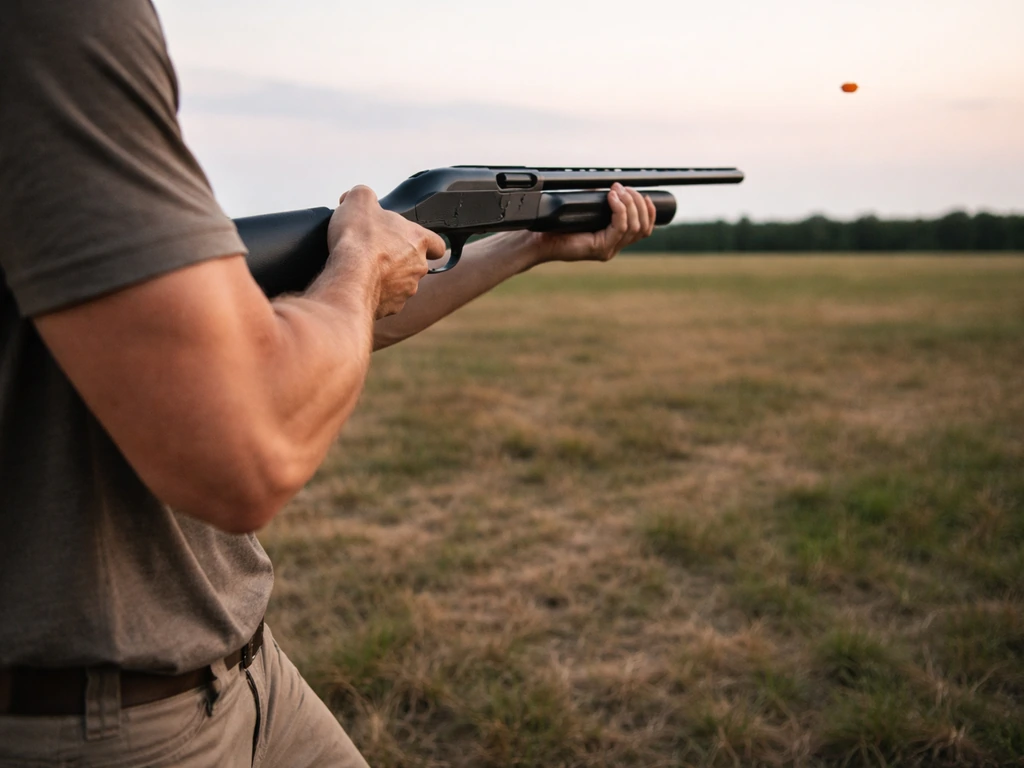
Just to be crystal clear about the other interpretation: using live birds as archery targets is illegal. Iowa state law, for example, explicitly prohibits using live birds as targets 'to be shot at for amusement or as a test of skill in marksmanship.' Similar laws exist across most US states and countries worldwide. Beyond legality, it's genuinely harmful to wildlife. So everything in this guide assumes you're shooting at target faces, foam 3D birds, or printed bird silhouettes, not anything that breathes.
Safety and ethics around wildlife: the non-negotiables
Before you even string a bow, it helps to understand why safety rules around wildlife exist in the first place. Washington State's Department of Fish and Wildlife points out that harassing certain species can be a criminal offense, and that repeatedly disturbing birds can interrupt their breeding cycles and cause them to permanently abandon territory. That applies even to things like getting too close while birdwatching, let alone shooting near them.
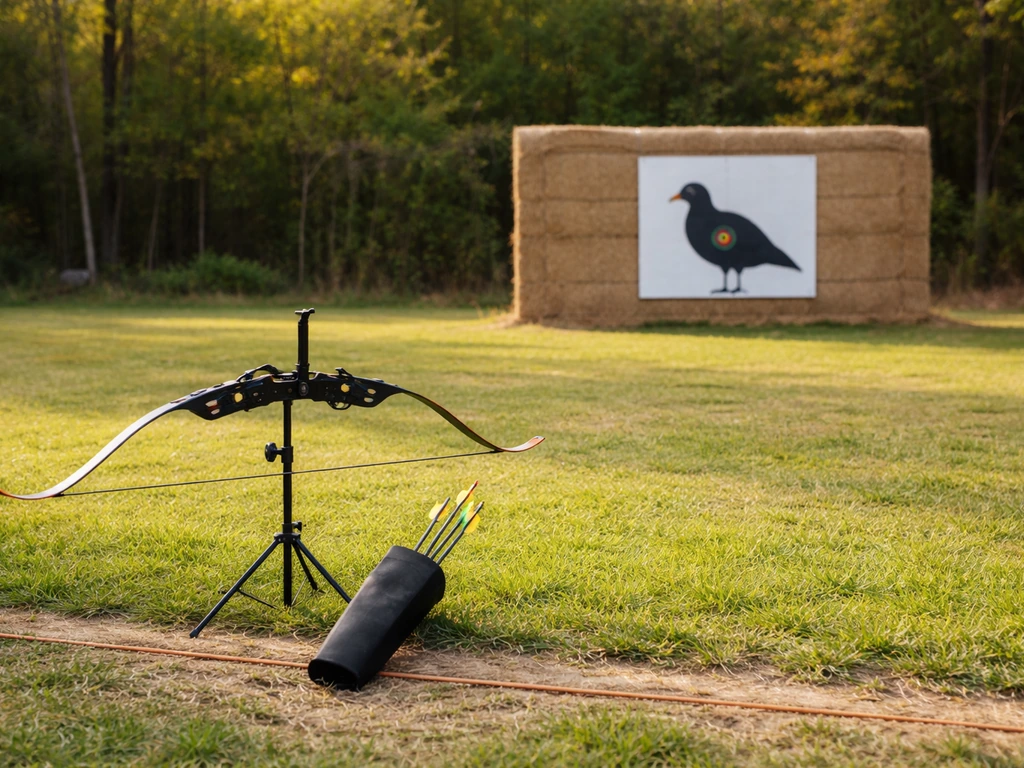
For your practice range, the core rule from every credible archery safety body is simple: only shoot when you have a safe, clear backstop and you are absolutely certain no person or animal is in front of you or behind your targets. NFAA range guidelines include detailed target butt and backstop set-up and construction sections that emphasize designing and maintaining appropriate backstops to contain errant arrows. Logan County, Colorado's range rules state it plainly: 'Never shoot an arrow until you are positive that no one is in front of you or behind the targets.' They also specify that if an animal enters the safety zone during shooting, you stop immediately. That includes birds. A robin landing near your target face is a reason to pause, not to speed up.
- Always use a proper backstop (a solid bale, foam block, or official target butt) that fully contains arrows, including misfires
- Never draw a bow toward any living animal, even accidentally
- Stop shooting the moment any bird, pet, or person enters your safety zone
- Follow your local regulations about where target practice is permitted; some wildlife management areas prohibit it outside designated zones
- Keep your practice area tidy so dropped arrows, equipment, or food scraps don't attract or injure wildlife
Picking the right gear for bird-target practice
You don't need expensive gear to start, but you do need gear that matches your current ability. Getting this wrong is the single biggest reason beginners either miss constantly or develop bad habits they spend months unlearning. Here's how I'd think through each piece.
Choosing your bow
For target practice, a recurve bow is the classic starting point. It's forgiving, affordable, and teaches you real technique that carries over to every other bow style. World Archery recommends choosing a draw weight (the force needed to pull the string back) appropriate to your strength and body size. Many archery shops let you rent beginner limbs, which is a smart move before you invest. A common beginner range is 20 to 30 pounds of draw weight for adults. Go heavier and you'll fatigue quickly, start compensating with bad form, and end up less accurate, not more.
Matching your arrows to your bow
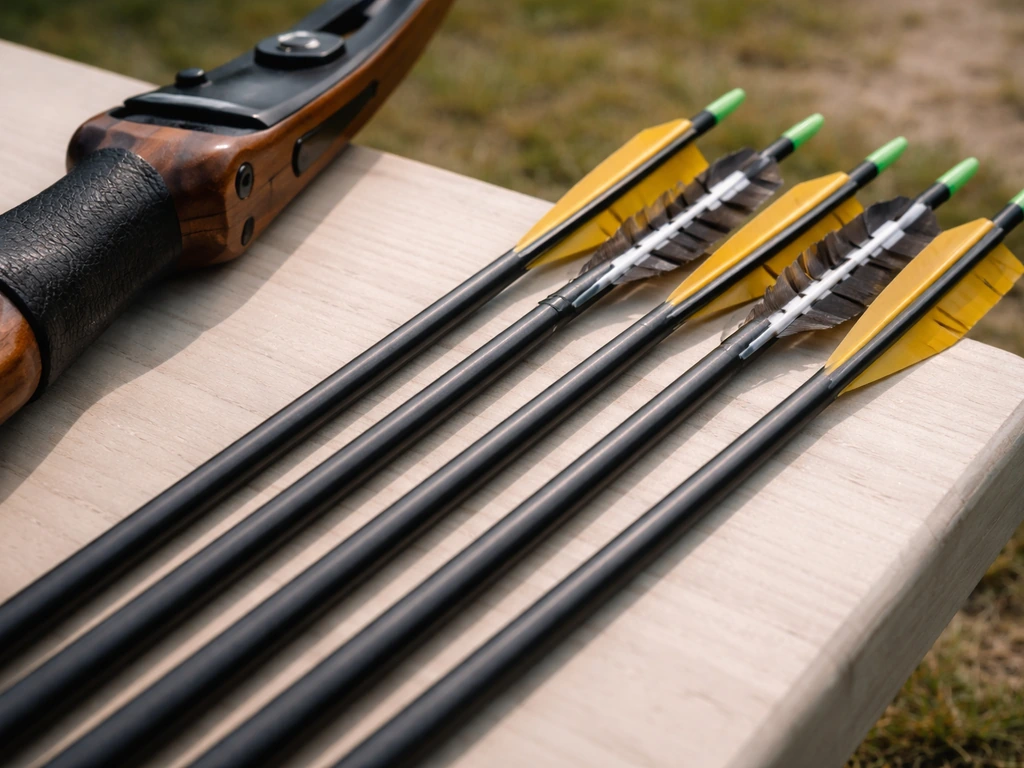
Arrow spine (stiffness) has to match your bow's draw weight and your draw length. Easton Archery publishes an official arrow selector tool that takes your peak bow weight and draw length as inputs and recommends the right spine. Gold Tip has a similar chart. Don't skip this step. A spine that's too weak causes the arrow to fishtail in flight; too stiff and it wobbles differently. Either way, accuracy suffers and you'll blame your form when the equipment is the real problem.
Targets and accessories
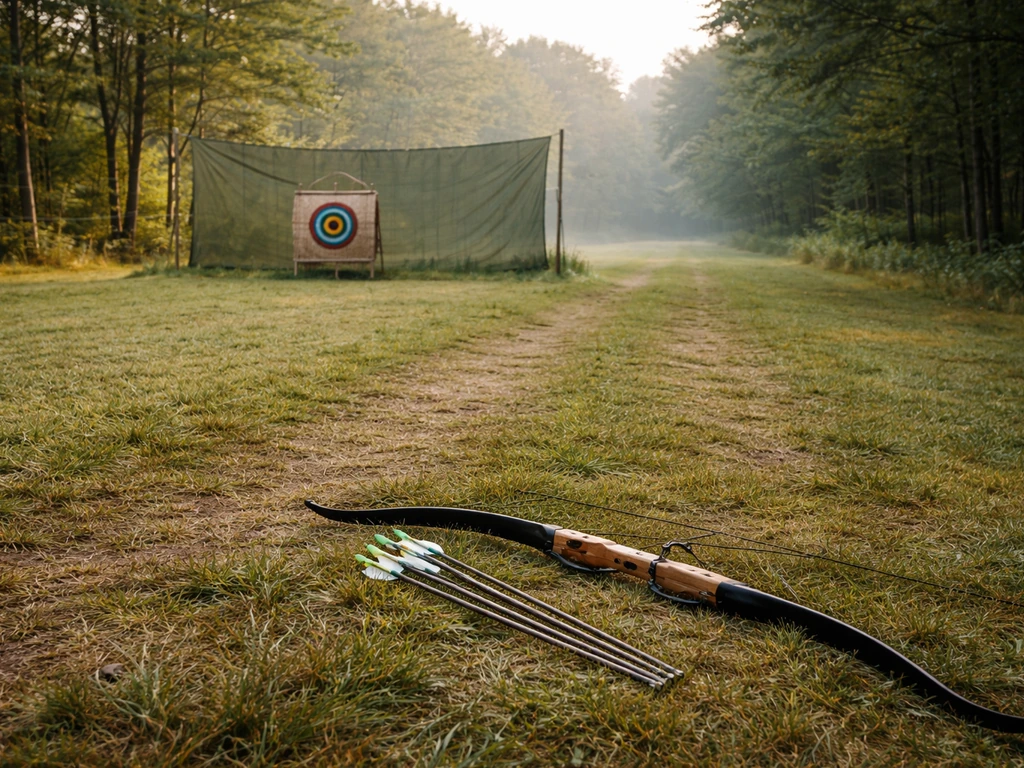
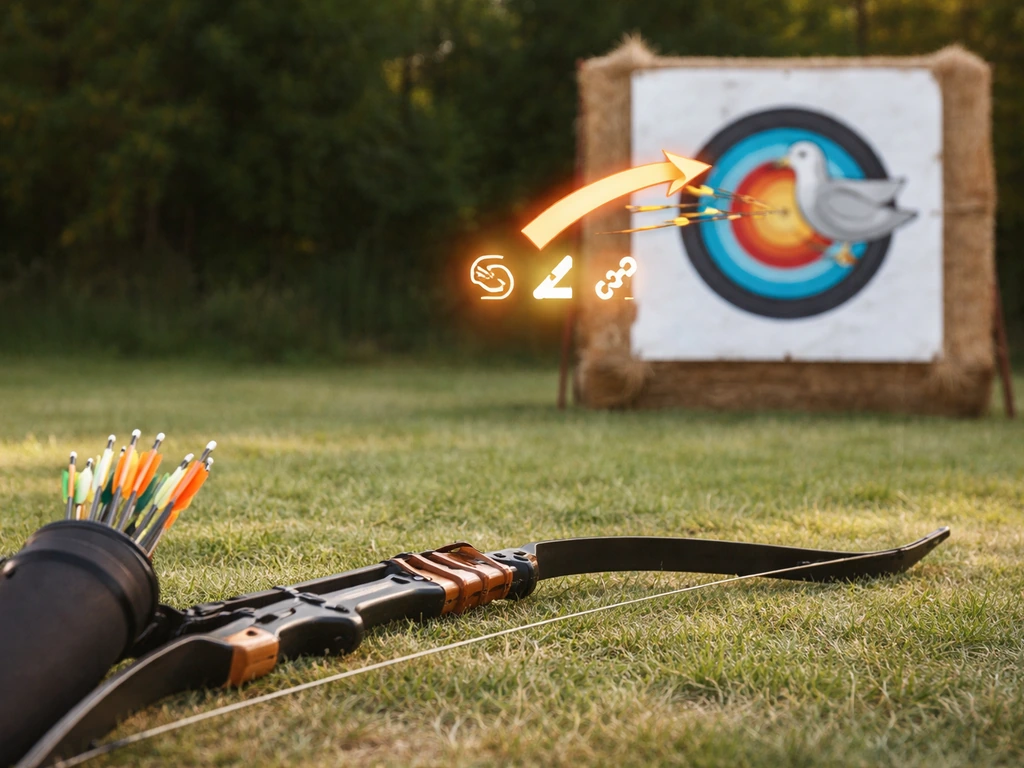
Bird-themed targets come in two main forms: printed 2D face targets (paper or cardboard) showing bird silhouettes or bird-shaped scoring zones, and 3D foam bird targets that replicate the shape and size of real species like turkeys, ducks, or pigeons. For pure form practice, 2D faces are cheaper and easier to score. For fun, variety, and a more realistic feel, 3D bird targets are hard to beat. Either way, mount them against a proper backstop, not a tree or a fence.
| Gear Item | Beginner Recommendation | Why It Matters |
|---|---|---|
| Bow type | Recurve, 20-30 lb draw weight | Teaches proper form; manageable for new muscles |
| Arrows | Matched spine per manufacturer chart | Mismatched spine ruins flight regardless of form |
| Target | 2D bird face or 3D foam bird | Safe, reusable, scored practice surface |
| Backstop | Foam block or packed straw bale | Stops arrows safely; protects property and wildlife |
| Finger tab or glove | Basic finger tab | Protects fingers; improves consistent release |
| Arm guard | Standard forearm guard | Prevents string slap and builds confidence |
Core shooting basics: stance, grip, draw, anchor, aim
Good form is just a sequence of repeatable steps. Oregon's Department of Fish and Wildlife describes proper stance as standing straight with your core engaged, your feet shoulder-width apart, perpendicular to the target. Mississippi State University Extension breaks the full shot process down into: stance, draw, anchor, aim, and release. Here's each step in plain terms.
- Stance: Stand sideways to the target, feet shoulder-width apart, body straight but relaxed. Your lead shoulder faces the target. Don't lean back or twist your hips.
- Grip: Hold the bow lightly in the web of your hand between thumb and index finger. A death-grip torques the bow and sends shots wide. The bow should feel like it's resting there, not squeezed.
- Draw: Pull the string back using your back muscles, not just your arm. Imagine you're pinching a pencil between your shoulder blades as you draw. This is the step most beginners rush.
- Anchor: Bring the string to a consistent spot on your face every single time. Common anchors are the corner of your mouth, under your chin, or touching your cheekbone. Pick one and repeat it identically on every shot.
- Aim: Focus your eye on the target, settle your sight or arrow tip on the scoring zone you want, and breathe out slowly. Don't stare at the arrow.
- Release: Let your fingers relax and open naturally. Don't pluck the string or flinch. Your draw hand should slide back slightly along your cheek as the string leaves your fingers.
- Follow-through: Hold your position until the arrow hits. Dropping your bow arm early is one of the most common reasons shots go low.
A useful drill from Mississippi State University's archery guide is to draw fully to your anchor and then let the bow down without shooting. Do this a few times before your session. It builds the muscle memory of a smooth draw without any pressure to aim, and it tells you quickly if your draw weight is too heavy (if you can't lower it with control, it's too much).
How to practice with bird-shaped targets
The single best piece of advice I can give a beginner: start embarrassingly close. Massachusetts' beginner archery guide recommends starting at 10 yards, partly to avoid losing arrows past the backstop. At that distance, you can see exactly where your form is breaking down, build confidence, and actually score well. Move back only when you're grouping arrows consistently at your current distance.
Distance and progression
- First 2-3 sessions: 10 yards (roughly 30 feet). Focus entirely on repeating your form, not on score.
- Sessions 4-6: Move to 15 yards once you're grouping 3 out of 6 arrows in the main body of the bird target.
- Intermediate goal: 20 yards. At this distance, small form errors show up clearly in shot groupings.
- Advanced: 30+ yards, but only after you have a consistent anchor and follow-through.
Drills that actually work
World Archery's practice guidance emphasizes quality over quantity. Shooting 60 mindless arrows builds bad habits. Shooting 20 focused arrows with intent builds skill. Here are a few drills that work well with bird targets specifically.
- The 'one arrow drill': Shoot a single arrow, walk to the target, study where it landed and why, walk back, repeat. Slow, but you learn more per arrow than any other method.
- The 'body zone drill': Bird targets (especially 3D ones) have clear vital zones. Challenge yourself to hit specific zones (head, wing, chest) in rotation rather than always aiming at the center.
- The 'blank bale drill': Move to 5 yards and shoot at a blank target with no markings. Forces you to focus on form and feel rather than score. Great for days when accuracy feels off.
- The 'group and move' drill: Shoot 6 arrows, record your group size on a notepad, then move back 5 yards. Track how your grouping changes with distance over several sessions.
Your first session plan
- Before you shoot: Review the range safety rules, check your backstop is solid, confirm no one (and no animals) are in the shooting zone. Learn or review the whistle commands if you're at a club range.
- Warm up: Do 5-10 slow draw-and-let-down reps without shooting. Get your muscles warmed up and your form dialed in.
- First 12 arrows: Shoot 2 sets of 6 from 10 yards. Don't score yet. Just focus on repeating the same stance, draw, anchor, and release each time.
- Score break: Walk to the target, pull your arrows, and note where they landed. Look for patterns (all left? All low?) and pick one thing to fix.
- Next 12 arrows: Fix that one thing and shoot another 2 sets of 6. Keep notes.
- End session: 30 to 40 arrows is plenty for your first day. Stop before fatigue sets in. Tired muscles build bad habits.
- Cool down: Spend 5 minutes watching the area around you. More on why below.
Common errors and how to fix them
World Archery lists nine common recurve mistakes, and most of them come down to three root causes: gripping too hard, rushing the draw, or flinching at release. Here's how the symptoms show up on a bird target, and what to do about them.
| What you see on target | Likely cause | Fix |
|---|---|---|
| Arrows consistently left (for right-handed archers) | Torque from gripping the bow too tightly | Relax your bow hand; let the bow fall forward after the shot |
| Arrows consistently low | Dropping the bow arm before the arrow leaves | Hold your follow-through position until you hear the arrow hit |
| Arrows scattering randomly | Inconsistent anchor point | Pick one anchor and consciously touch it the same way every shot |
| Arrows going high | Peeking at the target or lifting your head during release | Keep your head still and eyes on the target through the follow-through |
| Arrow fishtailing in flight | Arrow spine doesn't match bow draw weight | Use the manufacturer's spine selector tool to re-match your arrows |
| Shoulder or arm fatigue after a few shots | Draw weight too heavy for your current strength | Drop to lower limb poundage until your form is solid |
One mistake I see constantly with beginners is trying to fix everything at once. Pick the single most obvious error in your arrow group, work on just that for a full session, and then re-evaluate. Chasing multiple fixes simultaneously usually makes things worse before they get better.
Turn your practice sessions into bird learning
Here's the part that makes archery practice genuinely interesting for anyone who cares about birds: outdoor practice areas are almost always full of wildlife, and the quiet, patient nature of archery means birds often come surprisingly close. You're standing still, not making sudden movements, and over the course of a session you can observe more bird behavior than most casual walkers ever see.
Use your rest breaks (after every 6-arrow end is a natural pause) to scan the trees, fence lines, and ground around you. Keep a small notebook or use a free birding app on your phone to log what you see. Over a season of regular practice sessions, you'll build a surprisingly solid understanding of your local species, their habits, and their calls, without doing anything extra.
- Note the species, time of day, and what the bird was doing (foraging, singing, perching) in the same notebook where you track your arrow groups
- Try to identify birds by sound before you look; this trains your ear and is a key birdwatching skill
- If a bird lands near your target area during a shooting pause, use that as a chance to study its size, markings, and movement up close
- After several sessions, compare your bird sightings to your accuracy progress; it's a fun way to see both skills improving together
- Consider using 3D bird targets modeled after local species (turkey, pheasant, duck) to connect your target practice to the birds you're actually seeing around you
One important note on behavior near actual birds: Washington State wildlife guidance is clear that repeatedly disturbing birds, even unintentionally, counts as harassment and can drive them from breeding territory. Keep noise low during observation breaks, never approach a bird that seems agitated or distressed, and give nesting areas a wide berth. The goal is passive observation, not interaction. If you’re also using a safety checklist like the Frank Bird Safety Pyramid, treat it as a reminder to keep every session passive, controlled, and wildlife-safe passive observation.
If you want to go deeper on the bird side of things, the birdwatching and bird identification sections of this site pair well with outdoor archery sessions. If you mean learning to bird hunt in the legal, ethical way, you should start by reviewing local laws and safe hunting practices before planning any outing. And if you're curious about the specific arrow hardware used in hunting contexts (like blunt tips or judo points for small game), topics like bird tips for arrows and arrow tips for bird hunting cover that territory in detail. For now though, keep the focus on your form, your target, and the birds that show up on their own terms. Once you’re comfortable with bird-shaped targets, these bird shooting tips can help you translate your practice into more consistent groups.
FAQ
Can I use bird-hunting arrow tips on bird-shaped target targets?
Start with a blunted target arrow only. For bird-themed target practice, use normal target tips (or your usual field points) on a real backstop setup. If you are tempted by “bird hunting” hardware, confirm legality for your area first, because small-game arrow tips and configurations can be regulated and they are not meant for casual target ranges.
What should I do if a bird flies into my shooting lane while I’m practicing?
Yes, but you still need a safe backstop and to treat any animal that enters the safety zone as a stop signal. On a typical range, choose a location where birds are unlikely to cross the firing line, and pause immediately if a bird lands or flies into the danger area. Do not try to “thread” shots to avoid them.
How do I tell whether my misses are from form or from the bird target setup?
Use bird-shaped targets to evaluate form, not to chase the bird silhouette. If your groups are scattered, the first fix is almost always draw weight and release control. If the shot rhythm is stable but accuracy is poor, check arrow spine and nock set alignment before changing your stance or aiming style.
My grouping changes from one session to the next. What are the most common causes?
If you are getting inconsistent hits low, left, right, or with wide vertical spread, reduce draw weight or slow down your draw tempo and release. Then re-check arrow spine versus your draw length and peak draw weight. A target face that is off-level can also distort your “diagnosis,” so verify the stand and target height before adjusting anything.
Are bird-shaped targets good for accuracy training, or do they distract beginners?
Bird targets are great for scoring, but they can also encourage aiming at distracting shapes. For the cleanest learning, use smaller scoring zones or 2D faces briefly, then switch back to larger aiming references while you perfect stance and anchor. This keeps your practice focused on mechanics rather than perfect bullseye chasing.
How should I pace my practice when using bird-themed targets?
Begin with simple ends, like 3 to 6 arrows at a time, then reassess. The moment you start rushing or your anchor point feels inconsistent, stop that end even if you planned to shoot more. Quality breaks let you reset form, and they also help you notice wildlife movement early.
How can I tell if my draw weight is too heavy before I develop bad habits?
If you can’t lower draw weight with controlled lowering drills (draw to anchor, then let down smoothly), you are likely overbowed. The practical rule is, if fatigue or tension makes your release timing change after a few arrows, you need less draw weight or more time with a lighter setup.
What’s the best way to use scoring on bird targets without constantly changing my aim?
For short-range form practice, keep your eyes on a consistent aiming point and use your scoring results as feedback only. If arrows consistently group outside the bird scoring zone, don’t immediately “aim differently” on every shot. Instead, fix one variable per session, like anchor consistency or release relaxation.
Can I practice bird-target archery outdoors if there’s a lot of wildlife around?
Yes, and it can be safer and more comfortable. If birds are active and you keep seeing them near the safety area, move to a more enclosed range, set up the backstop so birds cannot enter behind or in front, or switch to indoor practice with printed bird silhouettes. Wildlife presence is a reason to adapt the venue, not force shots.
How far should I move back after I start at 10 yards?
Move closer only when your groups are tight enough to show a pattern, then progress gradually. A good next step is, after you can consistently group at your current distance, add a small distance increment and repeat the same focused drill. Avoid big jumps because your brain adapts to distance errors by altering form.
What’s a safe way to combine birdwatching notes with target practice breaks?
Treat wildlife viewing breaks as separate from shooting. Keep your body and gear oriented safely, and do not stand downrange or near the target face when arrows are in play. If you log bird activity, do it during planned rests, and keep noise low so you do not disturb birds or distract other shooters.
Next Article
Frank Bird Safety Pyramid: A Practical Risk Control Guide
Use a safety pyramid to prevent bird injuries, escapes, disease, and weather risks with checklists, do’s, and quick fixe