You can improve your backyard bird watching starting today, no fancy gear or prior experience required. The core idea is simple: set up your yard to attract birds, use the right tools to spot and identify them, and build a few habits around timing and observation. That's it. Everything else is just detail. This guide covers all of it, from what to buy first to your plan for the next seven days.
Backyard Bird Watching Tips: Set Up, Identify, Improve

Marcus Hendricks
13 Apr 2026
Getting started: what you need today
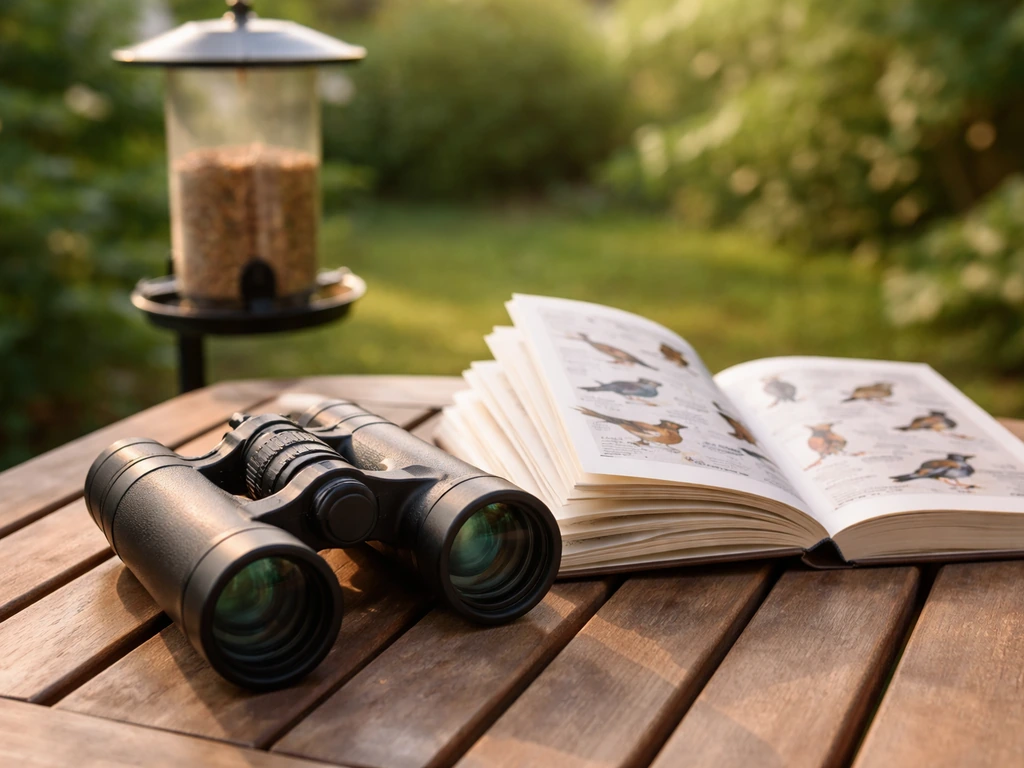
The good news is the minimum gear list is short. You need a decent pair of binoculars and a way to identify what you're seeing. That's your starting kit. Everything else, a camera, a field guide, a notebook, comes later if you want it.
For binoculars, aim for 8x magnification to start. Lower magnification gives you a wider field of view, which matters a lot when you're trying to track a bird flitting between branches. You don't have to spend a fortune either. Binoculars in the $250 to $500 range give you a view that's about 95% perfect for a beginner, according to instructors at the Buffalo Audubon Society. Yes, there are $1,200 pairs out there, but the jump in quality at that price isn't worth it until you know you're hooked.
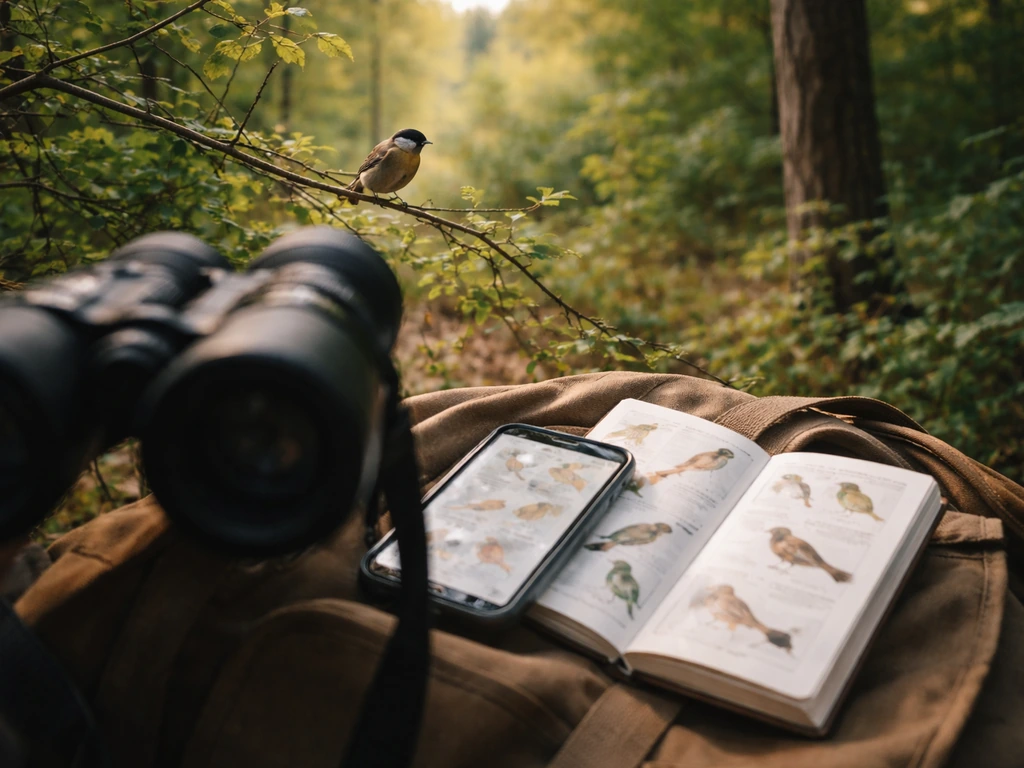
For identification, download Merlin Bird ID from Cornell Lab. It's free, and it's genuinely impressive. It can identify more than 450 bird species by sound, and it also has photo ID, range maps, and a step-by-step ID mode where you answer a few questions and it narrows down the options. You can even download regional packs so it works offline. If you're just getting started and want a broader picture of the hobby, the beginners guide to bird watching is worth reading alongside this one to fill in any gaps.
If you want a physical backup, a regional field guide for your area works well. But honestly, most beginners use Merlin and never look back. Start there.
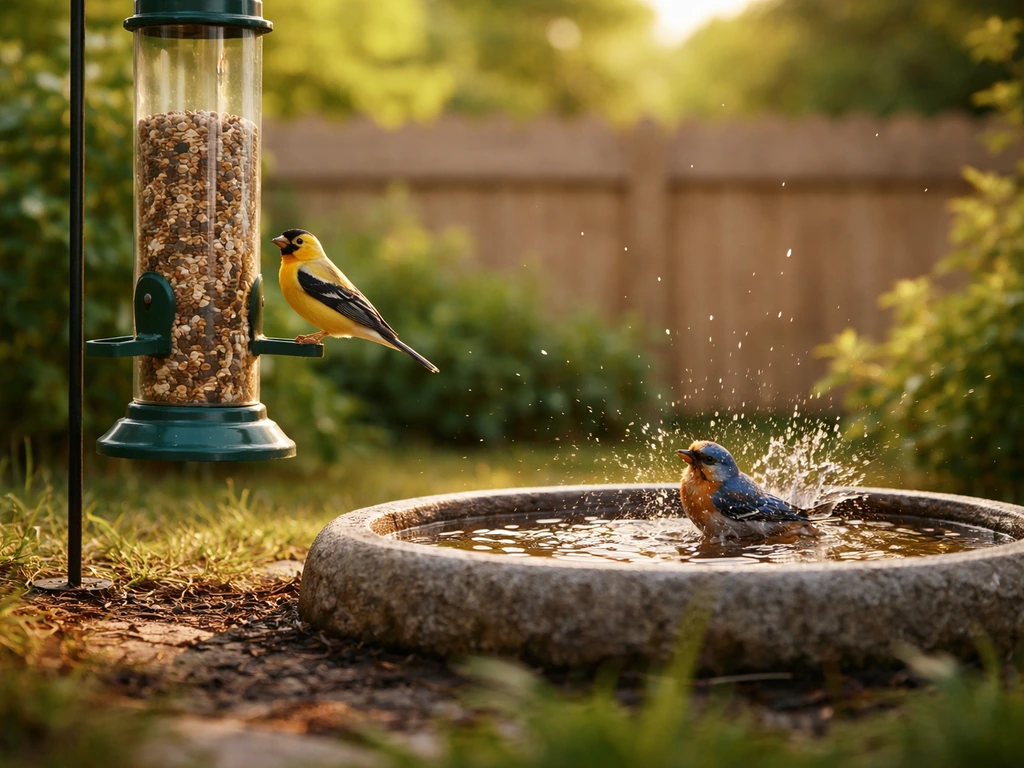
Set up your backyard to attract birds
Birds need four things: food, water, shelter, and safety. Your yard doesn't have to be perfect, but the closer it checks those boxes, the more birds you'll see. The single biggest upgrade most people can make is planting native plants. Cornell Lab puts it plainly: native plants add beauty and interest while providing shelter and nesting areas for birds. They also support insects, which are the main food source for most birds, especially during breeding season.
One thing that trips people up is the lawn itself. A big, tidy, closely mowed lawn is basically a bird desert. Reducing lawn area and replacing it with native shrubs, grasses, or wildflowers makes a real difference. If you have trees or garden beds, leave the leaf litter. Seriously, don't rake it all away. The USDA NRCS recommends keeping a thin layer of leaves on the ground or mulching it into garden beds because it supports the invertebrates that birds eat. I know it feels messy. Leave it anyway.
Also, skip the pesticides. Pesticides knock out the insects that birds depend on, and they can directly harm birds that eat treated bugs or seeds. A pesticide-free yard is a healthier food web from the ground up, and it's one of the simplest habitat improvements you can make without spending anything.
Where and how to place feeders, water, and shelter
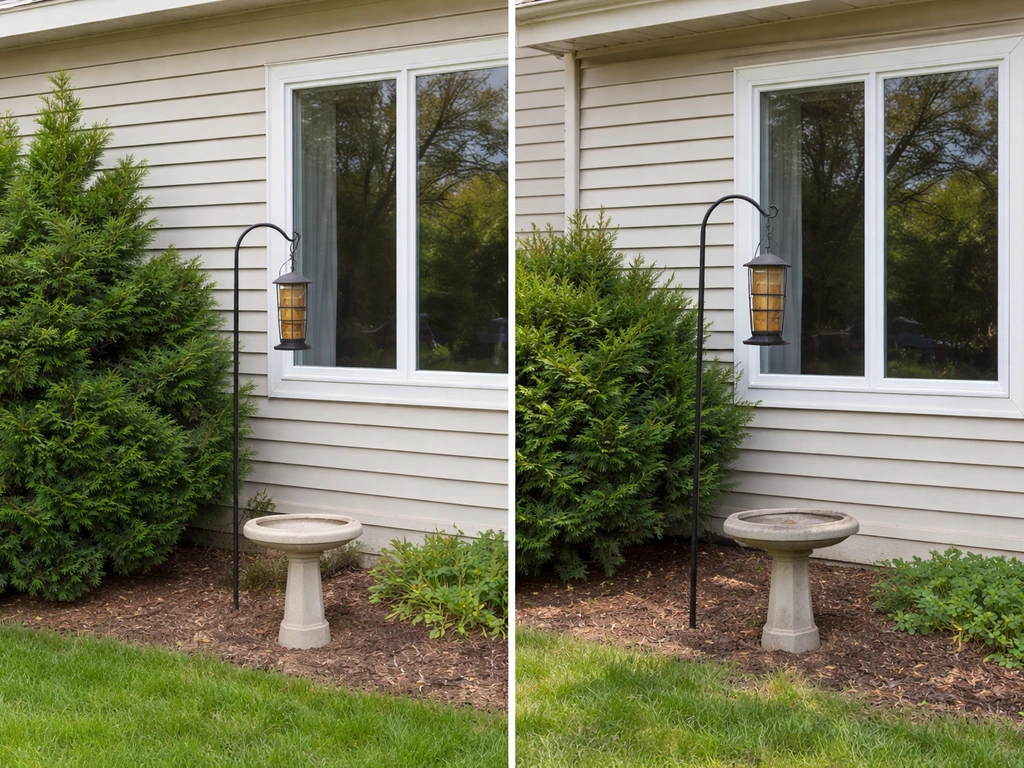
Placement matters more than most beginners expect. The biggest risk to get right from the start is window collisions. Birds can't see glass, and a feeder positioned at the wrong distance from your house can turn into a trap. Audubon recommends two safe zones: place feeders either within 3 feet of a window (so birds don't have space to build up speed before impact) or more than 30 feet away (so birds are well clear of the house). The dangerous middle zone, roughly 3 to 30 feet out, gives birds just enough runway to hit the glass hard. Pick one of the two safe options and stick with it.
The same rule applies to birdbaths. If you want a bath near a window for easy viewing, place it within that 3-foot zone. If you'd rather watch from a distance, 30-plus feet out is your target. Place baths in a spot with some nearby cover, like a shrub or low branch, so birds feel safe landing and have somewhere to retreat if spooked.
For feeders specifically, position them near natural cover but not so close that cats or squirrels can leap onto them from a branch. A pole-mounted feeder with a baffle is often easier to manage than a hanging feeder if squirrels are a problem in your yard.
Feeder and bath maintenance (don't skip this)
Dirty feeders and stagnant water are probably the most common beginner mistake I see. Audubon recommends changing birdbath water daily, or every other day at minimum, to prevent mosquitoes, algae, and bacterial growth. For seed and suet feeders, cleaning every other week is a good baseline, but bump that up in hot or humid weather. If you have a hummingbird feeder, clean it every time you refill the nectar, which depending on temperatures means every two to five days. If the water looks cloudy or you see black mold, replace everything immediately and scrub the feeder with a diluted bleach solution before refilling. This isn't optional, a dirty feeder can spread disease through your local bird population.
Identification basics: sight, field marks, and quick ID workflow
The fastest way to improve at bird ID is to build a quick mental checklist you run every time you see a bird. Audubon calls these "field marks," and the process is straightforward: look at size and shape first, then bill structure, then plumage, then what the bird is doing. That last point matters more than people think. Behavior is part of the ID. A bird creeping headfirst down a tree trunk is almost certainly a nuthatch. A bird pumping its tail while perched is probably a wagtail or phoebe. You don't need to memorize every species, you just need to notice the overall impression and a couple of distinctive details.
Birders sometimes call that overall impression "jizz," which sounds odd but just means the general gestalt of the bird: its posture, proportions, and the way it moves. Experienced birders often ID a species in a split second based on jizz alone before they even consciously register the field marks. As a beginner, you won't have that instinct yet, but consciously asking yourself "what does this bird remind me of?" is a good first step toward building it.
Some birds look nearly identical and are genuinely confusing even for intermediate birders. The house finch and purple finch are a classic example. They look similar at a glance, but the purple finch has a more raspberry-washed head and a noticeably thicker bill, while the house finch tends to have streakier brown tones and a finer bill. If you're in the Interior West, you also have Cassin's finch to contend with. When you hit a confusing pair like this, Merlin's photo comparison tool is your best friend.
Here's a quick ID workflow to use every time you spot something new:
- Note the size: is it smaller than a sparrow, sparrow-sized, robin-sized, or crow-sized?
- Check the shape: long tail, short tail, chunky body, slim body?
- Look at the bill: thin and pointy (insect-eater), thick and conical (seed-eater), hooked (raptor)?
- Note any obvious color patches or patterns on the head, wings, or breast.
- Watch what it's doing: feeding on the ground, clinging to bark, hovering, swimming?
- Open Merlin and use Sound ID or Step-by-Step ID to confirm.
Using bird sounds to find and confirm species
Sound is probably the most underused tool for backyard birders. Most birds spend more time being heard than seen, especially in dense vegetation. Learning to use sound for ID will multiply the number of species you can detect in your own yard. The good news is you don't have to learn everything at once.
Merlin's Sound ID feature is the easiest entry point. Open the app, tap Sound ID, and hold your phone up. Merlin listens in real time and shows you species as it detects them. It's genuinely useful, though keep in mind that phone and microphone positioning can affect detection, so try pointing the phone toward the sound source rather than just holding it at your side. You may miss some species and occasionally get a false positive, but it's a great learning tool and catches a lot.
If you want to go deeper, the Cornell Guide to Bird Sounds for the United States and Canada (released in December 2020 and updated as recently as February 2026) is the most comprehensive reference available. It includes curated recordings of songs, calls, flight calls, and mechanical sounds for each species, which is useful when you're trying to tell apart similar-sounding birds. You can use it alongside Merlin for confirmation. Audubon also has beginner-friendly "birding by ear" resources that walk you through learning vocalizations systematically, which is worth exploring once you've got the basics down.
A practical tip: when you hear an unfamiliar sound, stop moving and listen for 30 seconds before you look. Your ears will often lead your eyes to the right spot in the tree or shrub. Trying to scan and listen at the same time makes both harder.
Best times, seasons, and observation techniques
Timing is one of the highest-leverage things you can control. Cornell Lab's eBird data shows that bird detection peaks early in the morning during what birders call the dawn chorus, with a secondary peak in the early evening. If you can only get outside once a day, make it within the first two hours after sunrise. Birds are most active, most vocal, and most visible then. Midday is generally the slowest period, especially in warm weather.
Seasonally, spring migration (roughly March through May in most of North America) is the most exciting time for backyard birding because you'll see species passing through that don't normally live in your area. Fall migration is similarly productive but often quieter in terms of song. Winter can be excellent at feeders because birds are focused on food and less wary than usual. Summer is slower but great for watching nesting behavior if you've attracted resident species.
For technique, slow down more than you think you need to. Most people walk through their yard too fast and flush birds before they even see them. Pick a spot, stand still for five minutes, and let the yard settle around you. Birds that hid when you walked in will reappear. Scan from bottom to top: check the ground first for ground-feeders, then low shrubs, then mid-canopy, then treetops. This is a much more systematic approach than just looking wherever movement catches your eye.
If you want to track what you see and build a yard list over time, eBird is the best tool for it. You can keep a running checklist throughout the day and even submit separate checklists for different time blocks, which is useful if you're watching at dawn and again in the evening. If you bird across dawn, split your checklist at sunrise so eBird correctly tags your day and night observations. Many people also find that how to bird watch from home gives helpful advice on turning a window or porch into a dedicated observation point so you can log birds without even stepping outside.
Avoiding common mistakes + simple first-week plan
Mistakes that trip up almost every beginner
- Placing feeders in the danger zone (3 to 30 feet from windows): move them to under 3 feet or over 30 feet.
- Not cleaning feeders or changing bath water: dirty setups spread disease and drive birds away.
- Using the wrong seed: black-oil sunflower seed is the closest thing to a universal crowd-pleaser. Cheap mixed seed bags often contain filler seeds most birds ignore and leave to rot.
- Trying to ID birds too fast: rushing past the field-mark checklist leads to misidentification and frustration.
- Standing in the open and moving too much: you spook birds before you see them. Stand still, blend in.
- Only watching at midday: shift at least one session to early morning and watch your sightings multiply.
- Ignoring sound: a huge portion of the birds in your yard are announcing themselves; use Merlin to start learning their calls.
- Using pesticides: kills the insect food chain birds depend on.
Your first-week backyard birding plan
| Day | Task |
|---|---|
| Day 1 | Download Merlin, walk your yard slowly for 15 minutes, and try Sound ID. Note anything you see or hear. |
| Day 2 | Check feeder and bath placement against the 3-feet-or-30-feet rule. Adjust if needed. Fill feeders with black-oil sunflower seed. |
| Day 3 | Go out within an hour of sunrise. Stand still in one spot for 10 minutes. Practice the size-shape-bill-behavior checklist on every bird you see. |
| Day 4 | Create a free eBird account and submit your first yard checklist, even if it's just three species. |
| Day 5 | Clean your feeder and refresh your birdbath. Make this a weekly habit going forward. |
| Day 6 | Spend 15 minutes listening with Merlin Sound ID. Try to connect at least one sound to a bird you can see. |
| Day 7 | Review your eBird list. Look up one species you identified on Merlin and read its full profile, range map included. Repeat next week. |
That's a realistic first week. Nothing on that list takes more than 20 minutes, and by the end of it you'll have a functioning setup, a yard list, and a few species you can actually recognize by sight and sound. From there, it compounds quickly.
If you decide you want to start documenting what you see with photos, the beginners guide to bird photography covers how to get started without expensive gear. And if you've recently added a pet bird to your household alongside your backyard hobby, some of the new bird owner tips on this site cross over in useful ways, especially around understanding bird behavior and building a routine.
Backyard birding rewards patience more than any other skill. The setup work you do in week one keeps paying off for months, sometimes years, because once birds find a reliable food and water source they come back. Your yard becomes part of their circuit. Give it a week, and you'll already be seeing that happen.
FAQ
How long does it usually take before birds start showing up after I improve my yard?
Yes, but change one thing first, keep it the same time of day, and scale slowly. In most yards the easiest transition is swapping one part of habitat at a time (for example, add a few native shrubs or a small wildflower patch instead of reworking the whole lawn overnight). Birds often respond within days if food and shelter are already present, but nesting habitat quality improves over weeks.
What should I troubleshoot first if I set up feeders and still see almost no birds?
If you are not seeing many birds, check the basics in this order: windows, food availability, and water cleanliness. Window placement mistakes are common, feeders without nearby cover get ignored, and stagnant water stops attracting birds quickly. Also confirm you are offering the right type of food for your season, in winter switch to higher-energy foods like suet or appropriate seed mixes.
Do window-collision rules apply the same way if I want to watch birds very close up?
Use the two-window safe zones as your baseline, then add a safety cover layer. If you want to keep feeders close for viewing, place them within 3 feet or more than 30 feet, and consider adding window collision prevention film or decals if you have glass within the dangerous middle range. Even with good placement, dense feeder traffic increases collision risk, so position matters.
How can I add feeders without creating a yard that only works when I’m feeding constantly?
Assume you can invite more birds without making them dependent. Start with a couple of feeders rather than everything at once, and keep natural food sources in place by planting natives and reducing lawn. You can also rotate feeder types seasonally (seed in cool months, suet during cold snaps, hummingbird nectar during peak flowering or migration) so the yard remains the main attraction.
What’s different about birdbath care in freezing weather or extreme heat?
It’s safer to offer water than to assume birds will use it outdoors year-round. In freezing weather, use a birdbath heater or switch to a solution that prevents complete freezing. Change water more often in heat, and in winter keep water fresh but avoid constantly adding warm water that can shock birds at low temperatures.
How do I practice bird identification when I only have a few minutes outside?
For many beginners, shorter observation sessions beat long ones. If your goal is ID, pick 15 to 20 minutes at a consistent time and use a simple routine: scan bottom to top once, then pause, then check sound for 30 seconds before you move. You can also create separate eBird checklists for morning and evening to avoid mixing behavior cues from different times.
How should I handle unsure IDs and partial sightings in my yard list and photos?
Yes, but treat it as a separate workflow from feeding. Your yard list will be cleaner if you record uncertainties in a consistent way (for example, note “sparrow sp.” or “likely finch” when you cannot confirm). For photos, capture at least one image of the head and one of the posture or wing pattern, because some of the most diagnostic details are not visible in distant shots.
How do I know when I should clean a seed or suet feeder sooner than my normal schedule?
It depends on what the feeder targets and how much bird traffic you get. Seed and suet feeders usually benefit from more frequent cleaning during hot, humid weather. If you see clumping, mold, or a strong odor, clean sooner than your baseline schedule. Also replace any seed that looks damp or has visible fungus, even if the feeder itself is clean.
Where exactly should I place feeders if squirrels are dominant in my yard?
Give birds a “safe landing zone” rather than aiming for perfect cleanliness only. Position feeders near natural cover so birds can retreat quickly, but keep feeders far enough that squirrels or cats cannot easily launch onto them from a branch or fence line. If you have a lot of squirrel pressure, a baffle on a pole-mounted feeder often reduces losses more reliably than changing feeder height alone.
Is phone sound ID accurate enough to trust, or should I confirm species another way?
Yes, and it can cause misses if you rely on sound alone. Use Merlin Sound ID as a learning aid, then confirm by looking when the app suggests a species. Also point the phone toward the sound source, step back slightly if the microphone is blocked by your body, and pause your movement for about 30 seconds before you scan, because moving while listening reduces accuracy.
What’s the best way to study bird ID without getting overwhelmed by confusing lookalikes?
Start with the species you are already seeing regularly. Pick a few common “practice birds” and learn their field marks, then extend to lookalikes one pair at a time (for example, house finch versus purple finch). If you try to learn everything at once, confusing pairs will slow you down. Merlin’s photo comparison is best used after you’ve made your own guess, not before.
What is the quickest method to improve my accuracy from week to week?
Most beginner birders improve faster by focusing on behavior plus one or two visual clues. Run the same checklist every time: size and shape, bill structure, plumage, then what it is doing (foraging method, movement on trunk, tail pumping, or flight style). That approach reduces the need to memorize every detail on the first day.
How should my backyard bird watching routine change by season if I only go out once a day?
Season can change both the “who” and the “how you should watch.” If you only have time once daily, target the first two hours after sunrise during warm months. In migration seasons, widen your net by spending a little more time scanning for unfamiliar species, and use sound more aggressively because some migrants spend less time visible than vocal resident birds.
Can I log birds consistently if I mostly bird from a porch or window instead of walking around?
Yes, you can. The simplest approach is to set up a repeatable route from your main viewing point, then log observations from that fixed location. Use binoculars consistently, and make sure your notes include time block and whether birds were feeding, bathing, or just passing through, then split checklists at sunrise if you bird across it so your records match day and night activity.
Next Article
Beginners Guide to Bird Watching: Start Today Step by Step
Step-by-step beginners guide to bird watching with gear, field marks, sounds, and a 1-week starter plan to begin today.