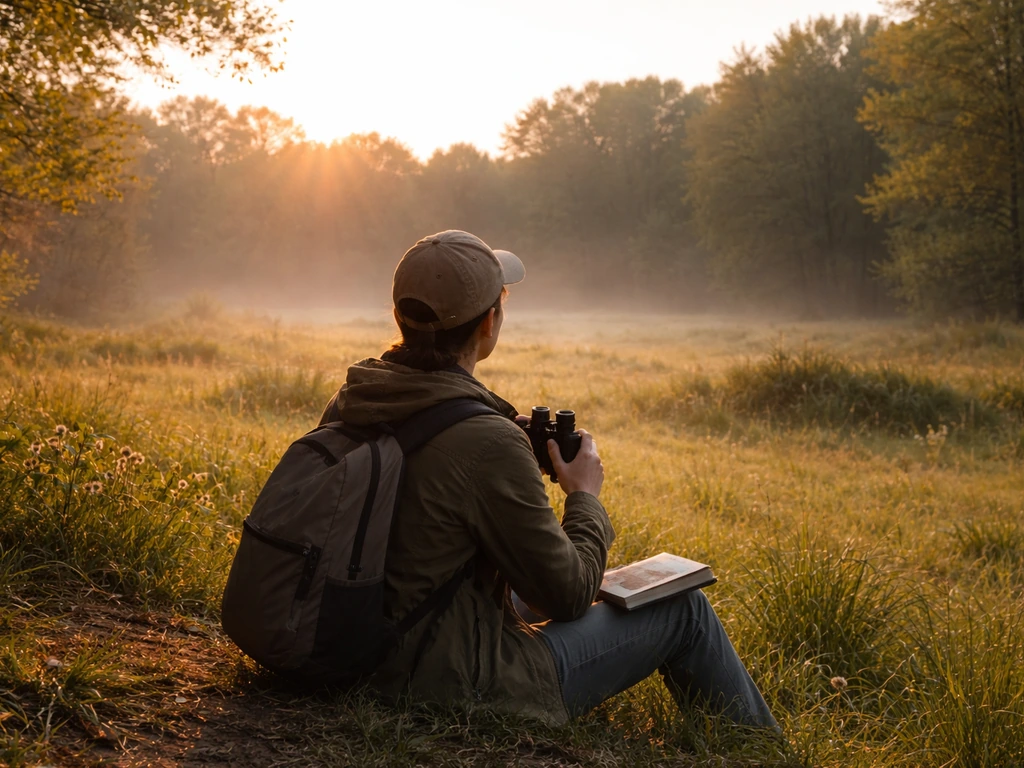
You can start bird watching today. Right now. You don't need expensive gear, a field guide collection, or any special training. All you need is a pair of eyes, a little patience, and a willingness to stop and look up once in a while. This guide walks you through everything from scratch: what to bring, where to go, how to actually spot and identify birds, how to use sound to your advantage, and a simple 7-day plan to build real skills fast.
Beginners Guide to Bird Watching: Start Today Step by Step

Marcus Hendricks
11 Apr 2026
What you need to start bird watching today
The honest answer is: almost nothing. The first time I went birding seriously, I had my phone and a cup of coffee. That's it. You can go outside right now and start noticing birds with zero equipment. But if you want to make progress faster and actually enjoy the experience, a few simple things help enormously.
- A pair of binoculars (entry-level 8x42 is a great starting point — more on this below)
- A free bird ID app on your phone, especially Merlin Bird ID by Cornell Lab
- Comfortable walking shoes and weather-appropriate layers
- A small notebook or the eBird app to log what you see
- Patience — birds don't perform on cue
That's genuinely the full starter list. You do not need a spotting scope, a special vest, or a physical field guide on day one. Those things are useful later, but they're not the barrier between you and bird watching. The barrier is just deciding to go outside and pay attention.
Where to go: best beginner locations and timing
Start close to home. Your backyard, a local park, a nature trail, or even a parking lot with trees around it, all of these work. Birds are everywhere, and the best location for a beginner is honestly wherever you'll actually show up. Consistency beats optimal habitat every time in the early stages.
That said, timing matters a lot. The best birding window is generally between dawn and 11am, when birds are most active, feeding, calling, and moving around. Early mornings are the gold standard because you'll often hear more birds than you can see, which is actually a fantastic way to train your ear. National parks are another great option: the National Park Service specifically organizes birdwatching activity around time of day, and many parks have trails designed for wildlife observation. If you're thinking about staying closer to home, bird watching from home is a totally legitimate and often underrated way to build your skills without even leaving your yard.
Edge habitats, where one type of terrain meets another, like where a lawn meets a tree line, or where a pond meets open grass, are especially productive. Birds congregate at these transition zones to feed and shelter. If you can find a spot like that within walking distance, start there.
How to spot birds: scanning, distance, and field marks
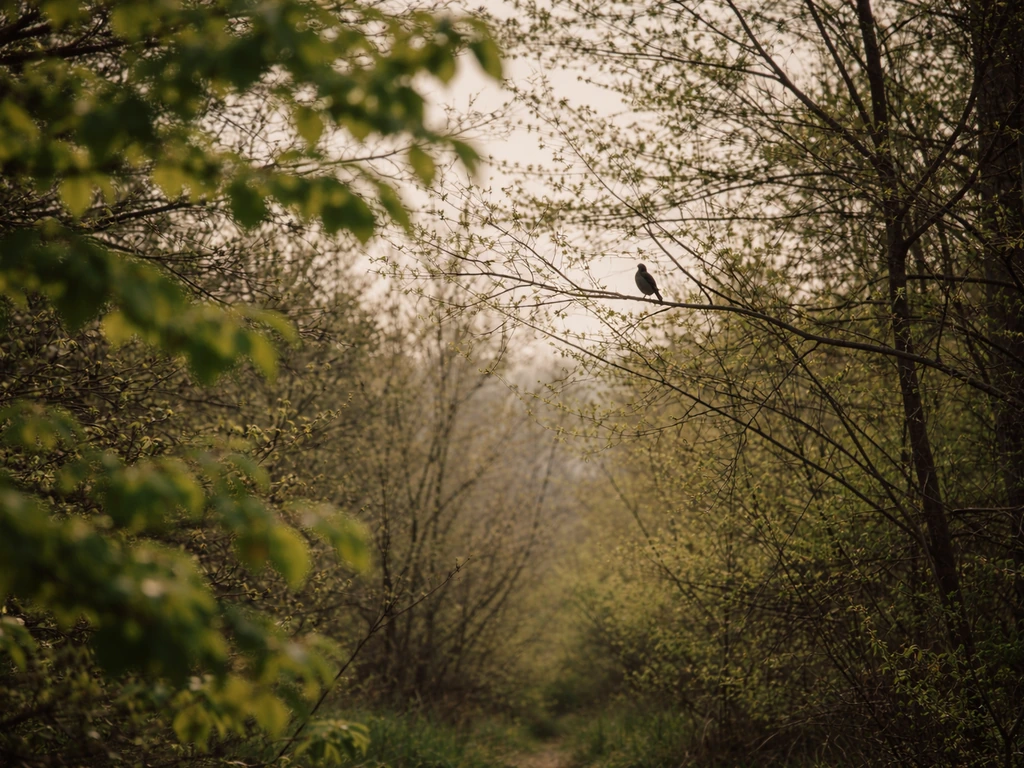
Most beginners make the same mistake: they look for the whole bird. Instead, look for movement. A flicker in the leaves, a branch bouncing when nothing moved it, a shape that breaks the silhouette of a tree. Birds give themselves away through motion more often than through color or size. Once you catch movement, then you freeze and focus.
The technique Audubon recommends is simple and it actually works: stop, look, listen. Then do it again. And again. Meander slowly, scanning the sky, the mid-story of trees, and the ground in a repeating pattern. Don't rush from spot to spot. The birds are already there, you just need to slow down enough to notice them. I learned this the hard way on my first few outings, where I covered a lot of ground and saw almost nothing because I was basically hiking, not birding.
Once you've spotted a bird, the first things to note are size and structure, not color. Ask yourself: is it sparrow-sized, robin-sized, or crow-sized? Is the beak short and stubby or long and thin? Is the tail long or short? Is it holding its body horizontally or upright? These structural cues (called "field marks" in birding) help you narrow down the species before you even worry about color patterns. Comparing the bird's size and shape to nearby birds you already recognize is one of the fastest ways to orient yourself.
Beginner identification workflow: name the bird with confidence
Here's the workflow I use, and it works whether you're standing in a park or looking out a window. Follow these steps in order and you'll get to a confident ID surprisingly often.
- Note size and shape first — compare to a bird you already know (robin, crow, sparrow)
- Look at the bill: thick and seed-cracking, thin and insect-probing, hooked and raptorial, or long and probing?
- Check posture and movement: does it hop, walk, or creep? Does it pump its tail?
- Now look at color and pattern: note any wing bars, eye rings, streaking on the breast, or cap color
- Note the habitat and behavior: is it on the ground, in shrubs, at a feeder, or soaring overhead?
- Open Merlin Bird ID, enter your location and date, and answer the quick visual prompts — it'll give you a short list of likely candidates
- Cross-check your notes against the top Merlin suggestions and pick the best match
Don't expect perfection. Some birds are genuinely hard to ID, and even experienced birders leave some sightings as "unidentified." That's fine. The goal at this stage is building a reliable process, not getting every bird right. The more you practice the workflow, the faster and more accurate it becomes.
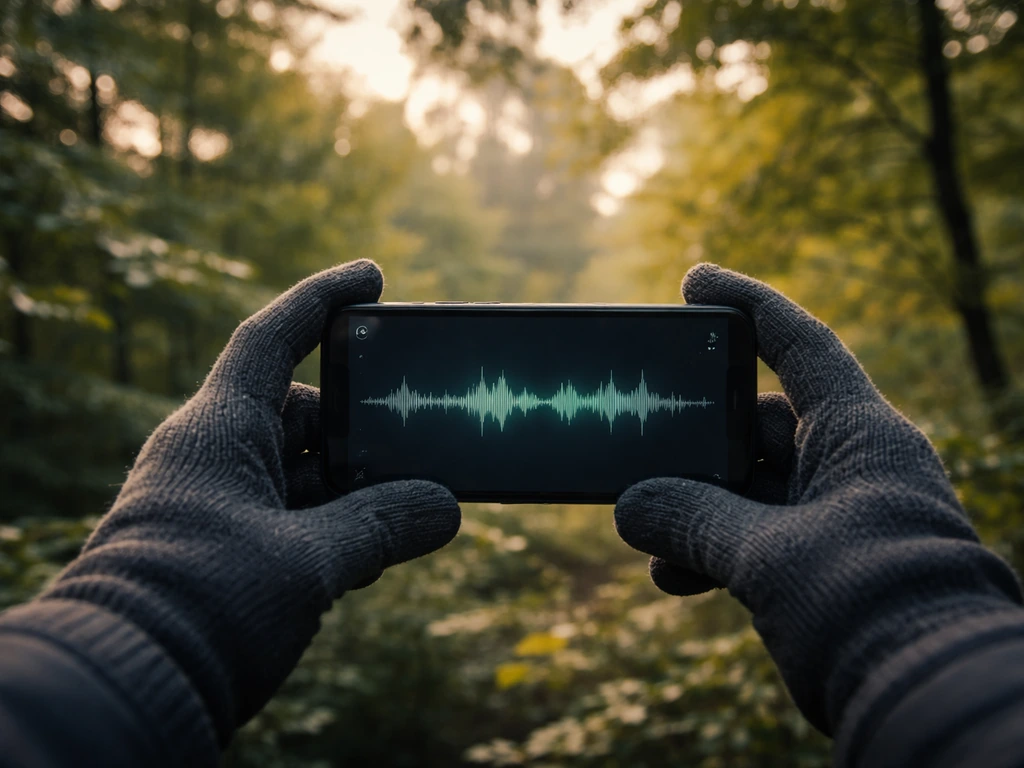
Using bird sounds to find and identify birds
Sound is the skill that separates okay birders from great ones. Most of the time, you'll hear a bird before you ever see it. Learning to use sound, both to find birds and to identify them, will dramatically increase how much you see on any outing.
The first thing to understand is that birds make two main types of vocalizations: songs and calls. Songs are longer, more musical, and typically used by males to establish territory or attract mates. Calls are shorter, sharper sounds used for alarm, contact, or coordination. Learning to tell the difference helps you interpret what birds are doing and where they are.
For identification, Merlin Bird ID's Sound ID feature is the single best tool available to beginners right now. You open the app, tap Sound ID, point your phone toward the birds, and it listens in real time. It's powered by machine learning trained on annotated audio from the Macaulay Library, and it can recognize the voices of over 450 bird species in the United States and Canada. It doesn't just tell you what bird is making noise, it shows you a live spectrogram of the sound as it identifies. I've used it in dense forest where I couldn't see a single bird and still built a list of 12 species in an hour. It's genuinely remarkable.
If you want to go deeper on learning bird sounds by ear (rather than relying entirely on an app), Audubon's birding-by-ear resources are worth exploring. Building your own mental library of calls takes time, but it's incredibly rewarding once it clicks.
One important note: using audio playback to lure birds in is a practice you should approach carefully. The American Birding Association's Code of Birding Ethics specifically advises limiting the use of recordings and other audio methods to attract birds, particularly in heavily birded areas, or for rare, threatened, or endangered species. Playback can stress birds and disrupt nesting behavior. Use Sound ID to listen passively, don't broadcast calls into the wild to draw birds closer, especially in sensitive habitats.
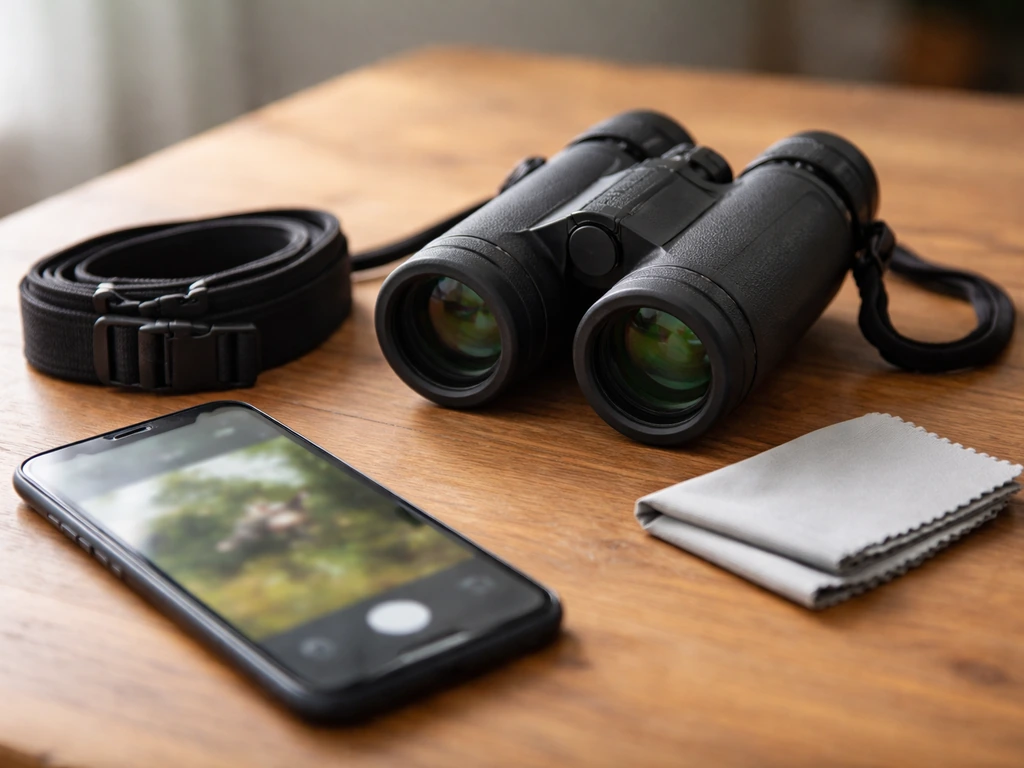
Essential beginner gear and simple equipment how-to
You'll eventually want a decent pair of binoculars, and it's worth understanding the basics before you buy. The two numbers on any binocular (like 8x42) tell you magnification and objective lens diameter. An 8x42 magnifies the image 8 times with a 42mm front lens. For beginners, 8x42 is the most popular choice because it balances magnification, brightness, and field of view well. Going higher in magnification (like 10x) sounds better but it actually narrows your field of view and makes hand-shake more noticeable, which makes finding and tracking fast-moving birds harder.
Here's a quick comparison of common beginner binocular sizes to help you choose:
| Size | Magnification | Best For | Tradeoff |
|---|---|---|---|
| 8x32 | 8x | Travel, lightweight use | Slightly less bright in low light |
| 8x42 | 8x | All-around beginner birding | Heavier than 8x32, but excellent balance |
| 7x35 / 7x42 | 7x | Wide field of view, easier tracking | Lower magnification |
| 10x42 | 10x | Distance viewing, open habitats | Narrower FOV, shakier handheld |
When you get your binoculars, take a few minutes to set them up properly before your first outing. Start by adjusting the hinge so the barrels match your eye spacing (interpupillary distance). Then close your right eye and focus on something stationary using the center focus wheel. Now close your left eye and use the diopter adjustment (usually on the right barrel) to bring the image sharp for your right eye alone. After that, the center wheel handles all focusing. Practice this until it feels automatic, fumbling with diopter settings in the field will make you miss birds.
One thing that trips up a lot of beginners is finding a bird in binoculars after spotting it with the naked eye. The trick is to keep your eyes on the bird while you raise the binoculars to your face, rather than looking down at the binos and then back up. Lock your gaze on the bird first, then bring the glass up to meet your eyes. It feels awkward at first but becomes second nature quickly.
Beyond binoculars, your phone is your most powerful tool. Merlin Bird ID (free, by Cornell Lab) handles both visual and sound ID. eBird (also free, also Cornell) lets you log your sightings, explore local hotspots, and track your life list. If you eventually want a physical field guide, the Sibley Guide to Birds or the Peterson Field Guides are the most widely recommended for North American beginners. But honestly, start with the apps. They're faster, more current, and always in your pocket.
Set up a beginner-friendly bird station
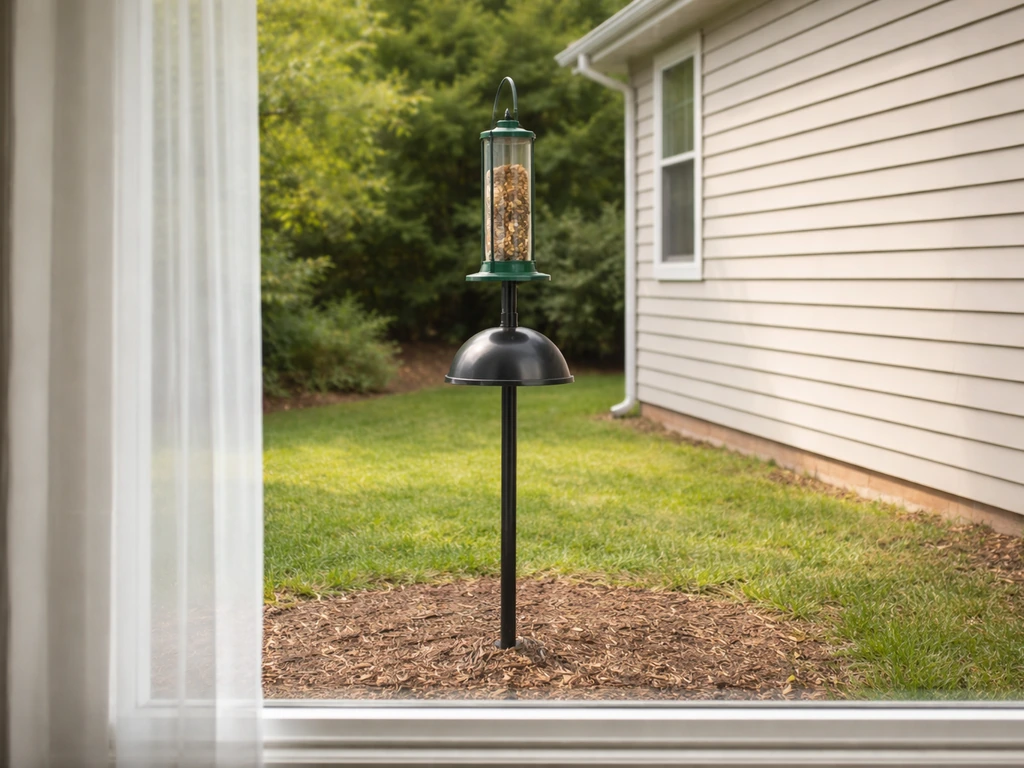
If you want birds to come to you, a simple feeder setup is one of the most satisfying things you can do. It gives you close, reliable views of birds at predictable times, which is perfect for practicing your ID skills. A tube feeder with black-oil sunflower seeds attracts the widest range of backyard species and is a great place to start.
Placement matters more than most beginners realize. The danger zone for window strikes is when feeders are placed 15 to 30 feet from a window. The safest placement is either very close (within about 3 feet of the glass, where birds can't build up enough speed to injure themselves) or far away (more than 30 feet from windows, where birds have time to course-correct). I made the mistake of placing my first feeder at exactly the wrong distance and had a scary window strike in the first week. Move your feeder to one of those two safe zones and you'll dramatically cut that risk.
Keep your feeder clean. Dirty feeders spread disease between birds. Scrub yours regularly with soap and water, then sanitize with a 15-minute soak in a 50/50 vinegar-and-water solution. If you add a birdbath, change the water frequently, standing water breeds mosquitoes and harbors bacteria. Also keep in mind that outdoor cats are one of the biggest threats to backyard birds, so if you have cats or your neighbors do, consider a feeder on a tall baffle pole that's harder for cats to access. For a deeper look at maximizing your outdoor setup, check out these backyard bird watching tips that go well beyond just feeders.
First outing checklist + a 7-day practice plan
Your first outing checklist
- Download Merlin Bird ID and eBird before you leave home
- Set your location in Merlin so ID suggestions are regionally accurate
- Bring binoculars if you have them — if not, your phone camera works for now
- Dress in neutral or muted colors (bright clothing startles birds)
- Plan to arrive at your location at or near dawn, or at least before 10am
- Pick one spot and stay there for at least 20–30 minutes instead of wandering
- Practice stop, look, listen every few minutes
- Open Sound ID in Merlin and let it run passively while you observe
- Note at least 3 birds by size and shape, even if you can't name them yet
- Log your sightings in eBird when you get home — even common birds count
Your 7-day beginner practice plan
| Day | Focus | Practice Task |
|---|---|---|
| Day 1 | First outing | Use the checklist above, log at least 5 birds in eBird |
| Day 2 | Size and shape | Go outside for 15 minutes and describe 3 birds by size and bill shape only — no color |
| Day 3 | Sound ID | Open Merlin Sound ID in your backyard or a park and let it run for 10 minutes — review what it found |
| Day 4 | Feeder watching | Spend 20 minutes at a feeder (yours or a public one) and practice the full ID workflow on each species that visits |
| Day 5 | Songs vs. calls | Pick one bird you've identified and find its song and call in Merlin — listen 5 times until you can recognize it by ear |
| Day 6 | Second outing | Return to your Day 1 spot and see how many of the same birds you can find and name without the app |
| Day 7 | Review and plan | Open eBird and look at your week's sightings — celebrate any new species and pick one ID question to research for next week |
Seven days of low-pressure practice like this builds more real skill than a weekend birding course because you're training your eyes and ears in your own environment. Don't worry about getting every ID right. The goal this week is building habits: stop more, look more, listen more.
As you get more comfortable with wild birds, you might also find yourself curious about birds in other contexts. If you're ever thinking about keeping pet birds, the fundamentals of observation carry over, and reading up on tips for new bird owners can help you understand bird behavior from a different angle. And when your birding skills feel solid enough that you want to start capturing what you see, transitioning into photography is a natural next step, a solid beginner's guide to bird photography will help you figure out what gear and techniques to use without wasting money.
The most important thing is just to start. Go outside today, pick a spot, and pay attention. You'll be surprised how quickly it clicks.
FAQ
If I can’t identify a bird right away, should I just look it up from a photo?
Use photos only as a “last step,” then confirm with structure and sound. Birds can look different in photos due to angle, lighting, and motion blur, so snap a quick reference shot, then re-check size, beak shape, tail length, and the call or song you heard. This prevents getting stuck chasing a photo-based guess.
How do I avoid guessing incorrectly when I’m a beginner?
Choose one consistent checklist per trip, or you’ll end up second-guessing yourself. A simple approach is, first build a “possible matches” list using field marks, then narrow to one best fit. If you still feel unsure after that, log it as unidentified rather than forcing a confident-sounding wrong ID.
What’s a realistic amount of time to go bird watching as a beginner?
Aim for short, repeatable sessions. For example, 15 to 30 minutes of “stop, look, listen” in the same area beats two hours of rushing around, because you’ll get multiple opportunities to observe movement patterns and calls from familiar perches.
What should I wear or bring besides binoculars and a phone?
Dress for comfort and temperature, not “birding style.” Neutral, non-shiny clothing helps reduce distraction, and wearing closed-toe shoes prevents distractions from uneven ground. Also, bring water, since early morning birding often takes longer than expected once you start listening.
What should I do when the bird keeps moving or stays hidden?
If you see a bird but can’t get a clear view, focus on what you can reliably measure. Note relative size against nearby known objects (bench, tree, feeder) and watch posture changes (upright vs horizontal, tail flicking, hopping vs walking). Many IDs become possible from behavior plus structure even without a full look.
How should I log sightings if I hear birds but can’t see them?
Many sightings start with “sound first,” but you should avoid overcounting repeats. A practical beginner rule is to treat each distinct individual or territory you can verify as one record, and wait for a second confirming cue (another call type, a visual pop-up, or repeated same location behavior) before you add more species.
Is it okay to use my phone to play bird sounds to attract birds?
Start with a safe, passive sound approach. In general, keep the phone volume low, avoid playing recordings outdoors to call birds in, and rely on listening tools to confirm identity. If a bird seems to change behavior abruptly (moving away from a feeder or vocalizing more intensely), pause and reassess rather than trying to get “better audio.”
How can I improve my spotting technique when bird activity is high but I still miss them?
In wooded areas, try scanning in a consistent pattern: from the canopy top down to the understory, then check the ground for movement. If you frequently miss birds, slow down and cover smaller zones (for instance, one tree line section) so you give yourself multiple chances to detect motion and calls in the same patch.
Should beginners always choose higher magnification binoculars for closer views?
If you plan to use binoculars frequently, focus on fit and stability before power. Pick a light, comfortable set (8x42 style is beginner friendly), and practice holding them steady against your body. If you want higher magnification later, do it when you can reliably track birds in motion using proper technique.
Do feeders make bird watching less useful for learning identification?
A feeder can help, but it can also bias your bird list toward the most feeder-tolerant species. Rotate focus by changing your “listening and looking” location too (near feeder, nearby tree line, and an open patch). Also, avoid expecting winter species to show up on the same schedule every year.
How often should I clean a feeder and birdbath to prevent health problems?
Do not clean less than you need to, aim for regular maintenance, especially during wet weather. A solid rule is to scrub and sanitize on a schedule and anytime you see moldy residue or heavy buildup, then refill with fresh food. For baths, change water frequently and remove standing water sources if mosquitoes are common.
Why aren’t birds coming to my feeder, even though I placed it outside?
Common failure points are wrong feeder distance, dirty equipment, and cat access. Use the safe placement zones near windows, keep feeders sanitary, and add a baffle if cats are a concern. If birds stop visiting, check for food quality, cleanliness, and whether squirrels or aggressive birds are deterring smaller species.
What should I review after a week of beginner bird watching to keep improving?
Treat this as a process, not a test. Repeat the same “stop, look, listen” routine in one place for a week, then review your notes or app logs to see which field marks you missed. Over time, you’ll start recognizing patterns, like how certain species behave around feeders versus open ground.
Next Article
How to Bird Mouth a Rafter: Step-by-Step DIY Guide
Step-by-step guide to cut the bird-mouth notch in a roof rafter, measure pitch accurately, and fit for a tight seat.