Tagging a bird usually means one of two things: recording and labeling a bird sighting in a field notes system or app (the most common meaning for hobbyists), or physically attaching a tracking band or tag to a bird for scientific research (which requires a federal permit and trained professionals). Most people searching this are birders who want to log and identify what they saw, not researchers capturing live birds. This guide covers both, helps you figure out which one you actually need, and walks you through the right steps for each.
How to Tag a Bird: Notes for Birding vs Tracking

Marcus Hendricks
23 Apr 2026
What does 'tagging a bird' actually mean for your goal?
The phrase gets used in very different contexts, and picking the wrong one wastes your time (or worse, gets you into legal trouble). Here are the three real-world meanings you'll encounter.
- Recording/labeling a sighting: You saw a bird, you want to document it with notes, photos, location, and a species ID. This is what most birders and citizen scientists mean by 'tagging.'
- Submitting a band report: You found a bird with a metal leg band already on it. You report that band number to the USGS Bird Banding Laboratory (BBL) so researchers can track that individual bird's movement and survival.
- Physical banding/tagging: A trained, federally licensed bander captures a wild bird and attaches a numbered metal or colored band (or other tracking device) to its leg for long-term monitoring. This is scientific fieldwork, not a DIY project.
If you're a hobbyist or a beginner birder, you're almost certainly in the first category. The third category is legitimate and fascinating, but it comes with real legal requirements that are worth knowing before you go any further.
Birding notes vs. physical tracking: which approach fits you?
Ask yourself one honest question: do you want to document what you saw, or do you want to track an individual bird over time across multiple locations? That answer splits almost everyone into the right lane immediately.
| Your goal | Right approach | Tools needed | Permits required? |
|---|---|---|---|
| Log a sighting for personal records or citizen science | Field notes and a birding app like eBird | Notebook, phone, binoculars, optional camera | No |
| Identify a bird from a photo you took | Photo ID tagging with species name, date, and location labels | Camera or smartphone, photo app or eBird upload | No |
| Report a banded bird you found | Submit the band number to USGS BBL at reportband.gov | Band number from the bird's leg | No |
| Track an individual wild bird for research | Physical banding through a licensed program | Professional mist nets, banding tools, trained handlers | Yes, federal permit required in the US |
The good news is that the first three options are open to anyone right now, today. The fourth one is not, and that's not a barrier designed to shut you out. It's there to protect birds from being stressed, injured, or killed by untrained handling. More on that below.
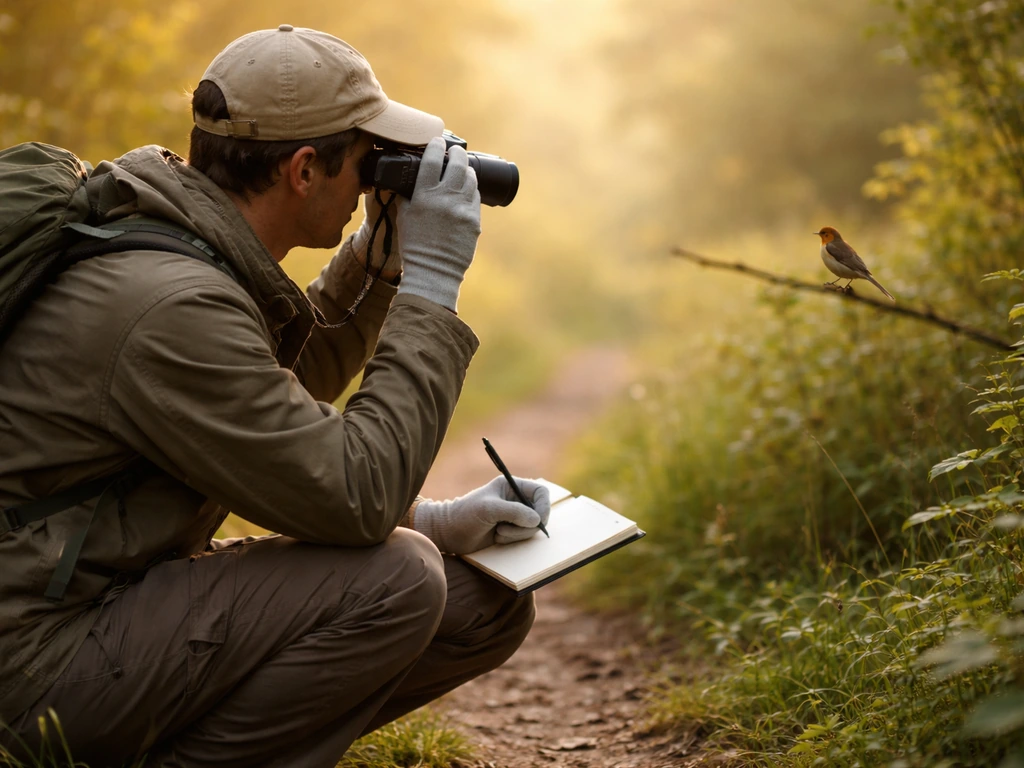
How to tag bird sightings for bird watching (field notes and apps)

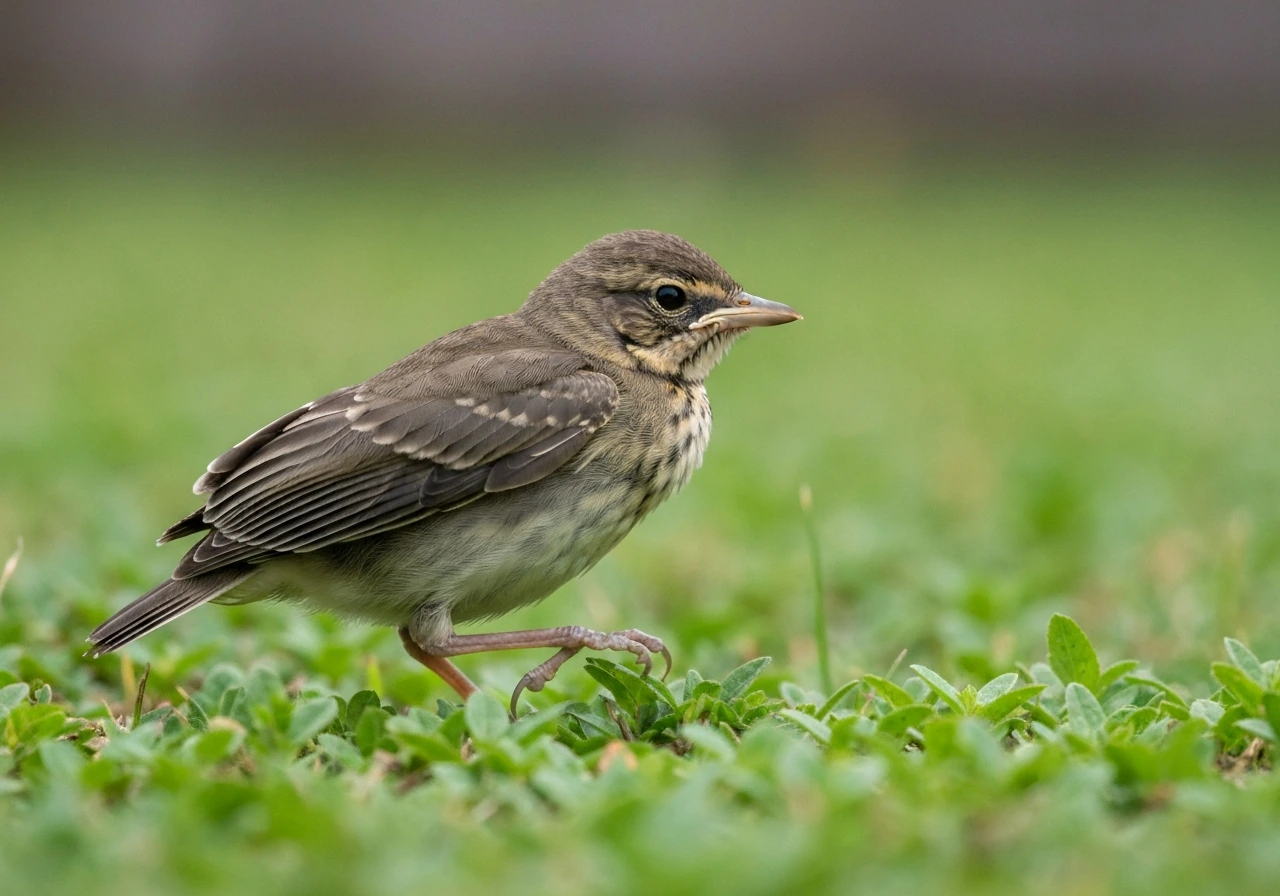
This is the core skill for any birder. A good sighting record has five basic components: species name, date and time, location, count (how many birds), and any notable behavior or field marks. When you record these consistently, your notes become genuinely useful, both for your own learning and for citizen-science databases. Once you have a solid record, use repetition with field marks and photos to get better at how to learn bird identification.
Step-by-step: logging a bird sighting
- Note the date, time, and exact location immediately. GPS coordinates from your phone work great, or write a specific place name like 'north end of Riverside Park, near the pond.'
- Write the species name if you know it. If you don't, describe what you saw: size, shape, color pattern, bill shape, behavior, and any sounds. You can identify it later.
- Count the birds. Even an approximate number ('about 20 starlings') is more useful than nothing.
- Add behavioral notes. Was it feeding, singing, carrying nesting material? This context matters for both identification and science.
- Log it in an app. eBird (free, from the Cornell Lab of Ornithology) is the gold standard for citizen-science bird checklists. You submit your sighting under a 'protocol,' which just means the type of observation: stationary (you stayed in one spot), traveling (you walked a route), or incidental (you happened to see it). Choosing the right protocol keeps your data useful.
- Submit the checklist. In eBird, once you save and submit, your sighting is tagged to a specific location and time and becomes part of a global dataset.
I'll be honest: when I first started using eBird, I ignored the protocol field and just hit submit. It still works, but taking 10 seconds to blank" rel="noopener noreferrer">pick the right protocol makes your data count for actual research. It's a small habit worth building from day one.
Good tools for field note tagging
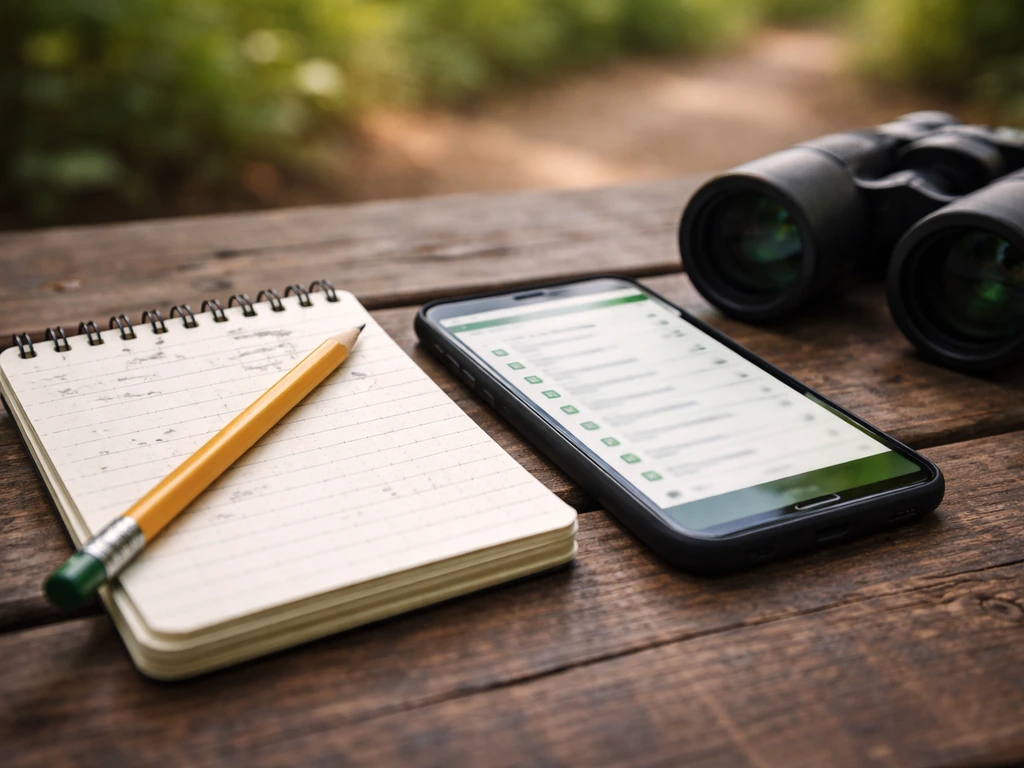
- eBird app (iOS/Android): Free, syncs with a global database, and lets you add photos directly to your checklist
- A small waterproof notebook and pencil: Old school, but they never run out of battery in the field
- Merlin Bird ID app: Helps you confirm an ID before logging it in eBird, including a sound ID feature for birds you hear but don't see
- Your phone's built-in notes app: Better than nothing, but transfer the details to eBird later so they're not lost
Photo ID tagging: taking usable photos and writing labels that actually help
Tagging a bird photo means attaching a species ID and key details to the image so it's useful later. A blurry photo labeled 'bird, backyard, 2026' is nearly worthless. A sharp photo labeled 'American Robin (Turdus migratorius), male, April 23, 2026, Riverside Park, Chicago, IL, foraging on lawn' is a genuine record.
How to take a photo worth tagging

- Get the whole bird in frame if you can. Full-body shots show size, shape, and leg color, all important for ID.
- Aim for the eye to be in focus. A sharp eye and blurry tail is far more useful than the reverse.
- Shoot in good light. Side lighting early morning or late afternoon brings out subtle color and texture better than harsh midday sun.
- Take multiple shots. Birds move constantly. Burst mode is your friend.
- Capture different angles if the bird cooperates: front, side, back, and in flight if possible.
How to write a useful photo label or caption
Whether you're tagging in eBird, a photo app, or just your phone's album, include the species name (or your best guess followed by a question mark), the date, the location, the sex and age if known, and any behavioral note. You can often identify male and female finches by looking at reliable sex and age clues in the field the sex and age if known. In eBird, you can upload photos directly to a checklist, and other birders can confirm or correct your ID, which is incredibly useful when you're learning. For general photo ID tips and building your identification skills, the related guides on how to identify a bird from a photo and how to learn bird identification go much deeper on the visual recognition side. If you want an adjacent skill to this photo-based approach, see how to identify a wild bird next how to identify a bird from a photo.
If you mean physical banding and tracking: what you need to know first
Physical bird banding is genuinely fascinating, and understanding it makes you a better birder. But there are hard legal and ethical lines here that every beginner needs to understand before going further.
The legal reality in the United States
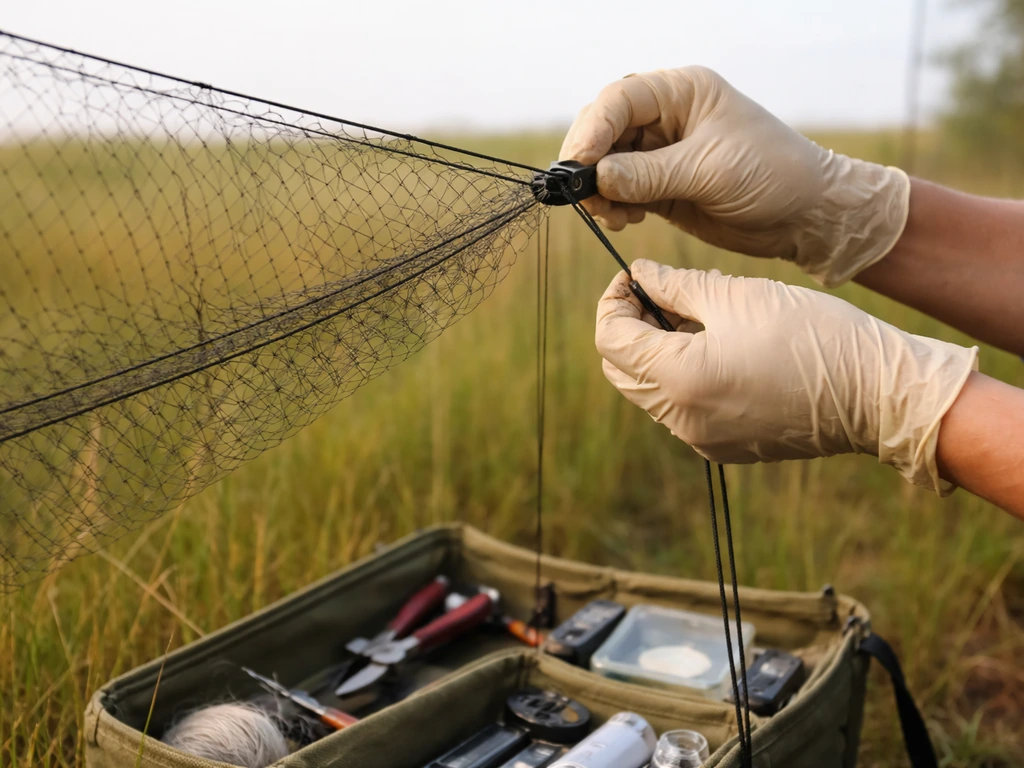
In the US, capturing, handling, and banding wild birds is federally regulated under the Migratory Bird Treaty Act. A CRS report on the Migratory Bird Treaty Act explains that Section 2 generally prohibits taking migratory birds and related actions unless authorized, while Section 3 provides permitting authority for activities that would otherwise be prohibited. You must hold a federal banding permit issued through the USGS Bird Banding Laboratory (BBL) to legally band any migratory bird. Getting one requires demonstrated training under an already-licensed bander, not just interest or good intentions. Violating this law can result in significant fines. Other countries have equivalent regulations. This isn't bureaucratic overreach: it exists because improperly handled birds suffer real harm, including broken bones, dislocated joints, feather damage, and death from stress.
What professional banding actually involves
Licensed banders use equipment like mist nets (very fine mesh nets nearly invisible to birds) or specially designed traps to temporarily capture birds without injury. Each bird is measured, weighed, aged, and sexed before a uniquely numbered aluminum band is fitted to its leg. The band number is logged with the USGS BBL. When that same bird is recaptured or found dead years later, researchers can trace its entire life history. Colored bands or tags (neck collars on geese, wing tags on raptors, colored leg flags on shorebirds) get used for visual re-sighting without recapture.
If you find a banded bird

This is the one part of physical tagging that's open to everyone right now. If you spot a bird with a metal band, colored ring, or leg flag, record the band number, the bird's species, the date, and your location. Then report it at reportband.gov (the USGS BBL's official reporting tool). You'll receive information back about where and when the bird was originally banded, which is genuinely exciting. Even just reporting a band number is a real contribution to science.
What to do instead: real ways to get involved in bird tracking
If your goal is to contribute to actual bird tracking and population science (not just personal record-keeping), there are several legitimate paths that don't require you to capture a single bird.
- Submit eBird checklists consistently. Your sighting data feeds into real conservation research and population monitoring. This is not a consolation prize. It's meaningful science.
- Participate in bird counts. The Audubon Society's Christmas Bird Count and Cornell's Great Backyard Bird Count run annually and welcome complete beginners. You contribute real data under an organized, supervised framework.
- Volunteer at a banding station. Many licensed banding stations welcome volunteers for non-handling roles: recording data, processing paperwork, and assisting. This is how you build toward a permit legally.
- Contact your local wildlife agency or Audubon chapter. They can connect you with permitted banders who are actively looking for apprentices and assistants.
- Apply for a sub-permittee position. Once you've gained hands-on experience assisting a licensed bander, you can apply through the USGS BBL to become a sub-permittee under their license, which is the legal first step toward your own permit.
- Use photo-based tracking tools. Projects like eBird allow photo contributions that researchers use to track individual birds (especially those with distinctive markings) without any physical contact.
The path from 'I want to tag birds' to actually doing professional-grade tracking is a real one. It just runs through volunteer hours, mentorship, and permit applications rather than buying a mist net online. The good news is that every step of the journey, from logging your first eBird checklist to helping at a banding station, is genuinely useful and genuinely fun.
A quick-start plan based on where you're starting from
Not sure where to begin? Here's a simple path based on your situation right now.
| Your situation | Start here | Next step |
|---|---|---|
| Complete beginner, just saw an interesting bird | Download eBird and Merlin, log your first checklist today | Practice photo ID tagging and build a 30-day streak of checklists |
| Casual birder wanting to contribute to science | Submit eBird checklists consistently and join a local bird count | Report any banded birds you find to the USGS BBL |
| Serious hobbyist wanting to do more | Volunteer at a licensed banding station | Work toward a sub-permittee application with a licensed bander |
| Researcher or advanced birder | Contact USGS BBL directly about permitting requirements | Find a licensed master bander willing to take you on as an apprentice |
Whatever your starting point, the most important tag you'll ever put on a bird is your first properly completed eBird checklist. It costs nothing, takes five minutes, and connects your backyard sighting to a global network of researchers working to understand and protect birds. If you are wondering how to read bird tags, the same checklist-style details can help you record band numbers and interpret what you see eBird checklist. If you’re trying to identify a young bird, you can also use the same checklist approach for how to identify bird chicks. Once you learn how to identify a fledgling bird, you can narrow down species using size, posture, and feather development identify a young bird. Start there, and the rest follows naturally.
FAQ
When should I tag a bird in notes or apps versus tag a bird for research?
If you want to document what you saw, use a sighting checklist (notes, eBird, or a photo label). If you want to follow a specific individual with bands or transmitters, that is research-level tagging and requires permits and trained handling by licensed professionals.
What exact details should I include when tagging a sighting in eBird or a photo app?
Use species (or your best guess plus a question mark), date and time, precise location, number of birds, and at least one behavior or field mark (for example, feeding method, posture, wing bars, call type). Adding sex and age if known also improves how others can validate your ID later.
What should I do if I am unsure of the species while tagging a photo?
Record the closest match and mark uncertainty (for example, use a question mark with the tentative species). If your app supports it, include the key reason for your guess (bill shape, pattern, habitat) so others can confirm or correct you.
Is it okay to submit a checklist without using the correct protocol?
It can still work, but it is better to select the right protocol because it changes how your observation is interpreted for data quality. If you often forget, start by choosing a default protocol that matches your usual outing type, then adjust only when conditions differ.
How can I avoid common mistakes when tagging bird photos?
Do not rely on vague labels like “bird, backyard.” Use a clear subject description tied to field ID cues (male or female if known, behavior, and the exact date and place). Also avoid saving only blurry originals, try to include at least one sharp frame where diagnostic features are visible.
If I see a banded bird, what information should I record before reporting it?
Write down the band number exactly as seen, the bird species, date, and location. If there are multiple visible markings (for example, colored leg flags), note their color and placement too, since that can help verify the specific individual reported.
Where do I report a found band number, and what should I expect back?
Report it through the official USGS Bird Banding Laboratory reporting tool (reportband.gov). You should receive details about where and when the bird was originally banded, plus other history tied to that band number.
Can I remove a banded bird’s band or tag if it looks loose?
Do not attempt removal or handling yourself. If a band looks dangerous or the bird appears injured, keep distance and contact local wildlife authorities or a permitted banding organization for guidance on humane next steps.
What makes a “real” physical tagging attempt illegal or risky for beginners?
Capturing and banding wild birds without the required federal permit and training is illegal under the Migratory Bird Treaty Act in the US, and it can injure birds even when the intent is good. The safe alternative is to participate as a volunteer with licensed banders rather than trying to do it independently.
How do I contribute to bird tracking without capturing birds?
You can help through legitimate paths like logging accurate sightings (including when you see banded individuals), volunteering at banding stations under mentorship, and submitting observations with strong documentation. Focus on consistency and accuracy rather than equipment purchases.
Next Article
How to Identify a Fledgling Bird: Quick Checklist
Checklist to spot fledglings by feathers, wings, behavior, sounds, and location, plus safe next steps and when to call r