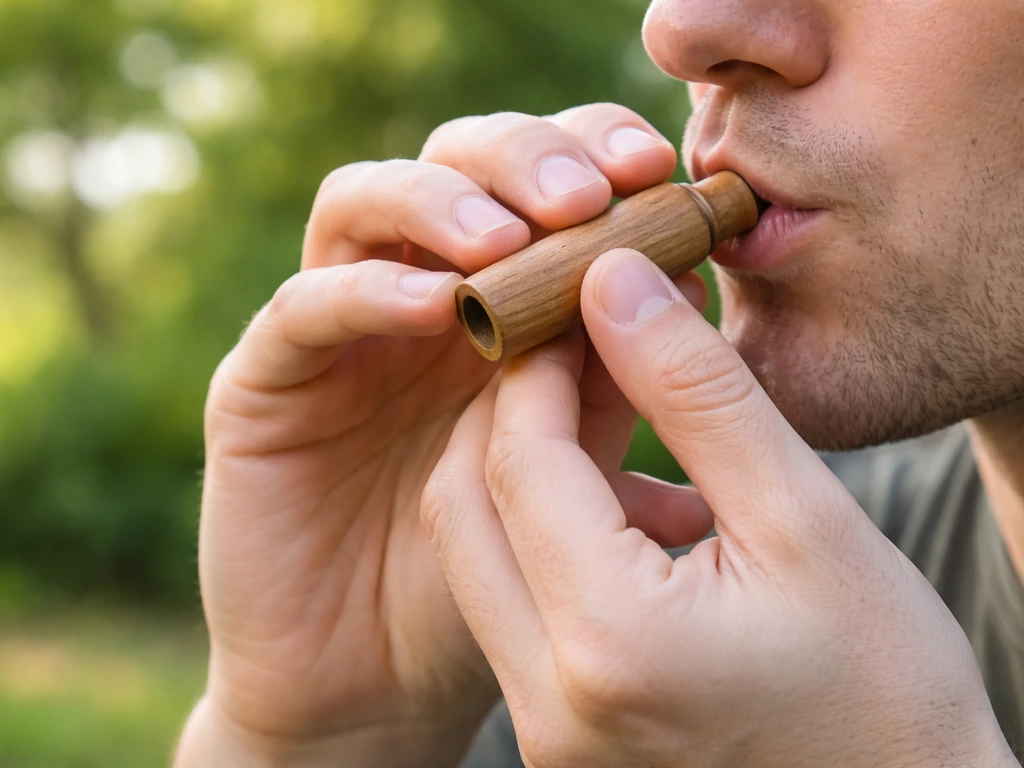
The Toysmith bird call (specifically the Beetle & Bee Garden Bird Call, model 39355) works by holding the wooden handle in one hand and the brass piece in the other, then twisting them together like turning a key in a lock. That friction between wood and brass is what makes the chirping sound. No blowing, no buttons. Just twist, adjust your speed and pressure, and you get a surprisingly convincing bird chirp. If yours is silent or sounds weak, the fix is almost always rosin.
ToysSmith Bird Call Instructions: Start Here to Sound Right

Marcus Hendricks
16 May 2026
Identify your Toysmith bird call model and parts
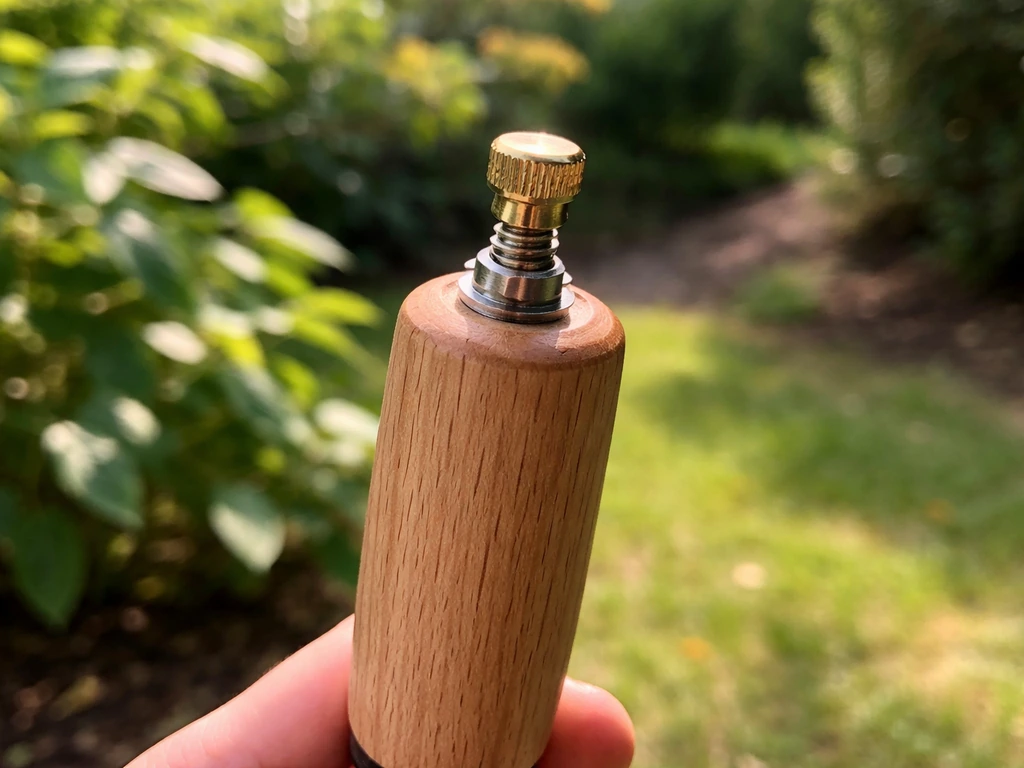
Toysmith sells one main bird call style that most people end up with: the Beetle & Bee Garden Bird Call. It comes in a garden-themed blister pack and the SKU on the back is 39355 (UPC 085761288980). If your packaging or the sticker on the device shows that number, you have the right one. It's a two-piece, roughly 2-inch device made from a wooden cylinder (the handle you grip) and a brass piece that fits into or over one end.
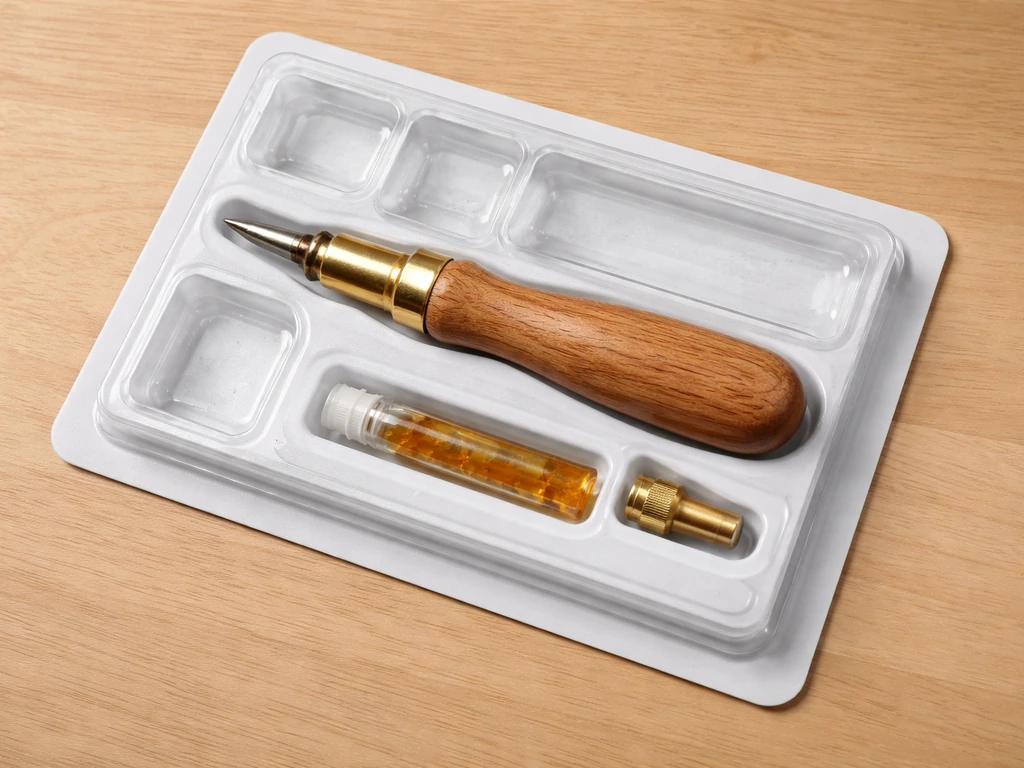
Here's what should be in your package when you open it:
- The wooden handle (usually pale, natural wood, about the diameter of a large marker)
- The brass piece (a small metal component that interfaces with the wood end)
- A small tube of rosin (this is critical and easy to overlook — don't toss it)
Rosin is a sticky, resin-based substance that creates the right amount of friction between the wood and brass. Without it, or when it wears off, the call goes quiet or sounds scratchy. Think of it like how a violin bow needs rosin to make the strings sing. Same principle here.
Get set up correctly before your first twist
Before you even try to make a sound, do a quick prep check. This is the step most people skip, and then they're confused when nothing comes out.
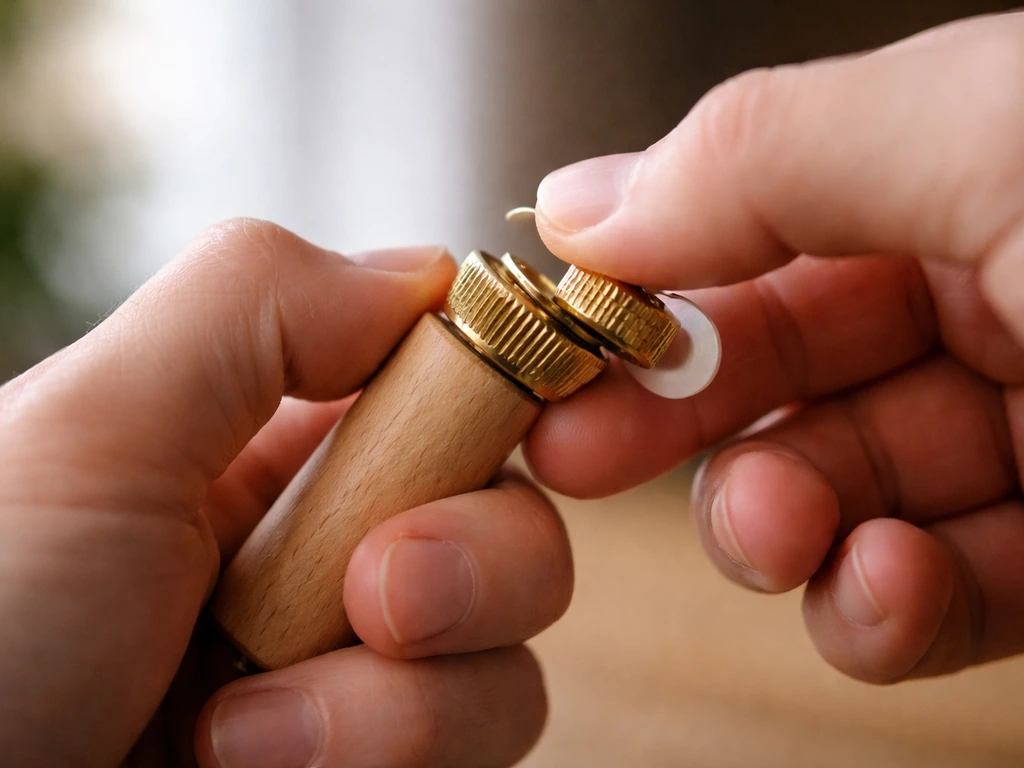
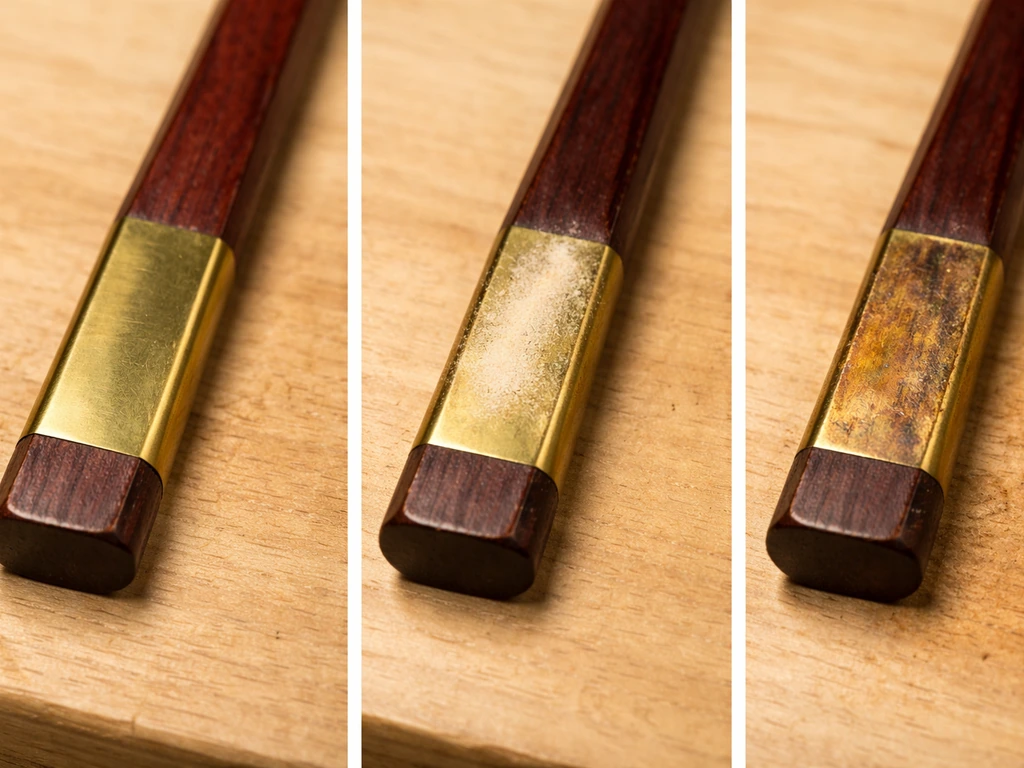
- Apply rosin first. If the call is brand new, dab a small amount of rosin from the included tube onto the brass contact surface (the part that rubs against the wood). You don't need much — a thin, even coating is all it takes. If the call has been sitting unused for a while, it almost certainly needs a fresh application.
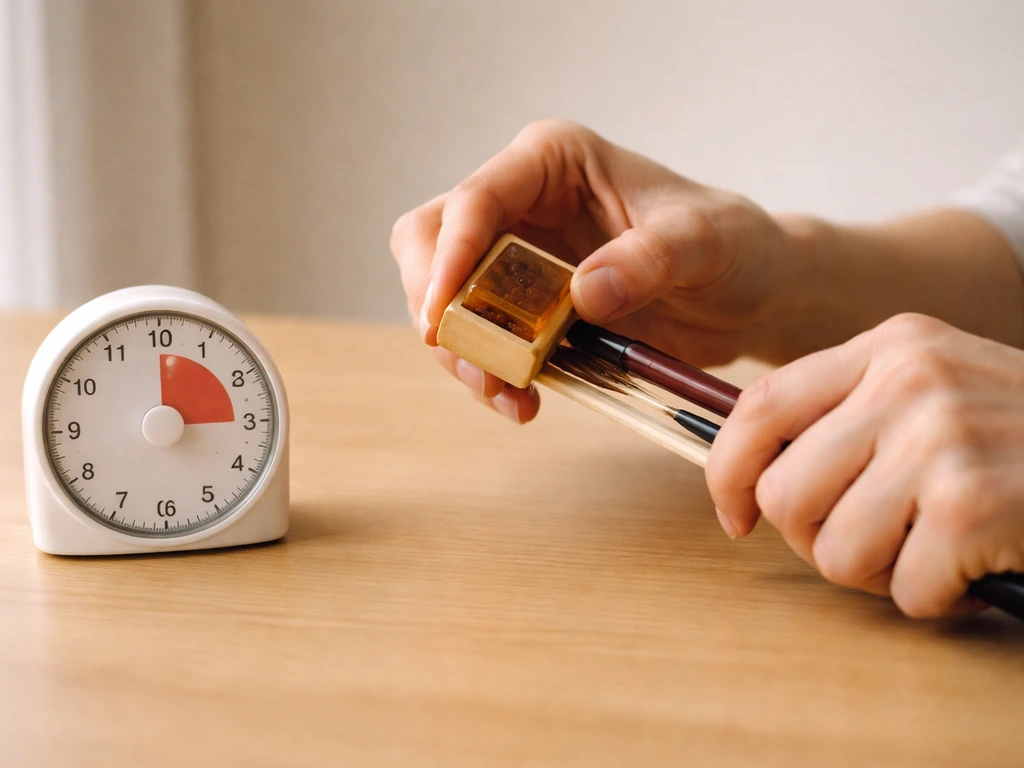
- Let it sit for 30 seconds. Give the rosin a moment to settle onto the surface before you start twisting.
- Hold it correctly. Grip the wooden handle firmly in your non-dominant hand. Hold the brass piece lightly but securely in your dominant hand. You want each hand controlling one piece of the call — not both hands squeezing the whole thing.
- Orient the call horizontally. Hold it roughly parallel to the ground with the brass end pointing away from you. This isn't a strict rule, but it helps beginners apply even pressure during the twist.
The grip is worth spending a minute on. You're not squeezing hard or pulling the two pieces apart. The wood and brass stay pressed together the whole time. Your job is to rotate one part relative to the other while maintaining that contact. Think key-in-lock, not bottle cap.
Make your first sounds: the basic twist technique
Here's the honest truth: the first few twists probably won't sound like a bird. They might squeak, scratch, or produce nothing at all. That's normal. It took me a few tries to find the right rhythm. Stick with it for about five minutes before you decide something is wrong.
- Start with a slow, steady twist. Rotate the brass piece about a quarter turn relative to the wooden handle. Don't jerk it. Think of it as a smooth, slow key turn.
- Listen for the chirp. A good twist produces a short, bright chirping sound. If you hear it even once, you're doing it right.
- Try different speeds. A faster twist usually makes a higher, sharper chirp. A slower twist produces a lower, fuller tone. Both are useful depending on the bird you're trying to mimic.
- Try short bursts. Real bird calls are rarely one long continuous sound. Practice two or three quick twists in a row with a half-second pause between them. That rhythm sounds much more natural.
- Adjust your grip pressure. If the sound cuts out mid-twist, you might be releasing pressure between the wood and brass. Keep gentle but consistent contact the whole time.
Once you can produce a reliable chirp on demand, start experimenting with rhythm. A single sharp chirp sounds like an alert call. Three quick chirps in a row mimics common songbird patterns. Longer, slower sequences can sound like a more conversational bird call. Play around and see what resonates (literally).
Use the call to match real bird sounds
This is where things get genuinely fun. The Toysmith call is designed for outdoor exploration, and pairing it with actual bird watching turns it into a learning tool, not just a toy.
Start by listening before you call. When you're outdoors, sit quietly for a few minutes and identify what you hear. Notice the rhythm, pitch, and cadence of nearby bird calls. Then try to replicate that pattern with the call. You're not trying to fool the bird at this stage. You're training your hands and ears to work together.
- Match pitch by adjusting twist speed: faster for higher-pitched birds like sparrows and finches, slower for lower-toned calls
- Match rhythm by practicing the number of chirps per second before you go outside
- Match volume by varying grip pressure: lighter contact makes softer sounds, firmer contact (within reason) makes louder ones
- Keep a small notebook and jot down which twist patterns triggered curiosity from nearby birds
If you want to go deeper into matching specific bird sounds, the technique is very similar to what you'd use with an Audubon-style wooden bird call, which is another common friction-based call design. For more specific Audubon bird call instructions, focus on matching rhythm, pitch, and pressure to the sounds you hear outdoors an Audubon-style wooden bird call. The core skill of adjusting speed and pressure to hit different tones transfers directly across both styles.
Fix common problems: no sound, weak sound, wrong pitch
Most issues with the Toysmith call come down to one of three things: rosin, technique, or condition of the wood. Here's how to diagnose and fix each one.
| Problem | Most likely cause | Fix |
|---|---|---|
| No sound at all | No rosin on the brass/wood contact surface | Apply a thin layer of rosin from the included tube, wait 30 seconds, then try again |
| Weak or scratchy sound | Rosin worn off unevenly or applied too thick | Wipe the surface clean with a soft dry cloth, reapply a thin, even coat of rosin |
| Sound cuts out mid-twist | Inconsistent contact pressure between wood and brass | Keep both hands firmly (not tightly) pressed together throughout the full twist motion |
| Wrong pitch (too high or too low) | Twist speed too fast or too slow | Slow down for lower tones, speed up for higher chirps; also try lighter vs. firmer contact pressure |
| Sticking or grinding feeling | Dirty or damaged contact surfaces | Unscrew the brass piece, lightly sand the inside of the wood with fine sandpaper, clean off dust, reapply rosin |
| Inconsistent sound from twist to twist | Jerky or uneven twist motion | Practice the twist motion slowly and smoothly until it becomes one fluid arc, not a series of small jerks |
If you've tried all of the above and still can't get a consistent sound, the wood may have absorbed moisture. Toysmith's care instructions say to wipe it clean with a soft, dry cloth only (no water). If the call got wet or was stored somewhere humid, let it dry completely in a warm room for 24 to 48 hours before trying again. Once dry, remove the brass piece, lightly sand the wood contact surface, and apply fresh rosin.
Use it responsibly around real birds
This matters more than most beginners expect. Using a bird call in the field can stress birds, especially during breeding season, and in some locations it's actually restricted or illegal. Forsyth Audubon notes that some national wildlife refuges restrict use of recordings, with the guidance “OBEY LOCAL RESTRICTIONS: National Wildlife Refuges prohibit use of recordings of any type.”.
When a bird hears a call that sounds like a competitor or predator, it can become so focused on responding that its defenses drop against real threats. During nesting season especially, repeatedly triggering that response can genuinely harm the bird's ability to protect its eggs or young. The American Birding Association's Code of Birding Ethics asks that you limit the use of calls and never use them to attract threatened, endangered, or rare species.
Audubon South Carolina also summarizes that using bird-call recordings or luring in the field is controversial and points to this American Birding Association Code of Birding Ethics guidance to limit calls and never attract threatened, endangered, or rare species limit the use of calls and never use them to attract threatened, endangered, or rare species. .
- Avoid using calls repeatedly in the same spot — one or two attempts is usually enough
- Stop immediately if a bird appears stressed, agitated, or is moving rapidly toward you
- Never use calls in heavily visited birding areas where birds are already subject to frequent disturbance
- Check local rules before using any call: many national wildlife refuges prohibit recordings and call devices of any type
- Breeding season (roughly spring through early summer) is the most sensitive time — be especially cautious then
- Use the call primarily as a learning and practice tool at home or in low-sensitivity locations rather than as a luring device
The Toysmith call is marketed for outdoor exploration and is recommended for ages 5 and up. That framing is a good reminder that it's fundamentally a learning and curiosity tool. Using it to observe birds in a low-impact way, producing a sound and watching what happens, then letting the bird return to its routine, is very different from aggressively luring birds for photography or sport.
A simple practice plan to get better fast
You don't need hours of practice to get good at this. Ten focused minutes a few times a week will get you producing reliable, natural-sounding chirps pretty quickly. Here's a routine that works:
- Day 1 (5 to 10 minutes indoors): Apply rosin, practice the basic twist until you can produce a clean chirp five times in a row. Focus on smooth, consistent motion.
- Day 2 (5 to 10 minutes indoors): Practice changing pitch on purpose — do five slow twists for low tones, then five fast twists for high tones. Notice the difference.
- Day 3 (outdoors, 10 to 15 minutes): Take the call outside and just listen first. Then try to match the rhythm of one nearby bird using short bursts. Don't worry about pitch yet.
- Day 4 and beyond: Pick one common local bird (a sparrow, a chickadee, a robin) and look up its call pattern. Practice replicating that specific rhythm and pitch with the call indoors, then test it outside.
- Ongoing: Before each outdoor session, re-check your rosin and wipe the brass surface clean. A 30-second prep step saves a lot of frustration.
To confirm the call is working correctly, you should be able to produce at least three clean, distinct chirps in a row without the sound cutting out or changing unexpectedly. If you can do that, you're in good shape. From there it's all about rhythm and matching the real sounds you hear in the field.
As your technique improves, it's worth exploring how other wooden friction calls work, since the fundamentals you're building here transfer directly. Audubon-style wooden bird calls use a very similar twist-and-rosin mechanism, and learning how to use a wooden bird call more broadly will help you get even more out of the Toysmith call and any others you try along the way. Learning how to use a bird call will also help you get more natural sounds and avoid common issues. If you're wondering how to use an Audubon bird call, the same twist-and-rosin fundamentals apply, so start by listening first and then matching the rhythm you hear how to use audubon bird call.
FAQ
How much rosin should I use, and how do I know if I’m overdoing it?
Use just enough to re-create a consistent film on the wood contact area. If the chirp becomes scratchy, gurgly, or inconsistent, you may have added too much rosin (or applied it unevenly). Remove the brass piece, wipe off excess rosin from the contact points, reapply lightly, then test with a steady key-in-lock twist.
My call squeaks first, then stops. Does that mean the rosin is gone or my grip is wrong?
Squeaking at the start usually points to technique or insufficient, uneven contact pressure. If the sound quickly fades to silence, rosin breakdown is likely, especially if the wood looks dry or chalky at the contact surface. Try a few minutes of controlled twisting first, then check the rosin condition and reapply fresh rosin if it still won’t sustain sound.
Can I use sandpaper on the brass or only on the wood?
Stick to lightly sanding the wood contact surface, since the brass piece is a precision contact part. Sanding the brass aggressively can change the fit and reduce friction performance. After any wood sanding, wipe away dust, then apply fresh rosin before testing again.
How long should I wait after drying the call if it got wet?
Dry it fully for 24 to 48 hours in a warm room before retrying, then test. If you still get weak or intermittent chirps, remove the brass piece, lightly sand the wood, apply fresh rosin, and retest. Don’t rush the process, because residual moisture can keep the friction from forming correctly.
Is it safe or ethical to use the call year-round?
It depends on season and local rules. During breeding and nesting seasons, repeated calling can stress birds by triggering defensive responses. Even where it is legal, use sparingly, avoid calling to attract rare or threatened species, and stop if you notice the birds reacting strongly or abandoning behavior.
How should I hold the call to avoid damaging the wood-brass contact?
Keep the two pieces pressed together, do not squeeze hard, and avoid pulling them apart while twisting. Treat it like rotating one part relative to the other, the key-in-lock motion, not a twisting and separating motion. Excess force can wear the wood contact faster and cause more frequent rosin needs.
What does “consistent chirps” mean in practice, and how do I test for it?
Aim for at least three clean, distinct chirps in a row without the sound cutting out or suddenly changing tone. For a fair test, use the same twist speed and pressure each time, and try at the same general angle and grip position. If chirps cut out, diagnose rosin first, then re-check technique and dryness.
What if I want louder or higher-pitched sounds, can I just twist harder?
Don’t rely on force alone. More pressure can raise intensity but also leads to squeaks or rapid wear if you overdo it. Instead, adjust speed and pressure gradually, and focus on maintaining contact. If you can’t change tone reliably, check rosin freshness and wood condition before experimenting further.
Can I use this same approach on other wooden friction bird calls?
Yes, the fundamentals carry over well, twist-and-rosin friction plus matching rhythm and cadence. The main difference will be the contact geometry and how quickly they respond to speed changes, so expect a short adjustment period when switching models. If a different call is silent, rosin and surface condition are still the first things to check.
Is there a best way to practice without bothering birds?
Practice away from active nesting areas, then use it briefly while birdwatching to match what you already hear. Sit quietly first, learn the rhythm and cadence in the field, then attempt short, non-repetitive calls. If you see strong distress or persistent attention from birds, stop and switch to silent observation.
Next Article
How to Use a Wooden Bird Call: Beginner Guide
Learn how to use a wooden bird call: pick the right type, master air technique, practice routines, and maintain it safel