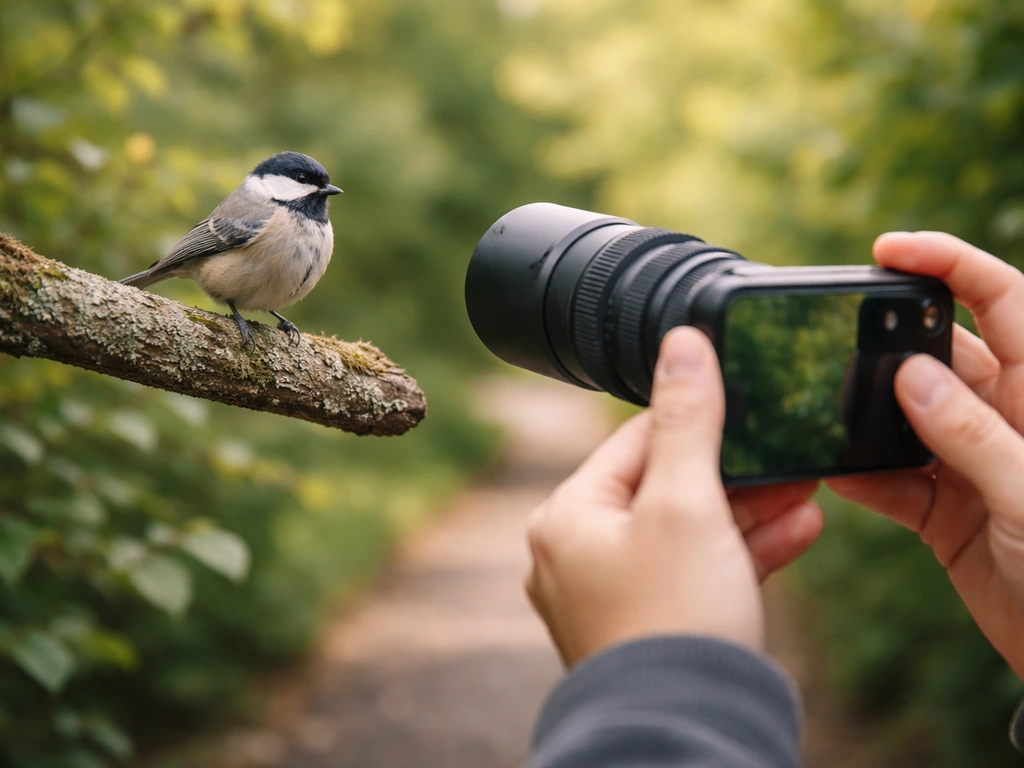
Taking great bird photos comes down to three things: the right settings, knowing where to look, and learning to move slowly. You don't need a $5,000 camera body or a lens the size of a fire hydrant. What you do need is a basic understanding of how to expose a fast-moving subject, how to find birds in the first place, and how to not spook them before you even raise your camera. This guide walks you through all of it, from first power-on to your first keeper shot.
How to Take Bird Photos: Step by Step for Beginners
Marcus Hendricks
7 Apr 2026
Getting set up: gear, settings, and the right mindset

If you're just starting out, don't let gear anxiety stop you. A modern smartphone can capture a decent bird photo in good light. A DSLR or mirrorless camera with a telephoto lens (anything from 200mm to 600mm gives you a real advantage) opens up a lot more possibilities. But the camera body matters less than understanding the settings inside it.
The three settings that matter most for bird photography are shutter speed, aperture, and ISO. Think of them as a triangle: changing one affects the others. For bird photography specifically, shutter speed is your priority. Birds move fast, even when they look still. A perched warbler twitching its head will come out blurry at 1/200s. Start at 1/1000s for perched birds and bump up from there.
For aperture, somewhere around f/5.6 to f/8 gives you enough depth of field to keep the whole bird sharp without stopping down so far that you need a punishingly high ISO. Speaking of ISO: don't be afraid of it. Higher ISO enables faster shutter speeds, and modern sensors handle ISO 1600 or even 3200 surprisingly well. For birds in flight, you'll often be shooting at ISO 2000 or higher, and that's fine.
The single best mode to shoot in is Aperture Priority (Av or A) combined with Auto ISO and a minimum shutter speed floor set in your camera's menu. Set your aperture, tell the camera your minimum acceptable shutter speed (1/1000s for perched, 1/2000s or faster for flight), and let Auto ISO fill in the rest. This approach keeps you from constantly fumbling with exposure while a bird hops around a branch.
Autofocus mode is just as important. Use continuous autofocus (called AF-C on Nikon/Sony, AI Servo on Canon) rather than single-shot AF. This keeps the camera actively tracking a moving subject instead of locking focus once and giving up. If your camera has a bird or animal detection mode, turn it on. Modern mirrorless systems from Nikon, Sony, and Canon can lock onto a bird's eye and track it through branches and distractions, which is genuinely incredible once you experience it.
On Sony cameras, enabling Face/Eye AF means the camera tracks eyes automatically, but in scenes with multiple birds or dense vegetation, it can struggle to pick the right subject. In those situations, switch to spot-style tracking so you can point the system at the specific bird you want. Canon's EOS R system recommends setting subject detection to Animals and using Whole Area Tracking Servo AF for large flying birds, but switching to 1-point AF when a bird is about to launch from behind an obstruction, where whole-area tracking might grab the wrong thing. These little adjustments make a big difference.
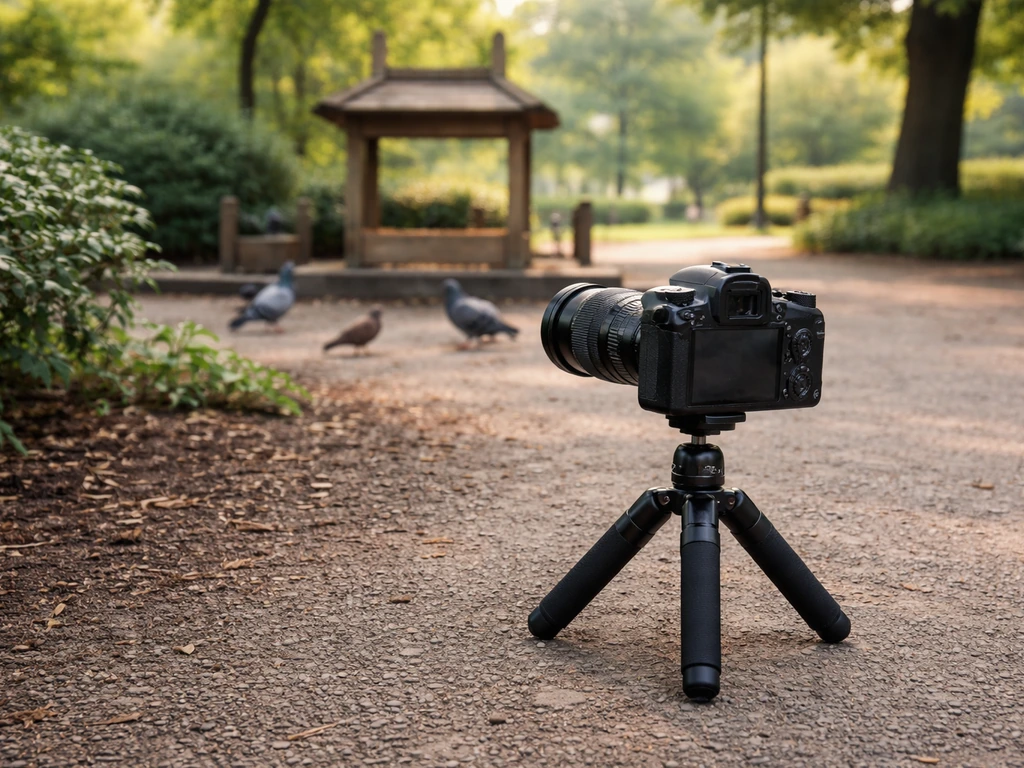
On the physical side, stabilization helps. A monopod is easier to carry than a tripod, though some experienced photographers find monopods only a marginal improvement over handholding for super-telephoto work since they can still shift during tracking. A tripod with a fluid gimbal head is the most stable option for long lenses, but it slows you down. For most beginner situations, handholding with good technique (elbows tucked, body as a brace, gentle shutter press) is totally workable. One thing that genuinely hurts sharpness that beginners overlook: jabbing the shutter button. Press it smoothly, not violently, to avoid introducing camera shake right at the moment of exposure.
If you want a deeper breakdown of gear choices and initial setup decisions for new shooters, beginner bird photography covers exactly that territory and is worth reading alongside this guide.
Finding birds and getting close without scaring them off
The best camera settings in the world don't help if there's no bird in front of you. Finding birds is its own skill, and it gets faster with practice. The golden rule for timing: get out between dawn and late morning. Bird activity peaks in that window as birds feed after the overnight fast. Midday is often dead quiet. Late afternoon picks up again, but morning is the magic hour.
For locations, think about edges and transitions. Open water, fields, lawns, and muddy shorelines hold different species than dense shrubs or woodland. The most productive spots are often where those habitats meet: the edge of a pond where reeds give way to open water, or a trail through a park where lawn transitions into thicker brush. Scan open areas first, then work the edges. Birds that seem to disappear into dense cover often pop out a few feet further along if you wait and watch.
Movement is your best detection cue. Instead of staring into a tangle of branches hoping to spot a bird by shape, train your eye to catch motion first. A leaf shaking when there's no wind, a branch dipping slightly, a flash of color at the edge of your vision, these are all birds announcing themselves. Once you spot movement and track where it goes, you can position yourself for a better angle.
Planning your outings gets easier when you use a tool like eBird to find active hotspots near you. Birders log their sightings there, and you can see which species have been reported at a given location in the past week. It's the fastest way to stop guessing and start showing up where the birds actually are. Backyard feeders are also underrated starting points: a backyard bird photography setup lets you control the perches, the light angle, and the background while you practice, which is a huge advantage when you're still dialing in settings.
Approach slowly and indirectly. Don't walk straight toward a bird. Move at an angle, pause frequently, and avoid making eye contact (birds read direct eye contact as a predator threat). The rule I always come back to: if the bird changes its behavior because of you, you're already too close. Signs of stress include alarm calls, raised feathers, repeatedly looking at you, or stopping feeding. Back off and let it settle. If it flushes (flies away entirely), you pushed too hard.
Be especially careful near nests, roost sites, and feeding young. Keeping parents away from a nest during incubation or when they're feeding chicks can have real consequences for survival. Keep your distance from any bird colony, and if you have a dog, keep it leashed or leave it home entirely. The point of bird photography isn't just getting a shot. It's getting a shot without causing harm.
Getting the shot: composition, light, focus, and clean backgrounds
Once you have a bird in range, the technical execution takes over. Let's talk about light first because it affects everything else. The best bird photos are almost always taken with the sun behind you, illuminating the bird's face and plumage evenly. Front light brings out color and catches the eye as a catch light (that tiny specular highlight in the eye that makes a photo feel alive). Backlit birds look dramatic but are tricky to expose well, and you lose feather detail. Side light can be beautiful but creates harsh shadows across the face.
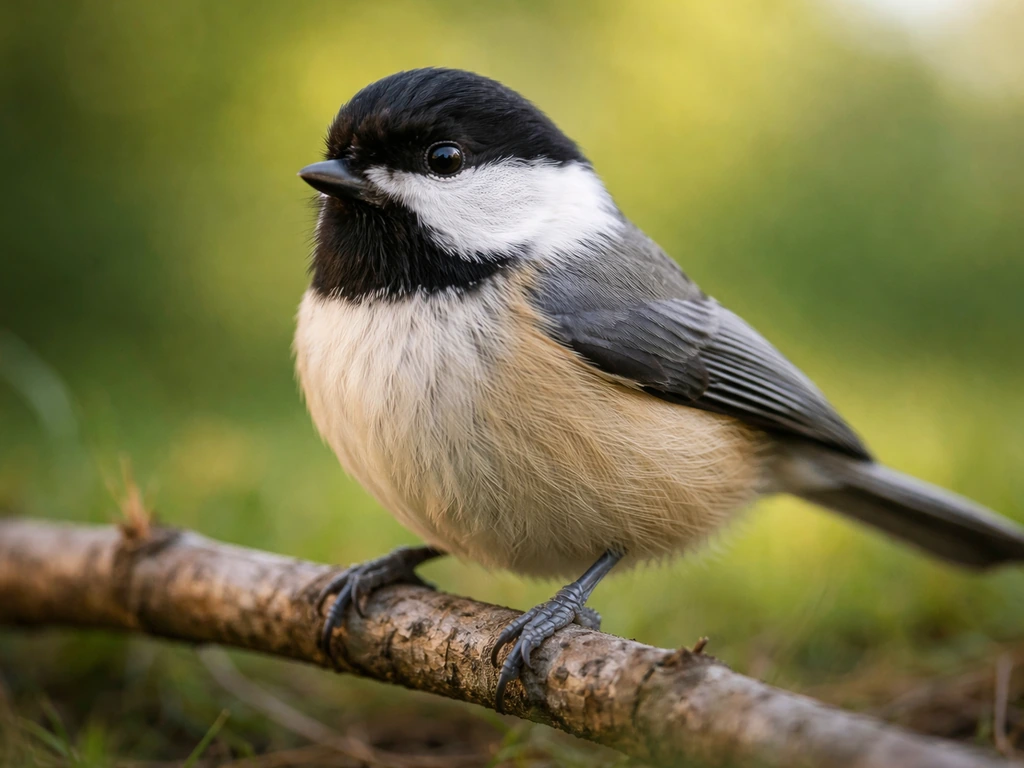
For still birds sitting on a perch or the ground, get as low as possible. Eye-level shots (where the camera is at the same height as the bird) feel intimate and real. Shots from above make birds look small and flattened. Even crouching, sitting on the ground, or lying in the grass can transform a shot from snapshot to something special. Photographing a bird sitting gets into the mechanics of this in more detail, including how to use cover and positioning to your advantage.
For focus on a still bird, aim for the near eye. If the eye is sharp, the photo reads as sharp even if the tail feathers are slightly soft. Use your camera's eye-detection AF if available, or manually place your focus point on the bird's eye in single-point AF mode. With continuous AF running, the camera will hold focus as the bird shifts its head.
Backgrounds can make or break a bird photo. A clean, out-of-focus background (smooth greens, soft blues, neutral browns) lets the bird pop. A busy background full of branches, fences, or other distractions fights with the subject. You control the background by changing your position. Moving a few feet left or right, crouching lower, or stepping back slightly to put more distance between the bird and whatever is behind it can turn a cluttered background into a silky blur. A wide aperture (f/4 to f/6.3) also helps by reducing depth of field and blurring the background more.
For composition, give the bird space in the direction it's facing. If a robin is looking left, put it in the right third of the frame so it has visual room to look into. Cutting off the tail is usually fine; cutting off the bill feels wrong. And don't over-center every shot. The rule of thirds is a cliché because it works. Place the bird's eye on one of the intersection points and the composition usually clicks into place naturally.
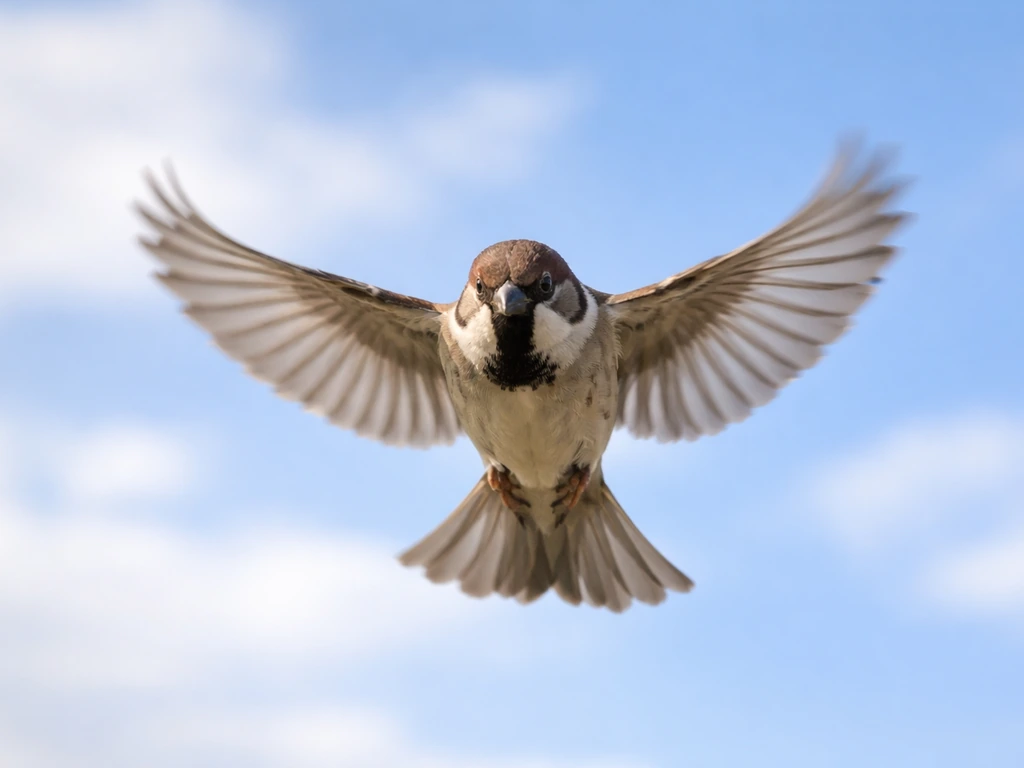
Birds in flight: tracking, shutter speed, and burst strategy
Flying bird photography is where a lot of beginners give up. The bird is moving fast, the autofocus is hunting, and you end up with 200 blurry frames and one accidental almost-keeper. Here's the thing: it gets much easier once you understand what settings to reach for and how to practice tracking.
Shutter speed is the non-negotiable starting point. For birds in flight, you need at least 1/2000s, and 1/3200s or faster is better for small fast birds like swallows or shorebirds. A heron or pelican with slow wingbeats gives you a little more room at 1/1600s, but when in doubt, go faster. The cost is higher ISO, which as mentioned is acceptable on modern cameras.
| Bird Type | Recommended Shutter Speed | Suggested ISO Range | Notes |
|---|---|---|---|
| Large, slow birds (herons, pelicans, egrets) | 1/1600s – 1/2000s | 400 – 1600 | Slower wingbeats give more room |
| Medium birds (ducks, gulls, hawks) | 1/2000s – 1/3200s | 800 – 2500 | Good starting point for most bird flight work |
| Small, fast birds (swallows, sandpipers, warblers) | 1/3200s – 1/4000s+ | 1600 – 4000 | Prioritize shutter; accept higher ISO |
| Unknown or mixed species | 1/2500s | Auto ISO with cap at 3200 | Safe all-around starting point |
Set your camera to its fastest burst rate. Many modern mirrorless cameras shoot 20 frames per second or more. This feels excessive, but birds in flight change position dramatically between frames, and having a burst of 15 to 20 shots through a wingbeat cycle gives you a much better chance of catching the exact moment when the wings are in a beautiful position and the eye is sharp. Review a few shots immediately after a burst to check exposure and focus, then adjust before the next pass.
Keep continuous AF running the whole time. With bird/animal eye detection active, most modern systems will lock on and hold focus surprisingly well. The key is to start tracking the bird before it's in your ideal shot position, not when it's already right in front of you. Begin tracking 50 to 100 feet out, keep the AF point on the bird's body (or head), and let the system warm up to the subject before you start shooting seriously.
A technique worth practicing is panning: moving the camera in sync with the bird's lateral motion so the bird stays in roughly the same position in the frame while the background blurs into streaks. You're not trying to hold the camera still; you're trying to match the bird's speed. This is hard at first but incredibly satisfying when it works. Start with slower birds like crows or pigeons flying across an open sky. The predictable flight path and moderate speed make them ideal practice subjects.
One trick that helps: watch where birds land after a flight. Tracking a bird visually even when you're not shooting trains your eye and hand to move together. It also lets you anticipate where to point next time. For a full breakdown of this specific challenge, how to photograph a bird in flight goes deep on tracking technique, panning, and the exact settings to dial in for different species.
Before you go out specifically for flight shots, get stable footing first. On uneven ground, shifting your weight during tracking throws off the whole sequence. Plant your feet wider than shoulder-width, keep your elbows soft, and rotate at the hips as you pan. It sounds like a yoga instruction, but body stability is the foundation of sharp tracking shots with a long lens.
Your first steps: a practice plan and fixes for common problems
The fastest way to improve is to practice one thing at a time, not everything at once. Here's a simple plan for your first few sessions:
- Session 1: Find a feeder or park bench with pigeons/sparrows. Set up your aperture priority mode with Auto ISO and a 1/1000s shutter floor. Shoot 100 frames of stationary birds, focusing only on getting the eye sharp and the background clean. Review on screen, delete blurry shots, identify what went wrong.
- Session 2: Same location. Now try to catch birds mid-hop or as they land. You're still shooting perched behavior, but with a touch more unpredictability. Bump minimum shutter speed to 1/1600s.
- Session 3: Find an open area with birds that fly short, predictable paths (crows, pigeons, ducks). Practice panning and burst shooting. Don't worry about framing yet. Just keep the bird in the frame and the autofocus engaged.
- Session 4: Review your keepers from all three sessions. What percentage are sharp? What's the main failure mode: motion blur, missed focus, bad exposure, or distracting background? Fix the one biggest problem before your next session.
- Session 5 and beyond: Start visiting eBird hotspots at dawn. Use the skills you've been practicing in more varied, less controlled environments.
For troubleshooting, here's a quick reference for the most common problems beginners run into:
| Problem | Likely Cause | Fix |
|---|---|---|
| Blurry bird, sharp background | Shutter speed too slow | Increase minimum shutter speed; use 1/1000s+ for perched, 1/2000s+ for flight |
| Blurry bird AND background | Camera shake from handling | Press shutter smoothly, tuck elbows, use image stabilization if available |
| Camera focuses on background, not bird | AF mode wrong or point placed badly | Switch to continuous AF with subject detection; use spot tracking in cluttered scenes |
| Bird is too dark / silhouetted | Bright background fooling meter | Dial in +1 to +2 stops of exposure compensation; try spot metering on the bird |
| Bird too small in frame | Not close enough or lens too short | Approach more carefully, use a longer focal length, or crop in post |
| Background distracting and busy | Camera/bird angle not optimized | Move laterally or crouch lower; widen aperture to blur background more |
Low light is a specific challenge worth calling out. Early morning, overcast days, and forest interiors all force you into uncomfortable tradeoffs between shutter speed and ISO noise. In those situations, I'd rather have a sharp, slightly noisy photo than a smooth, blurry one. Go ahead and push ISO to 3200 or even 6400 if that's what it takes to hit your target shutter speed. Noise can be reduced in editing. Blur can't be fixed.
As you get more comfortable with the fundamentals, there's a lot of room to refine your approach. Tips for bird photography covers some of the intermediate-level decisions that start mattering once you're consistently getting sharp shots and want to push composition, storytelling, and creative choices further.
One last thing: be patient with yourself. Every bird photographer has a hard drive full of blurry misses. The learning curve is steep at first and then levels out surprisingly fast. The moment a sharp, well-lit bird photo comes up on your screen after a session where everything clicked, you'll understand why people get obsessed with this hobby. That moment is closer than you think.
FAQ
How do I stop autofocus from grabbing branches or other birds when I’m aiming for a specific bird?
Use your camera’s autofocus “case” and tracking sensitivity settings (often labeled something like tracking sensitivity, AF response, or case 1–4). For birds, choose a setting that prioritizes focus staying locked on the subject rather than switching targets, then verify with a quick burst and zoom in to confirm the eye is sharp.
What should I do when I can’t reach the shutter speed needed for sharp photos, especially at dawn or in the shade?
If you do not have a minimum-shutter-speed floor or you’re shooting in very low light, set a hard shutter speed you can live with (for perched birds, try 1/800 to 1/1000). Then let ISO float upward. Editing can reduce noise, but missed shutter speed cannot recover motion blur.
If a bird is perched but still moves a lot, what shutter speed should I use?
For perched birds that keep pumping their heads, start at a higher shutter speed like 1/1600 even if the bird looks “mostly still.” The extra speed often saves the eye when the head movement is the culprit, and it reduces how often you’ll need to discard frames.
How should I set Auto ISO limits so my camera doesn’t choose unusable shutter speeds or excessive ISO?
With Av or A + Auto ISO, check your Auto ISO limits in the menu, otherwise the camera may push ISO beyond what you want and still not guarantee sharpness if shutter speed is capped too low. Set a realistic ISO ceiling, then confirm the shutter speed actually lands at or above your minimum.
What are common lens setup mistakes that cause sharpness issues during bird photography?
If your lens has a zoom ring or a focus-distance collar that can creep, lock the zoom position and use a steady stance before tracking. Also make sure stabilization mode matches your use, many lenses offer Mode 1 for general and Mode 2 for panning, and choosing the wrong mode can slightly reduce sharpness in action.
My birds are sometimes blurry even though autofocus seems to lock. What should I check first?
If you see “almost sharp” images where the eye is soft, try raising your focus priority on eye/face detection and use a single focus area that is smaller rather than the widest whole-area option. Also confirm your shutter press is smooth, because even with perfect settings, jabbing the button can introduce a tiny blur right at exposure.
How do I adjust exposure in bright daylight without losing shutter speed for fast motion?
When light is strong, aim to keep shutter speed high and adjust exposure with ISO ceiling or aperture range, rather than dropping shutter speed. If you cannot raise shutter speed further, stop down slightly (within your acceptable range) to improve depth of field for head-to-body sharpness.
What should I do if birds keep flushing before I’m ready to shoot?
If the bird keeps escaping after you approach, switch to longer distance and use a tighter composition from farther back (or crop later). Also practice “pause and wait” movement, stop for 10 to 30 seconds when the bird looks alert, then continue only if it resumes normal feeding.
How can I get a cleaner background if I’m stuck in a spot with no room to move?
For perched birds, the strongest background cleanup usually comes from stepping back rather than zooming more, because it increases the distance between bird and background. If you can’t move back, crouch lower or shift laterally, then reframe so the bird sits against smoother vegetation or open sky.
When shooting flying birds, how do I know whether my misses are from exposure, focus, or timing?
If you are missing the “wingbeat moment,” don’t just rely on burst rate. After a burst, review three things immediately: exposure (is the eye bright but not blown), focus (is the head sharp), and wing position (which frame sequence looks best). Then adjust shutter speed slightly up or down before the next approach.
Can I use flash or artificial light to take better bird photos?
Yes, you can, but use it deliberately. For example, set your minimum shutter speed high and practice on birds that fly across open sky, because flash does not help if the shutter speed is too slow. In many cases, sunlight exposure will still dominate, so prioritize shutter speed first and treat flash as a fill only when you know how it will affect highlights.
What’s the quickest way to get better at panning for birds in flight?
Use a panning practice session with predictable subjects, then apply it to real birds only after your body can rotate smoothly and keep the subject near the same part of the frame. If your panning is drifting, widen your stance and rotate at the hips, and keep the shutter timing consistent through the burst.
How can I tell if my bird photography is stressing nesting birds, and when should I stop?
If you’re photographing in a nest or colony area, treat “no shot” as a valid outcome. Keep a watch on adult behavior, if the bird shows repeated alarm calls, pauses feeding to look at you, or leaves more often than normal, stop shooting, increase distance, and give time before trying again later.
Next Article
How to Photograph a Bird in Flight: Step by Step Guide
Step-by-step tips to freeze bird motion, track focus, pan smoothly, and capture sharp flight photos with camera settings