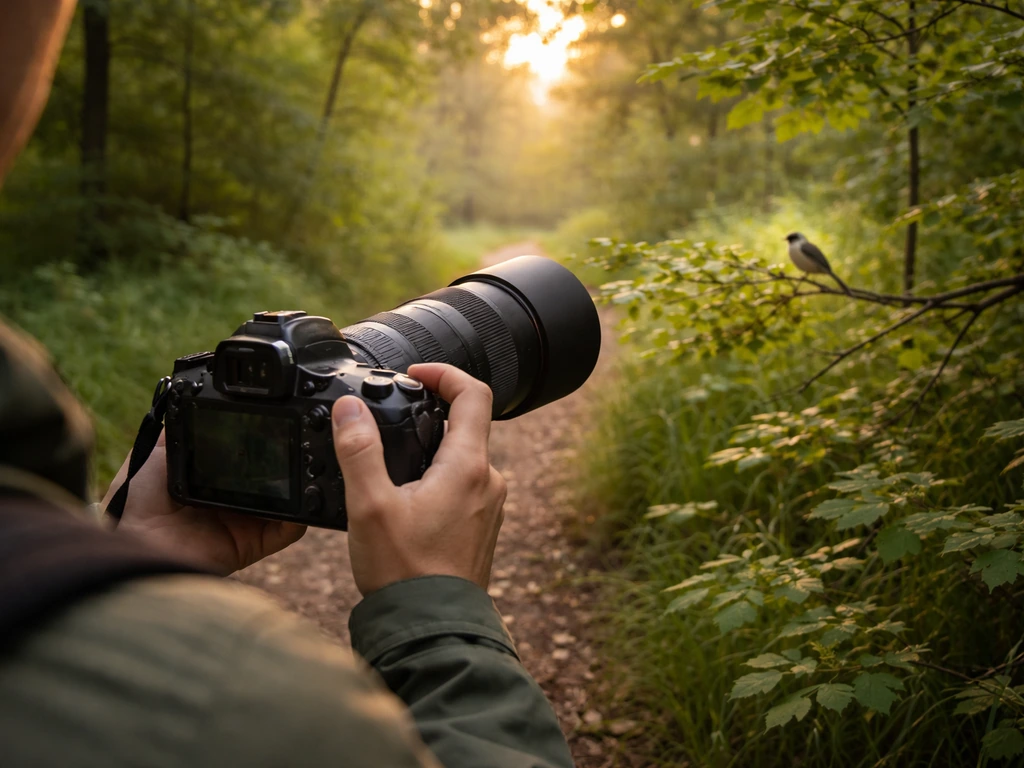
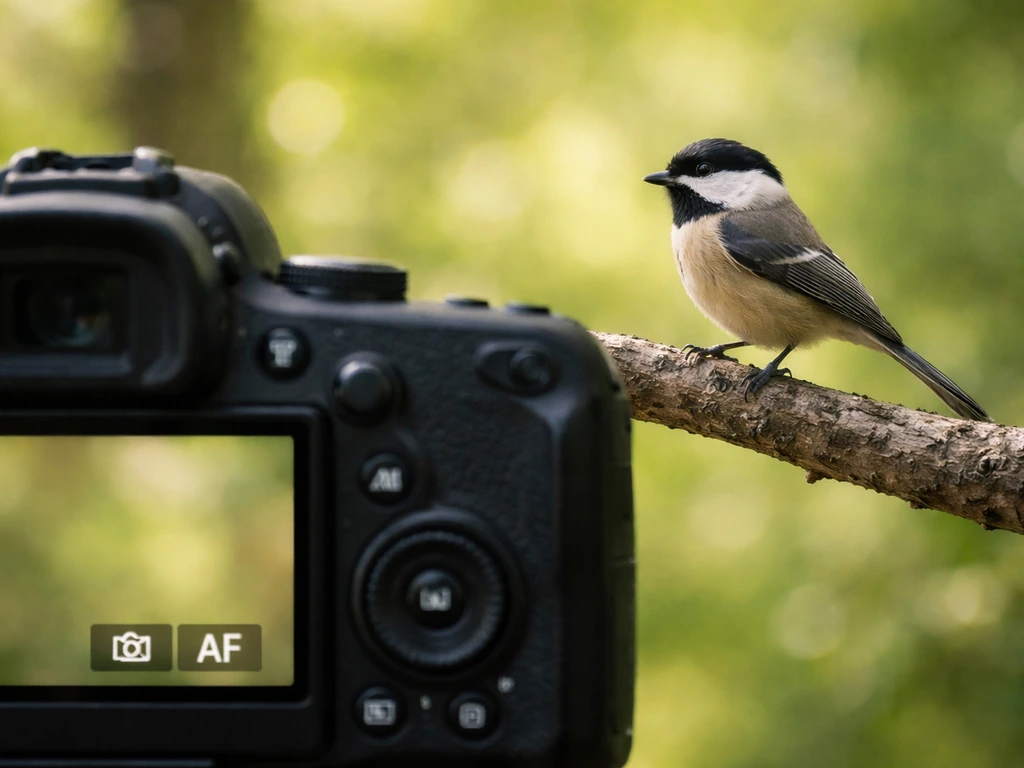
A bird sitting still on a branch looks like the perfect photography opportunity. It's right there. It's not flying anywhere. How hard can it be? Harder than you'd expect, honestly. Missed focus, soft feathers, blown-out highlights, and a bird that vanishes just as you press the shutter are all completely normal frustrations. The good news is that every single one of them is fixable once you understand what's actually going wrong. This guide walks you through the whole process, from sneaking up on your subject to dialing in your settings and getting that sharp, well-lit shot you're after.
You Are Trying to Photograph a Bird Sitting: A Step-by-Step Guide
Marcus Hendricks
12 Apr 2026
What makes a sitting bird hard to photograph
The word 'sitting' suggests total stillness, but birds are never truly frozen. Even a relaxed perched bird is constantly making micro-movements: breathing shifts its whole body, it blinks, tilts its head a few degrees, flicks a feather, or shuffles its feet. These movements are small, but they're enough to introduce motion blur at slower shutter speeds and to shift the plane of sharpest focus right as you fire the shot. I've lost dozens of otherwise great frames to a tiny head turn I didn't even notice happening.
Autofocus hunting is the other big culprit. Your camera's autofocus system looks for high-contrast edges to lock onto. A bird's eye and beak are ideal targets, but branches, leaves, and dappled light right behind or beside the bird are also full of high-contrast edges. The camera can't always tell which one you want, so it hunts back and forth. The farther away the bird is, the smaller its head appears in frame, and the worse this problem gets because there's less high-contrast detail on the bird itself for the AF to grab.
Background clutter compounds everything. A busy background of twigs and leaves doesn't just look messy in the final photo. It actively confuses your camera's metering (so exposure can be off) and autofocus (so focus can miss). Knowing these three problems exist, micro-movement, focus hunting, and cluttered scenes, means you can address them directly instead of just hoping for luck.
How to approach for minimal bird stress
Your approach is just as important as your camera settings. A spooked bird is a bird that's gone. Move slowly and deliberately, avoiding sudden motions. Keep your movements smooth rather than jerky. Walk at an angle toward the bird rather than heading straight at it. Direct, head-on approach is more threatening to birds than a slow arc that brings you closer over time.
Watch the bird's body language as you move. If it starts bobbing its head, raising its crest, fluffing up, or craning its neck to look at you, stop moving. Stay still for a minute. Let it settle. If it relaxes again, you can inch closer. If it keeps watching you alertly, you've reached your limit. Stay where you are and work with the distance you have. Forcing the approach gets you a blurry shot of a bird flying away, which is satisfying in a different way but not what we're after here.
Use whatever cover the environment gives you. Trees, bushes, fence posts, even your car can serve as a blind. Birds are often less bothered by cars than people on foot, so sitting in your vehicle with the window down is a legitimate and effective technique, especially at feeders. As part of setting up your shooting position, think about where the light is coming from and what your background will be. More on both of those later.
Gear basics for a bird-in-the-field photo setup
You don't need professional wildlife photography equipment to get great shots of perched birds. A decent entry-level DSLR or mirrorless camera paired with a 300mm to 500mm lens covers most situations. Even a superzoom bridge camera (the kind with a fixed long lens built in) produces impressive results for sitting birds because you have plenty of time to compose, unlike with birds in flight.
Binoculars are worth mentioning here too. Before you even raise your camera, use binoculars or a spotting scope to identify your bird, check its alertness level, and spot the best angle. This saves you from blowing your approach on a bird that's about to leave anyway, or wasting shots on a species facing the wrong direction. A good backyard bird photography setup often starts with binoculars right beside the camera for exactly this reason.
A tripod or monopod makes a real difference at long focal lengths. Camera shake is magnified at 400mm or 500mm, and holding a heavy telephoto lens freehand for more than a minute is tiring. Even a lightweight travel tripod steadies things enough to let you use slightly slower shutter speeds when light is low. If you don't have a tripod, brace your elbows against your body or rest the lens on a beanbag or rolled-up jacket on a car window.
Camera settings that work for stationary birds
Even though the bird isn't flying, you still want a faster shutter speed than you might think. Aim for at least 1/500s as a baseline. For small, fidgety birds like sparrows or warblers, push to 1/800s or even 1/1000s. This eliminates blur from those micro-movements and gives you a buffer when the bird suddenly turns its head. I learned the hard way that 1/250s, which feels fast enough in theory, produces soft images more often than not with live birds.
For autofocus mode, use single-point AF or a small AF zone and place it directly on the bird's eye. Eye-detection autofocus (available on most modern mirrorless cameras) is fantastic for this. It locks onto the eye and holds it even through small head movements. If your camera doesn't have eye-detect AF, manually position a small AF point over the eye yourself. Avoid wide-area or full-frame AF modes when the background is cluttered, because the camera will almost certainly pick a branch or leaf instead of the bird's face.
For focus drive mode, single-shot AF (called One-Shot on Canon, AF-S on Nikon and Sony) works well for a bird that's genuinely still. Continuous AF (AI Servo / AF-C) is better if the bird keeps moving its head around. When in doubt, use continuous AF. The slight penalty in battery life is worth the extra hit rate.
Set your aperture between f/5.6 and f/8. Wide open (f/4 or lower) gives you a beautifully blurred background, but the depth of field becomes so shallow that if the bird tilts its head even slightly, part of it goes soft. f/5.6 or f/6.3 gives you enough depth to keep the whole bird sharp while still producing a pleasing background blur. Use Auto ISO with a minimum shutter speed set, or set ISO manually. Don't be afraid of ISO 800 or ISO 1600 on modern cameras. Noise at high ISO is far less objectionable than blur.
Exposure compensation is worth keeping in mind. Birds with very bright plumage (white egrets, pale gulls) will fool your camera into underexposing. Dial in +0.7 to +1.3 stops of positive exposure compensation for bright birds. Dark birds (crows, blackbirds) may trigger overexposure, so try -0.3 to -0.7 stops. Check your histogram after the first shot and adjust.
Composition tips: angle, background, and lens choice
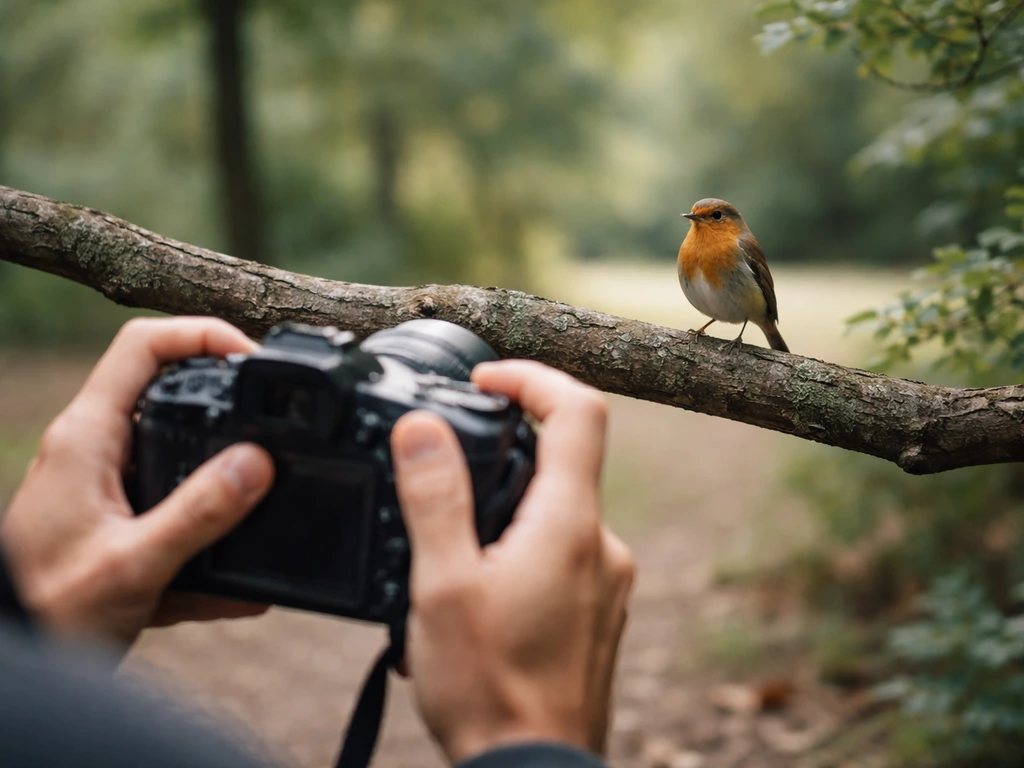
Get low. This is the single most impactful composition change most beginners can make. Shooting at the bird's eye level, rather than from above, creates a more intimate, immersive image and puts the background farther behind the bird, which helps blur it out. Crouching, kneeling, or even lying flat on the ground might feel awkward, but the results are dramatic.
Position yourself so that the bird is facing into the frame with space in front of it rather than behind it. This is called 'leading room' and it makes the composition feel natural and balanced. If the bird is facing left, you want it in the right third of the frame with empty space to its left. Fill the frame as much as you can with the bird. A bird that's a tiny dot in a sea of background looks like a record shot, not a photograph.
Actively manage your background by shifting your position even slightly. Moving a step to the left or right, or up or down, can swap a busy twig-filled background for a clean patch of sky, water, or shaded foliage. This small adjustment makes an enormous difference to the final image. A longer focal length also naturally compresses and blurs the background more than a shorter one, which is one of the reasons a 400mm or 500mm lens is worth the investment for bird photography. Check out tips for bird photography for more on managing backgrounds and framing effectively.
Lighting, timing, and weather for sharp feather detail
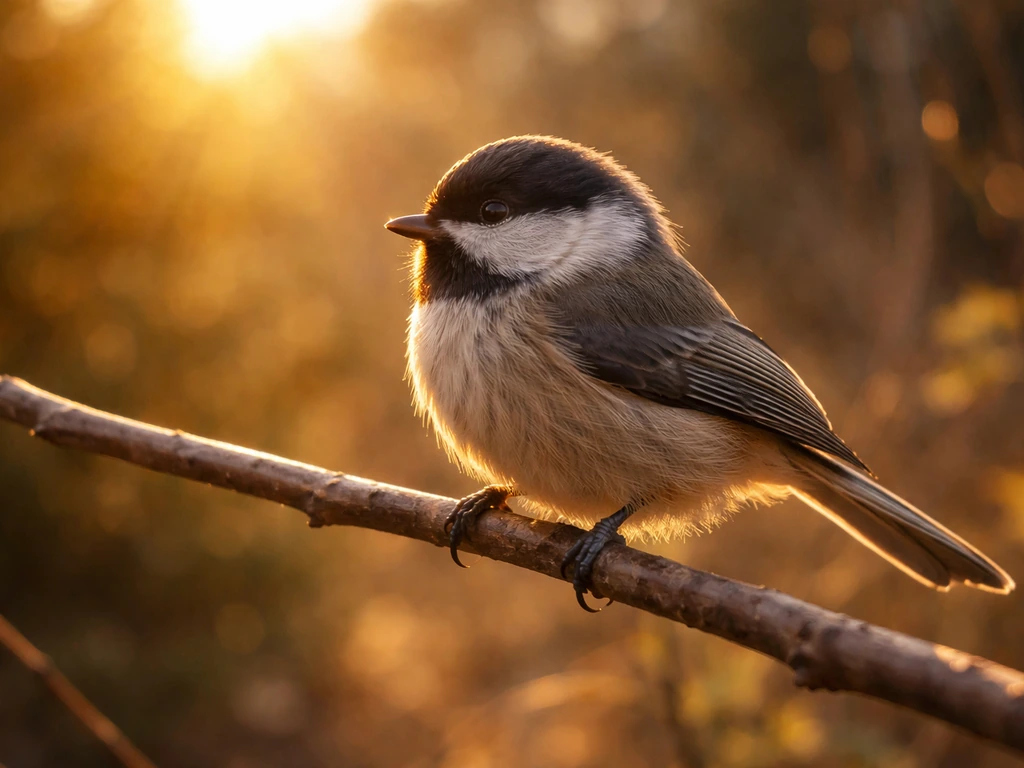
The golden hours, roughly the first hour after sunrise and the last hour before sunset, give you warm, directional light that wraps around feathers beautifully and shows incredible detail. Mid-day sun, especially in summer, creates harsh shadows, blows out pale feathers, and flattens the appearance of the bird entirely. If you have a choice, shoot early or late.
Light direction matters too. Aim to have the sun more or less behind you, so it's falling on the bird's face. Backlit birds look dramatic in the right context, but for a detailed feather shot, front or side lighting gives you the most information. If the bird is in shade but its background is in bright sun, your exposure will be a mess. Look for situations where the bird and its immediate surroundings are in the same quality of light.
Overcast days are actually excellent for perched bird photography. Cloudy skies act as a giant softbox and eliminate harsh shadows completely. Colors look saturated and true, and feather detail is often more visible than in direct sunlight. Lightly overcast conditions at golden hour are close to ideal. Avoid shooting in high wind if you can, because moving branches make backgrounds chaotic and birds shift their posture constantly to maintain balance.
Watch the bird's behavior to time your shot. Birds often hold their most alert and upright posture just after landing or just after a threat has passed. They also tend to turn toward the light when preening. Learn to read these moments and shoot a burst of frames during them rather than waiting for a single 'perfect' instant that may not hold long.
Troubleshooting: focus, blur, exposure, and behavior changes
Images are soft or out of focus
First, check where focus actually landed. Zoom into the image on your camera's LCD and look at the eye. If the eye is in focus but the body is soft, your depth of field is too shallow. Stop down to f/6.3 or f/8. If the eye itself is soft, focus hunted to the background. Switch to a smaller AF point and manually position it over the eye, or enable eye-detection AF if your camera has it. If everything looks slightly soft with no clear focal point, the shutter speed may have been too slow for the bird's micro-movements. Raise it to at least 1/800s.
Images look blurry even at fast shutter speeds
This is usually camera shake, not bird movement. At 400mm or longer, even a tiny hand tremor blurs the image. Use a tripod, monopod, or solid surface to brace the camera. Enable image stabilization (called IS, VR, or OSS depending on your brand) if your lens has it. Make sure you're pressing the shutter gently rather than jabbing it, or use a two-second self-timer or remote shutter release.
Exposure is off: too bright or too dark
Check your histogram immediately after shooting. If it's bunched up against the right edge, you're overexposing and losing highlight detail in pale feathers. Dial in negative exposure compensation. If it's bunched left, dial in positive compensation. Shooting in RAW format gives you much more latitude to fix exposure in post-processing without quality loss, which is something worth setting up before your next session.
The bird changes posture or flies away
This happens to everyone. The best response is to stay calm, keep the camera up, and be ready. Birds often return to the same perch within a few minutes, especially at a feeding spot or favorite lookout. If the bird just changed posture rather than leaving, quickly reframe and refocus before shooting again. Keep continuous AF running so you don't have to re-acquire focus from scratch. And honestly, a posture change often gives you a better shot than the original pose. Shoot through the change.
Next steps: practice routine and ethical guidelines
The fastest way to improve is deliberate practice on accessible subjects. Start with backyard birds at a feeder. They're predictable, return repeatedly, and are used to human presence. Spend 20 to 30 minutes a session working on one specific skill: one session on AF placement, one on exposure compensation, one on composition. Don't try to fix everything at once. Once you feel confident with perched birds, beginner bird photography guides can help you expand your skills across a wider range of species and situations.
When you're ready to push further, learning how to photograph a bird in flight is a natural next challenge. The techniques you've built for perched birds, good AF habits, shutter speed awareness, and reading bird behavior, transfer directly and make that jump much easier.
On the ethics side, keep the bird's wellbeing above getting the shot. Never approach closer than the bird's comfort threshold. Don't use playback of bird calls to attract birds during breeding season, as it stresses them and disrupts nesting behavior. Avoid trampling habitat to get a better angle. Don't bait birds into dangerous or unnatural situations. The goal is to take bird photos in a way that leaves the bird exactly as you found it. The best wildlife photographers are also the most careful ones.
Here's a quick practice checklist you can use before your next session:
- Set shutter speed to at least 1/800s before you start walking.
- Set AF to single-point or eye-detect, positioned on the eye.
- Set aperture to f/6.3 as a starting point and adjust from there.
- Enable Auto ISO with a minimum shutter speed cap.
- Check your histogram after the first shot and adjust exposure compensation.
- Approach slowly at an angle, stop when the bird watches you.
- Get as low as the terrain allows before shooting.
- Check your background before pressing the shutter. Shift position if needed.
- Shoot in bursts of 3 to 5 frames during the bird's most alert moments.
- Review sharpness at 100% crop on the eye, not just the thumbnail.
Perched bird photography is genuinely one of the most rewarding ways to get into wildlife photography because the feedback loop is fast. You can see what went wrong, adjust one thing, and try again within minutes. Give yourself permission to shoot a lot of frames in the beginning. Storage is cheap and practice is everything. If you want to go deeper on any of these techniques, the full breakdown in tips for bird photography is worth reading alongside this guide.
FAQ
Can I use burst mode to photograph a bird sitting? Or will it just waste shots?
Yes, but only if you can keep the bird in the AF area and the bird stays reasonably still. For perched subjects, use single-point or small-zone AF plus a short continuous drive rate, then adjust exposure after the first few frames. If you notice the camera grabbing the eye inconsistently, switch back to single-shot AF or enlarge the zone slightly so the eye stays captured during tiny head shifts.
Should I switch to manual focus when the bird is sitting still?
For most perched birds, manual focus is rarely worth it because the plane of focus can shift when the bird tilts its head. The exception is if you’re shooting very close and can predict the distance, or you have a locked, stable composition with minimal movement. If you try manual focus, stop down to f/6.3 to f/8 and use magnification to confirm sharpness on the eye before firing.
How do I know if my exposure is right when the bird’s feathers are very bright or very dark?
A “perfect” exposure for birds is often different from what the camera thinks. After your first burst, check highlights on the brightest feathers, not just the overall brightness. If the histogram is fine but white feathers look empty, reduce exposure compensation in small steps (for example, 0.3 stops). When in doubt, shoot RAW so you can recover highlights without turning feathers into blotchy textures.
What should I do if I’m getting a sharp eye but a distracting background in focus?
If the background is busy, widen your aperture goal slightly and rely more on focus accuracy and background simplification. Try f/5.6 to f/7.1, use a smaller AF point on the eye, and shift your position to get a cleaner background patch. This avoids trying to force heavy background blur with an overly wide aperture when the bird’s micro-movements can push part of the body out of focus.
My photos look blurry. How can I tell whether it’s focus error, micro-movement, or camera shake?
Start by confirming whether you are over- or underexposing, then address shutter speed. If everything looks soft even at f/6.3 to f/8, raise shutter speed first (many perched birds still need 1/800s or faster). If only the eye is soft, refocus with eye-detection or a smaller AF point. If the whole image is uniformly soft, suspect camera shake, not focus, and brace the lens, use IS/VR, and press the shutter gently.
Can I use Auto ISO or an auto exposure mode for perched birds?
Yes, if you’re careful about how the metering and AF behave. For perched birds with changing light (clouds, dappled shade), Auto ISO with a set minimum shutter speed is often the best balance. Avoid auto exposure modes that allow shutter speeds to drop below your minimum, because that’s when micro-movement blur starts. Set aperture and shutter intentionally, then let ISO float within reason.
Should I lock exposure or rely on the camera’s metering while the bird stays on one perch?
For many cameras, exposure for a moving bird is more stable when you lock exposure after you’ve dialed it in, especially under dappled light. Use exposure lock or manual exposure for a short sequence if the bird stays in the same lighting. If the bird moves between shade and sun, be ready to re-adjust compensation quickly or shoot RAW so exposure changes are recoverable.
What if my eye-detection autofocus keeps focusing on the branch instead of the bird’s eye?
If eye-detection AF keeps jumping to the wrong spot, switch to a manually selected small AF point and place it directly on the eye. Also check that the camera isn’t trying to track a contrasty branch behind the bird, and confirm your subject-detection settings are enabled correctly for birds. In clutter, smaller AF zones usually outperform full tracking.
Is a tripod necessary for perched birds, or only for birds in flight?
It can be worth using a tripod even for short sessions, because stability helps you keep the AF point accurately on the eye during head turns. If you do use a tripod, keep it positioned low and steady to match your eye-level composition, then use a remote or self-timer to avoid jarring the setup. Also remember to check that the tripod is stable in wind, and avoid extending the center column fully if you can.
Why can’t my camera focus on the bird sometimes even though it looks sharp in the viewfinder?
Check your lens minimum focusing distance and make sure you’re not inside it when you get close. If you’re too far, smaller AF points may not have enough detail to grab the eye quickly, especially in shade. The practical fix is to adjust your distance so the bird’s head fills more pixels in the frame, then re-select the AF point and confirm focus on the eye before shooting your burst.
Should I use continuous AF all the time for a perched bird, or only when it keeps moving?
If your bird is cooperative at a feeder, continuous AF can help when it keeps shifting its head, but only if the camera consistently prioritizes the bird. Use a small tracking zone or subject-detection with a tighter area, then keep bursts short to avoid battery drain and missed focus opportunities. If focus accuracy drops, switch to single-shot AF and shoot each time the bird pauses.
My photos have the bird in frame, but the eye isn’t sharp. How do I make my focus consistently land on the eye?
Most likely you’re composing too loosely, so the eye ends up outside the AF area during movement. Tighten framing so the bird’s eye stays near the center third, then use a smaller AF zone or eye-detection with tracking sensitivity set appropriately. Another common cause is pressing the shutter while the AF point is still settling, so pause for a fraction of a second after the camera confirms focus.
Next Article
Beginner Bird Photography: First Photos Today Step by Step
Step-by-step beginner bird photography guide to get first sharp photos today with settings, gear, field tactics, and fix