Bird photography is one of the most rewarding hobbies you can pick up, and you don't need a $5,000 camera to get started. With a decent smartphone, a budget zoom camera, or an entry-level DSLR, you can start capturing sharp, beautiful bird shots within your first few sessions. The learning curve is real, mostly because birds move fast and don't take direction, but once you understand a handful of settings and a few field tricks, the pieces fall into place surprisingly quickly.
Beginners Guide to Bird Photography: Gear, Settings, and Tips
Marcus Hendricks
18 May 2026
What bird photography actually involves (and what to expect at first)
Bird photography sits right at the intersection of birdwatching and photography, and it borrows from both. You're learning to find birds (habitat, behavior, timing), get close enough to fill the frame, and then execute a technically solid shot in a fraction of a second before the bird moves, flies, or turns its back on you. Adobe sums it up well: birds are fundamentally harder to photograph than static subjects because they're always moving. That's the honest reality. Your first dozen sessions will probably include a lot of blurry tail feathers and empty branches where a bird was half a second ago. That's completely normal, and it's actually part of what makes the hobby addictive.
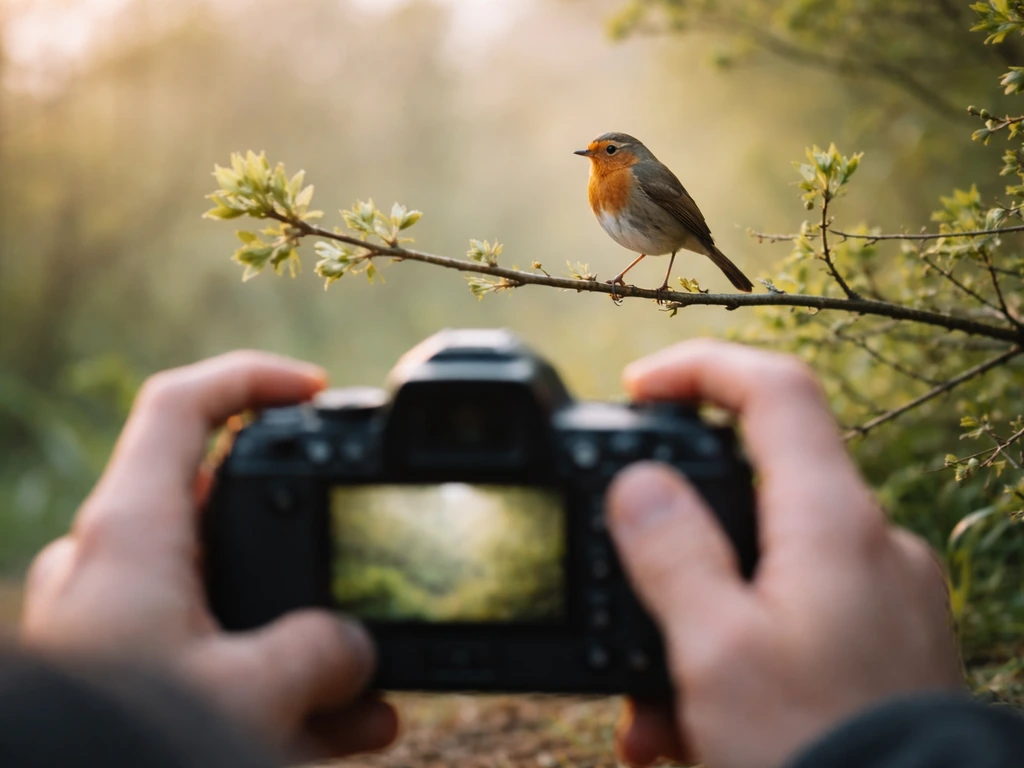
The creative side is just as important as the technical side. You're not just documenting birds, you're trying to capture personality, behavior, and light in a single frame. A sharp photo of a robin sitting on a fence is nice. A sharp photo of that same robin mid-song with golden morning light behind it is something you'll actually print. Keeping that goal in mind, even when you're still figuring out your settings, helps you shoot with more intention from day one.
Bird photography also overlaps naturally with birdwatching. Many beginners find that the more they know about birds (what species live in their area, where they feed, how they move, what time of day they're most active), the better their photos get. If you want a beginners guide to bird watching, focus on learning local species, reading behavior, and planning simple observation sessions before you chase photos birdwatching skills. If you're new to both hobbies at once, that's totally fine. Start in your backyard or a local park, and let the photography motivate you to learn more about the birds you're shooting. If you want to bird watch from home, start by choosing a nearby backyard spot and setting up to observe feeding and movement without disturbing the birds. If you are caring for birds at home too, these new bird owner tips can help you set up a safe routine from day one. If you want to make the most of your backyard, these backyard bird watching tips will help you spot more species and plan better viewing times.
Gear basics: what camera (or phone) to start with
The biggest gear challenge in bird photography is reach. Birds are small, they spook easily, and getting physically close enough for a good photo without disturbing them is often impossible. That means you need optical zoom, and more of it than you'd expect. Here's how the main options stack up for beginners.
| Option | Zoom Range | Image Quality | Cost | Best For |
|---|---|---|---|---|
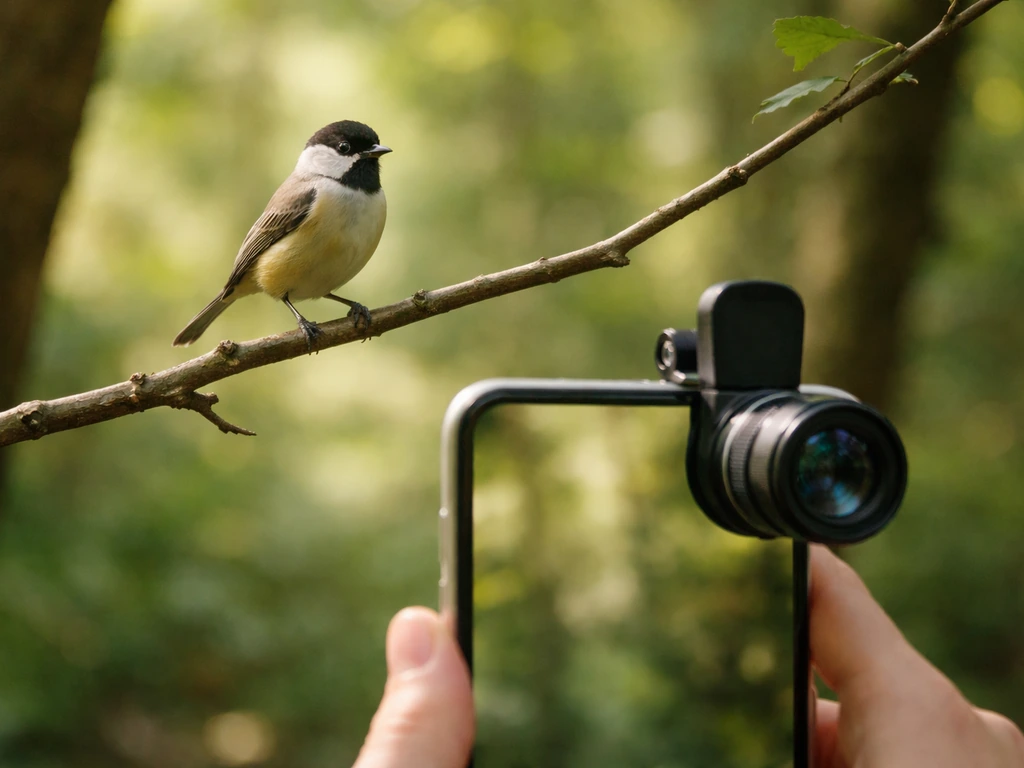
| Smartphone (with telephoto lens) | 2x–10x depending on model | Good in good light, degrades fast when zoomed | Free (if you already own one) | Testing the hobby, backyard birds up close |
| Bridge / superzoom camera | Up to 60x optical zoom (e.g., 20–1200mm equivalent) | Good, limited in low light due to small sensor | $300–$700 | Beginners who want reach without complexity |
| Mirrorless or DSLR (entry-level) + zoom lens | Depends on lens (200–600mm is ideal) | Excellent, upgradeable | $600–$1,500+ for body + lens | Beginners who want room to grow |
If you already have a smartphone, start there. You'll quickly discover its limits, especially at distance or in shade, and that will tell you exactly what to invest in next. If you're ready to buy something dedicated, a bridge/superzoom camera is the single best value move for most beginners. A 60x zoom camera (roughly 20–1200mm equivalent) at around 10fps continuous shooting costs a few hundred dollars and will get you frame-filling shots of birds that a smartphone simply cannot reach. The sensor is small, which means image quality suffers in low light, but for sunny-day backyard and park shooting, they punch well above their price.
If you're fairly serious from day one and want gear you won't outgrow, an entry-level mirrorless camera body with an APS-C sensor paired with a 100–400mm or 150–600mm zoom lens is the way to go. You'll get much better image quality, faster autofocus, and a real upgrade path. Just know that you're spending more upfront and the system is more complex to learn.
Must-have accessories (don't skip these)
- Extra batteries: Bird photography sessions are long, and continuous shooting and autofocus drain batteries fast. Carry at least two.
- Large, fast memory cards: You'll be shooting in bursts. A 64GB or 128GB card with a fast write speed keeps up with your camera's continuous shooting rate.
- Binoculars: Counterintuitive, but a good pair of 8x42 or 10x42 binoculars is essential for finding birds before you raise your camera. You can't photograph what you can't spot.
- A monopod or beanbag: Heavy telephoto lenses cause camera shake. A monopod gives you fast, mobile support. A beanbag works great on car windows and fences.
- Lens cloth and weather protection: Outdoor shooting means dust, rain, and morning dew. A simple rain sleeve for your lens costs almost nothing.
Lenses, distance, and getting sharp photos
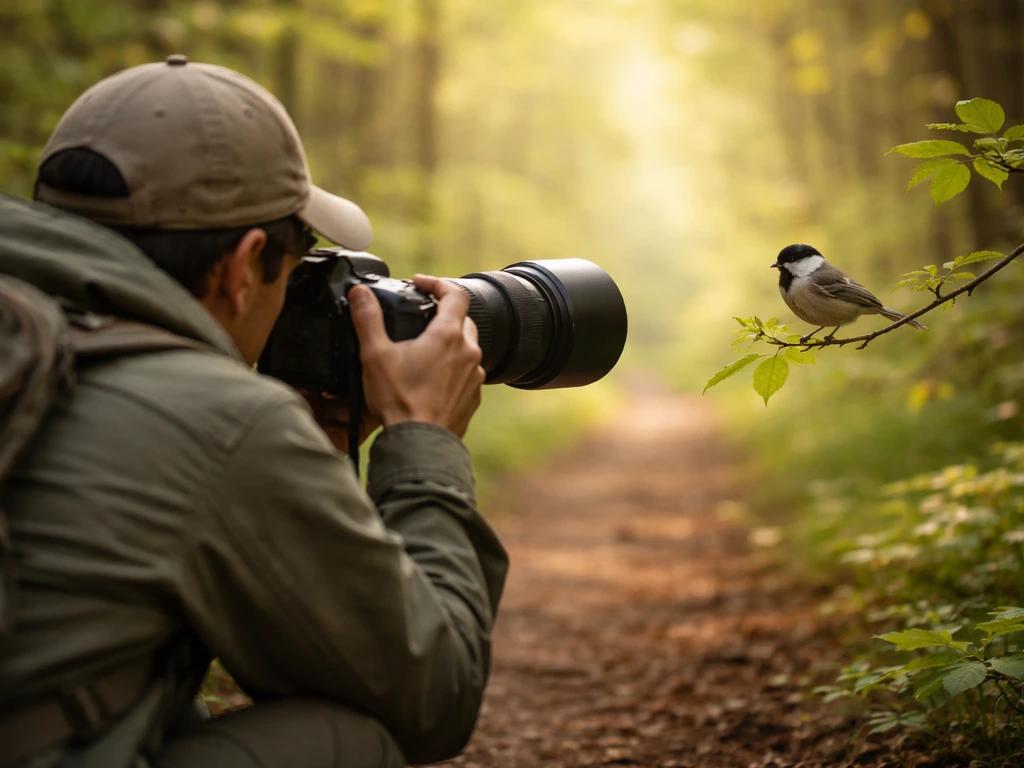
For interchangeable-lens cameras, the sweet spot for bird photography is roughly 200mm to 800mm focal length. That range gives you enough reach to fill the frame with most birds without needing to be uncomfortably close. A 100–400mm zoom covers a huge variety of situations and is a great first dedicated bird lens. Longer lenses (500mm, 600mm) are more specialized but make a huge difference for small or skittish species.
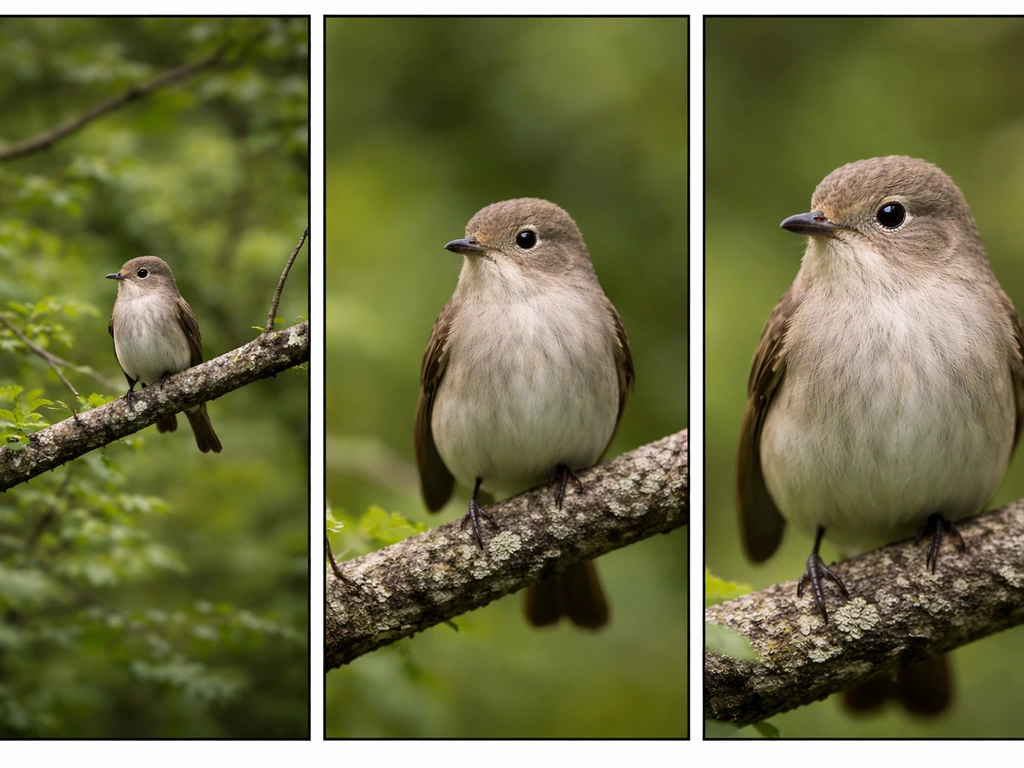
Longer focal lengths also compress the background, which is a happy side effect: it blurs out distracting foliage or fences and makes the bird pop out of the frame. This is one of the things that makes telephoto shots of birds look so good, even at modest skill levels. A long lens does a lot of the compositional heavy lifting for you.
Stability is a bigger deal with longer lenses because any camera shake gets magnified. As a rough rule, try to use a shutter speed at least equal to your focal length (e.g., 1/400s at 400mm) just to counter hand shake, and higher than that to actually freeze bird movement. A monopod or beanbag support dramatically reduces the shutter speed you need, which in turn helps in lower light. Image stabilization (labeled IS, VR, OSS, or IBIS depending on the brand) helps too, but it doesn't stop subject motion, only camera shake.
Field strategy: finding birds and positioning yourself ethically
The best camera settings in the world won't help if there are no birds in front of you. Finding birds, anticipating where they'll go, and positioning yourself without spooking them is genuinely half the skill of bird photography. The good news is that the more you practice, the better your bird instincts get.
Where to find birds worth photographing
- Your backyard: Start here. Set up feeders or a bird bath to bring birds to a known spot where you can set up comfortably and control your shooting angle.
- Local parks and nature reserves: Edges between habitats (where a woodland meets a meadow, or where land meets water) attract the most species. Walk slowly along these edges.
- Wetlands and ponds: Wading birds, ducks, and herons are large, slower-moving, and relatively tolerant of people. Great for beginners.
- eBird (Cornell Lab of Ornithology's free app): Shows you exactly what species have been spotted near you recently, with maps of hotspot locations.
Positioning and the ethics of getting close
Getting close enough for a great photo without disturbing the bird is the central ethical and practical challenge of bird photography. Audubon's guidance is clear and practical: if the bird flushes (flies away), changes its posture, stops feeding, or starts alarm-calling when you approach, you're already too close. Back off. A long lens is your best tool here because it lets you get frame-filling shots from a respectful distance rather than creeping closer and stressing the bird.
Move slowly and avoid direct eye contact with the bird when approaching. Wear muted, non-reflective clothing. Approach from downwind if possible. Once you've found a good position, stop moving and let the bird settle. Often a bird that flushed will return to the same spot within a few minutes if you stay still and quiet. Setting up near a known perch or feeding area and simply waiting beats slowly stalking a bird almost every time.
Near nests, be especially conservative. Nest photography should be done carefully and briefly. If you don't see a parent return after a reasonable wait, retreat so your presence doesn't keep them away from eggs or chicks. Always follow posted guidelines at nature reserves and parks, and follow the Leave No Trace principle: observe wildlife from a safe distance, and let their behavior be your guide, not your shot list.
Anticipating movement and timing your shots
One of the biggest skill leaps in bird photography is learning to anticipate behavior rather than react to it. Watch what the bird is doing. A bird that keeps looking to one side is probably about to move that way. A bird crouching low is about to take off. A bird that's been preening for a while is overdue for a shake or a wing stretch. These are the moments that make great photos, and if you're paying attention to behavior instead of staring through your viewfinder, you'll be ready for them.
Camera settings for bird photography
This is where most beginners get overwhelmed, so let's keep it practical. There are really just four settings that matter most for bird photography: shutter speed, aperture, ISO, and autofocus mode. Get these right and the rest is details.
Shutter speed: the most important setting
Shutter speed is what freezes (or blurs) a moving bird. For a perched bird, 1/500s is often enough to get a sharp shot. For a bird walking or hopping, aim for 1/800s to 1/1000s. For a bird in flight or taking off, you typically need 1/1600s to 1/2000s or faster. Smaller birds have faster wingbeats, so the rule of thumb is: the smaller the bird, the faster the shutter speed you need. Start your shutter speed higher than you think you need it and bring it down if the resulting photos are underexposed.
Aperture and ISO
A wide aperture (lower f-number, like f/5.6 or f/6.3) lets in more light, which lets you use faster shutter speeds. It also blurs the background, which is usually what you want for bird portraits. Most telephoto lenses for beginners open to around f/5.6 to f/6.3 at their longest focal length, which is workable but not a lot of latitude in low light.
ISO controls your camera's sensitivity to light. Higher ISO means you can shoot in dimmer conditions, but it also introduces grain (called noise) into the image. Use Auto ISO with an upper limit set to something like 3200 or 6400 on a modern mirrorless or DSLR body. That way your camera handles ISO automatically while you focus on shutter speed and composition. In bright daylight, ISO 400–800 is plenty. In shade or on cloudy days, 1600–6400 is normal.
Autofocus modes for birds
The autofocus setting that changes bird photography the most is continuous autofocus, usually called AI Servo (Canon), AF-C (Nikon/Sony), or C-AF (OM System). This mode keeps refocusing on the subject as long as you hold the shutter button halfway (or hold a back-button AF button). Use this for any moving bird. Single-shot AF (AF-S or One Shot) is fine for a truly stationary perched bird, but the moment it moves, you'll be out of focus.
Modern mirrorless cameras from Canon, Nikon, Sony, and OM System all have subject detection modes that automatically recognize and track birds, including bird-eye detection. If your camera has this feature, turn it on. It's genuinely transformative for beginners because it handles the hardest part of the job for you. The camera locks onto the bird's eye and tracks it even as the bird moves, turns, and flies. Set your AF area to wide or tracking mode so the camera has the whole frame to work with.
A simple starting settings recipe
- Mode: Aperture Priority (Av or A) or Shutter Priority (Tv or S). For birds, Shutter Priority is often simpler: you set the shutter speed, the camera sets aperture.
- Shutter speed: 1/1000s as a default starting point. Increase to 1/2000s for flight.
- ISO: Auto ISO with a maximum of ISO 3200 (or 6400 on newer cameras).
- Aperture: As wide as your lens allows (lowest f-number).
- Autofocus mode: Continuous (AI Servo / AF-C / C-AF) with subject tracking enabled.
- Drive mode: Continuous high-speed shooting (burst mode) so you capture a sequence and pick the sharpest frame.
How to photograph common bird behaviors (and avoid rookie mistakes)
Perched birds
Perched birds are the best starting point. Find a bird on a clean perch (branch, fence post, feeder rim) with some separation from a cluttered background. Get low if you can, shooting at the bird's eye level almost always looks better than shooting down at it from a standing position. Focus on the eye. If the eye is sharp, the photo works even if other parts are slightly soft. Shoot a burst of frames anyway, because even "still" birds bob their heads and blink constantly.
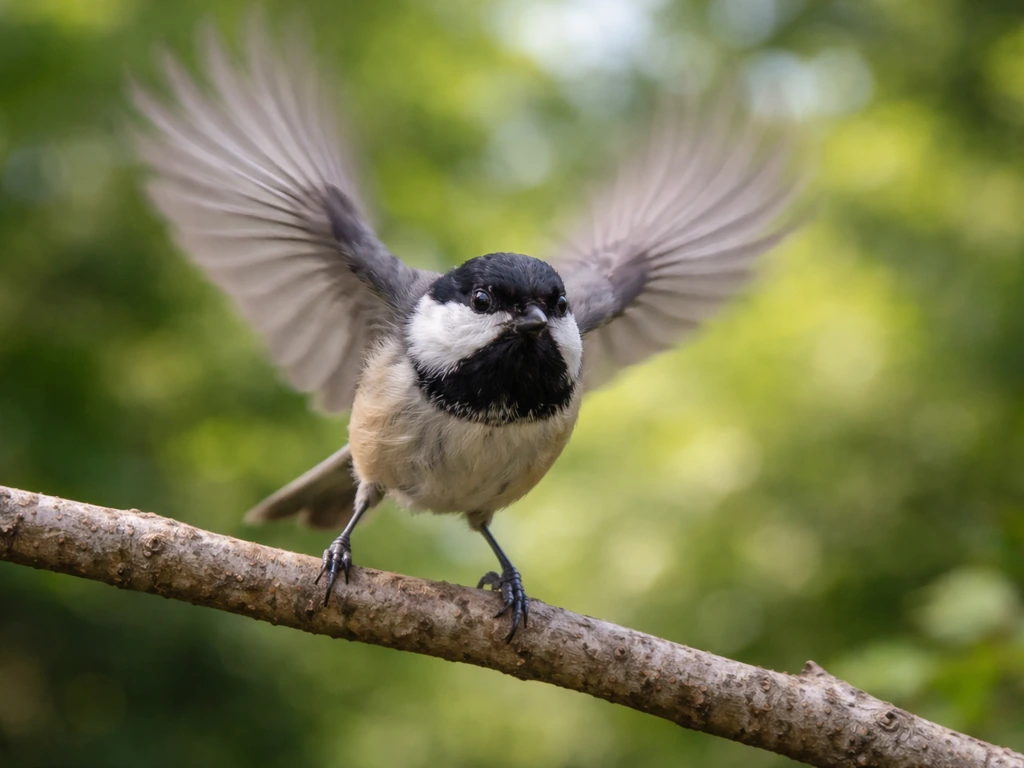
Birds in flight
Flight shots are hard at first and feel impossible, then suddenly click. The key is to find the bird while it's still perched, pre-focus on it, and be ready before it takes off. Start tracking the bird in your viewfinder as soon as it starts to move. Use your widest AF area setting so the camera can find and hold the bird as it moves across the frame. Shoot a long burst. Out of 30 frames, maybe 3 will be keepers. That's fine, that's normal.
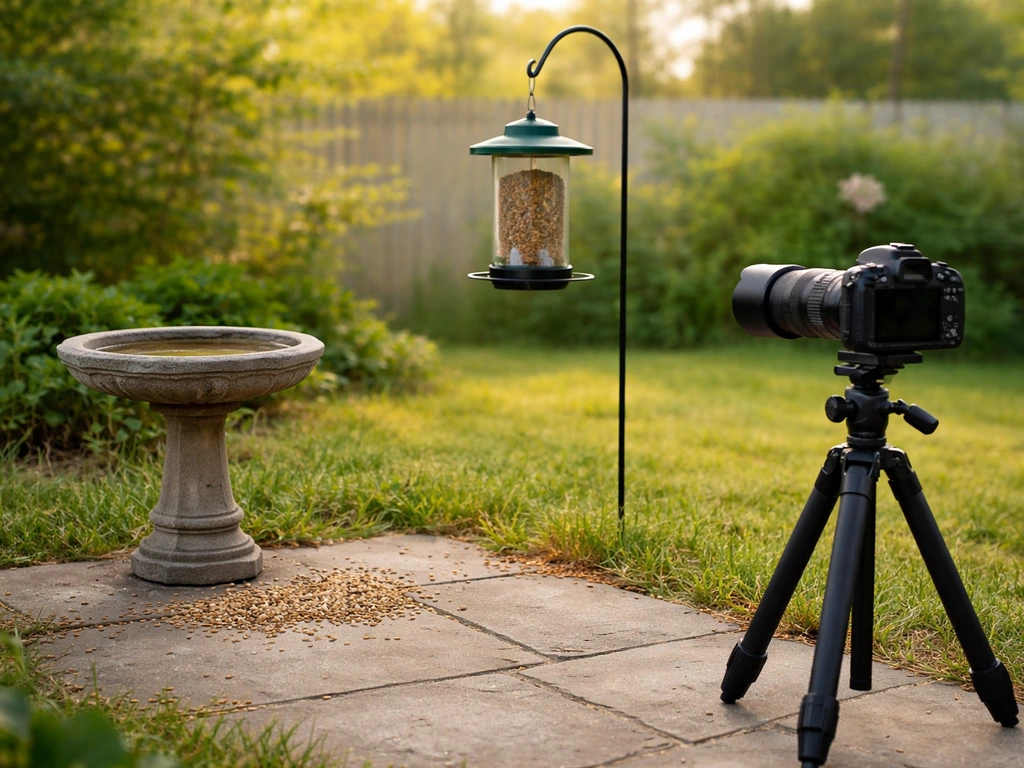
Birds at feeders and baths
Feeding stations and bird baths are a huge advantage because the birds come to you. Set up your feeder or bath in a spot with a clean background (sky, greenery, not your house wall) and position yourself so the light is behind you or to the side. Sit back several feet from the feeder and let the birds forget you're there. A car also works as a hide: birds are surprisingly unbothered by vehicles and will feed within feet of a parked car.
Common beginner mistakes to avoid
- Shooting in the middle of the day: Harsh overhead light creates unflattering shadows on birds. The golden hour (first hour after sunrise and last hour before sunset) produces the best light, and birds are most active then anyway.
- Centering every shot: Put the bird slightly off-center, leaving space in the direction it's looking. This is called the rule of thirds and it makes compositions feel more dynamic.
- Using digital zoom on a bridge camera or smartphone: Digital zoom is just cropping, it degrades quality. Always use optical zoom only and crop later in editing.
- Chasing birds rather than waiting: Walking toward a bird almost always ends in it flying away. Find a good spot and let birds come to you.
- Setting a shutter speed and forgetting it: Light changes constantly. Check your exposure every time you move to a new location or the sky changes.
- Focusing on the body instead of the eye: Autofocus can grab anything, and telephoto lenses have very shallow depth of field. Lock focus on the nearest eye every time.
A simple practice plan and upgrade path for getting better fast
The fastest way to improve at bird photography is a tight feedback loop: shoot, review, adjust, repeat. Here's a concrete plan for your first weeks.
Your first-month practice plan
- Week 1: Shoot only perched birds in your backyard or a local park. Focus entirely on getting the eye sharp and using burst mode. Don't touch your settings mid-session; just shoot and review afterward.
- Week 2: Review your best and worst shots. Identify the main problem in the bad ones (blur, missed focus, bad exposure). Adjust one setting at a time. If blur is the issue, raise your shutter speed. If exposure is off, check your ISO cap.
- Week 3: Try birds at a feeder or bird bath. Practice pre-focusing on a perch before the bird lands. Work on composition: eye level, off-center framing, background awareness.
- Week 4: Attempt your first flight shots. Pick large, slow birds first (pigeons, ducks, gulls) before trying small fast songbirds. Expect most to be blurry, and celebrate the sharp ones.
- Ongoing: Use eBird to find new locations. Each new habitat introduces new species and new challenges that keep you learning.
The upgrade path as you improve
Start with whatever you have, then upgrade strategically. The order that gives you the most improvement per dollar usually goes like this. First, if you're on a smartphone, move to a bridge camera with a long optical zoom. Second, if you're on a bridge camera and hitting its limits (especially in low light or with very fast birds), move to a mirrorless body with an APS-C sensor and a 100–400mm lens. Third, add a faster, longer lens (like a 150–600mm) before upgrading the camera body. Glass holds its value and makes a bigger visible difference than body upgrades at most skill levels.
On the skills side, the next level unlocks when you start learning bird behavior and habitat. Knowing that a kingfisher always returns to the same perch after a dive, or that warblers move through your area in a specific two-week window in spring, lets you set up deliberately instead of hoping to stumble onto something good. Resources like All About Birds from the Cornell Lab of Ornithology are excellent for this, and they're free. This is also where developing your birdwatching skills alongside your photography skills starts paying real dividends.
The honest summary: pick up whatever camera you have access to today, go outside, and shoot birds. Review what you get. Fix the biggest problem in the next session. Repeat that cycle consistently and you'll be producing photos that surprise you within a month or two. The gear matters less than the time you put in, and the time you put in is a lot more enjoyable than most hobbies you'll find.
FAQ
What’s the minimum shutter speed I can safely use if I only know one number for birds?
Use 1/500s as your baseline for perched birds, then raise it immediately if the bird is hopping, tail-flicking, or you see motion blur in the beak and head. For flight, don’t be tempted to drop below 1/1600s unless you’re intentionally going for blur and can keep the plane of focus where the bird is.
How do I choose an aperture if my telephoto lens has a narrow maximum opening?
If your lens tops out around f/5.6 or f/6.3 at full zoom, don’t stop down unless you’re getting consistently soft results and you have enough light. In bird photography, faster shutter speed usually matters more than adding depth of field, especially when the bird moves or blink timing is unpredictable.
Should I use Auto ISO or a fixed ISO for beginners?
Auto ISO is usually the easiest way to avoid underexposure when light changes between clouds and sun. Set a clear upper limit (like 3200 or 6400) so you don’t end up with unusably noisy files, and check your histograms or blinked highlights after the first few shoots.
Why are my bird photos sharp in the center but blurry around the edges or in motion?
This often comes from shutter speed that’s too low for the bird’s movement, not from lens sharpness. Verify the actual keepers: if the eye is soft, try faster shutter and continuous autofocus. If only the edges look soft, check that you’re not cropping too aggressively or using an odd AF point size that’s grabbing background instead of the eye.
What autofocus area setting should I use if my camera keeps switching off the bird?
Start with wide or tracking so the system has more room to reacquire the subject, then narrow only if it consistently grabs the wrong thing. If your background is busy, consider setting a smaller area around where the bird’s head will be, since wider areas can lock onto branches or reeds.
How can I improve keep rate for birds in flight?
Don’t wait for takeoff while staring at the camera. Track the bird as soon as it shows movement, start the burst slightly before you think the critical wing position will happen, and aim for repeated sequences instead of one long “hope” burst. Expect a low keeper ratio at first.
What should I do if my camera can’t find the bird’s eye?
Turn on bird detection or eye-detection if available, but don’t assume it will work through clutter. When the bird is side-on, small, or against leaves, switch to a more general tracking mode and keep the subject larger in the frame by adjusting distance or focal length.
Is it okay to use burst mode the entire time?
Yes, as long as you manage storage and you’re willing to review. Bursts help with head angle and blink timing. The practical trick is to burst during behavior changes (wing stretch, crouch, takeoff) rather than only when the bird “looks perfect” in your view.
Do I need a monopod or tripod for bird photography?
For longer lenses, a monopod is often the best beginner compromise, it stabilizes your framing and can reduce how high you need to push ISO. A tripod can work, but it can also slow your repositioning when birds move unpredictably, and it may draw attention in open areas.
How do I set up at feeding stations without spooking birds?
Use a respectful distance and avoid sudden movement after you start shooting. If birds stop feeding, posture changes, or you hear alarm calls, back off and reposition for a longer, quieter wait. Place the feeder so light comes from behind you or slightly from the side, reducing harsh shadows on the bird’s face.
What’s the biggest beginner mistake when aiming for “sharp bird photos”?
Relying on the camera’s stabilization or autofocus alone while keeping shutter speed too low. Stabilization reduces camera shake, but it does not stop the bird’s motion. If you see blur consistently, increase shutter speed first, then reassess technique and AF mode.
How do I handle low-light bird photography without ruining image quality?
Prioritize shutter speed over ISO, but keep Auto ISO capped so noise stays manageable. If your lens opening is limited, consider increasing your focal length only if it doesn’t force shutter speed too low. In extreme dim light, it may be better to wait for a brighter window rather than pushing ISO beyond your tolerance.
Is it ethical to take photos near nests if the bird seems calm?
Be extra conservative near nests even if adults are present. If you don’t see a parent return after a short, reasonable wait, retreat. If the birds change behavior, stop feeding, or show alarm calls, the safest move is to leave the area, since repeated disturbance can affect nesting success.
How do I practice anticipation if I’m mostly shooting perched birds?
Track behavior cues like head-bobs, repeated looking to one direction, crouching, preening pauses, and wing stretches. When you notice the cue, start your burst earlier than you think and keep your focus locked before the bird commits to moving, that timing gap is where most beginner sharp shots are won.
Citations
Audubon’s ethical-bird-photography guidance says to back off if your approach causes a bird to flush (fly or run away) or change its behavior—if it does, you’re too close.
https://www.audubon.org/audubons-guide-ethical-bird-photography
Audubon’s bird photography ethics page emphasizes considering the bird’s well-being before taking/posting photos and reinforces “too close” behavior as a key ethical trigger.
https://www.audubon.org/photography/ethics
Audubon’s nest-photography guidance advises being constantly aware of signs of stress/fear; it also recommends retreating if there’s no sign of the parent after time, to reduce your impact.
https://www.audubon.org/news/dos-and-donts-nest-photography
The NPS “Leave No Trace” content for wildlife viewing stresses respecting wildlife from a safe distance and avoiding disturbing animals (Do Not Disturb principle).
https://www.nps.gov/articles/000/idkt_lnt6.htm
RSPB’s beginner birdwatching guidance highlights that birds are sensitive to disturbance and advises checking reserve/site guidelines to avoid affecting wildlife.
https://www.rspb.org.uk/whats-happening/news/a-beginners-guide-to-birdwatching
OM SYSTEM’s bird photography guide states that “the smaller the bird the faster shutter speed is needed,” tying subject size to action-stopping requirements.
https://explore.omsystem.com/us/en/bird-photography
Adobe notes bird photography is harder than static subjects because birds move; it also frames bird knowledge (habitat/behavior) as improving your ability to find birds, get close, and capture what you envision.
https://www.adobe.com/creativecloud/photography/type/bird-photography.html
MPB’s beginner bird photography guide explicitly positions bird photography as achievable for beginners and uses real-shot examples featuring telephoto reach and background separation for readable compositions.
https://www.mpb.com/en-us/content/tips-and-techniques/bird-photography-for-beginners
Digital Camera World’s 2026 bridge-camera guide gives an example superzoom spec: a 60x zoom camera (1/2.3-inch sensor, ~20–1200mm equivalent) with a ~10fps continuous shooting rate.
https://www.digitalcameraworld.com/buying-guides/the-best-bridge-cameras
TechRadar’s May 2026 superzoom coverage discusses that ultra-zoom/bridge cameras target wildlife use cases and provides a concrete example model spec set including a 20–1200mm (60x) lens and ~10fps burst.
https://www.techradar.com/news/best-bridge-camera
RTINGS’ 2026 bird-photography camera list explains that some superzoom/bridge cameras can reach very long focal lengths (full-frame-equivalent) without carrying interchangeable telephoto lenses.
https://www.rtings.com/camera/reviews/best/bird-photography
Nikon’s backyard-birds guide emphasizes composition including considering the background/foreground and discusses using high-speed shooting to support faster shutter speeds for action moments.
https://www.nikonusa.com/learn-and-explore/c/tips-and-techniques/photographing-backyard-birds
Canon’s beginner guide states that 1/500s may be enough for relatively still birds but at least ~1/1000s is needed to freeze birds in flight (with shutter speed adjusted by movement and ISO increased if needed).
https://snapshot.canon-asia.com/reg/article/eng/beginners-guide-to-bird-photography
Canon’s R5 C training article explains Servo AF behavior: focus continues/switches as long as you keep the shutter/AF activation engaged, supporting tracking moving wildlife.
https://www.usa.canon.com/learning/training-articles/training-articles-list/the-best-settings-for-capturing-wildlife-on-the-canon-eos-r5-c-camera
Canon’s AF setting guidance for perched birds describes enabling Animals subject detection and using Whole area tracking Servo AF to ease framing; it also references eye detection options for birds.
https://cam.start.canon/hr/C017/guide/html/AF-06_Subject_0340.html
Cornell Lab of Ornithology (All About Birds ecosystem) is the organization behind All About Birds resources commonly used for bird behavior/ID and is a primary birding reference hub.
https://www.birds.cornell.edu/home/contact-us/
Audubon’s ethics content reiterates that a long lens can help you get strong images without getting physically close to the birds.
https://www.audubon.org/photography/ethics
Pictureline recommends a telephoto lens range roughly between 200mm and 800mm for bird photography so you have enough reach to fill the frame.
https://www.pictureline.com/blogs/bird-photography/best-focal-length-for-bird-photography
This bird-shutter-speed reference stresses that shutter speed is critical because telephoto setups and bird motion amplify blur risk (particularly for smaller birds and fast wingbeats).
https://wildlifewithronen.com/best-shutter-speeds-for-bird-photography/
Nikon’s backyard-birds guidance discusses using frame-rate/high-speed capture to enable faster shutter speeds when shooting birds with action.
https://www.nikonusa.com/learn-and-explore/c/tips-and-techniques/photographing-backyard-birds
Sony’s autofocus support guide for a camera example notes using tracking/AF sensitivity adjustments for fast scenes like birds bathing to minimize focus drifting (e.g., changing AF tracking sensitivity).
https://www.sony.co.jp/support/ilc/autofocus/ilce7rm5/en/12.php
OM SYSTEM’s wildlife settings advice states animals that move faster (e.g., a bird taking off) may require shutter speeds roughly in the ~1/800s to 1/2000s range to stop motion.
https://www.om-system.com/learnandsupport/getolympus.com/learn-center/photography-tips/wildlife/optimizing-camera-settings-for-wildlife-photography
Audubon’s ethical guide advises thinking about distance/behavior change as your feedback loop, rather than trying to “force” a shot at closer range.
https://www.audubon.org/audubons-guide-ethical-bird-photography
NPS frames wildlife-respect behaviors as part of safety and environmental stewardship: do not disturb wildlife and observe from safe distances.
https://www.nps.gov/articles/000/idkt_lnt6.htm
Nikon’s Z-series settings tips explain using ISO Auto (and setting bounds) and mention choosing AF area modes like 3D-tracking for moving subjects.
https://www.nikonimaging.com/technical_info/technical_solutions/zseries_tips/guide/en/camera_basic_settings_4.html
Sony’s focus setting guide specifically connects autofocus configuration to maintaining focus on the bird’s eye/subject feature and reducing misfocus caused by rapid background/subject changes.
https://support.d-imaging.sony.co.jp/support/ilc/autofocus/ilce7rm5/en/12.php
OM SYSTEM’s bird guide highlights AI detection bird AF as a feature intended to help with difficult bird-in-flight shots.
https://www.omsystem.com/us/en/bird-photography
Nikon’s wild birds guide mentions Pre-Release Capture can make autofocus harder in some cases and suggests switching to manual focus at a predicted point when needed.
https://www.nps.nikonimaging.com/technical_info/technical_solutions/z9_tips/setting_guide/en/wild_birds_guid-ed832083-853c-990d-f333-177f940939fd_16.html
The E-M5 Mark III manual includes troubleshooting-style exposure/ISO-AUTO guidance (e.g., showing what problems like underexposure correspond to and what parameter changes can resolve it).
https://learning.omsystem.com/E-M5MarkIII/zz_pdf/E-M5Mk3_ENU_01_FW110.pdf
Spokane Audubon Society’s post describes “quiet setup” as a behind-the-scenes process that reduces disturbance and supports getting sharp, natural-looking bird behavior.
https://www.audubonspokane.org/give-a-hoot-1/2026/2/18/seeing-without-being-seen-a-low-impact-approach-to-bird-photography
The RPS Nature Photographers’ Code of Practice PDF includes principles about minimizing disturbance and handling wildlife ethically, including behavior around nests and breeding birds.
https://www.rps.org/media/1xcnsuga/the-nature-photographers-code-of-practice.pdf
A Birder’s Guide to Gear (ABA) section links shutter speed and blur goals (e.g., using slower shutter speeds for wing blur) and notes that smaller f-stops isolate subjects.
https://www.abadiers.org/wp-content/uploads/bsk-pdf-manager/2022/03/Birders_Guide_dec-2013.pdf
This reference provides scenario-based shutter speed guidance and explains the “why” (motion blur) behind bird photography shutter speed choices.
https://www.wildlife-with-ronen.com/best-shutter-speeds-for-bird-photography/
BirdPhotography.com notes that reach/focal length constraints change based on distance (e.g., a bird that fills the frame at one focal length/distance would be impossibly close at a longer focal length).
https://www.birdphotography.com/articles/telephoto-and-standard-lenses-for-bird-photography/
OM SYSTEM’s guide describes practical capture considerations for bird photography including autofocus precision and compensation for shooting stability.
https://www.om-system.com/us/en/bird-photography
TechRadar’s 2026 guide includes examples of midrange bodies suitable for beginners/enthusiasts (e.g., APS-C sensor, high AF coverage, and specified continuous shooting fps figures).
https://www.techradar.com/cameras/the-best-camera-for-photography
Next Article
New Bird Owner Tips: A Beginner Checklist and Care Plan
Beginner checklist for new bird owner tips: setup, diet, daily care, enrichment, handling, and vet warning signs plus bi