You can record a clean, usable bird call or song today with just your phone. No special gear required to start. The trick isn't really about equipment, it's about positioning, timing, and a few settings most people never touch. Once you nail those, even a basic phone mic will capture something you can actually use for identification or learning.
How to Record Bird Sounds: Setup, Settings, Tips

Marcus Hendricks
12 Apr 2026
Pick your recording gear: phone vs recorder vs mic

Your phone is a perfectly legitimate starting point. Modern smartphones record surprisingly clean audio in quiet conditions, and the convenience means you'll actually have it with you when a bird shows up. If you want to go deeper on exactly how to squeeze the best results out of a smartphone, check out this guide on how to record bird sounds on iPhone, which covers phone-specific settings and apps in detail. For most beginners, start here before buying anything.
A dedicated portable audio recorder (like a Zoom H1n, Tascam DR-05X, or similar) is the next step up. These have better preamps (the internal amplifier that boosts weak signals), lower self-noise, and manual gain control. They also let you record in WAV format at 24-bit/48 kHz, which is the quality standard recommended by archives like the Macaulay Library for specimen-quality recordings. The difference over a phone is real, especially for faint or distant birds.
A directional microphone (also called a shotgun mic) attached to your phone or recorder is the biggest single upgrade you can make. It narrows the pickup pattern so it focuses on sound in front of it and rejects noise from the sides and rear. Paired with a parabolic reflector, you can isolate a single bird from surprisingly far away. But honestly, don't worry about a parabolic dish until you've already made dozens of recordings and know what you're missing.
| Gear Type | Best For | Main Limitation | Rough Cost |
|---|---|---|---|
| Smartphone (built-in mic) | Casual recordings, close birds, learning the basics | Picks up all surrounding noise, no manual gain | Free (you have it) |
| Portable audio recorder (e.g. Zoom H1n) | Better quality, manual settings, WAV recording | Bulkier, another device to carry | $80–$150 |
| Shotgun mic + recorder/phone | Directional recording, isolating single birds | Requires extra setup, wind protection needed | $50–$300+ |
| Parabolic reflector + mic | Distant birds, professional-quality isolation | Large, heavy, expensive, steep learning curve | $200–$600+ |
My honest recommendation: start with your phone. Once you've recorded 20 or 30 sessions and feel frustrated by the quality ceiling, that's the right time to buy a dedicated recorder. Spending money before you've developed an ear for what you're trying to capture is the fastest way to feel like gear is the problem when really it's technique.
Set up for best audio: mic placement, distance, and orientation
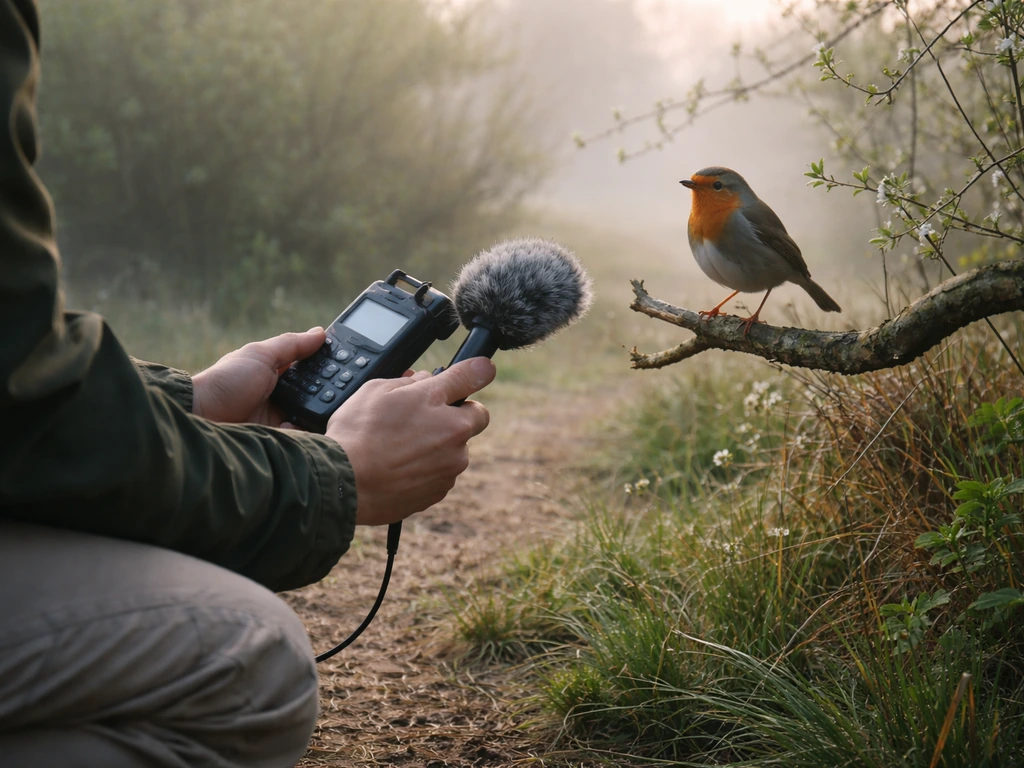
Distance is the single most important physical variable. This is not an exaggeration: cutting your distance to a bird in half literally doubles the perceived loudness of the recording. That comes straight from field recording guidance used by serious ornithologists, and it's something I've confirmed over and over in practice. Get closer. Move slowly, stay low, avoid rustling. Ten meters from a singing bird will always beat thirty meters with a fancier mic.
Point your mic at the bird, not just toward the general area. If you're using a phone, hold it with the mic end (usually the bottom on most phones) aimed at the source. If you're using a shotgun mic, treat it like you're aiming a narrow beam. Small misalignments matter more than you'd expect, especially with directional mics.
Keep your recorder or phone away from your body. Holding it pressed against your palm muffles the mic and adds handling noise. Hold it gently with two fingers, or better yet, use a small tripod or clip it to a branch at the right angle. Fabric and jacket material are notorious noise sources. I ruined a lot of early recordings by holding my phone in a gloved hand in winter. Use a bare hand or a mount whenever possible.
Height and angle matter too. If a bird is in the canopy, tilt the mic upward. If it's on the ground or a low shrub, aim lower. You want the clearest line of sound between the bird's throat and your mic, with as few leaves, branches, and air currents between them as possible.
Choose your timing and location wisely
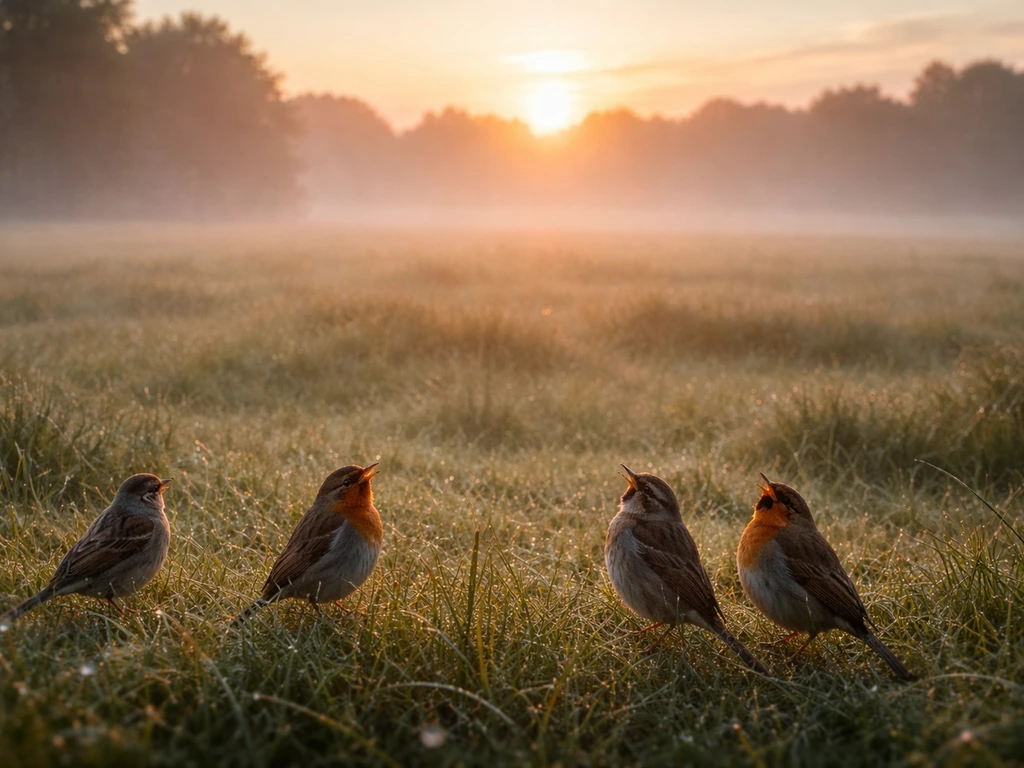
The dawn chorus is real and it's incredible. Birds sing most actively in the hour before and after sunrise, especially during spring and early summer breeding season. That's your golden window. Show up 20–30 minutes before first light, get settled quietly, and you'll capture far more song than at any other time of day. Midday is usually the worst: birds go quiet, wind picks up, insects get loud, and human activity increases.
Weather matters just as much as time of day. Calm, slightly overcast mornings after a clear night are ideal. Wind is the enemy (more on that below). Rain makes noise. Direct sun in summer brings cicadas and other insects that will drown out your bird. Cold, still mornings in spring are about as good as it gets.
For location, you want natural environments with minimal human noise: away from roads, airports, construction, and air conditioning units. Forest edges, wetland margins, and scrubby transitional habitat tend to have high bird activity. Dense closed-canopy forest can make it harder to locate and approach a singing bird. Open areas with scattered trees often give you both good bird density and easier access.
If you're after a specific species, learn where and when that species typically sings. A bird that sings from a fixed perch (like many thrushes or wrens) is much easier to record than one that sings while moving through dense vegetation. Patience is a strategy: find a good spot, stay still, and let the birds come to you rather than constantly chasing them.
Settings and workflow: gain, levels, and test takes
If your device gives you manual gain (volume) control, use it. Gain controls how sensitive your mic is to incoming sound. Too low and your recording will be faint and buried in noise. Too high and loud sounds will clip (distort into a harsh, crunchy sound that can't be fixed). Aim for levels that peak somewhere around -12 dB on your meter during the loudest sounds. A field-recording gain-staging guide recommends setting levels so peaks land around -12 dBFS to avoid clipping while keeping a healthy signal above the noise floor. That gives you headroom so a sudden loud call doesn't clip, while still keeping the signal well above the noise floor.
Set your recorder to WAV format if possible, not MP3. MP3 compresses the audio and throws away detail that you might want later, especially for identification. Aim for 24-bit depth and 48 kHz sample rate as a baseline. These are the settings recommended by serious bird sound archives and they're standard on most portable recorders. On your phone, use an app that supports WAV or high-quality AIFF recording rather than the default voice memo app, which often compresses heavily.
If your recorder has a pre-record buffer feature, turn it on. This keeps a few seconds of audio in memory continuously so that when you press record, the clip actually starts a few seconds before you hit the button. Birds have a frustrating habit of starting a call the moment before you react, and this feature saves a lot of otherwise-missed recordings.
Always do a test take before committing to a session. Record 30 seconds, put on headphones, and listen back. Does the level sound right? Is there wind noise? Is there distant traffic you didn't notice? Fix it now, not after you've recorded for an hour. Monitoring with headphones during recording is even better because you can hear problems in real time. A cheap pair of earbuds works fine for this.
Here's a simple workflow that keeps things practical in the field:
- Arrive early, get settled quietly, and let the environment calm down for a few minutes before recording.
- Set your format to WAV, 24-bit/48 kHz if your device allows it.
- Set gain manually if possible, targeting peaks around -12 dB on the meter.
- Enable pre-record buffer if available.
- Do a 30-second test take and listen back on headphones.
- Adjust gain or position based on what you hear.
- Record in longer continuous takes rather than lots of short clips. It's easier to trim later than to miss a call.
- Whisper a note at the start of each file: species, location, date, time.
Avoid and fix common problems
Wind noise
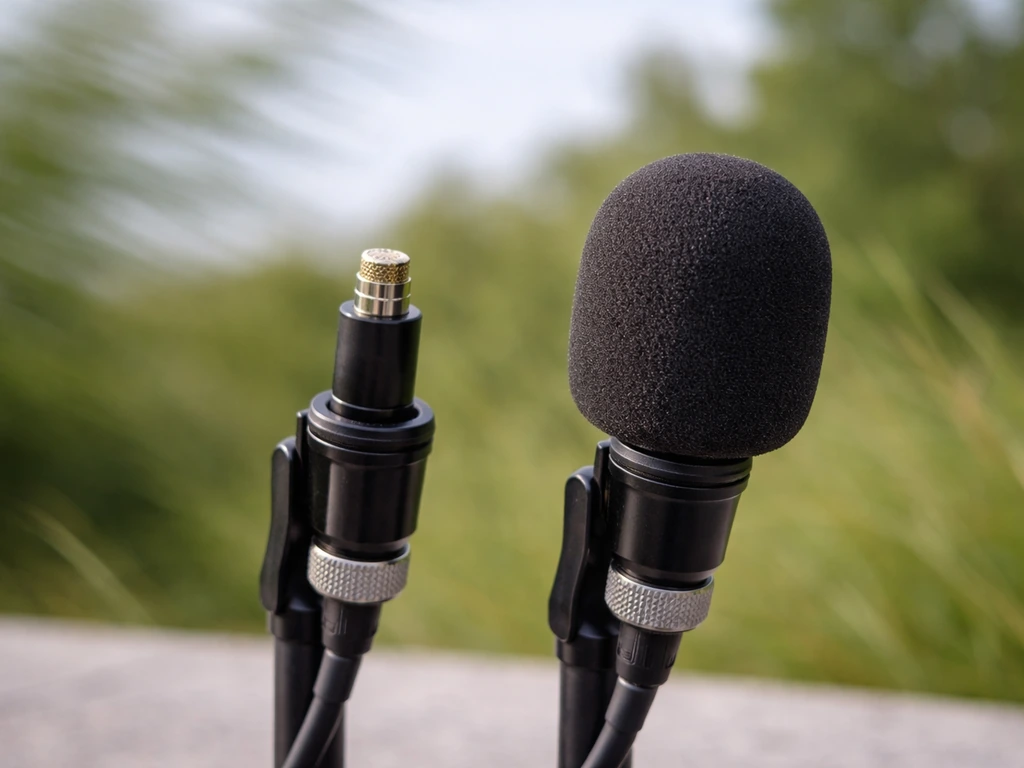
Wind hitting a bare mic capsule creates a low rumbling or rushing sound that drowns out everything. The fix is a windscreen. Foam windscreens come with most recorders and help with light wind. For stronger wind, a "dead cat" or furry windscreen works much better. If you have neither, even a loose sock over the mic reduces wind significantly. Find a sheltered spot: behind a hedge, in a hollow, under dense canopy. On breezy days, the sheltered side of a tree line will produce dramatically cleaner recordings than an open field.
Clipping and distortion
Clipping happens when the signal is too loud for your recorder to handle, causing a harsh digital distortion. It sounds like crackling or tearing on loud calls, and it can't be fixed in post-processing. If your meter is hitting the top (usually anything above -3 dB regularly), lower your gain. Some recorders have a "limiter" setting that automatically prevents clipping. Turn it on as insurance, but don't rely on it as a substitute for setting levels correctly.
Too much background noise
Traffic, insects, wind, running water, other birds. Some of this is unavoidable, but a lot of it is fixed by getting closer to your target bird (which raises the bird signal relative to the noise floor) or by choosing a directional mic. In post-processing, tools like Audacity (free) or iZotope RX can reduce steady background noise like traffic hum, but nothing replaces a clean recording from the start. Don't plan on fixing bad noise in editing. Plan on not capturing it.
Recordings that are too quiet
If your bird sounds faint in the recording, the most likely causes are: too much distance, gain set too low, or a non-directional mic being overwhelmed by ambient noise. Move closer first. Then raise gain slightly and do another test take. If the bird is faint but the noise floor is also faint, you can boost the gain in post-processing. If the noise floor is loud too, boosting gain just makes both louder and the recording unusable.
Silence or missing the call
Birds don't sing on command. You'll often get long stretches of silence, which is normal. The pre-record buffer helps with missed starts. Recording in longer continuous takes rather than short triggered clips also helps. Patience is not optional. I've sat still for 40 minutes waiting for a single wren to resume singing. It did, eventually. That recording was worth it.
Handling noise and clothing rustle
Swishing fabrics, footsteps, finger movements on the recorder body: all of these transmit directly into recordings and are surprisingly loud. Use a tripod or mount where possible. If you're holding the recorder, wrap the grip area in foam or use a shock mount. Wear soft, non-synthetic fabrics that don't swish. Fleece is a particular offender. Once you start listening for handling noise in your recordings, you'll hear it everywhere.
Organize and review what you've recorded
The moment you get home, rename and label your files. A file called "recording047.wav" is useless three weeks later. A file called "2026-04-12Song-SparrowCentral-Park-North-Meadow0615.wav" is immediately useful. Include date, species (or "unknown" if unidentified), location, and approximate time of day.
Create a simple folder structure: top-level folder by year, subfolders by month or location, files named as above. This sounds fussy, but after your first few dozen recordings you'll be glad you did it. Trying to sort through hundreds of unnamed files is genuinely miserable.
When you review recordings, listen with good headphones in a quiet room. First pass: check if the target bird is clearly audible and if there are obvious problems (clipping, wind, handling noise). Second pass: listen for the specific call or song pattern. Is it a clean phrase? Does it repeat? Is there only one individual or are multiple birds overlapping? These are the details that make a recording useful for identification.
If you're learning to recognize what you're hearing, free tools like Audacity let you view a spectrogram (a visual display of sound frequencies over time). Bird calls show up as distinct shapes on a spectrogram, which makes it much easier to separate a target bird from background noise visually. It's also genuinely satisfying to see a wren's call look like a tiny lightning bolt on screen.
If you recorded something you can't identify by ear, your own recordings are actually useful learning material. Compare the spectrogram against reference recordings in the Macaulay Library or Xeno-canto. You'll start to train your ear and eye simultaneously.
What to listen for while you're recording
Not all bird sounds are created equal for recording purposes. A full song (the complex, repeated phrase a male bird sings from a perch) is usually the most distinctive and the most useful for identification. A call note (shorter, simpler, often used for contact or alarm) is briefer and can be harder to attribute to a specific species, especially if multiple birds are active. When you have a choice, stay with a singing bird until you've captured several full song phrases.
Listen for repetition and pattern. A single bird usually repeats its song with recognizable structure. If what you're hearing sounds chaotic or random, you may be recording multiple overlapping species rather than one clear target. That's normal in busy habitat, but it's worth noting in your file labels.
Alarm calls are worth capturing too, even though they're harder to identify. They tell you something about behavior and context. If you want to understand the full vocal vocabulary of a species, learning to produce bird sounds yourself alongside recording them is a genuinely useful exercise because it forces you to listen analytically rather than passively.
Next steps and how to keep getting better
Once you've done a handful of sessions and you're comfortable with the basics, there are a few natural directions to grow. The first is gear: if you're consistently frustrated that you can't capture birds more than 10–15 meters away, a shotgun mic or a small portable recorder is worth the investment. The second is technique: the more you record, the more you'll notice patterns in what works. Certain times of year, certain weather, certain habitats. That experiential knowledge compounds fast.
A great parallel skill to develop is actually imitating bird sounds. When you can imitate bird sounds with some accuracy, you'll attract birds closer and understand their vocal structure better. It also gives you a reason to listen to your recordings repeatedly, which accelerates learning.
If you want a structured introduction to understanding bird vocalizations before you're deep in the field, working through a bird call tutorial is a genuinely efficient way to build your ear. Knowing what you're listening for makes recording it much more intentional.
For people who work with kids or want to introduce younger learners to bird sounds in a more playful way, understanding how to make a bird read aloud with a device can bridge the gap between recorded audio and interactive learning. It's a different use case but a surprisingly effective one for engagement.
The progression looks like this: start recording with your phone, focus on technique over gear, build a labeled archive of your own recordings, develop your ear by comparing what you captured against reference sources, and upgrade equipment only when you've clearly hit its ceiling. Most people never need to go beyond a portable recorder and a basic windscreen to get genuinely excellent recordings. The birds will do the rest, if you show up at the right time and stay quiet.
FAQ
Is it possible to record bird sounds using the voice memo app on my phone?
Yes, but expect tradeoffs. Phone voice memo apps often use heavy compression, so for best learnability and ID, use an app that can record uncompressed WAV or high-quality formats (and keep the microphone uncovered). If you only have voice memo, capture longer takes, because call structure can survive compression even when audio quality is not ideal.
What phone settings can accidentally ruin bird sound recordings?
Turn off auto-processing if your phone offers it (noise reduction, voice enhancement, or “scene” modes). These can smear bird calls or change their loudness shape, which matters for identification. Do a 30-second test take after changing any audio mode so you can confirm it did not worsen clarity.
Should I always increase gain if the bird is faint on playback?
Use the cleanest audio you can record without clipping, then choose the gain you need for the meter to sit comfortably below the clipping region during the loudest moments. If your bird is faint because of distance, increasing gain blindly may raise background noise until the recording becomes unusable. A better workflow is move closer first, then re-test gain with headphones.
What should I do if my recording is clipping or sounds crunchy?
If clipping happens, you generally cannot “unclip” it reliably in post, especially for distorted syllables. The practical fix is preventative, lower gain and enable a limiter if you have it. For borderline cases, lower gain and do a second take immediately, since birds may repeat.
Can I record bird sounds while filming video?
Yes, but treat it as a last resort because camera/phone audio often adds automatic gain control and processing. If you use video mode, record the audio track only if it’s truly high quality, and keep the mic aimed the same way as you would for audio-only. Otherwise, capture audio separately for more consistent results.
Do I need to use headphones during recording, and what type is best?
Headphones help, but use closed-back or at least something that doesn’t leak sound into the mic position. Also keep headphone volume moderate so you do not miss distortion cues. If you hear wind or handling noise during the test take, adjust windscreens or mounting before you wait for the next call.
When should I use pre-record buffer versus starting recording early and trimming later?
If your device has a pre-record buffer, use it for species that start calls suddenly. If you do not have it, start recording before you think the bird will sing and run longer continuous segments, then trim later. Short “tap-to-record” clips miss the first syllables more often than people expect.
How do I adjust mic angle if insects or wind are overpowering the bird?
Yes, and it’s a common reason for bad results. Insects and wind noise respond strongly to mic angle, so re-aim so the mic points directly at the bird’s approximate singing perch and adjust height to match the bird (canopy versus shrub versus ground). Even a small angle change can reduce side noise with directional mics.
Is 24-bit/48 kHz always necessary, or can I record at a lower quality setting?
Capture at 24-bit/48 kHz when possible, but if your recorder supports only one high-quality setting, choose the highest bit depth available first. Sample rate matters less than avoiding clipping and preserving clean frequency detail, so prioritize stable levels and a good windscreen over chasing sample rate upgrades.
What should I write in my notes beyond date, location, and species?
File naming is more useful than it sounds, but also consider adding a quick “notes” tag the moment you stop recording (example: “song, repeated, bird on fence post, windy”). This helps you later when spectrograms look similar between species and when you want to remember where you saw the target.
How can I tell if I recorded one bird versus multiple birds at the same time?
A loud song or call can overlap with another bird, and that may make identification harder even if audio is clean. In your listening pass, mark whether you hear one repeating phrase or multiple patterns at once, then label the file as “overlap” or “possible X” so you can filter later.
Should I rely on location metadata, or is manual labeling better?
Yes. If you travel to multiple sites, include more precise location in the filename or metadata, like “trail name” or “site sector.” For iPhone, enable location tagging only if you are comfortable with it, since it can clutter file handling but can save time when revisiting past sessions.
What’s the best troubleshooting order if the bird is present but still hard to hear?
If the bird is “faint” because the noise floor is already loud, increasing gain usually makes the recording worse. Instead, reduce distance (slowly), shield the mic from wind and traffic, and pick the calmest direction. Then do another test take to confirm the bird-to-noise ratio improved.
Next Article
Bird Call Tutorial: Vocal Imitation and Hand Call Steps
Beginner bird call tutorial with vocal timing and pitch tips plus a step-by-step bird call hand tutorial and practice pl