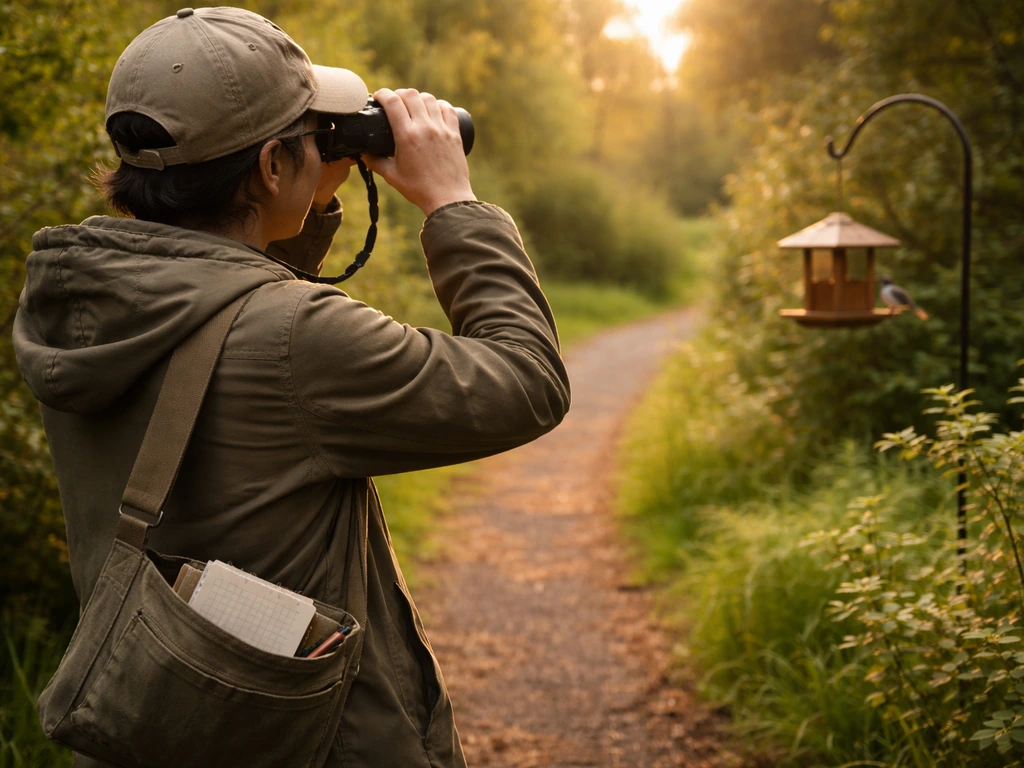
Bird watching is one of the easiest hobbies to start and one of the hardest to stop. You don't need expensive gear, a car full of equipment, or a biology degree. You need a pair of binoculars, a free app on your phone, and the willingness to slow down and look. Here's exactly what to do from day one.
Basics of Bird Watching: A Beginner Guide to Start Fast

Marcus Hendricks
5 Apr 2026
Getting started: picking spots, times, and goals
The best place to start is wherever birds already are, which is almost everywhere. A backyard feeder, a local park, a nearby lake trail, or even a cemetery (surprisingly great for birds) all work. Don't overthink location at first. The goal isn't to find rare species. The goal is to find birds, watch them, and start learning what you're looking at.
That said, some spots produce more birds than others. Edges matter: places where one habitat meets another, like where a field meets a tree line, or where a pond meets a grassy bank, tend to concentrate bird activity. Parks with a mix of open water, shrubs, and tall trees are gold for beginners. If you want a head start on how to start bird watching with location-finding built in, eBird's free app shows you exactly which species have been spotted near you recently. That feature alone can save you hours of guessing.
Timing matters a lot. Early morning, roughly the first two hours after sunrise, is when birds are most active and vocal. They're feeding, defending territory, and singing. Late afternoon is your second-best window. Midday in summer? Not much happens. For your first few outings, aim to be outside by 7 a.m. and plan to spend at least 90 minutes in one spot before moving on.
Set a goal that feels achievable. Something like "identify five species I haven't seen before" or "learn to recognize the call of one bird by the end of the morning" beats vague goals like "see lots of birds." Realistic first goals keep you motivated and make your first outing feel like a win.
Essential gear for beginners
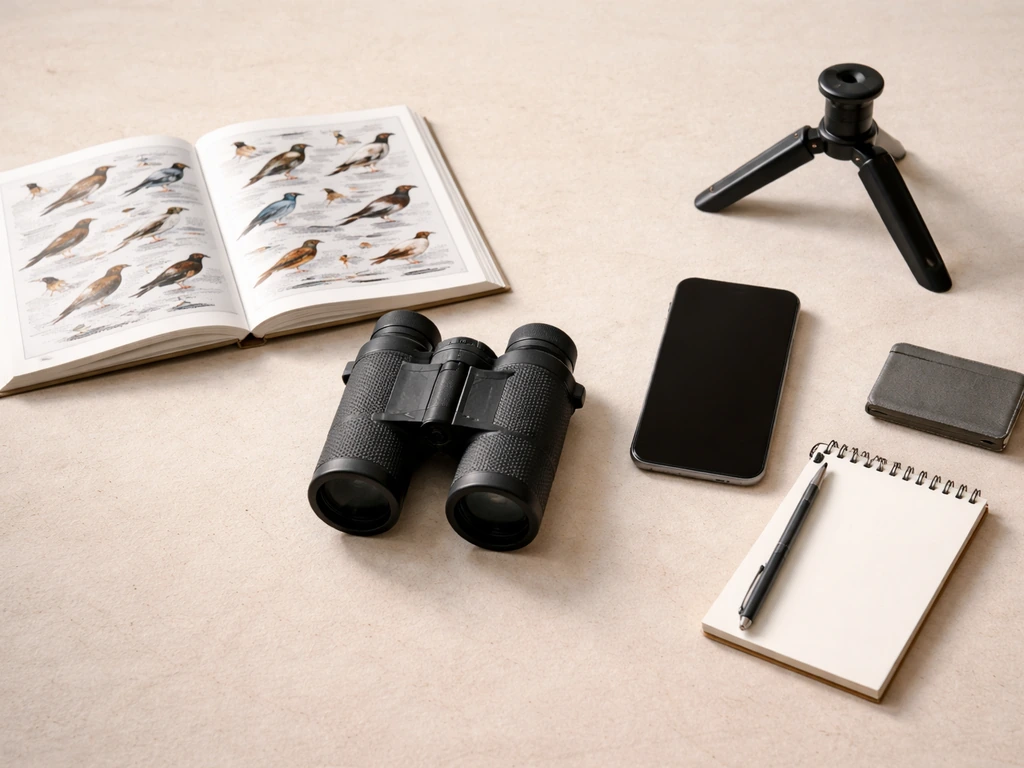
You don't need much. Here's what actually matters starting out:
Binoculars
Binoculars are the one piece of gear worth spending a little on. The notation you'll see on every pair, like 8x42, tells you two things: the first number is the magnification (8x means the bird appears 8 times closer), and the second number is the diameter of the objective lens in millimeters (42mm lets in more light).
For beginners, an 8x42 is the classic recommendation, and for good reason: it gives you a wide, bright view and is forgiving to hold steady. A 10x42 works too if you want more reach, but it's harder to keep still without a tripod. Midsize models like 8x32 or 7x35 are lighter and easier to carry all day, though they sacrifice a bit of brightness in low light. Any of these will get you started.
A field guide
A printed regional field guide is worth keeping in your bag. The Sibley Guides, Peterson Field Guides, and National Geographic Field Guide to the Birds of North America are all solid choices. Regional guides covering just your part of the country are actually better for beginners because they cut out all the species you'll never see locally, which makes narrowing down your ID much less overwhelming.
Apps
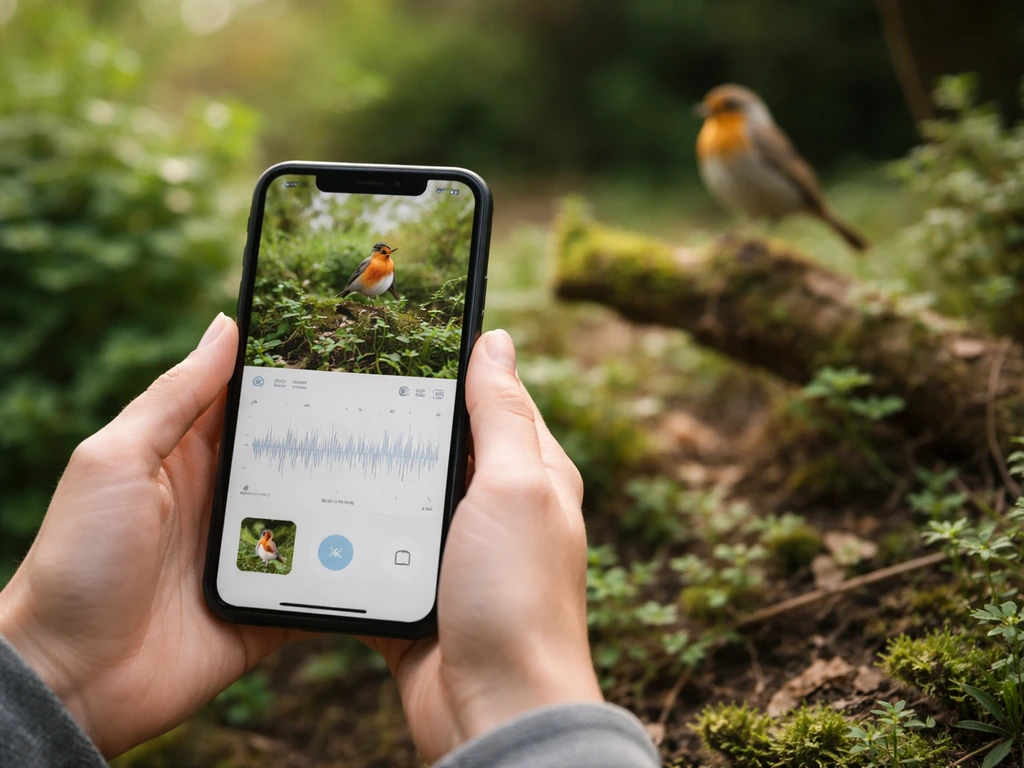
Two apps are worth downloading before your first outing. Merlin Bird ID from the Cornell Lab is free and does real-time Sound ID: you hold up your phone, it listens, and it tells you what species are singing around you. It works for 2,066 bird species and, once you download the regional pack, it works completely offline, which is great when you're out of cell range. The Audubon Bird Guide app is also free and includes songs and calls alongside species info, and it pulls in eBird data to show you what's been spotted near you. Between these two, you have everything you need to learn birds by both sight and sound from day one.
A notebook or the eBird app
You'll want somewhere to jot observations. A small notebook works fine. The eBird app (also free) lets you log sightings digitally and builds a searchable record of everything you've seen. More on that in the tracking section below.
How to identify birds by sight and sound
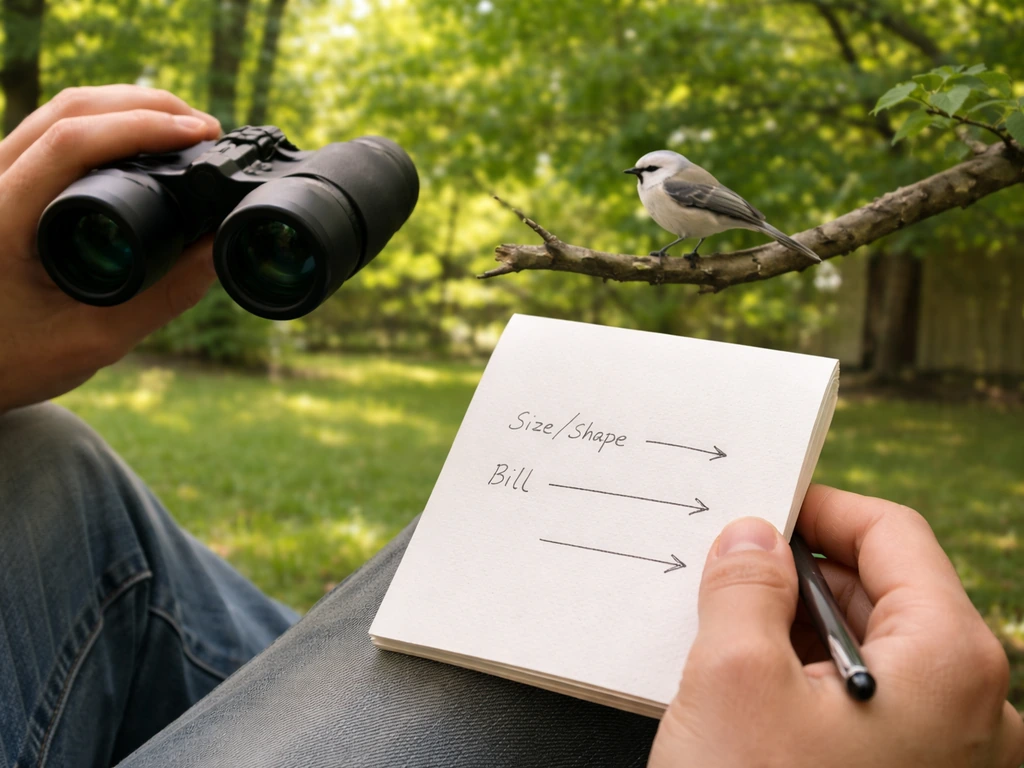
The biggest mistake beginners make is trying to identify birds by color first. Color is the last thing you should use, not because it doesn't matter, but because it changes with lighting, age, season, and angle. Start with four things instead: size and shape, color pattern, behavior, and habitat. This framework, used by Cornell Lab's All About Birds, is the most reliable beginner system there is.
Sight identification
When a bird lands nearby, ask yourself these questions in order. How big is it compared to something familiar, like a robin or a crow? Is it stocky and round or slender and long-tailed? What shape is the bill: short and thick, long and curved, thin and pointed? Only after you've answered those questions should you start looking at color and pattern. Then zoom in on what birders call "field marks": specific patches, stripes, or markings that distinguish one species from another. A white eye ring, a red cap, yellow wing bars, a rusty breast patch. Those are the details that clinch an ID.
Audubon's advice is to note key distinguishing features in order: overall size and shape, bill structure, plumage markings on the head and body, and the bird's behavior. That sequence works. Practice it on every bird you see, even ones you already know. It trains your eye faster than you'd expect.
Sound identification
Most experienced birders identify the majority of species by ear, not by sight. You don't have to get there immediately, but starting to train your ear early pays off fast. The trick is to focus on one sound quality at a time. Is the sound a clear whistle, a harsh scratchy noise, a liquid flute-like tone, or a rapid trill? Categorizing sounds that way first, before worrying about the exact species, helps you organize what you're hearing.
Learning by mnemonics helps too. "Old Sam Peabody Peabody Peabody" is the classic memory phrase for the White-throated Sparrow's song. "Drink your teeeea" works for the Eastern Towhee. These feel silly, but they stick. The Golden Gate Bird Alliance also recommends studying sonograms (visual representations of bird sounds) to understand the structure of what you're hearing, which is something the Cornell Lab's resources make surprisingly accessible.
Use Merlin Sound ID in the field to confirm what you're hearing, but also try to guess the bird before you look at the screen. That guess-then-confirm loop is how you actually learn. Cornell Lab's Bird Academy courses offer a deeper dive into learning by ear if you want to go further once you've got your first few songs down.
Reading habitat and behavior to narrow things down
Here's something that took me a while to appreciate: where a bird is tells you almost as much as what it looks like. Habitat is one of the four keys to identification for a reason. A small brown bird creeping headfirst down a tree trunk is almost certainly a nuthatch. A small brown bird hopping on the ground and scratching at leaves is probably a sparrow or a thrush. You can eliminate dozens of species just by noting the bird's location and what it's doing before you even raise your binoculars.
Learn to ask a few quick questions when you spot a bird. Is it on the ground, in low shrubs, in the treetops, or on open water? Is it moving fast and flitting, or slow and deliberate? Is it alone or in a flock? Is it foraging in the bark of a tree, or hovering over a flower? Behavior narrows the field fast. A bird hawking insects from a high perch and returning to the same spot is almost certainly a flycatcher. A bird pumping its tail up and down while walking is a wagtail or a phoebe.
eBird's habitat charts, built from millions of user submissions, show which species are most commonly found in specific habitat types, which is genuinely useful for setting expectations before you head out. If you're birding a scrubby open area, don't expect to see forest warblers. Match your expectations to the habitat and you'll be less frustrated and more observant.
Keeping a birding checklist and tracking your sightings
Tracking what you see makes bird watching dramatically more satisfying. It turns a walk in the park into measurable progress. The free eBird app is the standard tool for this, and it's worth learning from the start. Every checklist you submit gets tallied automatically, and eBird will tell you when you've seen a species before, so you can clearly see your life list growing over time.
When you log a checklist, eBird asks you to follow a protocol that matches what you actually did: stationary (you stayed in one spot), traveling (you walked a route), or incidental (you just jotted down a few birds without tracking effort formally). Pick the one that fits. Don't try to force one format onto everything. The goal is for the checklist to reflect your real effort and detection, because that's what makes the data useful, both to you and to the science.
One best practice worth knowing early: eBird recommends reporting all species you were able to identify by sight or sound, not just a highlight reel. That means logging the common House Sparrow alongside the exciting warbler. Complete lists are more valuable than selective ones, and they help you see patterns in your own sightings over time. For location accuracy, be as specific as possible: log your checklist to the exact park section or trail you birded, not just the city. eBird even lets you save recent locations so you can reselect them quickly on your next visit without hunting for the pin again.
If you go birding with a group, share one checklist rather than each person submitting separately. eBird's best practice is that a shared group list should represent observations from people who were close enough to potentially see the same individual birds. It keeps the data clean.
Beyond eBird, keep a few lines of personal notes. Jot down the habitat, the weather, the time, and anything interesting about bird behavior you noticed. Photos help too, even blurry ones shot with your phone. They jog your memory later when you're trying to confirm an ID you weren't sure about in the field. For more structured advice on building this habit, the article on tips for bird watching covers how to make your log-keeping routine stick.
Safety, etiquette, and the mistakes that will annoy other birders
Bird watching is a low-risk hobby, but a few basics keep you safe and keep wildlife undisturbed.
Stay on trails and respect the habitat
This isn't just about following rules. Trampling vegetation destroys the exact habitat that makes a spot worth birding in the first place. Stay on existing trails. Don't push through brush to get closer to a bird. If a nesting area has a buffer sign, respect it. Access rules at birding hotspots can change over time, so check before you visit if you're going somewhere new.
Think carefully about using playback

Playing a bird's call through your phone to lure it closer is tempting, especially when you're trying to confirm an ID. But it should be used very sparingly. Playback causes real stress to birds, especially during breeding season when they interpret it as a territorial intrusion. The ABA Code of Birding Ethics advises limiting audio attraction methods, especially in heavily birded areas and for any rare, threatened, or sensitive species. Some locations, like parts of Hawaii, prohibit it outright. When in doubt, don't. Learn the bird the harder way. You'll feel better about it.
Common beginner mistakes to skip
- Moving too fast: birds flush when you walk quickly. Slow down, stop often, and let the habitat come to life around you.
- Wearing bright colors: you don't need full camo, but bright red or white jackets spook birds. Neutral tones help.
- Talking loudly in the field: even a quiet conversation masks bird sounds and disturbs wildlife. Save the chat for the parking lot.
- Trying to ID everything at once: focus on one bird until you know what it is before moving on. Chasing every movement burns time and energy.
- Reporting species you're not sure about: if you're not confident in an ID, log it as unidentified rather than guessing. eBird lets you do this.
- Ignoring common birds: Robins, starlings, and house sparrows teach you the skills you need for harder species. Don't skip them because they feel too easy.
Personal safety in the field
Tell someone where you're going if you're birding alone in a remote area. Wear appropriate footwear for the terrain. Bring water, especially in warm months when the best birding spots are often near water where insects also thrive. Sunscreen and a hat matter more than most beginners expect on long morning outings.
A quick gear comparison for beginners
| Gear Item | Best Beginner Option | Why It Works | Worth Upgrading? |
|---|---|---|---|
| Binoculars | 8x42 | Wide field of view, good in low light, easy to hold steady | Yes, once you're hooked |
| Binoculars (budget/lightweight) | 8x32 or 7x35 | Lighter and easier to carry all day, slightly less bright | Maybe, if weight bothers you |
| Field Guide | Regional printed guide | Cuts out irrelevant species, faster to use in the field | Not immediately |
| Bird ID App | Merlin Bird ID (free) | Real-time Sound ID, works offline, covers 2,066+ species | No, it's already excellent |
| Supplemental App | Audubon Bird Guide (free) | Calls, songs, and eBird-powered nearby sightings | No |
| Checklist Tool | eBird (free) | Automatic tallying, life list tracking, location management | No |
What to do after your first outing
Your first outing will probably leave you with a short list of birds you're certain about, a longer list of birds you half-saw and couldn't ID, and at least one bird sound you heard but couldn't locate. That's exactly right. That's what every birder's first trip looks like.
When you get home, review your notes and photos while they're fresh. Pull up Merlin or All About Birds and work through the birds you weren't sure about. Listen to the calls of the species you think you might have heard and see if any match your memory. Update your eBird checklist if you firm up any IDs.
Then go back to the same spot within the next week. Same location, same time of morning. Familiarity with a patch teaches you more than constantly visiting new places. You start to notice what's always there versus what showed up unexpectedly. That's when bird watching starts to feel less like searching and more like conversation.
If you want to build faster, connecting with a local bird club is one of the best moves you can make. Going out with experienced birders accelerates your learning in ways that no app or book can match. Many clubs have free beginner walks. Look up your local Audubon chapter or check eBird's Explore tab for local birding groups.
For anyone who wants a deeper dive into the practical side of the hobby, the guide on bird watching tips for beginners covers the smaller details that make a real difference once you're past your first outing. And if you've been asking yourself whether this hobby is really for you, the honest breakdown of how to be a bird watcher covers what the lifestyle actually looks like day to day, which is a lot more relaxed and flexible than most people assume.
Bird watching rewards patience and consistency more than any other skill. Every outing teaches you something, even the slow ones where nothing seems to be happening. Especially those ones, actually.
FAQ
What should I do in eBird if I only half-know an identification?
If you cannot identify a bird confidently, log it as far as you can (for example, “sparrow sp.” or “small brown bird, likely thrush”) instead of skipping it. In eBird, use the options that match your confidence level and note what you used (call, behavior, habitat) so you can revisit that entry later when you compare sounds and photos.
How can I identify birds when they never stay still long enough to see the “right” features?
Choose field marks based on what your bird is doing, not what you hope it will do. For perched birds, head and bill shape often show first, for foraging birds, look at leg position, tail behavior, and how it moves through vegetation, and for fast flyers, focus on wing pattern and shape during short glides.
How close is too close when I’m trying to see field marks clearly?
For your first season, prioritize staying on existing trails and watching from a distance. A good distance rule is, if you notice the bird changing behavior because of you, you are too close. Binoculars help here, and if you need closer views, move slowly along the trail rather than pushing through brush or approaching off-trail.
Why do my bird IDs change when I see the same species at a different time of day?
Mistakes happen because color is slippery. Check lighting first (shade vs sun, cloudy vs bright), then compare patterns that stay consistent across conditions, like wing bars, tail shape, or a stable head pattern. If two features conflict, pause and re-check size, bill shape, and behavior before locking in a color-based guess.
Should I trust the app’s sound ID every time, or use it as a starting point?
Use the “sound before screen” loop for learning, but do not rely on audio alone if visibility is poor. When Merlin Sound ID gives a match, confirm with at least one non-audio clue, like habitat type, flocking behavior, or a distinct field mark. If it is noisy (wind, other birds), treat the app as a shortlist rather than a final answer.
What do I change when I feel like I’m not seeing any birds?
If you are getting too few birds in one outing, adjust one variable at a time: try a different edge habitat (tree line meeting open field, pond edge meeting grass), shift your start time earlier, or stay longer in one spot since bird activity can be bursty. Also note weather, light wind often improves song detection, and heavy midday heat can reduce movement.
How do I choose between an 8x42 and a 10x42 if I’m still deciding?
For binoculars, avoid buying “higher magnification” thinking it equals better viewing. Higher power (like 10x) can be harder to hold steady handheld, especially in low light. If you buy one new piece of gear, choose a model you can keep steady comfortably, and consider a simple strap or brace option for longer viewing sessions.
What’s the best way to use bird apps when I have no cell service?
If you want to download offline packs, do it before you leave home and confirm the app has completed the download for your region. Also save a screenshot or list of your top target species from your home area so you can keep learning even if you lose signal or your phone battery drops.
What’s the practical strategy for locating a bird that you can hear but can’t see?
When a bird is singing but you cannot locate it, shift your attention from “finding the bird” to mapping the sound. Stand still, listen, then turn your body slowly to see if the sound direction changes, once you have a likely direction, scan only a small portion of that area. Then confirm with one visual clue such as movement pattern or silhouette.
Are there beginner-friendly ethics or safety rules people often forget?
Birding ethics also includes disease risk and plant safety. Wash hands or sanitize after handling gear near wildlife areas when possible, avoid touching nests or sensitive spots, and do not bait birds with food beyond what local rules allow. If a site has specific access guidance, follow it even if it limits your “closest” viewing position.
Next Article
How to Be a Bird Watcher: Beginner to Pro Guide
Step-by-step guide to bird watching: start routine, spot ID skills, equipment basics, fast learning, and pro pathways.