You can start bird watching today, right now, with zero equipment. That's the honest answer. Bird watching is one of those hobbies that sounds like it requires a lot of preparation, but the truth is that the barrier to entry is almost nothing. You step outside, you look at a bird, you pay attention. That's it. Everything else, the binoculars, the field guides, the apps, all of that makes it better, but none of it is required on day one.
How to Start Bird Watching: Beginner Guide and First Trip

Marcus Hendricks
2 Apr 2026
Why bird watching is easier than it sounds
A lot of beginners think they need to be able to identify every bird they see, or that they'll look foolish standing in a park squinting at a sparrow. Neither is true. Even experienced birders spend time watching birds they can't immediately identify. The goal isn't to be an encyclopedia; it's to slow down and notice something you'd normally walk right past.
Here's what I've found after years of doing this: birds are everywhere. Your backyard, a city park, the edge of a parking lot with a few shrubs. You don't need to drive to a wildlife refuge on your first outing. The hobby scales to your life. You can spend five minutes or five hours, go alone or with a group, spend nothing or gradually build up gear. That flexibility is exactly why the basics of bird watching are so accessible for anyone, regardless of age, fitness, or budget.
The other thing that makes it approachable is that you already have the core skill: observation. You just need to redirect it. Most people walk through nature in a kind of autopilot mode. Bird watching is just turning that off and actually looking at what's moving in the trees.
What you need to start (and what to upgrade later)
Let's talk gear honestly. Here's what you actually need for your first outing versus what's worth buying once you're hooked.
The absolute minimum (free)
- Your eyes and ears. Seriously. Start here.
- Comfortable shoes you don't mind getting muddy or wet.
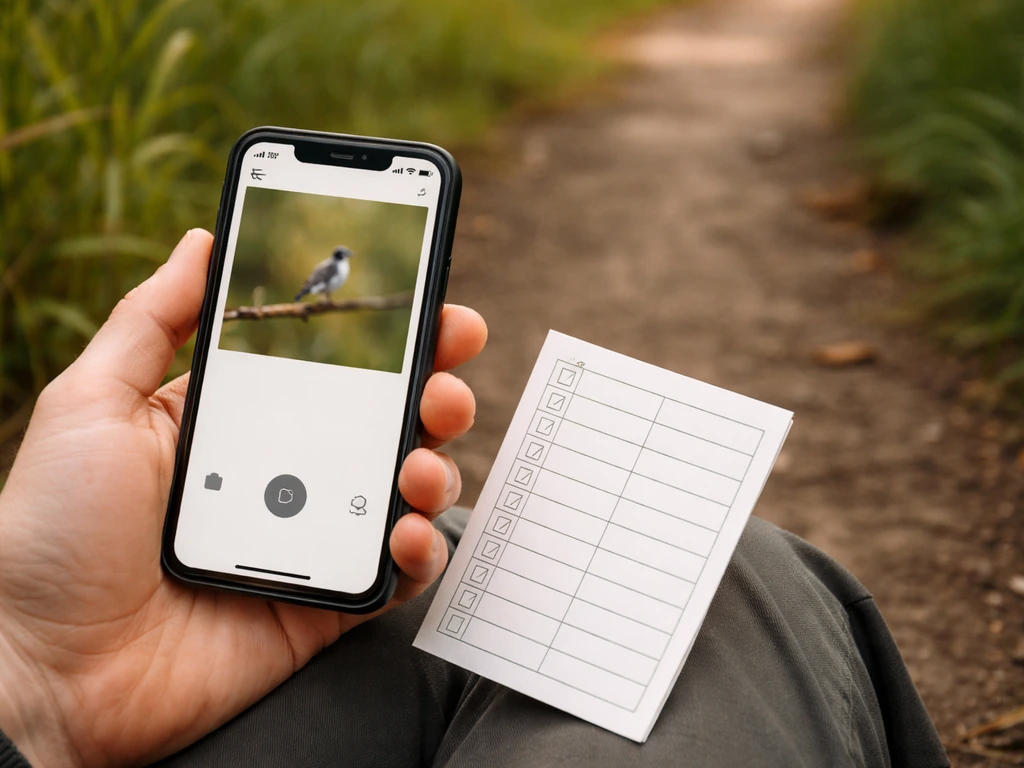
- A free bird ID app on your phone. Merlin Bird ID (by Cornell Lab) is the best free option available right now. It can identify birds by photo or even by sound, which is a game changer.
- A notebook or the notes app on your phone to jot down what you see.
Your first real upgrade: binoculars
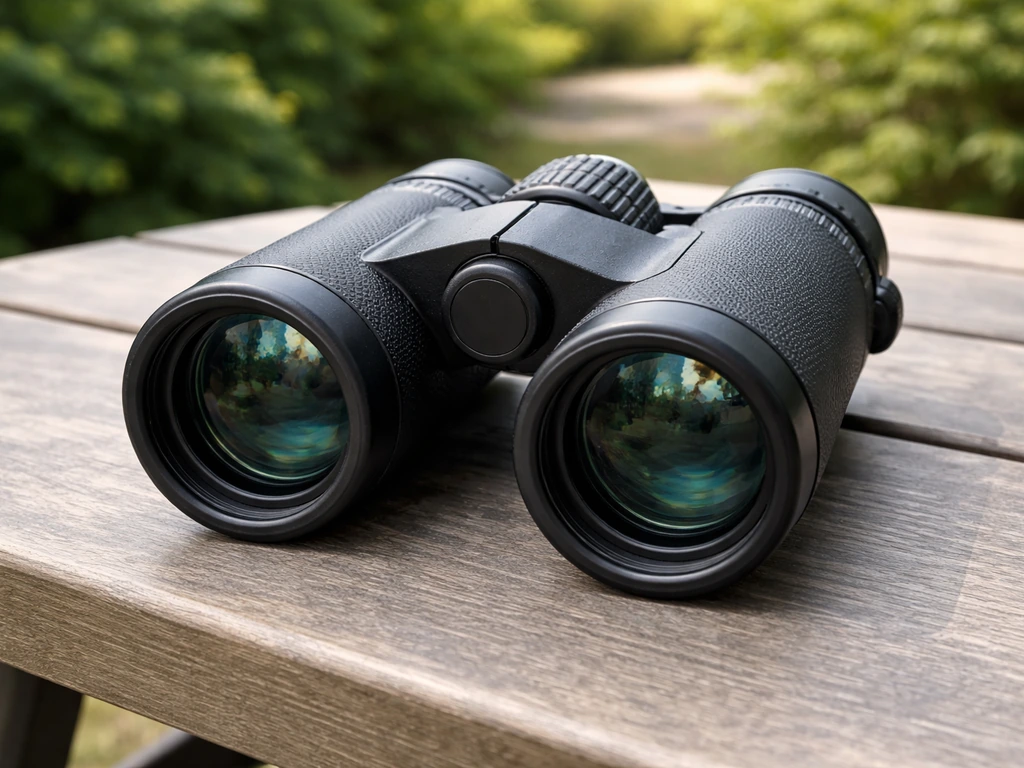
Binoculars make a massive difference, but you don't need to spend a lot. A pair in the 8x42 configuration (8x magnification, 42mm objective lens) is the sweet spot for beginners. It gives you a wide, bright field of view without being too heavy or hard to hold steady. You can find decent entry-level pairs for $100 to $150, and honestly, that's all you need to start enjoying this properly. Anything above $300 is for people who are already obsessed and know why they're spending the money.
Optional upgrades as you get more into it
| Gear | What It Does | When to Buy It |
|---|---|---|
| Field guide (book) | Regional bird ID reference with illustrations and range maps | After your first few outings, once you know you enjoy it |
| eBird app | Free tool to log sightings and find nearby birding hotspots | Any time, it's free and incredibly useful |
| Better binoculars ($300+) | Sharper optics, better low-light performance | After 6+ months of regular birding |
| Camera with zoom lens | Captures photos for later ID and memory keeping | Only if photography interests you specifically |
| Spotting scope | High magnification for open-water or long-distance viewing | Advanced birders only, skip this for now |
Where to go for your first bird watch
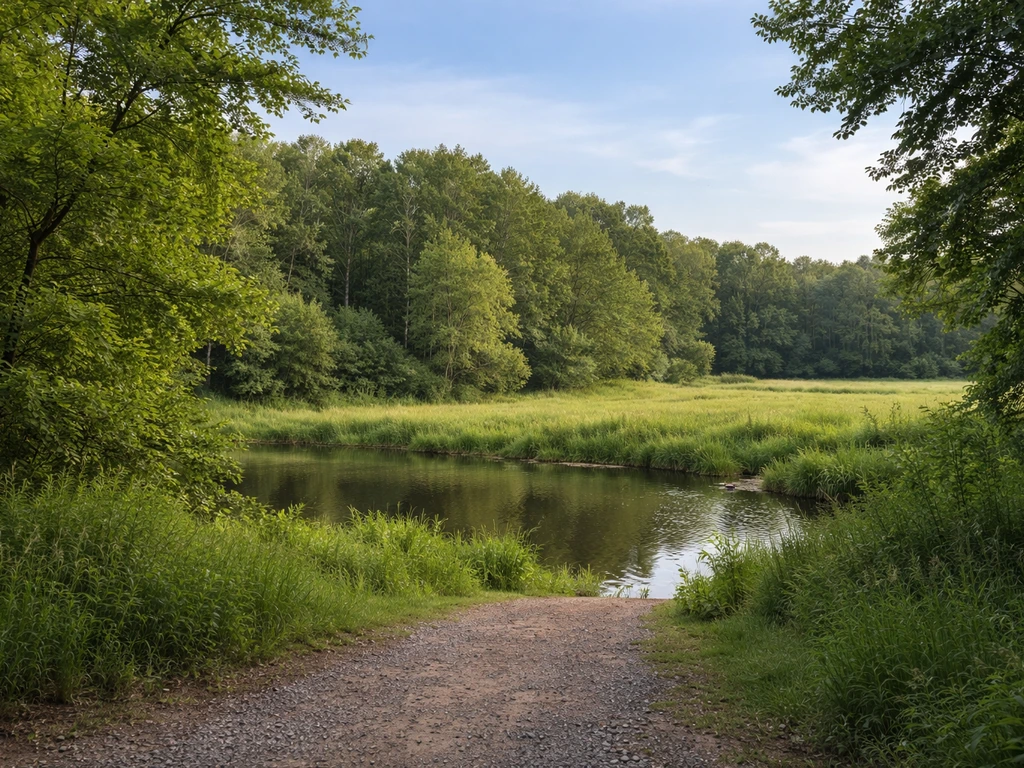
The best location for your first outing is wherever has birds and feels comfortable to you. Don't overthink this. That said, some spots are genuinely better for beginners because they have more variety, better sight lines, and are forgiving if you're still figuring out how to use your binoculars.
Best beginner locations
- Local parks with mixed habitat (trees plus open grass plus water if possible). The edge zones where two habitat types meet are called 'ecotones' and they consistently have more bird activity.
- Your own backyard or balcony. Setting up a simple feeder or bird bath draws birds right to you, which is especially great for learning to observe without chasing anything down.
- Nature preserves or wildlife refuges with walking trails. These usually have better populations and more species diversity.
- Lake edges, ponds, or slow-moving rivers. Waterbirds like ducks, herons, and egrets are large, slow-moving, and easy to spot, which makes them perfect for beginners.
- eBird's 'Explore' map. Open the app, zoom into your area, and look for 'hotspots' marked with orange pins. These are locations where other birders have reported sightings, so you know birds are actually there.
When to go
Timing matters more than most beginners expect. Birds are most active in the first two hours after sunrise and again in the hour or two before sunset. Midday, especially in summer, is often quiet. Early morning is the gold standard because birds are feeding, singing, and moving around. If you're not a morning person, the evening window still works well. Avoid going out in the heat of a summer afternoon and expecting a lot of action.
Spring (roughly March through May in most of the U.S.) is the absolute best time to start. Migration is happening, birds are singing loudly to establish territories, and you'll see species you might never encounter in winter. But honestly, there's never a bad time to start. Every season has its own birds and its own rewards.
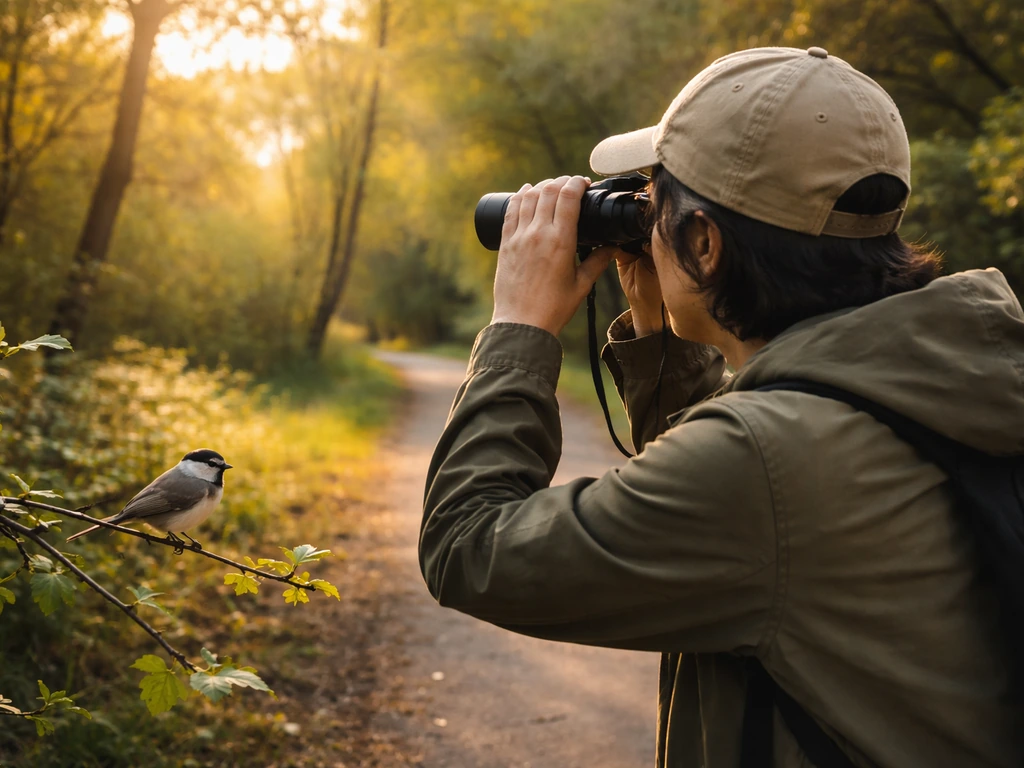
How to watch a bird: your first outing routine
This is the part most guides skip, and it's the part you actually need. Here's the exact routine I'd follow on a first outing.
- Arrive and stop. Before you start walking, just stand still for two to three minutes. Let the birds recalibrate to your presence. When you walk in, you disturb everything within 30 feet. Stillness brings it back.
- Listen first, look second. Close your eyes if it helps. Try to count how many different bird calls you can hear. Then open your eyes and try to locate where each sound is coming from. Your ears will find birds faster than your eyes in most habitats.
- Spot with your naked eye, then raise binoculars. Don't try to scan with binoculars from the start. Find movement or a shape with your bare eyes first, fix your gaze on the spot, then bring the binoculars up without moving your head. This takes practice but becomes second nature quickly.
- Watch before you move. When you spot a bird, resist the urge to immediately approach it. Stay where you are and observe for at least 30 seconds. Notice its behavior, its size relative to nearby objects, its color pattern, how it moves. You'll learn more by watching than by chasing.
- Note what you see. You don't need a formal system yet. Just jot down: what it looked like, where you saw it, what it was doing. Even rough notes help you identify it later and build memory over time.
- Move slowly and quietly. When you do move, take your time. Short, slow steps. Avoid snapping twigs or rustling brush. Sudden movements flush birds faster than anything else.
- Keep a respectful distance at all times. This isn't just good ethics, it actually produces better sightings. The NPS Leave No Trace guidelines make it clear that visitors are responsible for not disturbing wildlife even when there's no sign posted telling them to keep back. Birds that feel safe near you will stay longer and behave naturally, which means better views.
Bird identification basics: what to look for first
New birders often make the mistake of trying to memorize hundreds of species before they go out. Don't do that. Instead, learn what to notice, and let the identification follow from observation. Here's the order I'd prioritize.
Size and shape
Before color, before markings, get a feel for the bird's overall size and silhouette. Is it sparrow-sized, robin-sized, or crow-sized? Is the bill short and stubby (seed eater) or long and thin (insect prober) or hooked (raptor)? Birders use familiar species as benchmarks. 'About the size of a robin' is a legitimate field note.
Key color patches
You don't need to describe every feather. Focus on what's distinct: head color, wing bars (those horizontal stripes on folded wings), eye rings, breast markings. A bird with a rusty-red breast is almost certainly an American Robin. A yellow warbler with streaked breast is a different warbler than a plain yellow one. One or two distinctive features are enough to narrow it down.
Behavior and habitat
Where is the bird? Low in dense brush, high in the tree canopy, walking on the ground, or hovering over water? How does it move? Does it creep along bark headfirst (a nuthatch), hop on the ground (a sparrow), or pump its tail constantly (an Eastern Phoebe)? Behavior narrows ID down faster than most beginners realize.
Sound
This is the skill that separates casual observers from real birders, and it's worth developing early. Use blank" rel="noopener noreferrer">the Merlin app's Sound ID feature: open it, press record, and it will identify birds calling around you in real time. Over time, you'll start matching those names to sounds you actually hear, and eventually you won't need the app as a crutch. Cornell Lab says blank" rel="noopener noreferrer">Merlin includes Sound ID, which lets you see which birds are singing in real time as part of the app experience. Bird watching tips for beginners consistently rank learning bird calls as one of the fastest ways to accelerate your skills, and I'd agree completely.
Common beginner mistakes and how to fix them
I've made most of these myself, so consider this the 'learned the hard way' section.
- Getting too close to birds: It feels natural to want a better look, but approaching birds stresses them. Some species will abandon nests if disturbed repeatedly during breeding season. Use binoculars instead of your feet. Wildlife viewing guidelines from agencies like NOAA consistently advise using optics (binoculars or zoom lenses) rather than physically approaching wildlife. That principle applies perfectly to bird watching.
- Wearing bright colors: Birds notice you. Muted colors, greens, browns, grays, help you blend in. You don't need camo gear, but leave the bright red jacket at home.
- Moving too fast: The number one beginner mistake. Slow down by about 70%. Walk like you're trying not to wake someone up.
- Giving up when you can't identify something: Write it down or photograph it and look it up later. You won't ID everything in the field, and that's fine. The goal is to keep observing, not to always have an answer.
- Only going to the same spot: Different habitats have different birds. Rotate between a woodland area, an open field, and a water edge, and your species list will grow quickly.
- Skipping the sound: If you're only using your eyes, you're missing roughly half the birds around you. Turn your ears on.
- Overusing playback to attract birds: Some birders play recordings of bird calls to lure birds in for a better look. Don't do this as a beginner, and be very sparing with it even later. Washington Department of Fish and Wildlife's ethical viewing guidance specifically notes that overuse of such devices can disrupt breeding cycles and drive birds from their territories entirely.
Your next steps: a simple first-week birding plan
Here's what I'd actually do if I were starting fresh today. This is practical, not theoretical.
- Day 1: Download Merlin Bird ID and eBird (both free, both from Cornell Lab). Open Merlin, set your location, and browse the 'Explore Birds' feature to see which species are likely in your area right now. Takes 15 minutes.
- Day 2: Go outside for 20 minutes, anywhere. Use Merlin Sound ID while you stand still. Don't try to identify anything visually yet. Just listen and let the app do the work. Your only job is to start connecting names to sounds.
- Day 3: Go back to the same spot or a local park. This time, look. Use the naked-eye-first, then binoculars technique if you have them. Note three things you observe, even if you can't ID any of them.
- Day 4: Look up what you saw on Day 3. Use Merlin's photo ID feature or browse the species list for your area. Getting even one confirmed ID feels genuinely satisfying.
- Day 5: Try a new location. Use eBird to find a nearby hotspot. Go in the morning if you can.
- Day 6: Read up on how to improve. A solid overview of tips for bird watching will give you fresh techniques to try on your next outing.
- Day 7: Review what you've seen so far and set one small goal for the next week: a new habitat type to visit, a bird you want to find, or a call you want to learn to recognize without the app.
That's it. By the end of one week, you'll have the foundational habits in place. After that, it's just about going out more. The learning accelerates naturally once you're in the field regularly.
One more thing worth saying: this hobby rewards patience more than knowledge. You don't need to know everything to enjoy it. Some of my best days birding have been spent watching a single bird for 20 minutes, not ticking off 40 species on a checklist. If you find yourself genuinely curious about what you're seeing out there, dig into how to be a bird watcher in a more intentional way, and you'll find the hobby has a lot more depth whenever you're ready for it. For now, just go outside and look up.
FAQ
What if I feel overwhelmed and want to know every bird I see right away?
Start with one “win” per outing. Pick a goal like spotting three different silhouettes or getting ten minutes of steady binocular views, then stop while you still feel engaged. This prevents the common beginner problem of trying to do too much at once and quitting before you build confidence.
How should I handle it when I can’t identify a bird during my first trip?
If you cannot identify a bird, record what you can: location, time, habitat (trees, ground, water), and 1 to 2 standout traits (for example wing bars, bill shape, tail movement). Identification often comes later once you compare those notes with photos or sound recordings.
What should I do if the light or distance makes birds hard to see?
Plan for low-visibility moments. Early morning can be bright, but shaded trees and fog can reduce clarity. Use your best light window first, stand somewhere with open sight lines, and avoid moving your head constantly so your eyes can settle on the bird before trying to zoom in with binoculars.
Do I really need a field guide or can I rely on apps?
You can start without a field guide, but audio can fill the gap. If you are near living-space birds, Merlin Sound ID can help, especially for calling birds that stay out of view. Write down the suggested species name, then verify later using behavior and habitat rather than trusting the first result.
What are the basic etiquette rules for beginner bird watching in parks?
Don’t worry about “birding etiquette” at the cost of safety. Stay on paths where possible, keep a respectful distance, and avoid getting between a bird and its cover. If a bird changes behavior because you are too close, you are close enough, back off, and let it resume normal activity.
How long should I bird watch on my first few outings?
Use short sessions with a repeatable route. Ten minutes at one spot, then reposition. This helps you learn how birds move in a specific micro-area. A frequent mistake is only changing locations and never learning the patterns of one habitat.
What if I mostly see the same common birds, is that still worth it?
If you see the same bird type repeatedly, treat it as a learning opportunity. Compare how the bird behaves in different contexts, for example foraging on the ground versus singing from a branch. Behavior-based notes often lead to more accurate identification than memorizing appearance alone.
Are 8x42 binoculars really the best choice, and what if they feel hard to use?
8x42 is a great starting point, but choose comfort over specs. If you cannot hold steady or your hands get tired, use a tripod or rest your elbows on a railing, and consider a lighter option within the same general magnification range. Shaky viewing is a bigger issue than “perfect” binocular choice for beginners.
I can only go out afternoons, how can I still have a good experience?
Avoid the biggest timing trap, going out mid-day in hot summer expecting action. If you have only afternoon time, target shade, water edges, and areas with insects, and focus on quieter behaviors like feeding and hopping rather than constant singing.
Can I take photos and videos as a beginner, and does it change how I should watch?
Yes, but take one ethical safety step first. If you plan to use your phone for photos or recordings, do it without blocking paths or attracting attention to wildlife. Also, protect your eyes, if you are looking through binoculars while standing, keep your phone usage limited to when the bird pauses so you do not miss sudden movement.
Next Article
How to Bird Mouth a Rafter: Step-by-Step DIY Guide
Step-by-step guide to cut the bird-mouth notch in a roof rafter, measure pitch accurately, and fit for a tight seat.