A water bird whistle works by forcing air across a vibrating reed, which produces the tone. The reed sits against a flat surface called a tone board, and when your breath hits it at the right pressure, it vibrates and creates sound. That vibration, shaped by the internal channel and the size of the air exit, is what produces the call you hear. Simple in theory, but getting a clean, consistent call out of one takes a bit of practice. Here is everything you need to know to understand the mechanics and actually use one well. Once you understand the basics, you can move on to how to use a bird whistle in the field for reliable, repeatable calls use one well.
How Does Water Bird Whistle Work: Step by Step Guide

Marcus Hendricks
21 Apr 2026
What a water bird whistle is actually for

Water bird whistles, which most people know as duck calls or waterfowl calls, are designed to imitate the vocalizations of waterbirds like ducks and geese. Waterfowlers use them to attract birds during hunting season. Birders and hobbyists use them to observe waterbirds more closely in the field, or just to practice the craft of calling as a skill. Either way, the goal is the same: produce a sound convincing enough that a real bird responds to it.
These are different from general bird whistles or novelty bird-themed toys, though some of the mechanics overlap. If you are interested in the toy version or in hand techniques for making bird sounds, those are genuinely separate skills worth exploring on their own. To get the toy working well, use gentle, steady airflow and practice short, repeatable calls before you try longer sequences how to use bird whistle toy. But if you have a reed-based call designed for ducks, geese, or other waterbirds, this guide is exactly what you need.
How the sound actually gets made
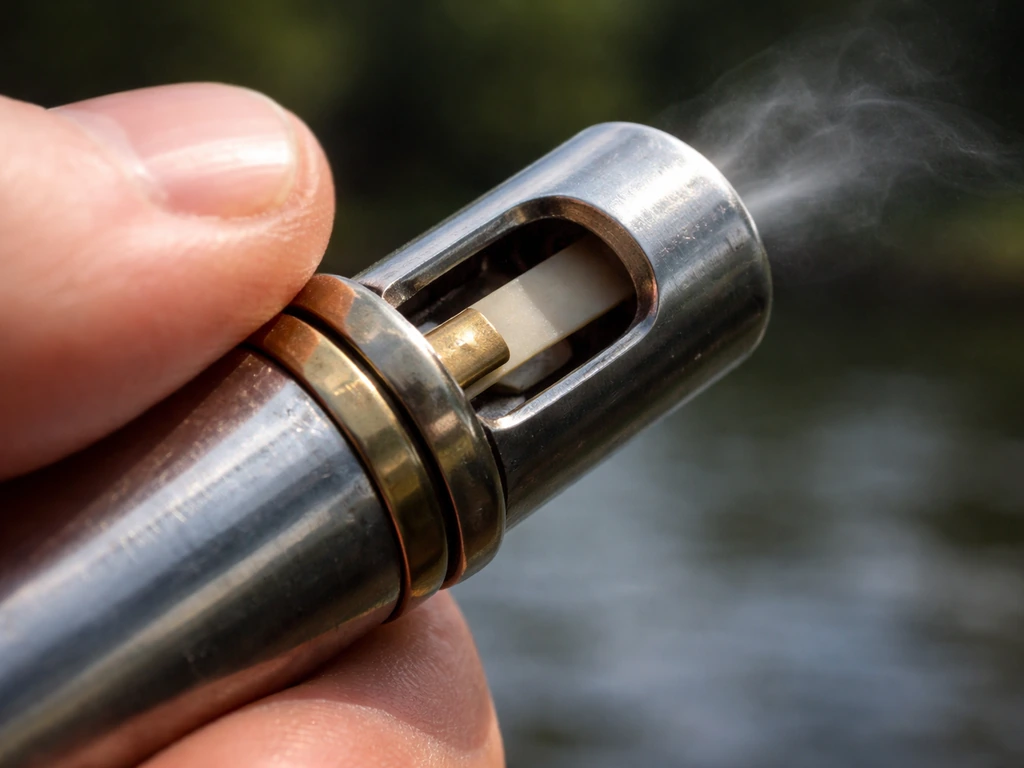
At its core, a single-reed duck call is a small reed instrument, not unlike a clarinet in principle. You blow air through a mouthpiece, that air travels across a thin, flexible reed sitting on top of a tone board, and the reed vibrates rapidly. Those vibrations create the sound wave you hear as the call. The tone board is a flat piece that the reed rests against, and the space between the reed and the tone board (called the tone channel) controls how easily the reed can vibrate and what pitch it produces. Ducks Unlimited notes that key sound-shaping parts inside a duck call include the number of reeds, the diameter of the tone channel, the tone board length, and the reed’s tip position relative to the tone board slope Anatomy of a Duck Call.
The shape and size of the air exit, plus the internal barrel of the call, act as a resonance chamber that amplifies and shapes the tone. Think of it like a speaker cabinet. The reed makes the raw vibration, and the barrel makes it loud and full. This is why two calls with the same reed can sound very different depending on how they are built.
Goose calls often use a longer reed design, sometimes called a long-reed mechanism. With these, applying different levels of back pressure can cause the reed to break into a two-tone sound, producing that distinctive honk or cluck that Canada geese make. The physics is the same, but the technique to get there is a bit different from a standard duck call.
One thing that caught me off guard when I first started: temperature and moisture actually change how the reed behaves. Cold air makes reeds stiffer and affects vibration. A reed that sounded perfect at home might feel completely different standing at the edge of a marsh on a 40-degree morning. Knowing that ahead of time saves a lot of frustration.
How to use one correctly
The biggest mistake beginners make is blowing too hard. This is the single most important thing to understand: excess air pressure can lift the reed completely off the tone board, which stops proper vibration and kills the sound. You want controlled, steady airflow, not a full lungful of force. Here is how to do it right from the start.
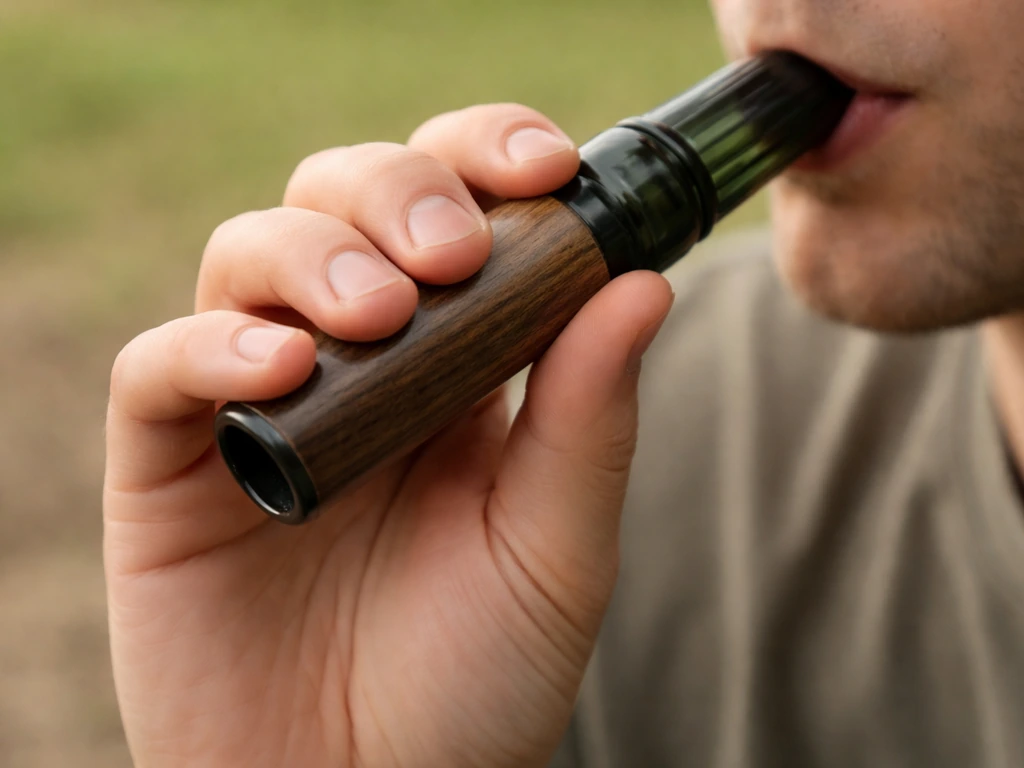
- Hold the call loosely in your hand with your fingers curled around the barrel. Bring your fingers together into a loose fist below the end of the call. This creates back pressure, which helps shape the tone and gives you more control over volume.
- Place the mouthpiece against your lips (not in your mouth like a straw). Your bottom lip should rest lightly against the call.
- Start with a medium breath, not a gasp and not a gentle puff. Think of the pressure you would use to fog up a cold window. That is roughly the right level.
- Say the syllable 'hut' or 'quit' as you exhale into the call. These hard consonant sounds help create the burst of air that starts reed vibration. This is much more effective than just blowing a steady stream.
- Adjust your angle slightly up or down to find where the tone comes out cleanest. A small shift can make a big difference.
- Once you get a basic tone, practice holding it steady. Consistency in breath pressure is what separates a clear call from a squeak or a muffle.
- For goose calls specifically, try humming your lowest note while blowing. This adds what is sometimes called a 'goosey buzz' to the tone and makes it sound more convincing.
One thing worth repeating: if you try to force the sound out by blowing harder when it is not working, you will almost always make it worse. Ease back on the pressure first, then adjust your technique. That is almost always the fix.
Choosing the right type for waterbirds vs other calls
Not all bird calls are built the same, and choosing the right one matters if you want to actually attract waterbirds. Here is a straight comparison of the main types you will encounter. Wikipedia also categorizes duck calls by reed configuration, such as single-reed versus double- or triple-reed mechanisms blank" rel="noopener noreferrer">categorized by reed configuration.
| Type | Mechanism | Best for | Skill level |
|---|---|---|---|
| Single-reed duck call | Reed vibrates against tone board | Mallards and dabbling ducks | Beginner to intermediate |
| Double-reed duck call | Two reeds create tone together | Beginners, more forgiving | Beginner |
| Long-reed goose call | Longer reed, back pressure technique | Canada geese, cackling geese | Intermediate |
| Flute/slide whistle style | Air over edge of opening, no reed | Simple tones, songbirds, toys | Beginner |
| Electronic caller | Recorded playback through speaker | Broad species range | No technique needed, but ethical limits apply |
For most beginners trying to call waterbirds, a double-reed duck call is the most forgiving place to start. It is harder to over-blow a double-reed because the two reeds work together and are less sensitive to pressure. Once you have the breathing and hand technique down, moving to a single-reed call gives you more range and expression. Goose calls are their own learning curve and are worth tackling separately once you are comfortable with the basics. Once you have the basics down, you can move on to how to bird whistle techniques for geese, since goose calls are their own learning curve worth tackling separately.
If you are interested in calling other bird species beyond waterbirds, or in hand techniques for bird sounds, those approaches work very differently from a reed-based call. The technique for those is worth exploring on its own.
Troubleshooting when something sounds wrong
Most problems with a water bird whistle come down to a few repeatable issues. Here is how to diagnose and fix them.
No sound at all
If you blow and nothing comes out, the reed is probably stuck to the tone board. A Reddit thread on r/Hunting discusses stuck single-reed duck calls as a real user problem, with practical fixes like disassembly and clearing, including an improvised cleaning workaround using thin material between the reed and tone board stuck to the tone board. This happens most often in cold or damp conditions when moisture causes the reed to seal flat against the surface. The fix is to gently pinch the tip of the reed upward with two fingers to free it, then try again. Do not snap or pull hard on the reed. It is a delicate piece of material and rough handling will permanently affect performance.
Weak or muffled sound
Weak sound usually means either too little airflow or moisture buildup inside the barrel. Try blowing through the call without the mouthpiece end in your mouth to clear moisture out. Then reassemble and try again with slightly more pressure. Also check that your hand is not covering the end of the barrel completely, which would choke the sound.
Squeaking or squealing
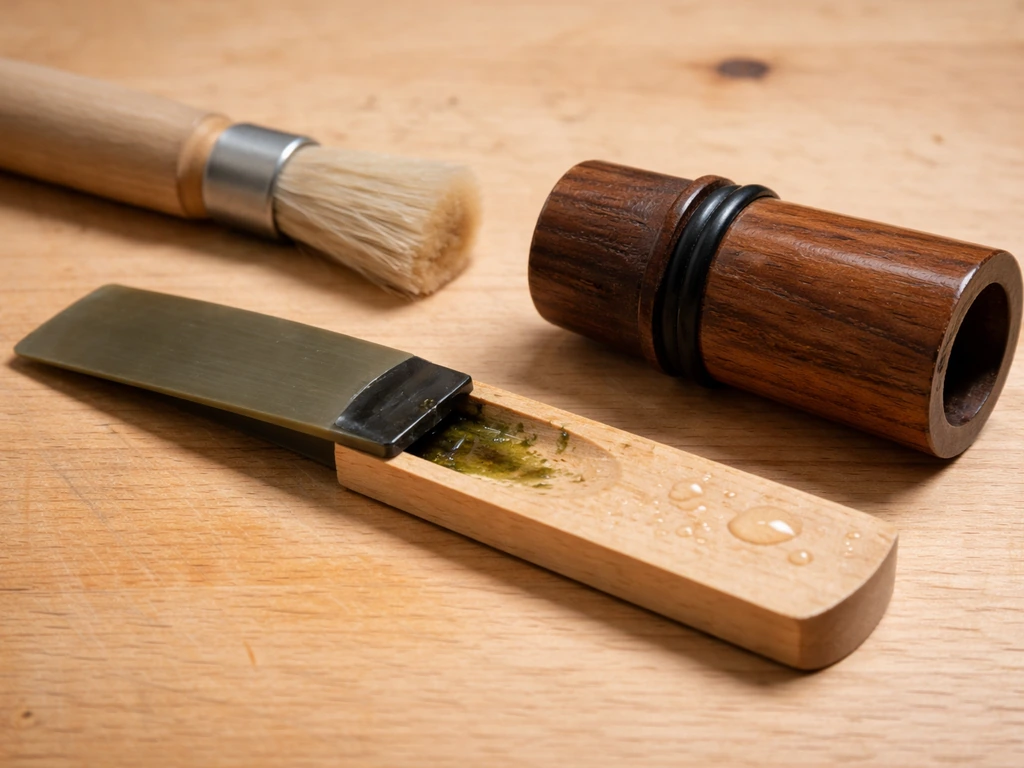
A squeak almost always means the reed is vibrating incorrectly, usually because the call is not seated properly. Disassemble the call (if it is a two-piece design), check that the reed is sitting flat against the tone board with no visible gaps or curling at the edges, and reassemble. Make sure all parts are snug but not overtightened.
Wrong pitch or inconsistent tone
Pitch issues often come from inconsistent air pressure or from temperature changes affecting the reed. If you are outdoors in the cold and the tone has shifted since you were inside, that is normal. Give the call a few seconds in your hand or a pocket to warm up. If the pitch is consistently wrong regardless of conditions, the reed placement relative to the tone board may need adjusting. Shortening the reed slightly can make the call easier to blow, but be careful: removing too much material will reduce volume and you cannot put it back.
Call sounds fine at home, bad outdoors
This is the temperature and moisture issue I mentioned earlier. Keep the call warm and dry by storing it in a pocket close to your body when not in use. Moisture inside the barrel can alter the sound significantly and in cold weather, a wet reed will stick. A quick blow-through before your first use of the session can help clear things out.
Using your whistle responsibly outdoors

This part matters more than most guides admit. Using bird calls in the field, whether for hunting, birding, or hobbyist practice, has real effects on the birds you are trying to attract. If you want to know how to chirp like a bird, focus on producing clear, repeatable tones with steady control instead of just louder blowing. If you want to whistle without a call, learn how to whistle with fingers like a bird so you can make similar clear tones using just your hands. Overusing calls can interrupt breeding cycles, drive birds away from their territories, and make them 'call shy,' meaning they stop responding to calls altogether because they have learned to associate them with stress.
The American Birding Association's Code of Birding Ethics is clear on this: limit the use of audio methods for attracting birds, especially in heavily visited areas, and avoid using them entirely for threatened, endangered, or rare local species. Audubon Washington goes further and advises birders to simply not use recordings to attract birds in sensitive situations.
- Use calls sparingly, especially during nesting and breeding seasons when birds are most vulnerable to disturbance.
- Do not repeatedly call the same bird or flock in one session. If you get a response, back off.
- Avoid using calls near nesting areas, roosting sites, or any area marked as a wildlife refuge with specific rules about disturbance.
- Keep your distance once birds respond. Getting close enough to stress them defeats the purpose.
- If you are hunting, follow all local regulations regarding electronic callers, which are prohibited in many jurisdictions for certain species.
- Practice your technique at home before heading into the field so you are not experimenting at the expense of real birds.
The goal of using a bird call well is to observe or interact with wildlife on their terms, not to force a response. Used thoughtfully, a water bird whistle is a genuinely rewarding tool. Used carelessly, it does real harm to the animals you care about.
Your first practice session: where to start today
You do not need to be outdoors to start getting comfortable with a water bird whistle. Here is a simple routine you can do in the next 15 minutes.
- First, check the reed. Open the call and make sure the reed is sitting flat against the tone board with no debris, moisture, or warping. Reassemble and seat it snugly.
- Hold the call correctly with a loose fist around the barrel, mouthpiece to your lips, not between them.
- Take one medium breath and say 'hut' into the call. You are looking for any clear tone at all. Do not worry about pitch or realism yet.
- Try five slow, controlled 'hut' sounds in a row, keeping the pressure the same each time. Listen for consistency. If one sounds different, think about what changed in your breath.
- Now try varying your hand grip slightly around the barrel end. A tighter fist raises back pressure and changes the tone. A looser grip opens it up. Feel the difference.
- Once you can get five consistent tones in a row, try the 'hut-hut-hut' pattern that mimics a basic feeding chuckle. This is the foundation of most duck calling sequences.
- If you want to try a goose sound, add a low hum while you blow. You should feel the buzz in your chest if you are doing it right.
That is genuinely enough for day one. Most beginners rush past the basics to try complex calls before they have controlled airflow down. Getting five clean, even tones in a row is a real skill, and everything else builds from it. Once that feels comfortable, you can work toward longer sequences, pitch variation, and eventually species-specific calls. The technique for actually using a bird whistle in the field, and for learning hand-based bird sounds without any instrument at all, are great next steps once you have these fundamentals locked in.
FAQ
How do I keep a reed from sticking after it gets wet in the field?
After you blow a reed call, the reed can stay “stuck” by a thin moisture film. If you notice the next call is weak or won’t start, let the call sit in a warm, dry pocket for a few minutes, then do a short blow-through again before you try full calling pressure.
What’s the best airflow timing for getting consistent tones, not just louder ones?
For most beginner setups, use short bursts of airflow and pause between tones so you can re-seat the reed back into its vibrating position. Trying to hold constant pressure usually leads to either no sound (reed lifts off) or a shrill squeak (reed vibrating out of alignment).
Why does my call sound okay at first, then quickly changes pitch or tone?
If you hear sound but it is unstable, check your mouthpiece seal and hand position on the barrel. Even a small leak or an almost accidental finger covering can change how the air exit vents, which shifts pitch and can make the call “wobble.”
Should I warm up the call before calling, and how do I store it between uses?
Yes. Store the whistle out of direct heat, but keep it close to body temperature and in a dry case between sessions. Avoid leaving it in a cold truck trunk or a damp blind, because repeated freeze-damp cycles can permanently affect how readily the reed vibrates.
If it’s cold and the call seems dead, how can I tell whether it’s moisture vs. stiffness?
With reed calls, internal moisture is often the bigger problem than dry reed stiffness. A quick clearing blow-through (mouthpiece off your lips, just air through the barrel) helps remove condensed moisture before you judge whether you have enough pressure.
What should I do if the call keeps squeaking even after reassembling it?
If you keep getting squeaks, disassemble and confirm the reed is seated flat with no rolled edges, then re-tighten only to snug. Over-tightening can warp alignment and make vibration harder to control, especially on older calls with worn tone-channel edges.
When is it time to replace a reed instead of troubleshooting technique?
Replace the reed rather than “adjusting around it” when the reed no longer vibrates cleanly across a range of pressures. Signs include permanent warping, visible cracks, or a call that squeaks or dies even when temperature and moisture are controlled.
Is it better to blow harder if the call isn’t working yet?
No, because you generally cannot “save” a call by blowing harder. Excess pressure can lift the reed off the tone board and stop vibration entirely. The corrective direction is almost always back off first, then increase only slightly if the reed starts responding again.
How do I troubleshoot pitch that’s always wrong, not just wrong because it’s cold?
If your pitch is consistently too high or too low, it is often due to how the reed is seated or how the call is designed for that specific tone range. Try warming the call first, then if it stays off, the next step is reed placement or proper assembly, not just changing breath pressure.
What practice goal should I focus on before I move to longer sequences and specialty sounds?
If you want to improve faster, track whether you can produce five clean tones in a row before attempting clucks, cut sequences, or long calls. More complex patterns with inconsistent airflow usually lock in bad pressure habits.
How many attempts should I make before I change strategy or stop calling?
Yes. Because you can unintentionally “train” birds to associate calling with repeated disturbance, use fewer, simpler call attempts and stop when you see no interest after a brief number of tries. Also switch tone quality goals (clear and repeatable) rather than making the calls louder.
What are practical tips for calling in heavy fog, rain, or marsh humidity?
In very damp conditions, moisture can cause the reed to seal flat and prevent sound. Keep a small towel or cloth to dry the exterior, and do the blow-through clearing step right before you start calling, not only after problems appear.
Next Article
How to Use a Bird Whistle Toy: Step by Step Guide
Step-by-step tips to use a bird whistle toy, make clear calls, adjust pitch, and troubleshoot blocked vents or weak airf