Yes, you can absolutely learn to whistle like a bird using just your hands, and you can get a recognizable chirp sound today with the right setup. The hand technique works by blank" rel="noopener noreferrer">forming a small air chamber with your cupped palms, then blowing through a narrow gap at your thumbs to create a thin, controlled tone. Once you understand what that tone should sound like and how to steer it, the rest is just repetition. This guide covers both the hands-on method and what to try if you want to skip the hands entirely and go mouth-only.
How to Bird Whistle With Your Hands: Step-by-Step

Marcus Hendricks
4 Apr 2026

What the sound should actually sound like
Before you start blowing air at your hands, it helps to know what you're aiming for. A proper bird whistle with your hands is a clear, thin, single tone, similar to a flute or a small songbird call. It should sound musical and focused, not a windy hiss or a foghorn. Think of a chickadee or a simple two-note call you might hear at sunrise. If you've ever chirped like a bird using just your mouth, you already have a mental model for the target tone. The hand method just gives you an external chamber to amplify and shape it.
One realistic expectation to set right now: your first attempts will likely sound like air escaping a tire. That's normal. The 'whoosh' stage is actually progress, not failure. You're close, and small adjustments will bring the tone in. Give yourself 15 to 20 minutes of focused attempts before you judge whether it's working.
Hand technique: how to position your fingers and lips
There are two common hand shapes used for this technique: the cupped-hand method and the interlocked-hand method. The cupped method is easier for beginners and is the one I recommend starting with.
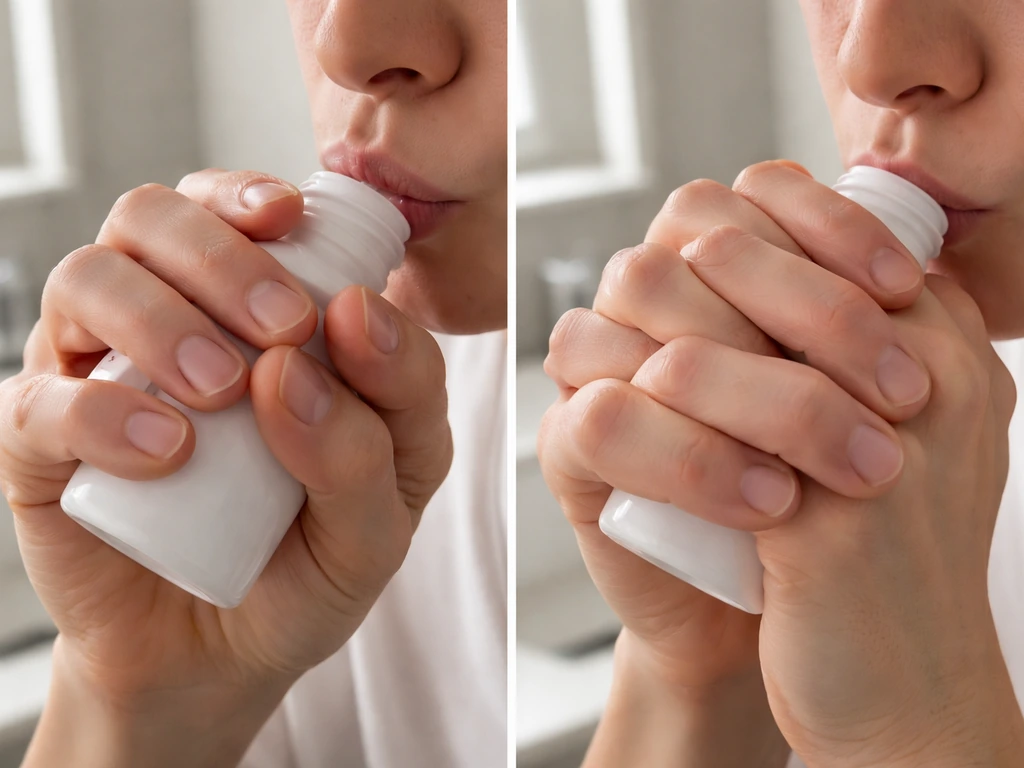
The cupped-hand setup (start here)

- Cup both hands together as if you're scooping water, fingers closed and touching each other on the sides.
- Press your left thumb joint against the back of your left index finger (just behind the middle knuckle) to form a C-shape gap at the top.
- Place your right hand over the left so the palms form a sealed hollow chamber between them, like a small cave.
- Your two thumbs should run side by side along the top, with a narrow slit between them — this is the blowhole.
- Rest your lips gently against the back of your thumbs (the first knuckle area) without pressing hard.
- Tuck your lips slightly inward, as if you're about to whistle normally, so they seal around the thumb gap without covering it.
The goal is a small, consistent opening blank" rel="noopener noreferrer">between your thumbs with your lips forming a seal around that gap. Think of it like a tiny tube: air goes in through your mouth, passes through the thumb slit, and resonates inside the hand chamber. If you've ever been curious about how to whistle with fingers in a bird-like way, this hand-chamber approach is a natural extension of that same principle, just with both hands working together to build the resonant cavity.
Lip seal and tongue placement
Once your hands are set, the lip and tongue position is what actually makes or breaks the tone. Rest your tongue tip lightly just behind your lower front teeth, not pushed forward and not curled back. Your lips should form a small oval opening, not a flat line and not a tight pucker. The tongue acts as an airflow shaper, and its position is how you'll control pitch later. For now, just keep it low and relaxed behind the lower teeth.
Breath and airflow: how to get pitch, volume, and stability

The single biggest mistake beginners make is blowing too gently. You need a steady, supported breath from your diaphragm, like you're fogging up a mirror but through a cocktail straw. A soft gentle puff won't produce a tone. You want a forceful, continuous blast that stays even throughout the exhale. Engage your belly, not your chest or shoulders. If your shoulders are rising when you blow, you're breathing from the wrong place.
Here's how the controls work once you have a basic tone:
- Pitch (higher or lower): Move your tongue slightly up toward the roof of your mouth to raise the pitch, or drop it lower to deepen it. Small moves make a noticeable difference.
- Volume: Increase airflow pressure while keeping the seal tight. More air equals more volume, but only if the seal holds.
- Stability: Keep the lip seal and thumb gap absolutely still while you blow. Any wobble in the hand position will break the tone.
- Chirp effect: For a short, sharp bird chirp instead of a long sustained note, use quick, decisive puffs of air and tighten the thumb slit slightly to make the opening even smaller.
Adjusting the size of your oral cavity (by opening or closing your jaw slightly while keeping the lip seal) also changes the resonance character of the sound. Think of your mouth as the tuning chamber and your hands as the speaker cabinet. Both matter. If you want to go deeper on how different whistle setups shape airflow, understanding how a water bird whistle works is a surprisingly useful comparison, because it uses a water chamber to modulate pitch the same way your tongue does here.
No-hands method: how to whistle like a bird with just your mouth
If you want to skip the hand setup entirely, or just want another tool in your kit, the mouth-only method is very learnable. It relies entirely on lip shape, tongue position, and breath control. The mechanics are simpler in some ways, but harder to feel because you don't have the visual feedback of your hands.
- Moisten your lips slightly, then pull them inward just a little, as if you're thinking hard about something.
- Form a tiny round opening at the center of your lips, about the size of a small pea.
- Place your tongue tip just behind your lower front teeth, flat and relaxed.
- Blow a thin, steady stream of air through the lip opening. You're not puffing out your cheeks — the air comes from your core.
- Once you hear any tone at all, hold everything still and experiment by moving your tongue slightly up or back to shift the pitch.
- To get a chirp rather than a sustained whistle, use short, clipped exhales with a tiny pause between them.
The mouth-only method is what most people picture when they think about how to bird whistle in general. It takes patience because you can't see what you're doing, but once you find the sweet spot it becomes very natural. The key variable is always tongue height. Raise it a millimeter, the pitch goes up. Drop it, it goes down. That control is what lets you reproduce actual bird calls rather than just a single monotone whistle.
Hands vs. no hands: which method should you start with?
| Feature | Hand method | Mouth-only method |
|---|---|---|
| Learning curve | Moderate (hand setup takes practice) | Moderate (no visual feedback) |
| Volume potential | Louder (hand chamber amplifies tone) | Softer (body-only resonance) |
| Pitch control | Tongue + jaw adjustments | Tongue position only |
| Bird chirp realism | Very good with practice | Excellent with fine control |
| Portability | Requires both hands free | Always available |
| Best for beginners | Yes, more feedback cues | Yes, simpler setup |
My recommendation: start with the hand method because the physical structure gives you more to work with and diagnose. Once you have a tone with your hands, transition to the mouth-only approach and you'll find it much easier because you already understand the airflow mechanics. If you eventually want to branch into instrument-assisted sound, checking out how to use a bird whistle tool or device can show you what a well-shaped bird tone is supposed to feel and sound like, which makes your own technique easier to calibrate.
Troubleshooting: when it's not working
No sound at all
If you're getting nothing, not even a hiss, your seal is broken somewhere. Check that your fingers are fully interlaced with no gaps, and that your lips are making contact with the back of your thumbs. Then check that you're actually blowing through the slit and not over it. Press your lips a little more firmly against the thumbs and try a short, sharp puff of air.
Too airy or hissy
A breathy, windy sound means you're close. This is the most encouraging failure mode. The slit between your thumbs is too wide or the lip seal isn't tight enough. Move your thumbs slightly closer together and increase the air pressure. The 'airy to clear' transition happens when the geometry locks in, so keep adjusting in small increments rather than making big random changes. If it still sounds like wind through a cracked window, try tucking your lips slightly more inward.
Wrong pitch or won't sound like a bird
If you're getting a tone but it sounds more like a foghorn than a bird, the chamber is too large or your jaw is too open. Close your jaw slightly and raise your tongue a little. Bird sounds are high and thin, not deep and round. Shrinking the oral cavity raises the pitch toward songbird territory. For actual bird call mimicry, you also need to modulate pitch mid-blow, which comes from moving the tongue while air is flowing.
Inconsistent chirps that cut in and out
This is usually a stability issue. Your hand position is shifting mid-blow, or your lip seal is inconsistent. Try pressing your hands more firmly together and keeping your wrists locked. Also make sure you're not tensing your shoulders or chest, since that creates irregular airflow. Breathe from the belly and keep the exhale smooth and continuous. If you're exploring vocal mimicry techniques beyond just whistling, the approach described in guides on how to do a Chicano bird whistle uses similar breath-and-shape mechanics and can give you a different angle on solving consistency issues.
Lips or mouth getting sore
If your lips or facial muscles feel strained after practicing, stop and rest. You should not be pressing hard or forcing anything. Good whistling technique is relaxed and supported by breath, not muscular tension in the face. Take a break, shake out your hands, and come back later. Soreness is a sign to rest, not push through.
Practice drills you can do right now
Here's a realistic practice plan you can run through today. It takes about 20 to 30 minutes and will get most beginners to their first clean tone.
- Drill 1 — Find the airflow (3 minutes): Set up your hands and blow steadily without worrying about sound. Just feel where the air is going. You should feel a stream of air escaping through the thumb slit onto your upper lip. If you don't, reseal your hands.
- Drill 2 — Hunt for the hiss (5 minutes): Keep blowing until you hear any kind of hiss or whoosh in the chamber. That's your baseline. Once you have it, stop and note your exact hand angle and lip position. That's your starting form.
- Drill 3 — Tighten into a tone (5 minutes): From the hiss, slowly increase air pressure and tighten the thumb gap by 1 to 2 millimeters. Keep adjusting until the hiss sharpens into a cleaner tone. Reset your form and repeat if you lose it.
- Drill 4 — Pitch movement (5 minutes): Once you have a stable tone, practice moving your tongue up and down while keeping everything else still. Can you hear the pitch shift? That movement is your pitch control.
- Drill 5 — Chirp bursts (5 minutes): Replace your long sustained blow with short, sharp puffs. Each puff should produce a single brief chirp. Try to make three chirps in a row that sound the same. This is the bird-call pattern.
- Drill 6 — Mouth-only transfer (5 minutes): Put your hands down and try to reproduce the same tone using just your mouth. You won't nail it immediately, but you'll recognize the feeling from the hand work and get closer faster.
After today, the fastest way to improve is short, focused sessions rather than long frustrated ones. Ten minutes a day for a week will get you much further than an hour of random attempts. Record yourself on your phone so you can hear what it actually sounds like versus what it sounds like inside your head. Those two things are often very different, and the recording will tell you exactly what to fix.
As you get more comfortable, you can start adding two-note calls, sliding pitch changes, and eventually multi-chirp patterns that mimic real birds. If you want to see how physical tools replicate these sounds to help train your ear, looking at how a bird whistle toy works is actually a great reference point, because toy whistles are engineered to hit the same pitch ranges you're trying to produce with your hands and mouth.
FAQ
How do I change the pitch of the hand bird whistle while I’m blowing?
If you want the pitch to be higher, make the thumb gap slightly smaller and raise the tongue a little while keeping the lip seal fixed. If you make the gap smaller but your lips lose contact with the thumbs, you will only get a hiss, so adjust one variable at a time.
Should I blow continuously or in short bursts when learning the hand whistle?
Do not blow in short bursts only. Use a steady exhale that lasts about one second, then stop and reset your lips and jaw. Beginners often fail because they break airflow before the tone can stabilize.
What should I check if all I hear is air escaping, no tone?
If you keep getting a loud whoosh, try a tighter lip seal and a firm tongue position. Also check that your thumbs are not too flat, they should create a narrow, consistent slit. A small change in thumb alignment can turn wind into a thin tone.
Can I still bird whistle with my hands if I have braces or dental work?
Yes, but it is a different technique. If you wear braces or have limited jaw flexibility, focus on keeping the tongue low and relaxed behind the lower teeth, and use a gentler oral seal instead of forcing a tight pucker. Stop if you feel pressure on teeth or gums.
Why does my note wobble or break after a second?
Keep your wrists still, hands pressed together, and let your pitch control come from the tongue. If you move your hands mid-blow, the chamber geometry shifts and the note wobbles, so aim for a stable hand shape and moving only the tongue.
How can I produce a two-note bird whistle instead of a single monotone chirp?
To get two-note calls, start by mastering one clean tone first. Then make tiny tongue height changes during the same continuous exhale (not separate breaths). Larger mouth opening changes tend to sound like foghorns rather than a second note.
Does hydration or warming up affect whether I can get a clean bird tone?
Warm up first with 3 to 5 calm practice breaths and a gentle lip seal, then attempt the whistle at moderate breath support. If you try to force it when you are dry-mouthed or out of breath, the sound turns windy and your facial muscles tense.
How should I use phone recordings to know what to fix?
Earphones can help for recording, but they can also distort what you hear. Record in a quiet room and listen back with volume low at first, then compare to the “windy” versus “thin tone” difference. The goal is a focused, musical tone, not loudness.
My lips feel sore after practicing. Is that normal, and what should I adjust?
If your lips get strained, reduce pressure and slow down the exhale so the tone forms without forcing. Strain usually means your seal is too tense or the breath is too forceful. Rest for a few minutes, then retry with relaxed facial muscles.
What causes complete silence (no hiss, no tone) even when my hands are in position?
Yes. If you feel nothing at all, start by forming the hand chamber shape without blowing, then seal your lips around the slit. A “no hiss” result often means the seal is breaking or you are blowing at the wrong angle, over the gap instead of through it.
Next Article
How to Use a Bird Whistle: Step-by-Step Guide
Learn to use a bird whistle: identify the right type, assemble, blow correctly, test tone, and troubleshoot safely.