Using a bird whistle is straightforward once you know what type you have and how to hold it. The two most common versions work completely differently: one goes in your mouth, and one gets filled with water. Get that distinction right first, and the rest falls into place quickly.
How to Use a Bird Whistle: Step-by-Step Guide

Marcus Hendricks
2 Apr 2026
Water whistle or original bird whistle? Figure this out first
Before you do anything else, identify which type of bird whistle you're holding. Using the wrong technique for the wrong whistle is the number-one reason beginners get no sound at all.
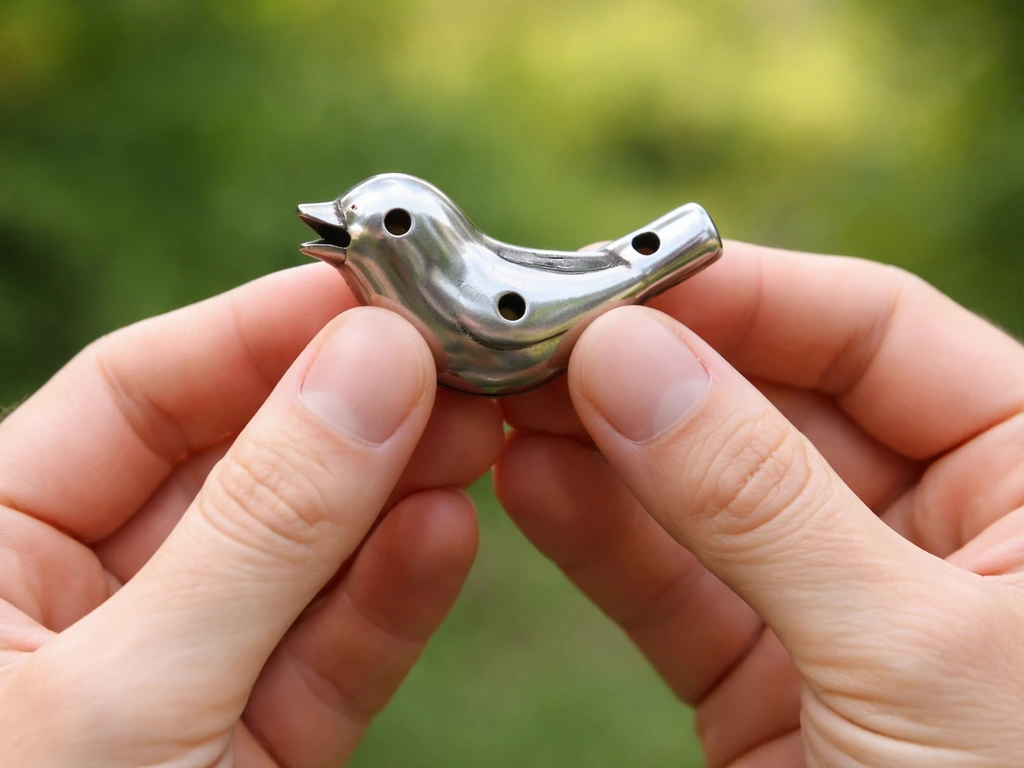
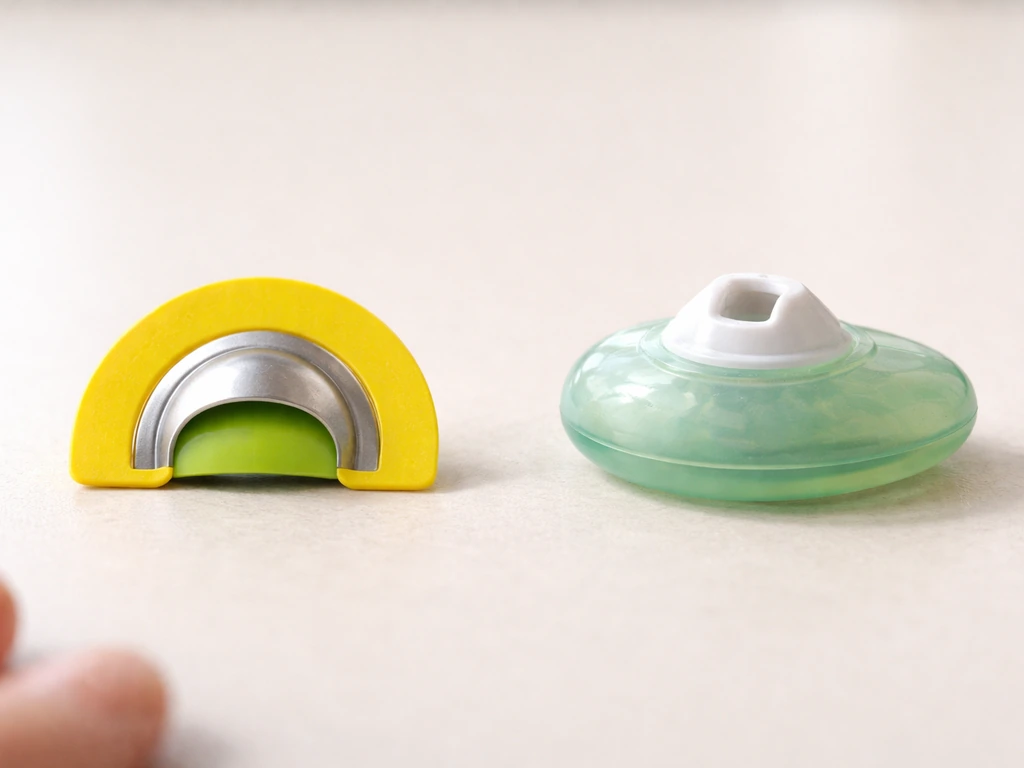
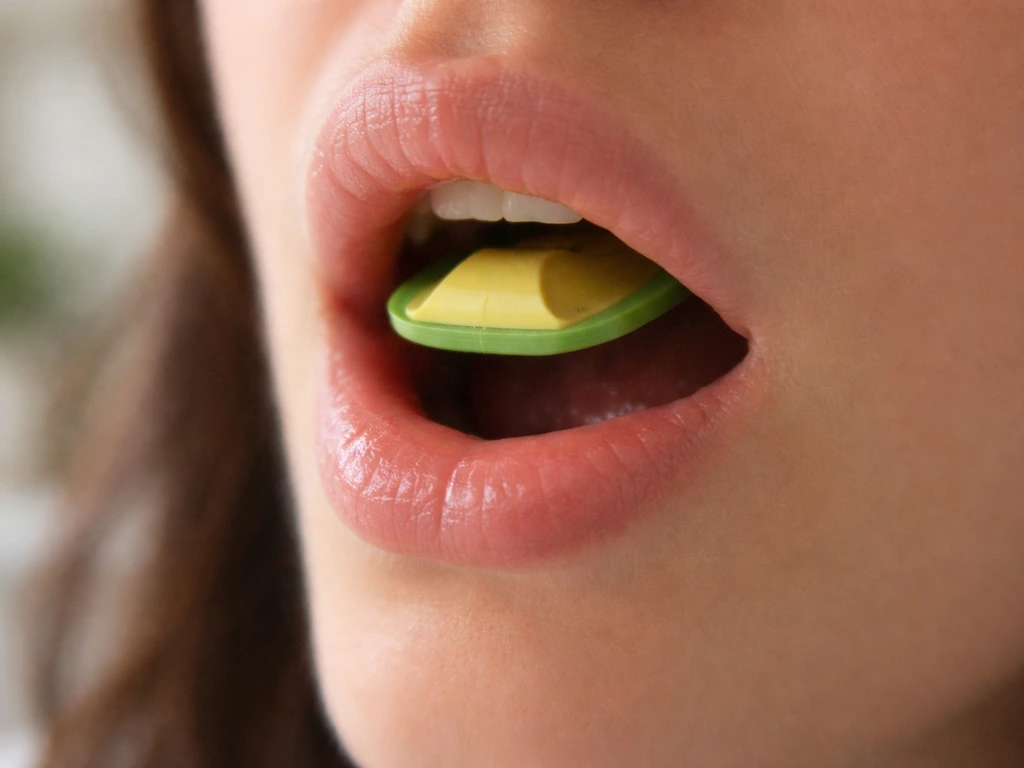
The Original Bird Whistle is a small, tongue-mounted device. It has a whistle body (often described as leather-like in texture), a thin membrane that vibrates to produce sound, and a stainless-steel ring that holds the membrane in place. It produces sound through a combination of airflow and controlled mouth movements. There is no water involved.
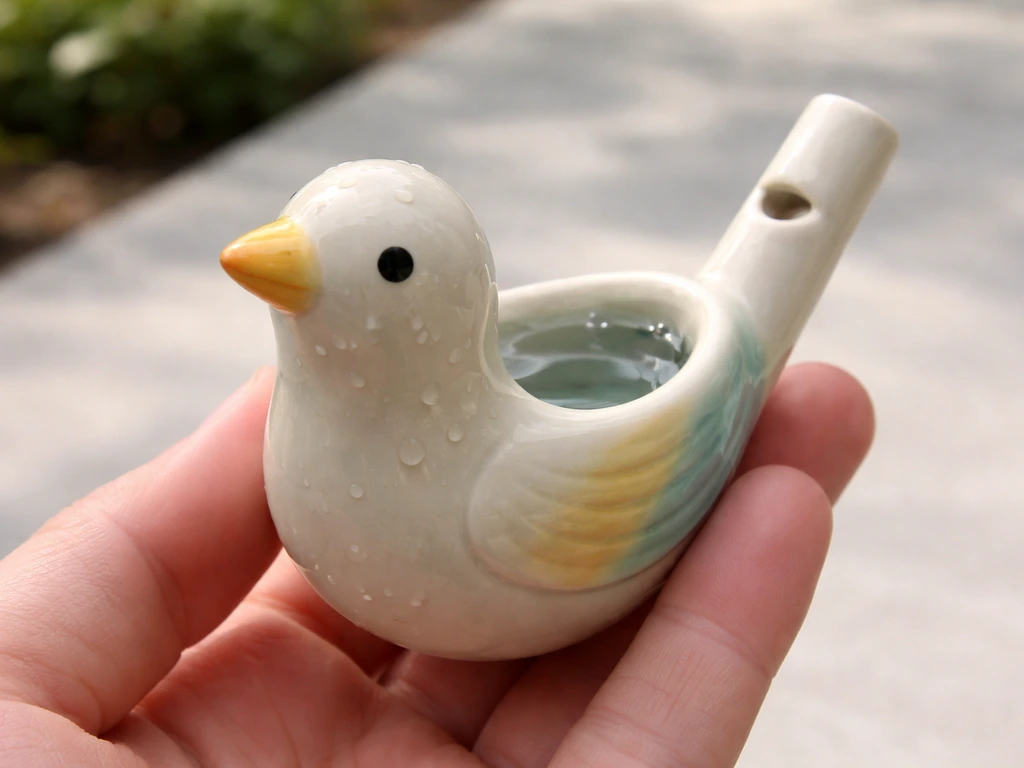
A water bird whistle is a ceramic or porcelain bird-shaped vessel, often sold as a toy or decorative item. It has a hollow reservoir inside the body and a mouthpiece at the tail end. It makes sound when you blow air through water. If you're curious about exactly how a water bird whistle works on the inside, the mechanics are surprisingly elegant for such a simple tool.
| Feature | Original Bird Whistle | Water Bird Whistle |
|---|---|---|
| Material | Leather-like body, membrane, steel ring | Ceramic or porcelain |
| Held where? | On tip of tongue inside mouth | In your hand, outside your mouth |
| Needs water? | No | Yes, filled in reservoir |
| Sound type | High, clear chirps and chips | Burbling, warbling tweet |
| Assembly needed? | Wetting only | Fill with water before use |
| Best for | Mimicking real bird calls outdoors | Play, decoration, kids' use |
Quick visual check: if your whistle looks like a small bird figurine with a hollow belly, it's a water whistle. If it's a small flat disc or tongue-piece with a ring around a thin membrane, it's the Original Bird Whistle. When in doubt, check the packaging. The Original Bird Whistle comes in original packaging with instructions inside, so that's your fastest reference.
Unbox, assemble, and get familiar with the parts
For the Original Bird Whistle
Open the packaging and pull out the instruction sheet first. The manufacturer includes step-by-step directions in every box, and they're worth reading even if you think you can figure it out from the shape. Lay the whistle flat and identify the three parts: the whistle body (the main piece, firm and slightly textured), the membrane (the thin, flexible layer in the center that will vibrate), and the stainless-steel ring around the edge holding everything together. Don't try to disassemble it. These parts are meant to stay assembled.
Before first use, you need to wet the whistle. Place it in your mouth and let saliva wet it for about a minute. That's it for setup. The membrane needs moisture to vibrate properly, and a dry membrane produces no sound. This is not optional.
For the water bird whistle
Your water bird whistle has three functional areas: the reservoir (the hollow inside the body where water sits), the fill spout (usually located at the tail), and the mouthpiece (also typically at the tail, sometimes the same opening). Fill the reservoir under a tap through the spout at the tail. The critical guideline here is to fill it just below the filling line marked inside the reservoir. Overfilling kills the sound. Underfilling weakens it. Get this measurement right and you're already 80 percent of the way to a good tone.
One thing worth knowing: water bird whistles are not watertight. Water will evaporate during use, so expect to refill periodically if you're playing for a while. If you're picking one up for a child or using it as a bird whistle toy, just factor in that top-ups are part of the routine.
How to use a bird whistle, step by step
Using the Original Bird Whistle
- Wet the whistle in your mouth for about 60 seconds before you begin.
- Place the whistle on the very tip of your tongue. Not the middle of your tongue. Not the back. The tip. This is the most common mistake beginners make, and it's worth repeating.
- Position the round, white, jagged side of the whistle facing backward (toward your throat).
- Gently press your tongue up so the whistle makes light contact with the roof of your mouth.
- Begin blowing a slow, controlled stream of air while simultaneously making a sound. The target sounds are TSH, chips, or cheese. Think of it as a soft, breathy chirp sound, not a hard puff.
- Vary the pressure and the shape of your mouth to experiment with different call tones. Lighter pressure tends to produce softer, higher sounds. More airflow adds volume and depth.
- Practice a few short bursts to start. You do not need to sustain a long blow.
The membrane is doing the heavy lifting here. When it vibrates against the roof of your mouth with the right amount of moisture and airflow, it produces a genuinely high, clear, and clean sound that can fool birds at a surprising distance. The technique takes a little practice, but most people get their first real chirp within five minutes.
Using the water bird whistle
- Fill the reservoir just below the fill line as described above. Do not skip this step.
- Hold the bird upright or at a slight angle so the water stays in the reservoir and doesn't rush toward the mouthpiece.
- Place your lips around the mouthpiece at the tail of the bird.
- Blow gently. You're not trying to force air hard. A soft, steady breath is what activates the water and creates the burbling, chirping tone.
- Adjust your blow pressure if the sound is too harsh or missing entirely. Softer usually works better.
- If the tone changes during play, it means water level has shifted or evaporated. Add a small amount of water and try again.
The resulting sound from a properly filled water whistle is a soft, sweet chirping tone, not a harsh or mechanical noise. If it sounds wrong, water level is almost always the culprit.
Getting the best results: timing, distance, and volume
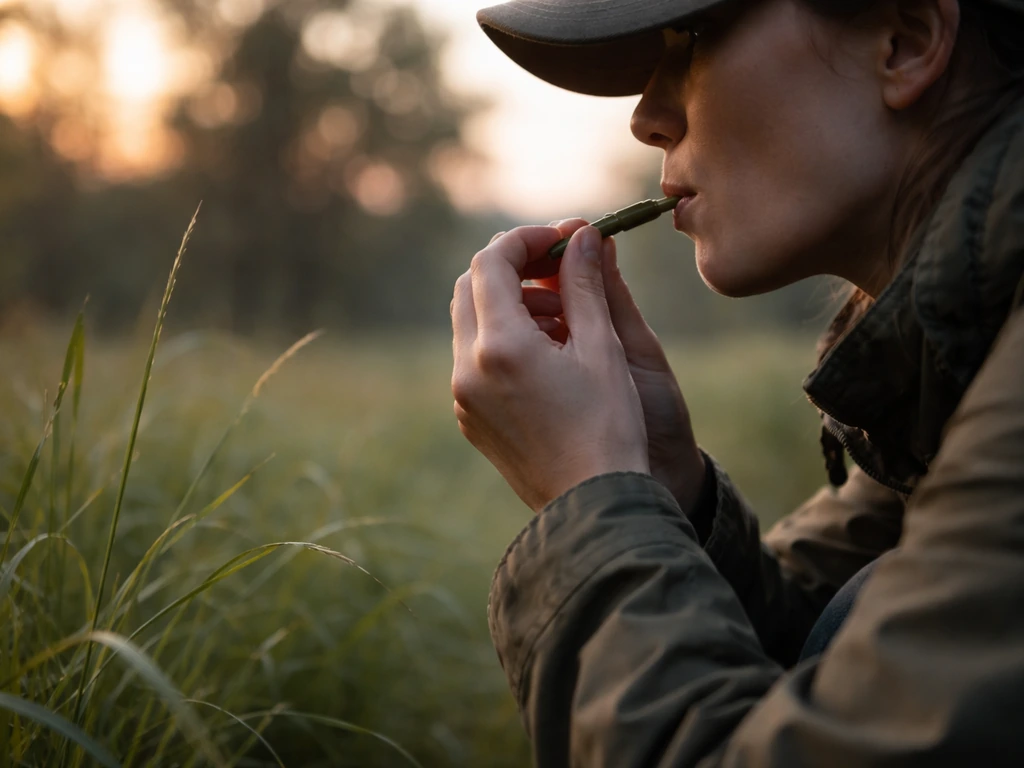
If you're using your bird whistle for actual birding (attracting or communicating with birds in the field), technique matters beyond just getting a sound out. Here's what makes a real difference.
- Timing: Birds are most vocal and responsive in the early morning, roughly 30 minutes before sunrise to about two hours after. Try your calls during this window for the best responses.
- Distance: Start calling from a comfortable distance, at least 30 to 50 feet from any area where birds are actively feeding or nesting. Calling too close immediately stresses the birds you're trying to attract.
- Volume: Start quiet. A soft call carries further than you'd expect in still morning air. Loud, aggressive calling pushes birds away rather than drawing them in.
- Intervals: Give calls in short bursts with pauses in between. Real birds don't call continuously. Two or three quick calls, then 20 to 30 seconds of silence, is a more natural pattern.
- Practice indoors first: Get comfortable with your technique at home before you're standing in a field. The less you're fiddling with placement or water levels while trying to watch birds, the better.
If you want to take your skills further and learn to make convincing bird sounds without any tool at all, it's worth exploring how to chirp like a bird using just your voice and breath. It's a useful complement to any whistle technique.
Common mistakes and how to fix them
No sound at all
For the Original Bird Whistle: the whistle is probably too far back in your mouth. Move it to the very tip of your tongue and try again. The second most likely cause is that the membrane is dry. Wet it for another minute and retry.
For the water whistle: either the reservoir is empty, you're not blowing through the correct opening, or you're blowing too hard and pushing all the water away from the sound chamber. Try a gentler breath.
Weak or thin sound
On the Original Bird Whistle, a weak sound usually means not enough contact between the whistle and the roof of your mouth, or insufficient moisture. Press the tongue gently upward to increase contact and make sure the membrane is adequately wet. On the water whistle, weak tone almost always means the water level is too low. Refill to just below the fill line.
Inconsistent tone or pitch shifting
If the pitch on an Original Bird Whistle starts shifting higher than normal, or you notice the tone getting thinner over a session, the membrane may be getting too dry. Re-wet it. If pitch inconsistency persists on a reed-based call (like those used in duck or turkey calls rather than the tongue whistle), the issue is often debris in the reed assembly. The fix: gently lift the reed, blow through the assembly backwards to clear any debris, and reassemble carefully. When reassembling, line up the marker lines on the reed and reed base. Kinking the reed during cleaning is the most common way to permanently damage it, so handle it gently.
The whistle worked before but stopped
If you stored your Original Bird Whistle wet inside its packaging, the membrane may have degraded. The manufacturer specifically advises drying the whistle in fresh air before storing it. To revive it, place it back in your mouth and re-wet it for a full minute before trying again. For the water whistle, this scenario usually just means the water has evaporated. Refill and you're good.
Using your whistle responsibly in the field
A bird whistle is a tool for connection, not a toy to run on repeat in the middle of a nesting area. Responsible use is a real part of good birding, and it's worth taking seriously.
The American Birding Association is clear on this: limit the use of audio methods to attract birds, especially in heavily birded areas and when dealing with species that are rare, threatened, or endangered in your region. More calling is not better. It can interrupt feeding, cause unnecessary stress, and pull birds away from their natural routines at critical times like breeding season.
A good rule of thumb is the behavior check: if a bird stops what it was doing, looks agitated, or flushes (flies away suddenly), you're too close or calling too much. Back off. Audubon puts it simply: if your presence or audio use changes the bird's behavior, you've crossed the line. The goal is observation without interference.
In popular birding spots where many people visit the same trails, avoid using attracting calls altogether. When everyone uses calls in the same spot repeatedly, birds in that area experience cumulative stress far beyond what any single visit would cause. This is especially true for sensitive or territorial species.
Use binoculars to close the visual distance rather than physically moving closer or calling more aggressively. Watching patiently from a respectful distance is almost always more rewarding anyway. You see more natural behavior, and the bird doesn't know you're there.
Ways to keep building your skills
Once you've got your whistle working reliably, there's a lot of room to grow. If you want to produce convincing calls without any device at all, learning how to bird whistle using just your lips and breath is a genuinely useful skill for birders who don't want to carry gear. You can also explore how to bird whistle with your hands to create cupped, resonant calls that carry surprisingly well across open terrain.
For birders interested in louder, more piercing signals, the technique of how to whistle with fingers like a bird is worth experimenting with. It takes a bit of coordination to get right but produces a sharp, carrying sound. And if you've come across a regional style you're trying to replicate, the Chicano bird whistle technique is a distinct approach with its own rhythm and method worth learning separately.
The short version: identify your whistle type, wet or fill it correctly, place or hold it right, and blow with control rather than force. Those four things solve almost every beginner problem. Everything else is practice.
FAQ
How can I tell which way to blow, or where the airflow should go, on each bird whistle type?
For the Original Bird Whistle, you blow by creating airflow and tongue position against the membrane, the ring and membrane stay sealed under your mouth pressure. For a water bird whistle, you blow through the tail opening toward the reservoir chamber, if you blow at the outside edge or at the wrong opening you will get air but no chirp. A quick test is to keep the whistle steady and use gentle, consistent breath rather than “aiming,” then adjust only one variable at a time (moisture, water level, or mouth/tongue placement).
My whistle works briefly, then stops. What should I check first?
Check moisture and water level first. The Original Bird Whistle can lose effectiveness as the membrane dries, even within a short session, re-wet it for about a minute. The water whistle is not watertight, evaporation and splash-out reduce water volume, refill to just below the marked fill line. If you have already corrected those and it still dies quickly, inspect for debris or damage, especially on any reed-based components (if your kit includes them).
What “too much force” looks like for a water bird whistle, and how do I fix it?
Too hard a breath often pushes the water away from the sound chamber, the result is a weak, thin chirp or silence. Fix it by using a softer, steadier breath and keeping the whistle upright so the reservoir drains toward the intended internal opening rather than toward gaps or the outside surface.
Can I wet the Original Bird Whistle with water from the sink instead of saliva?
You can, but saliva is the most reliable because it stays in place and provides consistent moisture and viscosity for membrane vibration. If you do use water, keep it minimal and allow it to sit briefly, then retry, if the tone is still dead after a couple of attempts, return to saliva or re-wet for a full minute to fully re-hydrate the membrane.
How do I clean and store a bird whistle without ruining the membrane?
Do not try to disassemble the tongue-mounted Original Bird Whistle, and avoid aggressive wiping that can leave the membrane dried or contaminated. Before storage, follow the manufacturer-style approach in the article: let it dry in fresh air rather than sealing it while wet. For the water whistle, emptying and refilling with fresh water for each session helps reduce residue buildup inside the reservoir.
Why does my pitch shift higher, or sound “thinner,” after a while on an Original Bird Whistle?
That pattern usually indicates the membrane is drying or contact with the roof of your mouth is changing. Re-wet and then adjust placement, keep the whistle near the very tip of the tongue and maintain gentle upward contact. If pitch inconsistency continues and your setup includes a reed-based call, debris in the reed assembly is a common cause, clearing it by blowing through the assembly backwards can restore performance.
How close should I hold the whistle to my mouth, and should I press hard?
For the Original Bird Whistle, you want firm, controlled contact, not a crushing grip. The tongue should guide the whistle so the membrane lightly but consistently touches the roof of your mouth. Over-pressing can change the seal and affect tone, under-pressing reduces membrane contact and results in weak or no sound.
What’s the best way to practice so I get a good chirp fast without overusing it in the field?
Practice first in a low-distraction area, then move outdoors once you can produce a stable tone with a single short breath. Use brief bursts during field use and watch the birds’ behavior, if feeding stops, the bird looks agitated, or it flushes, pause and back off. This keeps learning from turning into repeated audio interference.
If I get no sound at all, what are the most common “order of operations” fixes?
For Original Bird Whistles, first confirm correct type handling (tongue-mounted, membrane contact at the roof), then wet the membrane for about a minute, then move the whistle to the very tip of your tongue. For water whistles, first ensure the reservoir is filled just below the fill line, then blow through the correct tail opening, and finally reduce breath force. The key is changing one factor per retry, so you can identify what actually solved it.
Next Article
How to Bird Whistle: Techniques and Simple DIY Tools
Step-by-step how to bird whistle with mouth and airflow tips, plus DIY bird-whistle toy building and tuning for real chi