The fastest way to learn bird identification is to follow a repeatable four-step method every single time you see a bird: note its size and shape first, then its color and field marks, then its behavior, then its habitat. Do that consistently for a few weeks with common local species, and your brain will start making connections that used to feel impossible. Add in a free app like Merlin for sound ID, a good field guide for your region, and a basic checklist habit, and you will be confidently naming birds most people walk right past. When you apply this method consistently, it becomes much easier to identify a wild bird with confidence.
How to Learn Bird Identification Fast With a Step Plan

Marcus Hendricks
2 May 2026

The repeatable bird ID method (use this every time)
Most beginners make the same mistake: they fixate on color first. The problem is that color is the least reliable clue. Lighting changes it, distance washes it out, and many species look similar in color but are completely different birds. The better approach, backed by both Audubon and Cornell Lab's All About Birds, is to work through four keys in order every time a bird is in front of you.
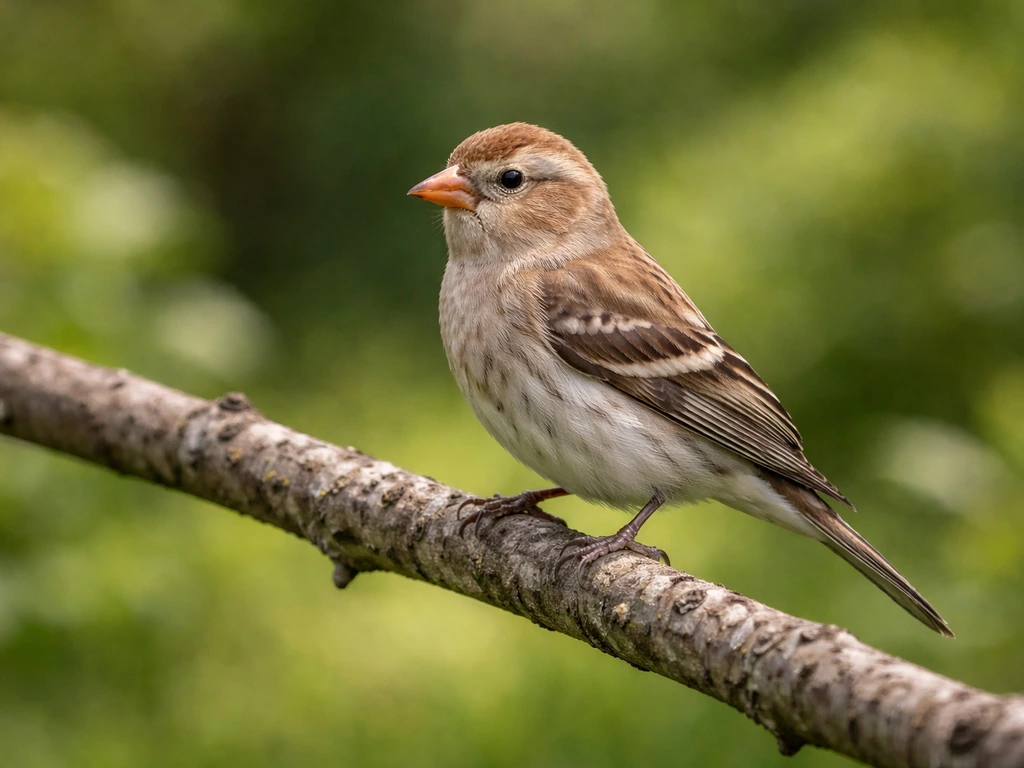
- Size and shape: Compare the bird to something you know. Is it sparrow-sized, robin-sized, or crow-sized? Look at the overall body shape, bill length and curve, tail length, and how the wings sit when folded. Size and shape stay consistent across seasons in a way color often doesn't.
- Color and field marks: Now look at markings. Eye rings, wing bars, malar stripes (the "mustache" mark on the cheek), cap colors, breast spots. These are your diagnostic details. Head and face marks are especially high-value for beginners because they're specific and easy to see.
- Behavior: Is the bird creeping down a tree trunk headfirst? Pumping its tail? Hovering before diving? Behavior is one of the most underrated ID tools. Many species have movement habits that are nearly as reliable as plumage.
- Habitat: Where exactly is the bird? In the cattails, at the top of a pine, on a gravel bar in a river, hopping on a lawn? Habitat narrows your candidate list dramatically before you even open a field guide.
One more thing to add to that framework: silhouette and flight style. When a bird flushes and you only catch it in the air, watch the wing shape (pointed vs. rounded), tail shape (forked, squared, rounded), and the cadence of wingbeats. Undulating flight, gliding between bursts, direct powered flight, these are all clues. Posture also matters more than people expect. A roosting owl can stretch into a surprisingly elongated posture that throws off your size estimate, so treat posture as one data point, not a definitive measurement.
The key to making this repeatable is discipline: always go in the same order. Size/shape, then markings, then behavior, then habitat. Within a month of doing this on every bird you see, it becomes automatic.
Field marks: what to actually look at
Field marks are the specific visual details that separate one species from another. Once you've used size, shape, behavior, and habitat to narrow a bird down to a group (say, medium-sized shorebirds, or small brown sparrows), field marks are what get you to a confident species ID. Think of them as your tiebreakers.
The most useful field marks for beginners to learn first are on the head and face. Look for a supercilium (the stripe above the eye), an eye ring, a dark cap, a malar stripe, or a contrasting throat patch. These features are specific enough to rule species in or out quickly. After the head, check the wings for wing bars (horizontal stripes across the folded wing) and the breast/belly for streaking, spotting, or solid color.
For trickier IDs, especially with similar-looking species like white herons or diving ducks, shift your attention to bill color, leg color, and bill shape. These details separate species that look nearly identical at a glance. A quick example: sorting out white herons involves checking whether the bill is yellow, orange-yellow, or black, and whether the legs are dark or yellowish. Bill and leg color are your friends in those situations.
An important caveat: not every field mark is visible every time. You need good lighting to see subtle details, and birds rarely cooperate by posing in perfect light. If you can only confirm two or three marks, that's still useful data. Work with what you have and use multiple clues together rather than betting everything on one feature.
Use location and season to narrow your options fast
Here's something that dramatically speeds up bird ID and that most beginners don't use enough: where you are and what time of year it is will eliminate most species from your candidate list before you even look at the bird's markings. A beginner staring at a yellow warbler in July in the Midwest doesn't need to worry about a hundred other species. They need a short list of yellow warblers likely to be in that region at that time of year.
eBird is the best free tool for this. Its dynamic range maps update in real time as birders submit checklists, so they reflect what's actually being seen right now, not just historical data. Use eBird's Explore section to look up species in your county or region. The Illustrated Checklist tab shows you bar charts of when species are present through the year, combined with photos from the Macaulay Library, which is genuinely one of the most powerful learning tools available for free.
The practical habit to build: before you go out birding, spend five minutes on eBird looking at what's been reported near you in the past week. You'll end up with a mental shortlist of 20 to 30 species that are likely. When you see something, you're matching it against that shortlist first, not against the entire 900-species North American list. That's a huge cognitive shortcut.
Season matters in a few specific ways. Migration windows (typically March through May, and August through October in North America) introduce dozens of species that won't be around in winter or summer. Breeding season brings males into their most colorful, easiest-to-ID plumage. Finches can also be tricky, but comparing males versus females using field marks like head and beak details can help you identify them confidently Breeding season brings males into their most colorful, easiest-to-ID plumage.. Winter flocks can be confusing because you're seeing juveniles alongside adults, and some species look noticeably different in non-breeding plumage. Knowing what season you're in shapes how you interpret what you see.
Learning bird sounds: calls vs. songs
Bird sound ID feels intimidating at first, but it opens up a whole new layer of birding. Most birds are heard before they're seen, and in dense vegetation or forest, sound is often your only clue. The good news is that you don't need perfect pitch or a musical background. You just need a system and some practice.
Start by understanding the difference between songs and calls. Songs are typically longer, more complex vocalizations used for territory defense and attracting mates. Calls are shorter, simpler sounds used for contact between individuals, alarm signals, or flock coordination. The distinction matters because calls are often what you hear most frequently, and they can sound very different from the same bird's song. A species can have multiple call types depending on context.
For learning sounds, the single best tool right now is Merlin Sound ID from Cornell Lab. Open the app, tap the sound ID button, and it listens in real time and suggests who's singing based on your location and what's been reported nearby. It works offline if you download the regional bird pack in advance, which is great for trails without cell service. When using it, point your phone toward the sound, hold it steady, and try to record for at least 30 seconds to give the app enough audio to work with. Minimize background noise by keeping the mic unobstructed.
If you want to actively learn sounds rather than just look up answers, try this: pick five common local species and learn their songs and calls by ear using Merlin or All About Birds. Listen to each one three to five times, then try to write a phonetic description or a mental image. "Sounds like it's saying 'old Sam Peabody Peabody Peabody'" for a White-throated Sparrow is cheesy but it works. Once those five are locked in, add five more. This approach, learning fewer species deeply rather than skimming dozens, is the fastest path to real sound ID fluency.
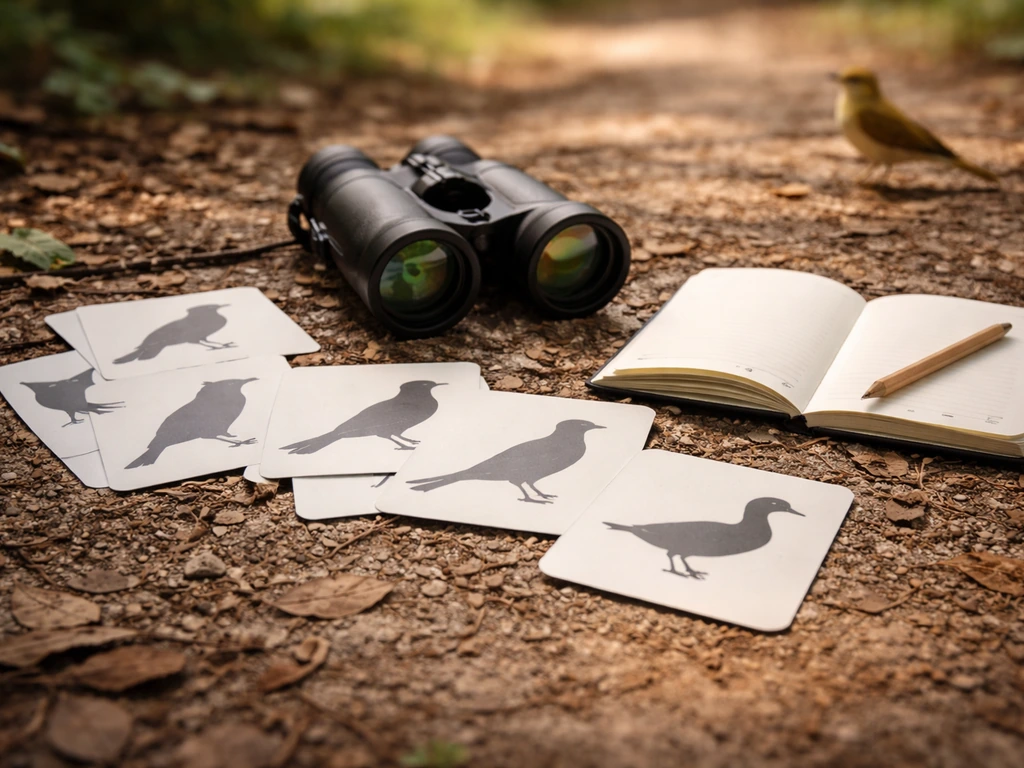
Tools and resources worth your time

You don't need to spend a lot of money to get started. The core toolkit for a beginner is a pair of binoculars, a field guide or app, and a checklist platform. Here's what's worth using. If you also want to learn from banding records, read up on how to read bird tags so you can interpret the codes and reporting details.
Binoculars
For most beginners, 8x42 binoculars are the sweet spot. The 8x means eight times magnification, and the 42mm objective lens gives you a 5.25mm exit pupil (42 divided by 8), which means bright images even in lower light. Ten-power binoculars give more magnification but are harder to hold steady and can feel shaky. For backyard watching or casual hiking, 7x or 8x is more forgiving. If you'll be watching shorebirds or waterfowl at distance, a spotting scope on a tripod adds reach, but it's not a beginner priority.
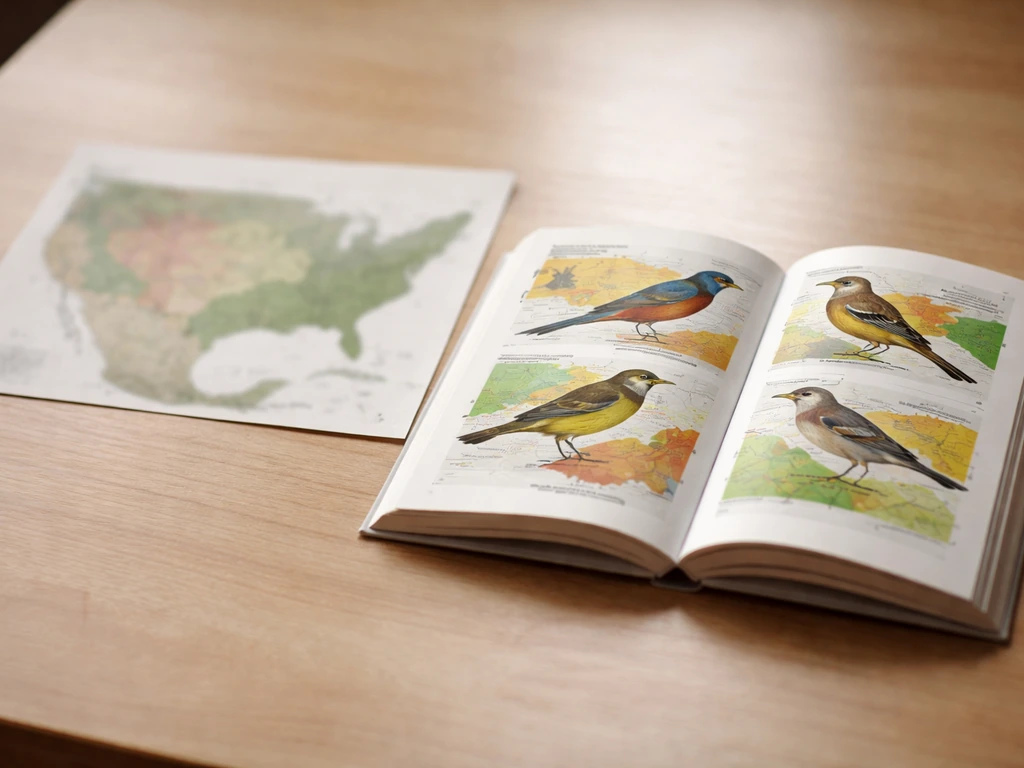
Field guides and apps
| Resource | Best For | Cost | Offline Use |
|---|---|---|---|
| Merlin Bird ID (Cornell Lab) | Sound ID, quick visual ID, trip checklists | Free | Yes, with downloaded packs |
| eBird (Cornell Lab) | Range maps, local checklists, seasonal filters | Free | Limited |
| All About Birds (Cornell Lab website) | Deep species info, sounds, photos, ID tips | Free | No |
| Sibley's Guide to Birds (print) | Detailed illustrations, range maps, regional editions | ~$30-40 | Full offline |
| Audubon Bird Guide App | Advanced species search by size/shape, photo logs | Free | Partial |
| Project FeederWatch App | Backyard counts, linked to All About Birds ID tips | Free (with membership) | Partial |
If you want one print field guide, get a regional edition of Sibley's. A North America-wide guide has too many species for everyday use and can overwhelm beginners. A regional guide cuts that list to a manageable number and keeps the illustrations more detailed.
Checklists and photo logging
Use eBird to submit complete checklists after each outing. A complete checklist means birding was your primary purpose and you recorded every species you could identify by sight or sound. This habit does two things: it forces you to commit to an ID rather than skip past uncertain birds, and it builds a personal record you can look back on to track your progress.
If you can't identify something, photograph it or sketch it quickly, note the field marks you observed, and consult your field guide or Merlin later. eBird recommends writing down observations as you see them because lighting and distance affect memory of details more than most people expect. eBird’s Help Center specifically recommends documenting observations in the field in real time so key details stay fresh despite lighting and distance changes [eBird recommends writing down observations as you see them](https://support. ebird.
org/en/support/solutions/articles/48000803130).
A practice plan you can actually follow

The biggest mistake new birders make is trying to learn too many species at once. Instead, go deep on a small number of common local birds, get them solidly memorized by sight and sound, and then expand. Here's a practical plan built around that principle.
Weeks 1 and 2: Build your baseline
- Open eBird and look at what's been reported within 10 miles of your home in the last two weeks. Pick the 10 most common species on that list.
- For each of those 10 species, spend five minutes on All About Birds: read the ID section, look at multiple photos in different lighting conditions, and listen to at least two sound recordings.
- Go outside for 20 to 30 minutes each day, ideally in the morning, and try to find and identify those 10 species using your four-key method (size/shape, color/marks, behavior, habitat).
- Submit a complete eBird checklist after each session, even if it's short.
Weeks 3 and 4: Add sound and expand the list
- Use Merlin Sound ID during your morning sessions. When it identifies a bird, verify it visually if possible and add its call to your mental library.
- Pick five of your original 10 species and actively learn their calls by listening to recordings on All About Birds, then trying to find that exact sound in the field.
- Add 10 more species to your list from eBird reports. Repeat the pre-study habit before each outing.
- Start noting which habitat each species prefers. Does that species always show up near water, in shrubby edges, or at the top of trees? Habitat association is one of the fastest pattern-recognition shortcuts.
Measuring progress
Track your life list in eBird. Watch the number grow and pay more attention to your confidence level on each ID than on the total count. A good milestone: can you identify 20 species by sight and 10 by sound without opening an app? That's a genuinely solid foundation. After that, consider joining a local Audubon chapter or bird walk. Going out with experienced birders accelerates learning faster than almost anything else because they point out field marks in real time on real birds.
Troubleshooting tricky IDs
Even experienced birders get stumped. Here's how to work through the most common sticking points without just guessing.
Similar-looking species
When two species look nearly identical, the trick is to identify which specific feature separates them and focus on that feature exclusively. Don't try to look at everything at once. With diving ducks like scaup species, for example, head shape is the key field, but it looks different depending on whether the bird is actively diving or sitting still. Knowing that going in means you wait for the right moment rather than making a call from an awkward angle. The Audubon app's Advanced Search lets you filter by size and other traits when you're stuck and need a shortlist of candidates.
Juveniles, first-year birds, and seasonal plumage
Juvenile and first-year birds are responsible for a huge proportion of "mystery bird" confusion. Many species look completely different before their first adult molt. The best approach is to note the bird's approximate size and shape, which stays consistent even when plumage is atypical, and to check All About Birds for the species' juvenile plumage photos specifically. If you're seeing something that looks almost right but not quite, ask whether it could be a young bird. This is also relevant when learning to identify bird chicks or fledglings, which can look surprisingly different from adults.
Lighting and distance problems
Backlit birds lose all color information. A bird silhouetted against a bright sky might look completely black regardless of its actual plumage. In those cases, fall back entirely on shape, silhouette, and behavior. Birds in low morning light can look warmer or more orange than they really are. The lesson here is to note your lighting conditions when you make an ID, especially for photos you might want to share or submit. If the light was terrible, be conservative about your certainty level.
Brief sightings and heard-only birds
You heard it but it flew before you could see it. Or you caught a three-second look at something that flushed out of a bush. These happen constantly, and the honest answer is that sometimes you just can't confirm an ID. What you can do is note every detail you did observe: approximate size, any color impression, flight style, habitat, and any sound.
If you want to improve accuracy, include how to tag a bird in your notes by recording the key field marks you observed. Then use that evidence stack in Merlin or eBird's filtering tools to generate a short candidate list. Macaulay Library search supports filtering by media type (photos, audio, and video), which can help you find the right learning reference materials [Merlin or eBird's filtering tools](https://search. macaulaylibrary.
org/). If the evidence supports two or three species and you genuinely can't confirm, log it as "unknown" or list your best candidate with a note. eBird encourages documenting your sightings in real time precisely because details fade fast.
Confirming a tricky ID with multiple evidence types
The gold standard for confirming an uncertain ID is triangulating from at least three independent evidence types. Visual field marks plus location/season plus vocalization gives you a very strong case. If all three point to the same species, you can be confident even if no single piece of evidence was perfect. If they're conflicting, that's a signal to hold off on committing to an ID and gather more observation time. This rule-in/rule-out approach is more reliable than making a call from one striking feature you happened to notice.
As you get more comfortable with these fundamentals, you might find yourself wanting to go deeper into specific identification challenges, like how to identify a bird from a photo you took, how to tell apart male and female birds of the same species, or how to read bird leg bands you notice on tagged individuals. Each of those is its own skill set built on top of the foundation you're building here.
The honest truth about how long this takes: most people who practice consistently, even just 20 minutes a day outdoors and a few minutes of study, can identify 50 to 75 common local species with confidence within three to six months. The first month is the steepest learning curve. After that, each new species you add clicks in faster because you're building a mental reference library. Stick with the method, submit your checklists, and let the small wins accumulate. They add up quicker than you'd expect.
FAQ
How many bird species should I try to learn at the same time without getting overwhelmed?
Start with 10 to 20 local “core” species for sight and 5 to 10 for sound, then expand only after you can identify them correctly on multiple outings. A practical rule is to stop adding new species in a week when you notice you are relying on guesses rather than consistent evidence. If you keep a running shortlist in eBird, you can rotate species in and out based on what you actually see.
What should I do when the bird is out of view or I only get one brief glimpse?
Record what you can from your four-step order as quickly as possible, even if the ID is uncertain (size/shape impressions, any markings you noticed, behavior, and habitat). If you have sound, add that too. Then log the sighting as “unknown” or as your best candidate with a confidence note, and do not “force” a species match from a single striking clue.
How can I avoid color-based misidentifications in bad lighting or at long distance?
Treat color as a low-confidence clue unless lighting is stable and the bird is close enough to see features (like wing bars or head patterns). If the bird is backlit, focus on silhouette, posture, and flight style, then re-check later in better conditions. For distance, use relative proportions and shape (bill length vs. head size, tail shape, wing taper) rather than shade or saturation.
What’s the best way to tell similar species apart when I keep focusing on the wrong feature?
Pick one “separating trait” before you look (for example, bill shape and leg color, or a specific head pattern). Once you notice that trait, stop scanning everything else and confirm it with a second clue from your checklist order. If you are still unsure, create a shortlist using location and season first, then compare only those candidates.
How do I learn bird identification faster if I don’t have good binoculars or I’m viewing from far away?
Use your time to capture the highest-value features first, silhouette and field marks, then behavior. Consider a spotting scope only if you regularly bird waterfowl or shorebirds at distance, and use a tripod so you can hold a steady view long enough to read wing and tail shape. If you cannot see field marks, shift your strength to flight style plus habitat and season, and use photos or later sound confirmation when possible.
Should I prioritize sight ID or sound ID first?
If you mostly bird in open areas where birds are easy to see, sight ID first is usually more efficient. If you bird woods, dense thickets, or early mornings, sound ID can give you an immediate candidate list before you ever spot the bird. Either way, aim to learn a small set deeply, because mixing many species quickly slows down learning.
How do I use Merlin Sound ID correctly so it’s actually useful for learning?
Hold your phone steady, point the mic toward the bird (not toward the ground or sky), and capture at least 30 seconds if possible. Reduce background noise and avoid moving while recording. After it suggests a species, immediately look up the same species’ calls and confirm whether the sound fits the context (song vs call), so you are training your ear rather than only accepting app guesses.
What’s the difference between a “song” and a “call” in practice, and why does it matter?
Calls are often frequent and short, they can indicate contact, alarm, or coordination, while songs tend to be longer and used more for territory or mate attraction. Many species have multiple call types, so if you hear the same bird making different short sounds, don’t assume it must be a different species. Build your ear training around the type you hear most often in the field.
How should I handle juveniles, fledglings, and first-year birds that don’t look like adults?
First, do not anchor on adult-like plumage. Prioritize size/shape and consistent structural traits, then check juvenile or first-year photo references for the specific species you suspect. If something “almost” matches an adult but the patterns look off, explicitly ask yourself whether it could be an immature bird before committing to a rare plumage interpretation.
What’s the best way to practice when I’m not sure which species I’m seeing?
Use evidence stacking: log your four categories (size/shape, markings, behavior, habitat) and any sound, then generate a short candidate list based on season and location. Only then compare field marks. If the evidence supports two or three species and you still cannot confirm, record it as unknown or with your best candidate plus what you need to see next time (for example, a clear bill profile or a visible throat patch).
How can I improve accuracy for “mystery birds” when my observations conflict?
Use triangulation: require at least three independent evidence types to agree (for example, visual field marks plus habitat/season plus vocalization). If they disagree, treat that as a signal to withhold certainty and gather more observation time rather than locking into the most noticeable feature.
Is it worth tracking my life list, and what should I pay attention to instead of the number?
Yes, but track confidence per identification, not just total counts. A more meaningful metric is how many species you can identify correctly without looking up help (by sight and by sound). When that number rises, you are genuinely building a recall library rather than just adding observations.
How long does it realistically take to get confident, and how can I tell I’m progressing?
Most people improve noticeably within 1 to 3 months of consistent practice, especially for common local species. A good progress check is whether you can correctly name a small core set on repeated encounters, plus whether your uncertainty drops when you revisit the same species. If your IDs remain guessy after several outings, reduce the species count and practice fewer birds more deeply.
Next Article
How to Identify Male and Female Finches: Step by Step Guide
Step-by-step guide to identify male vs female finches by species traits, plumage changes, and confidence checks